Star news


Plasticineography in kindergarten: how to conduct creativity lessons. Plasticineography: features of conducting classes in different groups, implementation of project activities and club work
Vera Zolotareva
Target: Introduce children to the type of work plasticine - plasticineography. Strengthen the ability to work accurately with plasticine.
Tasks:
Develop children's imagination creative imagination;
Strengthen knowledge of color, the ability to choose the right color,
Strengthen the skills of composing a whole from parts;
Lead to an emotional assessment of finished work.
Material: cardboard, pieces plasticine 7 colors, cups of water, napkins, modeling boards, stacks, part of a sheet of cardboard for each child.
Sample work.
Preliminary work: looking at photographs and educational pictures about flowers, talking about the signs of spring.
Progress of the lesson.
Children stand in a circle. There is a dialogue about spring.
Introduction.
Fly, fly petal,
Through west to east,
Through the north, through the south,
Come back after making a circle.
As soon as you touch the ground -
To be, in my opinion, led...
V. Kataeva
2. Conversation.
Each of us has a desire, and more than one.
Do you have any wishes? (children's answers)
There's a knock on the door. The Olya doll appears.
Hello guys. I heard from a magpie that in your group Today your wishes will come true. Guys, I also really want my wishes to come true.
Educator - Oh, how we want them all to come true. If each of us had a seven-flowered flower, our seven wishes would come true.
What if we try to make such a flower with our own hands from plasticine?
3. Showing, explaining and doing the work.
And in order for us to succeed, we will do a warm-up.
Here are my helpers,
Turn them any way you want.
(bending fingers, turning
brushes up and down).
Along the white, smooth road
Fingers gallop like horses.
Chok-chok-chok, chok-chok-chok,
A frisky herd gallops.
(Hands on the table, palms down. Alternately moving forward with the left, then right hand with simultaneous flexion and extension of the fingers).
Children choose colors plasticine, perform each petal in turn. The center and petals of the flower are carefully smeared on cardboard. Place the petals evenly on the base around the center of the flower, alternating them by color.
Quiet music is playing. The children do the work.
In progress classes help is provided.
4. Summary classes.
At the end classes All that remains is to touch the petal and make a wish.
Game with a flower. (The child makes his wish by touching the petal.)
The doll says goodbye to the children, praises them and thanks them for their good work.
Publications on the topic:
 Program content: - continue to form ideas about the signs of autumn, the cyclical nature of changes; - teach children to reflect.
Summary of an open lesson on art activities using the plasticine technique in the middle group “Gift for Piggy” Topic: “Gift for Piggy.” Technique: plasticineography. Goal: Creating an expressive image of a pet using plasticineography.
Summary of an open lesson on plasticineography in the senior group using ICT “Butterflies”
Abstract open class in the senior group using ICT on the topic “Butterflies” using plasticineography.
Lesson on plasticineography in the younger group. Goal: to promote the aesthetic development of children 3 - 4 years old. Objectives: 1. To introduce children to.
Lesson for middle group children aged 4-5 years. Dear mother's portrait. Goal: to promote the aesthetic development of children 4-5 years old Objectives: 1. Continue.
One of the favorite arts and crafts techniques for preschoolers is plasticineography. Most kids generally love to draw, and drawing with plasticine attracts them doubly. After all, it is very simple, and, in addition, such images are easy to correct. Kindergarten teachers also appreciate plasticineography: such activities do not require special preliminary preparation and has a beneficial effect on nervous system children.
The essence of plasticineography as a type of children's creativity. Goals, methods, techniques
Plasticineography refers to an unconventional modeling technique; it involves drawing with plasticine on some kind of dense base. In this case, objects and items appear in relief to a greater or lesser extent. In addition, plasticineography allows the inclusion of auxiliary parts into the composition - beads, beads, natural and waste materials.
Opportunities for the development and training of preschoolers
- In the process of work, mental processes such as attention and memory develop, logical thinking and imagination.
- Plasticineography reveals creative potential children, and from the very younger age.
- Performing such crafts develops spatial orientation and sensorimotor coordination - these are precisely the functions that provide successful learning At school.
- Plasticineography is a rather painstaking process that stimulates perseverance, patience, and the desire to complete the work begun.
- This type of modeling improves fine motor skills- the child’s hand is being prepared for writing.
- Plasticineography classes can relieve muscle and nervous tension in children.
- With this type of creativity, integration of educational areas occurs (cognition of the surrounding world, speech development, music).
- With successful mastery of this technique, children can make exclusive gifts to their family and friends, create paintings that will decorate their home interior.
Let us highlight the main goals of plasticineography as a type of productive activity for preschoolers:
- Improving skills in working with plasticine, stimulating interest in visual arts.
- Mastering new sculpting techniques (pressing, smearing, rolling).
- Development of the ability to navigate on a sheet of paper.
- Improving fine motor skills, eye, hand coordination.
- Fostering qualities such as accuracy, perseverance, and independence.
- Development of fantasy and aesthetic feelings.
Mastering the technique of plasticineography involves the use of a variety of materials during the work process. different techniques. The children have already become acquainted with some of them in traditional modeling classes.
This rolling out a piece of plasticine between the palms, during which it lengthens and takes the shape of a cylinder.
At rolling down Circular movements of the palms form a ball.
Pulling back- obtaining a pointed tip of an object using movements with the tips of the fingers.
Flattening– squeezing the ball into a flat cake shape. Using a stack or finger pressure, such a part can be given bends and indentations.
The following techniques are typical specifically for plasticineography. This smoothing, pressing and smearing, which are necessary to create a flat and smooth surface. They are performed using the fingertips. As for smearing, it can be done from top to bottom or from left to right.
In addition, when creating paintings using the plasticine technique, children learn to mix different colors of plasticine to obtain unusual shades. Such a labor-intensive but interesting process is carried out different ways. Pieces of plasticine can be kneaded and then mixed into one piece. Another option is to mix plasticine directly onto the base, apply strokes one at a time and smear them on the surface.
Types of plasticineography used in kindergarten
During classes in kindergarten Various types of plasticineography are used. The most common is direct plasticineography, in which a molded image is formed on a horizontal surface. Kids are able to master this technique already with early age- for this, the teacher offers them a simple drawing without small parts. At the senior level, children create more complex compositions. A similar design is filled with plasticine (preferably wax) on a thick sheet of cardboard (it is better to first cover it with tape - this makes it easier to correct the image). Smeared plasticine produces the effect of brushstrokes with oil paint.
Direct plasticineography
With reverse plasticineography, drawing is done on back side glass or other transparent surface. IN preschool institution

For these purposes, plastic or plexiglass is usually used (since the use of ordinary glass for preschoolers is unsafe). The design is outlined on the surface with a marker and then filled with plasticine (smeared with a thin layer). Along the contour, the finished composition can be marked with stripes - it will look like a frame.
Reverse plasticineography (on glass) Modular plasticineography –

a picture made of plasticine rollers, balls, disks and other elements. This is a more complex technique that requires children to master all sculpting techniques.
Modular plasticineography Mosaic plasticineography – an image composed exclusively of plasticine balls. This is the most simple technique

, the main thing here is to choose colors beautifully and carefully fill the space without going beyond the contour.
Mosaic plasticineography At contour plasticineography

Contour plasticineography
Multilayer plasticineography involves the sequential application of several layers to the surface. This technique is most suitable for landscape compositions - images of the sky, forest, mountains, when the layers are superimposed on each other. Elements are sometimes attached to the base using thin rollers - a kind of 3-D effect is obtained. Note that such work is quite difficult for preschoolers and is appropriate only in the preparatory group.

Multilayer plasticineography
Textured plasticineography is distinguished by a convex image and, in turn, is divided into bas-relief (the figure protrudes above the background by less than half), high relief (more than half) and counter-relief (in-depth design).

Textured plasticineography (bas-relief)
Plasticineography in children of different ages. Difficulty level of crafts
Junior group
You can introduce children to plasticineography at a very early age - starting from the nursery group. Children 2–3 years old are quite capable of mastering the simplest techniques - rolling balls, rolling out flagella, flattening them into cakes. Of course, children's fingers are still quite clumsy, so the teacher should offer a picture with a small amount large details. For elementary lessons Themes such as “Sun”, “Flower”, “Rainbow” are great. The teacher draws the silhouette of the object with a pencil, and the child completes it with plasticine dots. For example, it could be a tree that the baby will complement with red or yellow apples. Another option is a vase in which the child will depict a bouquet of flowers.
Second junior group second junior group plasticineography in the nursery group (the trunk is drawn up by the teacher)
Middle group
TO middle group children's hands are becoming more dexterous, and the teacher can move on to more complex technology plasticineography. Preschoolers 4–5 years old can already create a picture of thin flagella twisted in the shape of a snail. The teacher can draw a magic bird, and the child can paint its feathers with plasticine different colors

Middle group

Middle group
,
At the senior preschool level, children are already able to create complex compositions (images of landscapes of different seasons, animals, humans, etc.) and fantasy works. The teacher can offer children 5–7 years old softened plasticine, which is applied to the base using a syringe in thin strips. This technique will undoubtedly delight the kids. A wonderful solution for older and preparatory group

- collective compositions.

- collective compositions.
preparatory group Plasticineography classes in kindergarten can cover a variety of topics. It is best to coincide with activities to familiarize yourself with the outside world. So, in the fall it would be advisable to propose such themes as “Leaf Fall”, “Basket with Mushrooms”, “Gifts of Autumn” (fruits and vegetables), “Asters”. After getting acquainted with the topic “Birds”, the children will be happy to portray an owl, swan or peacock, and after the topic “» - Marine life goldfish
, dolphin, octopus. Crafts using the plasticine technique will consolidate knowledge of wild and domestic animals (“Hedgehog”, “Cat”, etc.) In winter, the following themes will be appropriate: “Snowman”, “New Year’s balls”, “Decorated Christmas tree”, “Snowflake”, “Bullfinch”, “Penguin on an ice floe”. In the senior preschool level these can be landscape paintings winter compositions
, including collective ones (such work, in principle, can affect all seasons).
In spring it will be important to depict the first flowers (“Snowdrops”, “Dandelions”), insects (“Butterfly”, “Ladybug”). Wonderful gifts are made using the plasticine printing technique.
 For example, by March 8 it could be a “Bouquet for Mom” or a composition for Dad (“Tank”, “Flying Planes”, “Boat”, etc.). To make this work more effective, it is recommended to cover the surface of the finished composition with colorless varnish. Khokhloma patterns Mosaic technique Modular technique with volume effect Plasticineography using additional materials (foil) Collaboration
Bas-relief Gift for mom (modular technique) Bas-relief Bas-relief Bas-relief Landscape composition Still life Portrait Plasticineography using natural materials Modular technique Modular technique Mosaic technique Gift for dad plasticineography Gift for dad
Before starting to work with plasticine, the child needs a base picture, or template. Older preschoolers usually draw them on their own. For younger children, the teacher offers ready-made silhouettes. Templates can be simple (an object image) or represent complex plot compositions with many small details. The last option is acceptable, of course, for senior and preparatory groups.
Template Template Template Template Template Template
Videos on the topic “Plasticineography”
Video lesson for preschoolers - plasticine painting “Bullfinch”
Master class in kindergarten on plasticine painting “Fish in an aquarium”
Master class on making panels with lilies using plasticine printing technique
Class notes
| Author's full name | Title of the abstract |
| Bekhtereva L.N., Surovikova A.G. |
"Apple Tree" (middle group) Educational objectives: learn to create an image of a tree using plasticineography, include additional natural material(peas), Developmental tasks: consolidate knowledge about the structure of wood, develop fine motor skills, hone skills in working with plasticine. Educational tasks: cultivate interest and respect for plants. Integration of educational areas: “Artistic creativity”, “Cognition”, “Communication”, “Socialization”, “Health”. Handout: sheets of colored cardboard, plasticine, peas, napkins, boards for modeling. Preliminary work: looking at trees while walking, reading fairy tales in which an apple tree or apples appear (“ Swan geese", "Tiny Khavroshechka", "Apple"), an applique lesson on the theme "Apple Tree", didactic games on a similar topic. Progress of the lesson Riddle about an apple. A surprise moment is the appearance of the crow Karkusha, who sits on a painted apple tree. She talks to the children about the structure of a tree. The teacher suggests didactic game“Find the same” (sort paper apples by size). The motivation is to show Karkusha that an apple tree can be drawn with plasticine. The teacher demonstrates the stages of completing the craft. The trunk is formed from a brown plasticine flagellum. The crown is a flattened green ball that needs to be smeared on cardboard with your fingers. different sides. The grass at the bottom of the composition is small pieces of green plasticine. Peas are used as apples, which are pressed into the crown of the tree. Before productive activities, children independently massage their hands using a bump. At the end of the lesson, the guys show their work to Karkusha, and she treats them to real apples. |
| Drynkova A. | (junior group) During a walk on the eve of class, a teacher and children look at the sun. The lesson begins with reading V. Suteev’s fairy tale “Under the Mushroom”, the kids share their impressions. Motivation - the poor animals from the fairy tale lack the sun, you need to draw it for them. An interesting point: the teacher tells the children that they have run out of paints and only plasticine remains. Demonstration of image techniques: the contour of the sun is filled with small circles (mosaic method), rays of the sun are formed from sausages. Before children’s productive activities, an outdoor game “The sun came out from behind the clouds...” is played. |
| Thriller R.N. |
"Gifts for Flower Fairies" (drawing with plasticine on glass, preparatory group) At the beginning of the lesson, a mini-conversation is held about what children used to make from plasticine. The teacher consolidates knowledge of colors and asks what will happen if you mix certain colors of plasticine. Unusual motivation: a teacher tells preschoolers fairy tale story. IN magical forest The most beautiful flowers in the world grew in the clearing, and flower fairies looked after them. But one day an evil witch appeared and bewitched the fairies - the flowers began to die because they needed care. The children's task is to make magic flowers for the fairies in order to disenchant them. The work is done on glass; children mix plasticine of different colors to obtain interesting shades. |
Plasticineography project: goals, objectives, planning, reporting. “Gifts of Autumn” as an example of a project - themes and photos of works
Plasticineography, one of children's favorite activities, provides great opportunities for project activities.
The project must have detailed theoretical basis. First of all, the teacher must come up with a catchy name for it, for example, “Let's create magic!” or "Plasticine Fairy Tale".
The teacher should briefly formulate the main idea of the work, for example “Let’s create magic together with a child - plasticine will help us with this!”
Sirotkina Tatyana Vladimirovna
http://tutmama.ru/obshhee-razvitie/plastilinografiya-v-detskom-sadu.html
The relevance of the project (the benefits of plasticineography for the comprehensive development of children) is substantiated in detail. The main goal of the activity and its constituent tasks are outlined. The teacher clearly indicates age category children involved in the project, as well as its duration (short-term or long-term). In the documentation, the teacher clearly describes the paths and stages of the project (preparatory, main and final), as well as the expected results of the activity.
At the end of the project, the teacher mandatory prepares a report: indicates whether the assigned objectives have been achieved. A photo exhibition on the subject of the project is being organized.
If we consider specific examples, then very interesting topic for the project – “Gifts of Autumn” (can be carried out in any age group, only the complexity of the tasks changes). As part of this topic, the teacher can offer preschoolers: « following works Autumn birches
", "Lukoshko with mushrooms", "Maple leaves", "Miracle fruits" (vegetables and fruits), "Asters".
Project "Gifts of Autumn" Project "Gifts of Autumn" Project "Gifts of Autumn" Project "Gifts of Autumn" Project "Gifts of Autumn"
Plasticineography circle
resources for teacher self-education Plasticineography may well become a field for its own. group work
Such activities are usually carried out with children starting from the middle group. Of course, the teacher himself must be passionate about this technique. artistic creativity , study the necessary methodological literature
, the topic of his self-education should correspond to this direction. It is advisable to attend seminars specifically on plasticineography. To create a circle you need to take care of necessary materials and instruments (in in this case it won't require special costs ). The teacher thinks in advance which toys and visual aids
will be needed for classes.
During the work of the circle, the teacher shares his knowledge with parents, offers them consultations, conducts conversations, and gives recommendations on home activities with children.
Before starting a plasticineography circle, it would be appropriate to conduct a survey among parents to study the interests and needs of their children.
Club program. Fragment of the program for the senior group Before the start of the circle, the teacher draws up a program in which he justifies theoretical aspects
topics: its relevance, novelty, main goals and objectives. The teacher outlines the forms and methods of work. The age of the children who will attend the club and the implementation period are clearly indicated (as a rule, the program is drawn up for one year). A list of children is also attached to the program. with a description of the purpose of each lesson. As an example, here is a fragment of the program for a plasticineography club for senior group(author Babakekhyan A.G.):
| Month | Subject | Goals |
| October | Introducing children to plasticineography. Autumn leaves. | Conversation about plasticineography. The teacher demonstrates finished works using this technique, with the reflection of convex volumetric images on a horizontal surface. Introduce children to the concept of a stencil, show and teach how to work with it. Develop fine motor skills of the hand, develop color perception, the ability to choose the right tone of plasticine, graphic skills (the ability to work with a stack like a pencil, using the scratching technique); to cultivate aesthetic feelings through the perception of paintings by great artists about autumn, to lay the preconditions for love of nature and a caring attitude towards it. |
| Mushroom mushrooms grew in the forest | Improve skills in working with plasticine using the “plasticine drawing” technique - cutting with scissors, rubbing into shape. To form in children a generalized concept of mushrooms, their varieties, and qualities. Learn to find correspondences between the shapes of real and depicted mushrooms, convey them natural features, color. Develop creative imagination and thinking; muscle activity of the arms. Cultivate accuracy in work, the desire to complete the work started with high quality and completion; feelings of collectivism. | |
| My garden and vegetable garden | Continue mastering the techniques of plasticineography - consolidate the technique of “rubbing” plasticine over the surface. Strengthen the ability to carefully use plasticine in your work. Learn to use contour drawing as the basis of the image. Strengthen the ability to classify fruits and vegetables. Develop hand motor skills, develop creative activity and independence; make you want to do useful thing- didactic game, to cultivate feelings of unity from the process of joint work. | |
| Sovushka is an owl. Big head | Learn to mix plasticine without allowing the colors to completely absorb each other. Teach how to use a “rolling pin” - a tube of glue stick for rolling plasticine over a surface. Develop Creative skills, independence and activity. Develop fine motor skills when performing techniques for working with plasticine. Develop color perception. Cultivate diligence and perseverance in work, the desire to complete the work correctly and to the end. Foster honesty and criticality when evaluating “drawings”, teach how to prepare the background of the work (branch, moon, balls). | |
| November | gold fish | Improve technical skills in working with plasticine. Develop figurative perception, logical and creative thinking. Develop children's creativity through acquaintance with different ways and materials. Cultivate dedication and passion for creative work. Find out the desires and aspirations of children (with the help of a Goldfish). |
| Worm in the apple | Carrying out work as a teacher using different modeling techniques. Strengthen the ability to carefully use plasticine in your work. Learn to use contour drawing as the basis of an image. | |
| Sperm whale - sperm whale | Continue mastering the techniques of plasticineography - consolidate the technique of “rubbing” plasticine over the surface. Strengthen the ability to carefully use plasticine in your work. | |
| Octopus | Continue mastering the techniques of plasticineography - consolidate the technique of “rubbing” plasticine over the surface. Strengthen the ability to carefully use plasticine in your work. Learn to use contour drawing as the basis of an image. Develop hand motor skills, develop creative activity and independence; evoke a desire to do something useful, cultivate feelings of unity from the process of one’s work |
Monitoring using plasticineography, features
The plasticineography monitoring system does not include any special forms and types of organization of children's activities. Diagnosis is carried out through observation, which occurs during individual and collective sessions.
This issue is especially relevant for club activities - it helps to organize classes more effectively.
The teacher evaluates the following parameters.
1.Creative activity
a) Increased interest, creative activity - high level
b) The child is active, there is interest in this species activities, but performs work as directed by the teacher - average level
c) The child is not active, does work without much desire - low level
2. Sensory abilities
a) The form is conveyed accurately. Diversity color range, real color is conveyed, image expressiveness is high
b) There are minor distortions. Deviations from paint - medium level
B) The form failed. Indifference to color, monochromaticity - low level
3. Composition
a) Proportionality between objects is maintained throughout the entire plane of the sheet - high level
b) On a strip of sheet with minor elements - average level
c) Not thought out, random in nature - low level
4. General manual skill
a) Well-developed hand motor skills, accuracy - high level
b) Manual skill is developed - average level
c) Hand motor skills are poorly developed, assistance is required - low level
5. Independence
a) Completes tasks independently, without assistance. The child independently chooses a topic, an idea, knows how to plan his actions, chooses expressive means, brings the job he has started to the end - high level
b) Requires little help - average level
c) Performs a task with the help of a teacher, support and stimulation are needed - low level
6. Technical skills indicators
- rolling out
- flattening
a) Performs independently - high level
b) Required a little help- average level
c) Performs actions with the help of a teacher - low level
- smudging
a) Performs independently - high level
b) Needs a little help - average level
c) Performs actions with the help of a teacher - low level
Plasticineography contains a lot of possibilities for revealing creative potential preschoolers, as well as for teacher self-education. This technique is an excellent basis for project activities and group work. Kids love to work with plasticine, and when they find an original use for this material, they get real pleasure and are able to create real masterpieces.
Nikitina Yulia Alexandrovna
Children's garden "Golden Key"
town Taksimo
Lesson notes on plasticineography Subject:"Mushroom mushrooms grew in the forest"
with middle school children
Goals:
- formation in children of a generalized concept of mushrooms;
- developing the ability to find connections between the forms of real and depicted mushrooms, to convey their natural features and color;
- consolidating children's knowledge about the properties of plasticine: soft, pliable, capable of taking a given shape.
Equipment: thick cardboard(half A4 format), a set of plasticine, a stack, a modeling board, illustrations of mushrooms, dummies of mushrooms.
Progress of the lesson:
Educator: Guys, in the fall there are a lot of mushrooms in the forest. Now I’ll tell you some riddles and clues, and you try to guess what these mushrooms are called.
(The teacher asks riddles and at the same time demonstrates
illustrations or dummies of mushrooms.)
Educator:
Above the mushrooms - the main one,
Smooth and nice.
He stood on a strong leg,
Now it's in a basket.
(Answer: White mushroom, boletus.)
Near the forest on the edge,
Decorating the dark forest,
He grew up bright like Parsley,
Poisonous...
(Answer: fly agaric.)
Well done, you solved all the riddles! How many of you have ever gone mushroom picking with your parents?
(Children's answers.)
Educator: Now let's decide who will make which mushroom. I have boletus mushrooms, fly agarics and russula. Have you chosen? Well done! Let's start drawing the mushroom from the stem. All mushrooms are white. This means we need white plasticine. Boletus mushrooms have thick, strong legs, so you need to take a large piece of plasticine and roll it into a sausage. And fly agarics and russula have thin legs. Those who want to depict these mushrooms need to take less plasticine and also roll thin sausages.
(Children roll sausages from plasticine.)
Educator: The sausages are ready, they need to be attached to the legs of the mushrooms on your cardboard. Press the resulting leg evenly and flatten it onto the base. For grass we need green plasticine. Take a few small pieces and roll into small sausages for the blades of grass. Then we apply them to the bottom of the leg and flatten them in different directions. Now it's time for the hat. Boletus mushrooms have smooth, shiny brown caps, while fly agarics have elongated red caps with white polka dots. Russulas have different caps, let's make them gray. Take plasticine of the color you need, roll it into a ball, and place it in the center of the hat. Then, flattening, distribute the plasticine evenly throughout the mushroom cap. Now let’s smooth out the bumps and protruding parts on the hat. Those who make fly agaric mushrooms, do not forget to make white dots. To do this, roll small balls with your fingers. white plasticine and by flattening attach them to the cap.
Physical education lesson "The wind is blowing in our faces"
Children stand next to the chairs and perform movements together with the teacher.
Educator:
The wind is blowing in our faces. (Swing your arms forward in front of your face.)
The tree swayed (Raise their arms up, depicting the crown of a tree, bend to the right and left.)
The wind is quieter, quieter, quieter. (Hands in front of you, perform shallow squats.)
The tree is getting higher and higher. (Hands up, gradually rise on tiptoes and stretch.)
Educator: Now let's see what you got. I’ll sing you a funny song about mushrooms, and you listen carefully. When I name the mushroom you drew, quickly raise your picture up.
Lived in the forest, forest, forest
Small mushroom.
The russulas called him “Our little boletus.”
The red fly agarics shook their heads,
Why do they take him with them, with them?
Well done! You have got real forest mushrooms.
Plasticineography. Types of plasticine applique.
Plasticineography is a technique whose principle is to create a molded picture with plasticine on a paper, cardboard or other base, thanks to which the images are more or less convex, semi-volume.
Regular work with plasticine allows the child to create more complex compositions using varied and complex techniques.
Plasticine and bright plasticine is perfect for making applications, as it is easy to process, shape the required form. And the application itself retains its shape for a long time. For a plasticine applique you will need multi-colored plasticine, cardboard (colored or white), in addition, the applique can be done on a glass surface, then covering it with the same piece of glass and inserting it into a frame.
The subject for the applique can be any drawing from a book or magazine that can be transferred to the surface using carbon paper.
Application from plasticine can be done in different ways. To work you will need a sheet of cardboard, a selected plot and colored plasticine. Advantages of plasticine applique over modeling volumetric figures is that on a plane you can create very beautiful and vivid plot, and much less material will be needed.
First you need to transfer the drawing you like onto a sheet of cardboard or with a marker onto glass, fill each section of the picture with plasticine of the appropriate color, which can be done with small balls, flagella or whole parts, giving the edges the desired shape with a stack.
Application on glass
The piece of glass must first be thoroughly washed with soap or detergent for glass, dry with a napkin. It is best to seal the edges of the glass with tape or tape to avoid injury during operation. Transfer the drawing to the glass using a marker, fill the elements of the drawing with plasticine, for which you select a piece of plasticine of the required size and knead it well in your hands and smear it on the glass. You can smear it with your fingers or a glass, carefully pressing it onto the surface to form a thin layer. New color must be applied sequentially and separately. After the application is completed, you need to remove the tape from the edges and place a background of colored paper on the plasticine surface, and another glass of the same size tightly on top, then thick cardboard. Cover the outline of the resulting work with strips of colored paper to create a neat frame. The application can also be done on a sheet of thick cardboard, but in this case the base will remain greasy spots from plasticine.
Types of plasticine applications
Application from whole parts. Plasticine paintings
A painting is already more difficult option plasticine applications. This will require some skill in working with this material, the ability to mix colors and accuracy. Technology plasticine painting It's best to start learning with simple images small size. In the process of completing the painting in plasticine technique Everyone develops their own style and manner, gains confidence in working with the material, their own recipes for obtaining tones and shades, as well as little tricks and secrets. By completing several simple and small paintings. It will be possible to proceed to a more complex work.
So, to create a plasticine picture you will need a plot (your own or from a book (magazine), a base, a set of stacks and a little initial knowledge about the technique of making a plasticine picture.
Thick cardboard, a plexiglass plate or plywood are suitable as a basis for a plasticine painting. A painting made of plasticine can be either flat or convex, depending on its constituent parts.
A plasticine painting has a smooth surface and resembles oil painting, and in bas-relief design the components of the figure may protrude slightly above its surface.
The picture can be square, round, oval, etc. Plasticine is applied to the base using a stack or with your fingers. It is best to spread plasticine on cardboard by hand, since the material under pressure lays in an even layer on the surface, thus achieving the effect of a brush stroke with oil paints.
The picture can be made in relief in different ways - by forming elements using a stack, sculpting individual parts, by cutting with scissors and lifting the cuts, rubbing plasticine through a sieve or squeezing it through a garlic press, etc.
Abstract of GCD on artistic and aesthetic development. Plasticineography “Winter Landscape” in the middle group
Subject: "Winter landscape"
" Target : learn to flatten plasticine balls and smear them on cardboard (snowman), lay out flagella on a drawn outline (Christmas tree), use colored pieces of plasticine to create bright image(Christmas tree toys). Learn to combine crafts into plasticine. Strengthen the ability to paint with paints.
Integration of educational areas:
"Cognitive development"
“Socio-communicative development”, “ Physical development", "Speech
development", "Artistic and aesthetic development".
Preliminary work:
reading poems about winter by A. Pushkin “Winter Morning”, I. Bunin “First Snow”. Looking at winter landscapes.
Material:
- ½ cardboard sheet A4 blue;
Plasticine set
Stack
Hand wipes
White gouache, brushes, jar of water.
Progress:
Educator : Guys, today I want to invite you to visit one amazing craftswoman. And who she is, you will find out by guessing my riddle:
The sun warms the earth weakly,
The frost crackles at night,
In the snow woman's yard.
The carrot nose turned white.
Suddenly there was water in the river
motionless and firm
The blizzard is angry, the snow is spinning,
Sweeps everything around
snow-white silver.
Children's answers: winter!
Yes, that's right, winter.
Educator : Guys, tell me, is winter good or bad? (Children's answers). Let's try to figure it out: is winter still good or is winter bad! (Word game “Good - bad”)
Educator : And now we will play the game “Winter Words”
Children, clap your hands if you hear a word related to winter.
(Snowflake, warm, New Year, sled, ice, heat, mittens, tulips, snowman, Santa Claus, falling leaves, Snow Maiden, peaches, sunbathing, snowfall, skis).
Educator: Well done! You were very attentive.
Educator : And now I want to invite you to our snow workshop, where we will draw a winter landscape using the plasticineography technique, but before that we will warm up a little.
Physical education lesson “Snowflakes are falling from the sky”
Snowflakes are falling from the sky,
Like in a fairy tale picture.
Let's catch them with our hands
And we'll show mom at home.
(Children raise their hands above their heads and make grasping movements, as if catching snowflakes.)
And there are snowdrifts around,
The roads were covered with snow.
(Stretching - arms to the sides.)
Don't get stuck in the field so that
Raise your legs higher.
(Walk in place, knees raised high.)
There's a fox jumping in the field,
Like a soft red ball.
(Jumping in place.)
Well, let's go, let's go
(Walk in place.)
And we come to our house.
(Children sit down.)
Children's work.
Children on pre-prepared sheets of cardboardUsing a pencil, draw blanks in the form of a tree trunk and circles of different diameters for a snowman.
Educator: From brown plasticine we make the trunk of the future Christmas tree and glue it to the silhouette of the tree.
We roll sausages out of green plasticine, try them on and sculpt branches. From above these are very small branches, and with each new"floor" the branches will become longer and thicker. Do not bring the branches to the very bottom - leave part of the trunk visible. If you want to make not just a Christmas tree, but Christmas tree– add colorful balls to it.
Let's start with the snowman. Take plasticine white and apply stretching movements to the area of the first circle, the largest, and thus fill all three circles. We make eyes from black plasticine, and a carrot-shaped nose from red. Make the bucket on the head purple
Now take white gouache and draw snow drifts at the bottom. We'll also sprinkle some snow on the branches. Draw directly on plasticine , it will be even more true.
Educator: Well done guys, you did a great job! These are some wonderful winter landscapes – the postcards we made.
On the topic: methodological developments, presentations and notes
Summary of educational activities for introducing preschoolers to the culture of the Russian people in the middle group. "Visiting Pelageyushka."
Summary of GCD Stages of GCD; Activities of the teacher: Activities of children: Organizational moment (game motivation) Children enter the group, they are met by a teacher in a Russian folk costume....
Abstract of the educational field of educational field "Speech development" (sound culture of speech in the middle group) Topic: "Visiting Little Red Riding Hood"
Abstract of GCD educational field"Speech development" ( sound culture speeches in the middle group) Topic: “Visiting Little Red Riding Hood” Nikishina Larisa Vasilievna, Educator of MBDOU “Kindergarten Com...
Plasticineography is becoming increasingly popular in kindergartens these days. This is not only a pleasant leisure activity, but also a whole area of creativity, which has its own types and techniques. She conquers everything more attention teachers, since it allows you to solve many developmental and educational problems during the game. But what is especially important is that the child has the opportunity to create a beautiful work of art with his own hands.
Plasticineography as an unconventional way of combining modeling and drawing
You can draw in different ways. Today among teachers preschool education popular unconventional techniques: drawing with fingertips, palms, prints of objects, blotography, plasticineography.
A child's mind is at his fingertips.
V. A. Sukhomlinsky
On the one hand, the child is involved in an exciting process, but at the same time there are many nerve endings on the tips of the fingers and the surface of the palms transmit signals to the brain, activating its activity. When little hands tear paper napkin, learn to roll a ball out of dough, feel materials or show a “magpie-crow”, information enters the brain and is distributed among various centers (auditory, visual, mental, emotional and speech).
Plasticineography - unconventional way drawing using plasticine. Children are taught activities with plastic materials at an early age. Modeling trains your fingers and activates sensors located on the hand that are associated with brain function, and helps relieve muscle and emotional tension. Modeling classes develop not only manual dexterity and coordination, but also creative imagination.
Creating a painting using this technique is new level working with plasticine, which can become art.

Using the plasticineography technique, we create true works art
Using techniques, methods and techniques in working with preschoolers
Plasticineography in pure form Available for children in the middle and older groups of kindergarten. Young children master basic skills during short-term individual or subgroup lessons.
It is important for the teacher to remember that in the junior and middle groups preschool age This type of creativity is aimed not so much at the result, but at obtaining positive emotions, developing children's interest and desire to improve skills.
To make the lesson enjoyable, the materials must be of high quality and the tools must be comfortable. For the basis of a future plasticine painting, paper is suitable, but thick cardboard, plastic, plexiglass or ordinary glass is preferable. The plasticine must be non-greasy, otherwise stains will appear on the paper or cardboard base, and the work will have an untidy appearance. Choose a bright and pliable material for modeling.
The tools you will need are a modeling board (can be replaced with a piece of plastic or oilcloth), a plastic rolling pin for rolling out plasticine, a set of stacks, scissors, various devices for creating patterns on a plasticine surface (brushes, a pastry syringe, a strainer, a plastic fork).
Methods of teaching plasticineography:
- visual (showing samples of work, illustrations on the topic, observing the actions of the teacher);
- verbal (conversation, explanation, story);
- practical (exercises with material, practicing techniques, game actions, experimentation).
The techniques used in plasticineography are already partially familiar to children from modeling classes. This is rolling and unrolling, flattening and stretching, that is, normal actions with a piece of plasticine to give it the required shape. But there are also some techniques here: pinching, smearing, pressing, smoothing, mixing colors. The teacher pays special attention to mastering them.

Drawing with plasticine - exciting activity for preschoolers
Tasks of plasticineography from nursery and second junior to preparatory groups
- Developmental. Techniques for working with plasticine develop finger dexterity and prepare the brush for writing. The ability to correctly perceive composition and scale improves.
- Cognitive. Pupils get acquainted with a new species visual arts, comprehend the interaction of two various techniques- appliqués and sculpting, the basics of which they have already mastered.
- Aesthetic. Children develop a sense of color and shape. The first experiments are being carried out with a combination of shades and materials.
- Educational . Children are taught to be independent, diligent, patient and neat, and gain experience working in a team. Depending on the topic, love for the native land, the ability to see and cherish the beauty of nature, a friendly, grateful attitude towards family and friends, love for pets, etc. are cultivated.
Children's skills and abilities become more complex from year to year. The main directions of work with preschoolers are also changing.
- In the first junior preschool educational institution group children learn to make elements from plasticine, one lesson - one element (ball, cylinder, sausage); create images simple objects; master the techniques of pinching and smearing, develop the basics of the ability to work according to a given pattern.
- In children the second junior group It is important to develop the ability to draw with plasticine, to cultivate independence (the child does not repeat after the teacher, but learns to build a composition himself). Training to work in a subgroup begins.
- In the middle group, skills in working with plasticine and creating more complex images; children are taught to create works using a variety of materials (cereals, beads, buttons, etc.); interest in teamwork develops.
- Senior and preparatory groups are characterized by the complication and development of the plot and game concept of the lesson; development speech activity pupils in the process of creating plasticine images; learning to create a collective work of artistic value.
Types of drawing with plasticine in kindergarten
Plasticineography can be divided into several types, based on the material that is taken as the basis for the picture. Work is performed on paper, cardboard, plastic, ordinary or organic glass.
Thick cardboard is often deformed, but it is simple and easy to work with. Plastic and glass bases are easy to apply (they won't bend or wrinkle), but to avoid cuts, be sure to provide safety training and teach your children how to seal the edges of the base with tape, or do it yourself first.
According to the method of creating an image, plasticineography is:
- Direct Performed with plasticine different color. In the first younger group it can be vegetables, winter snowfall, leaves.
- In the second younger group, children will willingly perform bright works on the theme “Dishes for dolls”, “Fish”, “Mushroom”. In the middle group, the plot and outline are much more complex: transport, trees, houses.
- Stained glass or reverse. The outline of the image drawn with a marker on a glass base is filled with plasticine.
- Mosaic. Plasticine balls of different colors are applied to the base in accordance with the design.
- Contour. This type of work is recommended for students in the senior and preparatory groups, because it requires perseverance. Warmed plasticine flagella of different colors need to be squeezed out of a syringe (without a needle) and filled with them in the outline.
- Multilayer. Plasticine is applied to the base with strokes in several layers, various colors and shades of the material are combined, resulting in a three-dimensional, complex image.
How to warm up the material: roll out some of the plasticine into a sausage, push it into the syringe. We cut off the excess material in a stack. We close the syringe using the piston and heat its contents using water or a microwave.
Photo gallery: types of plasticineography depending on the method of application
Contours are painted over with plasticine in the first junior group “Fish” is performed in the 2nd junior group The work of a middle group student is made as a “Gift for Dad” Reverse plasticineography “Teddy Bear” is suitable for children of senior preschool age Such painstaking mosaic work “Matryoshka” requires perseverance and patience Contour plasticineography “ Fish" Multi-layer technique is very picturesque and allows you to convey the colors of living nature
Difficulty level of crafts
Children of each age group ability level differs. For harmonious work and positive emotions, this point must be taken into account.
Table: level of abilities of children of different ages
| Age group | Skills in working with plasticine | Form of work | Type of work |
| Nursery | mastery of the skills of rolling, unrolling, flattening, joining elements | individual | creation according to model |
| Second younger |
honing the skills acquired in the nursery group, mastering more complex skills: pinching, pulling, cutting, smoothing, work with simple tools: stacks, scissors |
individual | creation according to the model, doing something like this |
| Average | honing skills acquired in early age groups, mastering the technique of mixing plasticine of different colors, work with more complex instruments: brushes, curly shapes, syringe (regular without a needle or a pastry syringe with a variety of attachments) |
individual, work in subgroups |
doing something like this independent composition planning |
| Older | the use of waste material is added, combining elements various types plasticineography |
individual, work in subgroups, teamwork |
independent choice of materials, thinking through the composition, attraction of plot and game elements |
| Preparatory | acquaintance with new techniques (bas-relief, tile), design training finished work(frame, baguette, background, mat) |
individual, work in subgroups, collective |
independent choice of materials and type of work performed, thinking through the composition, a combination of various techniques of fine art, mandatory use of plot and game elements |
Photo gallery: samples of work by children of different age groups
Image of a flower in direct technique (first junior group) “Daisies” made by children of the second junior group Children of the middle group can do the composition “Space” Work of children of the senior group Beautiful gift for Mother's Day (preparatory group)
We are planning plasticineography classes in kindergarten
For a teacher, visual arts classes are an opportunity to create a connection between art and different areas of knowledge. IN creative process speech development, patriotic, labor and environmental education are integrated. Therefore, topics are selected so that they reflect the diversity of the surrounding world and correspond to social significant events, which occur in the time closest to the lesson, or season. For example, it is advisable to plan a patriotic theme in November, for the Day of national unity, making flowers and treats would be appropriate for Mother’s Day.
Approximate topics for classes with children of middle preschool age
- "Apples and berries on a plate."
- "Bugs in a flower bed."
- "Mushrooms".
- "Sun in the clouds."
- "Rowan sprig."
- "Autumn tree."
- "Fish"
- "Christmas tree".
- "Christmas decorations".
- "Snowman".
- "The snow woman is a dandy."
- "Teremok".
- "Owl".
- "Jolly Rocket"
- “A gift for dad (grandfather).”
- "Pie for Mom."
- "Flower - seven-flowered."
- "White birch".
- "Space".
- "Starry Sky".
- "Easter Egg".
- "Lily of the valley".
- "Snail on a leaf."
- "Dandelion"
In the preparatory group, the themes “My Homeland”, “My Family”, “Underwater Kingdom”, “Autumn Tale”, “Winter brought us fun” should be introduced. "Round dance at the Christmas tree." They are more voluminous in content and require good preparation of children. You can also plan to depict painted dishes and various items clothes, folk toys, for example, Dymkovo, human bodies in motion.
Children in their seventh year of life are sometimes capable of creating real masterpieces if they are given free rein to their imagination.
Photo gallery: works of children of middle and senior preschool age on the theme “Hedgehog”, “Peacock”, “Rowan Branch”, “Clown”, “Flowers” and others
“Hedgehog” Colorful image of a peacock On a wonderful tree we see signs of all seasons Teamwork “ Undersea world»
 Funny bear made using the brushstroke technique Mosaic plasticineography « New Year's ball» Original Christmas decorations in mixed media “Chrysanthemums” “Grandma Yaga’s Hut” Painted Easter eggs“Rowan Branch” “Funny Clowns” “Russian Flag”
Templates to help the teacher
Templates, the outline of which must be filled with plasticine of different colors, are suitable for straight and more complex species plasticineography.
Photo gallery: templates depicting fruits, vegetables and animals
Template “Ladybug” Template “Hedgehog” Template “Puppy” Template “Bullfinch” Template “Cat” Template “Vegetables and fruits”
Photo gallery: clothing and tableware templates
Template “Jug” Template for painting “Gzhel” Template “Teapot” Template “Cup” Template “Pan” Template “Pants” Template “Sweater” Template “Jacket”  Template "Fur Coat" Template "Skirt" Template elegant dress Doll clothes template
Photo gallery: templates of transport and human figures
Truck Template Template « Ambulance» Template “Taxi” Template “Steamboat” Template “Ship” Template “Helicopter” Template “Airplane” template “Steam Locomotive”  Template “Human Figures” Template “Clown” Template “Men” Template “Children” Template “Man in Motion”
It is also interesting to work with templates on cardboard with a ready-made background. The contours are filled with colored material.
Photo gallery: animal templates with ready-made backgrounds
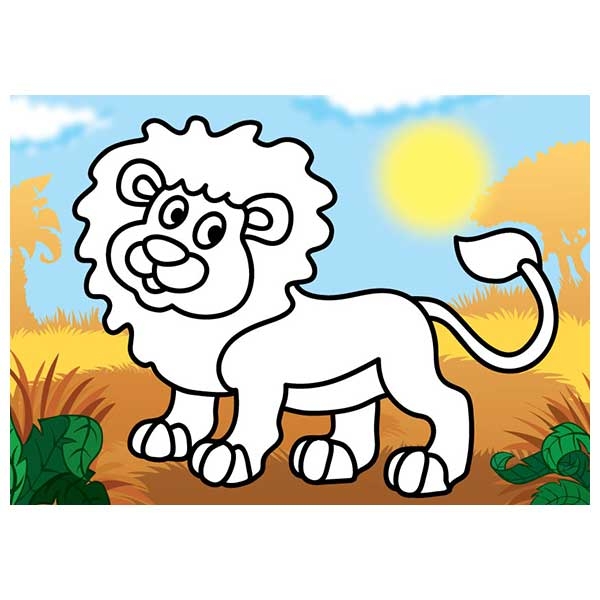 Template “Lion” Template “Bug” Template “Grasshopper” Template “Dragonfly”
  Stegosaurus template
  Template "Pterolactyl"
  Dinosaur template
  Template "Piglet"
  Rooster template
  Ostrich template
Description of the contents of the abstract of GCD on plasticineography for the nursery group “Kolobok” by the author Potekaeva N.G.
- Preliminary work: reading the fairy tale “Kolobok”, looking at the illustrations for it, coloring coloring pages based on the fairy tale “Kolobok”.
- Form of work: subgroup (6–7 people).
- Goals: training in rolling, attaching, pinching techniques; development of coordinated work of both hands; training to work in a team.
Progress of the lesson

Organization of a project or circle on plasticineography
You can diversify the forms of working with children on drawing with plasticine using project and circle activities. In the first case, the teacher has the opportunity to take a deeper and more systematic approach to introducing children to this wonderful form of art; in the second, to expand the range of topics and additional materials used.
Stages of project preparation
- Goal: to develop the creative thinking of preschool students using plasticineography techniques.
- Tasks:
- training in performing simple elements using a given technique;
- learning to create objects of the surrounding world in artistic form;
- training to work in a given space;
- development of spatial thinking;
- development of aesthetic taste;
- mastering the basics of design;
- education of perseverance, accuracy, patience;
- involvement in team work.
- Drawing up detailed planning:
- preparatory stage of work;
- attraction of motivating material at the beginning of project activities;
- If possible, time the project to coincide with a significant event in the life of the kindergarten (Mother’s Day, Autumn Holiday, New Year, Victory Day, Cosmonautics Day).
- Implementation of project activities.
- Project presentation. When the project is finished, it can be shown (to another group, in the kindergarten hall, in assembly hall on the holiday). Children talk about their work to listeners who evaluate their creativity.
Description of the project “Gifts of Autumn”
- Goal: prepare creative work for the Autumn Festival in kindergarten.
- Tasks:
- honing skills in working with plasticine;
- development of aesthetic taste;
- artistic reproduction of objects of the surrounding world;
- group work training.
- Pupils are divided into subgroups and independently distribute responsibilities for creating individual parts compositions: drawing mushrooms with plasticine, creating tree trunks using contour technique, using mosaic technique for depicting berries and animals, using methods of working with scissors and stacks to create three-dimensional elements.
- Presentation of the work at the Autumn Festival in the assembly hall (with musical accompaniment and reading of poems).
Photo gallery: collective work of children from the preparatory group on the “Autumn” project
« Autumn trees» “Children in the autumn park” “Autumn in the forest” “Plasticine autumn”
Literature and tips for creating a circle
Before development work program mug, it is recommended that you familiarize yourself with the teaching aids on working with preschoolers using this technique:
- G.N. Davydova. Plasticineography for kids. – Scriptorium, 2003.
- Shnitskaya I. O. Application from plasticine D.: Phoenix, 2008.
- Yanushko E. A. Modeling with young children (1–3 years). Methodological manual for educators and parents. – M.: Mosaic - Synthesis, 2006.
For self-education, it will be useful for the teacher to familiarize himself with manuals on the development of fine motor skills in children:
- Anishchenkova E. S. Finger gymnastics for the development of speech in preschool children. – M.: AST: Astrel, 2006.
- Bolshakova S. E. Formation of fine motor skills of the hands: Games and exercises. - M.: TC Sfera, 2009.
- Koltsova M. M. Motor activity and development of child brain functions. – M.: Pedagogy, 1973. – P. 144.
- Pavlova L. The importance of developing hand actions. Preschool education. 1984, № 1.
- Tsvintarny V.V. We play with our fingers and develop speech. - St. Petersburg: Hardford, 1996.
The club program takes into account:
- age characteristics of children who will study in the circle;
- forms of conducting classes;
- methods and techniques that the teacher will use;
- means (materials and tools for creativity, attraction of ICT and technical means);
- training mode;
- predicted results to be achieved when implementing the program;
- topics of classes.
Fragments from the program of a circle on drawing with plasticine for the senior group
- It is recommended to involve information computer technology. This is necessary to display working diagrams, visual examples, images of works of art. Viewing such material develops the imagination and creative thinking of students.
- In preschoolers it predominates visual-figurative thinking, therefore, presentations and video materials stimulate emotionally rich work with plasticine.
- Class schedule: for older children (5–6 years old), classes are held in the afternoon, twice a week. The duration of the lesson is 25–30 minutes.
- The work of drawing with plasticine is carried out in several stages, at each of which the child is given different tasks.
Program monitoring shows what your skill level was at the beginning school year and what the children learned at the end. For each child there is a table that displays the level of skills in working with plasticine and modeling tools, the ability to follow the teacher’s recommendations, the level of development of creative thinking, independence in constructing a composition and developing a creative plan.
Videos on drawing with plasticine
We bring to your attention videos about different techniques plasticineography.
Video: “Fish in an aquarium” made from plasticine
Video: master class on contour drawing with plasticine
Video: aquarium - a craft with plasticine in a combination of plasticineography and modeling on a plane
Video: drawing an autumn forest with plasticine
During plasticineography classes, children work with different materials and tools, develop fine motor skills and train the hand to write. This type of art introduces the original use of materials and opens up a new perspective on everyday objects and natural objects. Preschoolers improve their speech skills and enjoy communication in a group.
Share with your friends!Related posts.

