Star news


DIY rooster for the New Year: photos and ideas. DIY cockerel for the New Year
Are you ready for the upcoming New Year celebration? If you haven’t bought gifts for everyone yet, you can please your loved ones with very beautiful and unique souvenirs that you make yourself. Do-it-yourself rooster, master classes on making the symbol of 2017, suitable for both experienced needlewomen, and for beginners. We have 6 original techniques for making cute Cockerels: stuffed toy, papier-mâché rooster, newspaper tubes, from candies, from salt dough and even from cardboard egg trays. Find out for yourself which of these master classes you like best.
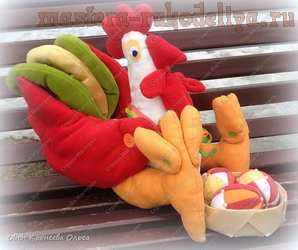
Stuffed toy cockerel – a caring father
The original image of a rooster, instead of a hen hatching an egg, will certainly appeal to people with a good sense of humor.
For work you will need: polystyrene foam; multi-colored pieces of fabric; tailor's chalk; threads; buttons; felt fabric (for decoration small parts); stationery knife; decorative ribbons and beads; padding polyester or any soft filler; hot glue.
How to do?
Papier-mâché handsome rooster
You will need: cardboard; plastic bottles; scotch; PVA glue; wood varnish; watercolor; gouache or any paints for painting; brushes; stationery knife; thin paper or newspapers; hot water and a saucepan. The dough for the papier-mâché rooster master class needs to be cooked a little on the stove.
 How to do?
- We assemble the base frame from bottles and cardboard, as shown in the figure, connect them well with tape.
- Prepare the papier-mâché dough: tear the paper into small pieces and pour hot water for soaking. For thin parts, the paper will have to be cooked over a fire. When the paper gets wet, squeeze out the water and mix with PVA glue.
- We gradually apply layer by layer, giving the papier-mâché the shape of a rooster. Each layer must be thoroughly dried.
- Now you can paint the cockerel and, to secure it, coat it with wood varnish so that the paints do not spread and stain your hands.
Rooster from egg trays
For the master class on a rooster made from egg trays you will need: pearlescent acrylic paints; cardboard egg trays; balloon IR; PVA glue; hot glue; newspapers; paper; brushes; scissors; stationery knife; simple pencil.

How to do?
- Cut out separate parts from the trays for feathers, beak and everything else, as shown in the picture.
- Gradually glue the feathers onto the cardboard base using hot glue and assemble the parts of the cockerel - head, wings and tail.
- Make the abdomen using the papier-mâché technique from newspapers; to do this, cut the newspapers into strips, coat them with PVA glue and cover the balloon with them in several layers. The top layer should be made of white paper.
- When the paper on the ball has hardened, pierce it and cut the shape into two unequal parts, as shown in the picture. Insert the smaller half into the larger one and secure it with strips of glue.
- Fasten all the parts and paint every feather, every detail with multi-colored mother-of-pearl acrylic paints, changing shades. You can imagine with your children.
Candy rooster
What you will need for the candy rooster master class: lollipops - roosters on a stick; a scattering of different chocolates; skewers; cling film; basket; decorative ribbons; artificial flowers; Styrofoam.
How to do?
- We wrap the chocolate candies in cling film and thread them onto skewers.
- Glue a piece of foam plastic to the bottom of the basket.
- We beautifully distribute the skewers with candies and lollipops on the foam.
- We place the flowers last to cover the entire bottom of the basket.
- We decorate the skewers and the basket with bows and multi-colored ribbons.
Rooster made from newspaper tubes
What you will need for the master class: a rooster made from newspaper tubes: newspapers; PVA glue; stationery knife; knitting needles; paints for painting;

How to do?
- Fold the newspaper lengthwise and cut it, bend it again and cut it again so that you get four strips from one sheet. Using a knitting needle, twist the paper at an angle of 30 degrees to create a long thin tube. Towards the end of the work, remove the knitting needle and tighten the tube, lightly gluing its edge. Paint the dried tubes in different colors.
- Place ten tubes together. Twist the tube from the middle around the bundle three times and divide them in half. Leave the tip to the side.
- We braid the two halves with a figure eight.
- From one bunch we make a rooster's tail. Let's straighten the tubes, flattening them.
- We will continue to braid the second bundle with the tip of the middle tube, creating a neck.
- We bend a piece of tube in the middle and weave it into the neck, this is the beak.
- We wrap the bundle over the beak three more times and hide the tip of the tube inside.
- For the stand, take a new wet tube and screw it onto the bottom of the bundle, adding glue. Trim the protruding ends with a knife.
- The wings need to be made in the middle of the figure; to do this, use a knitting needle to widen the hole between the tubes and insert three multi-colored bent tubes into it.
Salt dough rooster
What you will need: a glass of flour; half a glass of salt; half a glass of water; PVA glue 20 grams; toothpicks; paints; brush.
 Making a rooster from dough is very simple, you can do it with your children. Knead a soft dough from water, flour, salt and glue, preferably with a mixer, so that the mass is more homogeneous. You need to immediately start sculpting the parts of the cockerel; toothpicks are needed to draw small details, feathers, pupils on the eyes. Connect them together and dry them near the battery. After drying, you can start painting.
The cockerel is ready! We wish you creative inspiration! And may he bring good luck to your home and cheer everyone up throughout 2017!
If you liked our site or found the information on this page useful, share it with friends and acquaintances - click one of the buttons social networks at the bottom of the page or at the top, because among the heaps of unnecessary garbage on the Internet it is quite difficult to find truly interesting materials.
Next 2017 a year will pass under the auspices of the Rooster. This means that DIY New Year’s crafts for 2017 should be very diverse. We invite you to make a symbol of the year in a wide variety of variations. In this article you will find a number of the most interesting crafts that you will definitely make with pleasure.
Making our own crafts for the New Year
Felt cockerel.
If you plan to make a cockerel with your own hands and do not want to buy it from souvenir shops, then this master class will come in handy. You can make a beautiful bird from bright pieces of felt. You can give this toy to a child or decorate the interior of your home with it.
- So, in order to sew a toy, you need to sketch all the details. Make sketches on a regular sheet of cardboard. You can also download and print the template.
- After that, we transfer the contours of the parts onto felt and cut out individual parts of the toy from the material.
- The parts that were cut out are sewn together. In this case we use threads of the color of the material. It is also recommended to use an overlock stitch.
- When you have sewn the main part of the toy, start decorating it. Make eyes and other decorations.
Pay attention to what kind of cockerels can be sewn from felt. As you can see, there are many different options here.


Funny snowmen.
In this article you can find the most interesting New Year's crafts that you can make for the New Year 2017 with your own hands. In addition to cute cockerels, you can easily make a number of other interesting crafts.

So, for such snowmen you should prepare socks white, as well as cereal for filling. Just fill your socks with cereal. Form snowmen and make them additional elements For decoration. pay attention to step by step creation such crafts.
- Cut the light sock into two parts.
- After which, the upper part of one sock is tied with a rubber band.
- Turn the piece inside out.
- Fill part of the sock with cereal.
- We tie at the top strong threads or tape.
- Now take a colored sock and cut it in half.
- We put one part on the snowman, and use the other as a hat.
- Sew beads to the snowmen to act as eyes. And also decorate your craft with lace.
Fluffy Christmas tree for the New Year.
It is worth saying that even from the most simple materials Today, every craftswoman can create an original craft. For example, below we will tell you how to make an unusual Christmas tree using simple plastic bags. So, first of all, prepare:

- light green plastic bags,
- wire and scissors,
- small bell.
Progress:
- First of all, we make a strong frame with a stand from wire.
- Now take a stack of bags and cut circles out of them. The circles should be 12 cm in diameter. But as the Christmas tree grows, the diameter of the circles should become smaller.
- The edges of the circles should be wavy. To do this, they are stretched with your fingers.
- We collect a stack of large circles and string them onto the base. The height of your future Christmas tree at this stage should be 5 cm.
- Now cut out circles with a diameter of 11.5 cm and place them on the base again in a stack.
- In this way, we cut out and put circles on the base until the circles cover it.
- We tighten the top of the base and attach a bell for decoration.
New Year's rooster using quilling technique.
If you are interested in techniques such as quilling, then you will enjoy making unusual craft and give it to someone magical holiday. This cockerel is very easy to make. It is worth noting that the main part of the cockerel is made from quilling forms. But the cockerel's tail is made from ordinary strips of colored paper.

In addition to simple crafts, you can easily make a real work of art using this technique.

And in order to make paper blanks, use the master class.

Cute tree made from toilet rolls.
The upcoming 2017 Year of the Rooster must be bright. And now start boldly making crafts for the New Year.
So, to create the next craft you will need toilet rolls. You should also use:
- paints,
- glue,
- Christmas balls.
Progress:
- So, first of all, color the toilet rolls.
- If the paint has dried, start building the Christmas tree. Glue the rolls together with glue.
- Attach the balls to the rolls, and also secure the beads on top of the tree.
- As a result, you have a very interesting craft.

Santa Claus from a brush.
Look what interesting craft You can decorate your home for the New Year. Take a regular brush and draw facial features. Also make a hat of your own craft. In this case, choose fluffy fur.

Fairytale snowman made of white threads.
In order to make the next craft, you need to put in a minimum of effort. Your children can freely join in this process. To create a snowman take:
- white threads,
- big needle,
- glue and 5 balloons,
- felt-tip pen and blush,
- scarf for decoration.
How to do?
- We inflate all the balloons. 3 balls will be needed for the body. We use a couple of balls to create hands.
- Now we take a large needle, insert a thread into it and pierce it with ordinary office glue. We take out the thread from the other end of the bottle and wrap it around the balls.
- At the fastening points, press the balls slightly inward.
- If you have assembled the snowman, then glue the nose to it. And we paint the cheeks with blush. To draw eyes we use a felt-tip pen.
- Use a scarf for decoration.

Magic snow composition.
From this article you can learn how to make New Year's crafts for 2017. Indeed, in this publication we have collected for you only the most best crafts for the New Year 2017. Now we want to invite you to make magical composition from handy materials. To create it, take:
- a simple glass jar,
- various miniature figures,
- glycerol,
- waterproof glue,
- distilled water,
- sparkles.
Progress:
- First, stick a figurine to the inside of the lid or to the bottom of the jar.
- Now pour water into a jar and add glycerin to it.
- After that, add the snowball and close the jar with a lid. Shake it. If the glitter in the jar falls off quickly, add more glycerin.
- If you are satisfied with the result, then feel free to give your gift.

Finally
We hope you enjoy our selection of ideas. You will probably be able to choose the most from these ideas. wonderful crafts, which you will make on the eve of the new year.
Despite its simplicity and cheapness, paper is one of the most interesting materials for crafts and creativity, because from it you can make so many different beautiful things with your own hands: appliques, flat and three-dimensional figures using the origami technique, entire paintings using the quilling technique, luxurious panels and much more.
In addition, there are so many varieties of paper and such a diverse range of colors that with its help any creative ideas and ideas.


Try to start by making not very complex products. For example, with some variation of the image of a cockerel.
What could he be like?
Many master classes are devoted to creating a paper cockerel with your own hands. You can make it the most different ways, depending on what image is expected, as well as on the purpose of manufacturing this product:
- If your child needs a craft for kindergarten, then help him make an applique with his own hands. To do this, you just need to print the template, cut out its parts, and then use them to make the same elements, but from colored paper. Glue all the parts onto cardboard to make a cockerel. Complete the applique - draw or also make grass and flowers out of paper, sunny skies, grains for a rooster, you can even create a whole family by adding a hen and chicks. It will turn out very beautifully if you take dense, shiny or velvet paper. You can decorate the craft with sparkles;

- The applique can also be experimental - for example, try gluing parts made of feathers and corrugated paper onto a blank figurine of a cockerel, but not just like that. If you dip colored corrugated paper into a bowl of water and rinse it a little, the water will become colored and the paper will acquire interesting stains - this will add originality to the applique and make the craft unique;


- Another one interesting option DIY appliqués - make a lot of blanks from children’s hands outlined on paper, then cut them out and chaotically glue them to the blank-body of the cockerel, adding some more elements;

- with small children it is easy to make a voluminous cockerel with your own hands, which will become a wonderful character in puppet productions paper theater and is useful for dramatizing various fairy tales. To make it, you will also need a template from which you will need to cut out the parts. The base and body of such a cockerel will be a cone (it needs to be glued together), and a cylinder-shaped head will be attached to it. Bend the rectangles along the fold lines, and form the wings, tail, comb and beak from the strips. Glue all the parts (see assembly diagram);
- it’s even easier to make a figurine with your own hands from paper cone- cut and glue a cone out of colored paper, and glue eyes, a beak (folded triangle), a comb, feathers and a tail made of many stripes, as well as accordion paws to it;

- crafts made using simple and modular origami, the rooster will be described below;

- You can also make interesting things with your own hands using the paper-plastic technique. modular figures‒ for this you will need a diagram and a template, according to which you need to cut and glue the parts, and then model the cockerel figurine;
- If you have at least minimal skills in quilling techniques, you can create entire paintings and panels. The easiest way is to use ready-made template birds, on which you just need to attach multi-colored shapes. To make more complex products, you can watch a special master class. Some masters even combine various techniques, for example, the body and head of a rooster are made from paper pulp or papier-mâché, and the tail, comb, wings and other details are made using the quilling technique (the “droplet” element);
- making a cockerel from corrugated tubes twisted from multi-colored corrugated paper will also look like quilling;


- beautiful and original figures can be made from the same papier-mâché and even from paper egg trays.

Making a cockerel using origami technique
- A beautiful cockerel is quite easy to obtain after some manipulations with a square sheet of paper. Mark the fold lines and fold the sheet diagonally. Then bend the corners of the fold lines.
- About half paper figurine bend it back and make bends on both sides.
- Fold the top corner up and inward, and then turn the fold out.
- Then the upper corner bends to the right and inward again, and the fold bends first inward and backward, and then inward and forward. After this, the corners are bent on both sides inside the figure.
To make a modular cockerel, you will first need to make separate modules for it (about four hundred pieces), and then connect them together.
Making a cockerel from paper egg trays
- To make original and beautiful cockerel from paper trays for eggs, take the tray, disassemble it into cells and cut out, as if individual tulips.
- Then glue them together using thin paper.
- Cut out the cockerel's beard from the tray and make a beak.
- Prepare cardboard blanks and start gluing feathers in rows from small to large.
- Make the belly of the cockerel like this: cover the balloon with scraps of newspaper and white paper. When it dries, cut it into two parts (they should not be equal).
- Take the larger one and insert the smaller one into it. Start assembling the cockerel by attaching the wings, tail, legs and face with all the details.
- Paint the product with pearlescent acrylic paints, changing colors and shades to make the rooster bright and colorful.
- To make it stand well and steadily, you can attach it to a stand and decorate the empty top colored eggs or other decor.

Beautiful New Year crafts are great for decorating your home, school classrooms and rooms in kindergarten. Such products can be easily made by both children and primary and secondary school students. Bright rooster with your own hands from paper, cotton pads, plastic bottles do not require any special skills - they can be easily made from inexpensive and simple materials. And to make the symbol of the 2017 New Year a bright fiery one, you can use different combinations materials with colorful colors. The considered toy master classes with photos and videos are great for fast execution. They can be used for entertaining handicraft activities in schools and kindergartens. The article also presents original craft for parents - a rooster costume for a matinee.
How to make a beautiful Rooster symbol of 2017 with your own hands - an idea for kindergarten

Very bright and beautiful craft For the New Year, a rooster can be made from such simple materials as plastic bottles and plates, glasses. Unusual symbol year, a rooster can be made with your own hands quite quickly. It can be made to decorate a corridor or office or bedroom. The colorful craft will fit perfectly into the overall interior and will be a wonderful addition to the New Year tree.
Master class materials: bright DIY rooster craft
- plastic bottles (brown) - 3 pcs.;
- plastic plates (red and yellow) - 2 pcs.;
- plastic glasses (red and yellow) - 5 and 6 of different colors;
- disposable spoon - 2 pcs.;
- yellow ball (for the pool);
- stapler, marker, tape.
Master class on making a rooster with your own hands - an interesting decor for school and kindergarten
- The top parts of the bottles are cut off and firmly fastened with ordinary tape, as shown in the photo.

- Upper parts disposable glasses cut into fringes and put on the bottle one by one. 2 top glasses and cut into fringe on the other side.

- U disposable plates you need to carefully cut off the sides. Finely cut the inner sides with scissors to create a bright fringe. Connect the parts together with a stapler.

- We make a small cut on the bottle and insert the prepared tail into it.

- We decorate the tail with gift or wrapping paper. From the remaining parts plastic plates The wings are cut out and attached to the body using double-sided tape. The ball head is also attached to the craft with double-sided tape.

- A comb, beak and “earrings” are cut out of plastic plates. The parts are glued to the rooster's head with double-sided tape. From disposable spoons Eyes are made and glued to the head. The pupils are marked with a marker.

- Additionally, you can make a small stand. For example, from a flower pot.

Original do-it-yourself paper rooster for school and kindergarten - crafts with photos and videos

It is very beautiful to make a rooster - the symbol of 2017 with your own hands using plain paper. This craft can be supplemented with a magnet, photo, to get original decoration for the refrigerator. Do a simple rooster kids from paper can also make it with their own hands kindergarten, and school students. Entertaining New Year's craft Can handle even babies 3-4 years old.
DIY materials for the “Rooster Magnet” master class for kindergarten and school
- multi-colored paper;
- glue gun;
- PVA glue;
- magnet, photographs.
A simple and clear DIY master class - New Year's rooster 2017 for school and kindergarten

Do-it-yourself soft New Year's toy Rooster for the senior group of kindergarten and school

Not just paper or plastic crafts can be prepared in the form of a symbol of the New Year 2017. To solve this problem, you can also use felt. Beautiful New Year's toy a rooster with his own hands can become a wonderful gift for mom or good friend. The idea is suitable for average and high school: kids from primary school and it will be difficult for a kindergarten to make such a New Year's toy.
Materials for the master class DIY Rooster toy for the New Year 2017 for school
- felt;
- beads;
- needles, threads;
- padding polyester (can be replaced with regular cotton wool).
Step-by-step instructions for the master class: DIY New Year's rooster as a gift

Unusual DIY crafts for the Year of the Rooster 2017 - for school and garden with photos and videos

Every child and adult knows how pleasant it is to give and receive. new Year gifts. For such an occasion, children can make a simple craft that can become excellent decor for kitchen, room, hall. Making gifts for the Year of the Rooster with your own hands is not at all difficult: you just need to follow specified instructions and observe the correctness of their execution.
Materials for the master class: DIY paper rooster
- paper plate;
- newspapers;
- paper tape;
- dye;
- PVA glue.
An interesting master class for kids - simple DIY crafts for the Year of the Rooster

Do-it-yourself small New Year's rooster made from cotton pads - crafts for school and kindergarten

Funny small rooster can be made from scrap materials. Regular cotton pads are perfect for this task. Even primary and secondary school students can make a small rooster with their own hands in kindergarten. preparatory group. Fun craft is a simple children's applique.

Every year passes under the auspices of some symbol. The coming 2017 will be under the auspices of Fire Rooster. Of course, it is customary to celebrate the New Year brightly and interestingly. In addition, on this day people make all kinds of crafts that are original gifts. Also, such products quite often become exhibits. In this article, we decided to talk about what crafts you can make with your children for the Year of the Rooster. Here you will find plenty of interesting ideas, which will be very easy to make with your own hands.
Children's crafts for the Year of the Rooster
Cockerel from chenille wire.
This cockerel requires minimal effort to create. In addition, children who like to make can take part in this process. various crafts. So, in order to make a craft, take:
- a couple of pom-poms yellow color,
- a couple of pieces of yellow and one piece of orange chenille wire,
- scissors and universal glue,
- eyes.
Progress:
First of all, two pompoms should be connected with one piece of chenille wire. This will be the body of the chicken. In this case, before connecting the pompom, the ends of the wire should be greased with glue.

At the next stage, you need to make blanks for the cockerel from yellow wire.

Make a beak and comb from a piece of orange wire.
Now attach all the pieces to the pompoms. But before attaching the parts, you need to lubricate the ends of the chenille wire with glue.

Rooster made from chestnuts.
As mentioned above, crafts for the year of the rooster will be interesting and bright. They are very easy to make with your own hands, if you look at the pictures of how they are made. To create the next craft, you should prepare:

- maple lionfish,
- chestnuts,
- disk,
- plasticine,
- gouache,
- openwork napkin,
- red and yellow paper
- piece of wallpaper,
- chenille wire.
Progress:
- People take part in the creation of our crafts: natural materials, which should be pre-painted with gouache.
- After that, you should start designing the disk. The colored side of the disc should be covered with a piece of wallpaper.
- On front side stick an openwork napkin on the disk.
- Now, using plasticine, you should glue a chestnut into the middle of the napkin, which will be the body. Glue another chestnut above it. A small chestnut will be the head of a rooster.
- Draw the cockerel's eye, and use tape to glue the comb and beard.
- Glue the tail and wing to the body using plasticine.
- Then make legs from chenille wire and glue them to the craft.


The original cockerel.

A beautiful cockerel is quite easy to make if you prepare:
- cardboard egg cells,
- 2 foam balls, one larger and one smaller,
- colored corrugated paper,
- scissors and PVA glue,
- gouache and brush,
- wire and tinsel,
- decorative tape.
Progress:
Cut the cells into separate segments. Give these blanks rounded shape. Cut off sharp corners. After that, glue these blanks to the balls.

To make a comb, soak the trimmings from egg cells V warm water. Add PVA glue to the water. From the segments that you have prepared, you should glue the tail and wings.

Cover the resulting blank with colored corrugated paper. Cut the edges to give them the shape of feathers.

Glue the wing and tail blanks to the rooster. After the rooster dries, paint it with paints.

Now make a blank from the wire and wrap it with tinsel.
That's all. Your craft is ready. If you do everything correctly, your craft will become a worthy decoration of the exhibition.
Rooster made of plasticine.
 Modeling is great way develop children's motor skills. For the New Year, invite your children to make an interesting cockerel directly from plasticine. To make a cockerel, take plasticine different colors. You will also need wire and mesh.

