Santa Claus and Snow Maiden from fabric patterns. "Ded Moroz and Snegurochka"
New Year is already around the corner! Do you feel the spirit of magic and emerging miracles in the air?))
By the way, you yourself can take part in creating a miracle - sew your own Santa Claus for the New Year tree!
After all, every child and even adults secretly expect that when the clock strikes, a good wizard will bring a bag of gifts and a whole armful of happiness))
So, for work we will need the following materials and tools:
- Cotton white or beige fabric for the body base
- Cotton multi-colored fabric for pants, caps and mittens
- Fleece in two colors (white and red)
- Felt for applique
- Hollow fiber for stuffing and a piece of lining padding polyester
- Felting wool (combed tape)
- Foam rubber for boots
- Floss threads, buttons, beads, beads for decoration
- The wire is thick, holds its shape well, and thin copper
- Thick cardboard
- Acrylic paints, brushes
- Felting needle
- Pliers, wire cutters, utility knife
- Glue gun, Moment-Crystal glue
If you are a fan of Tilda, then definitely look at the review with patterns and tips for sewing primitive dolls
1. Prepare the pattern. First, we determine the diameter of the bottom of the cone and its desired height and, based on this, we build a scan in any convenient way. Calculation formulas and construction methods are easy to find on the Internet. We draw the pattern of the hands randomly.
Santa Claus pattern
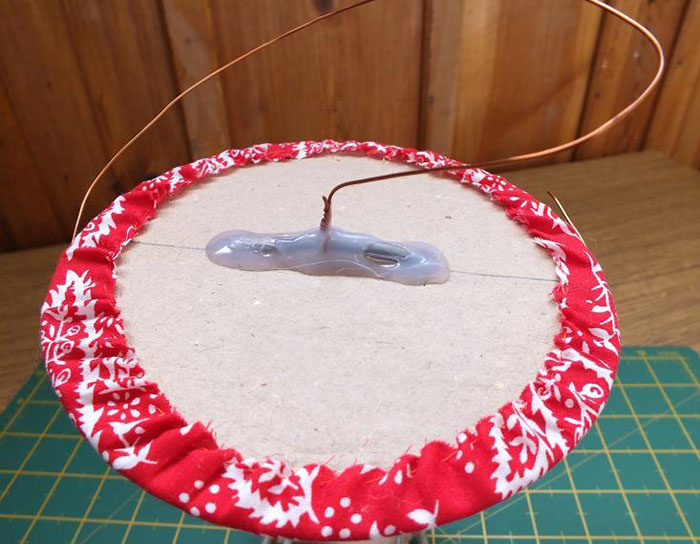
2. Cut out a circle from thick cardboard, draw a line through its center, which we divide into three equal segments. At their joints we cut holes for the wire. We apply a padding polyester circle and a circle of colored fabric of a slightly larger diameter. We tighten the fabric around the cardboard.

3. Bend the thick wire in a U-shape and pierce it through the holes in the cardboard, padding polyester and fabric. We bend the ends of the wire at the “ankles” and make “feet”. We screw a thin copper wire to the jumper with a length longer than the height of the cone, about 10 centimeters.

4. Important! Carefully glue the wire to the cardboard with hot glue and glue the wire joint. At this stage, the structure should be well balanced and stable, the cardboard should not fall down the wire!
 Legs for Santa Claus
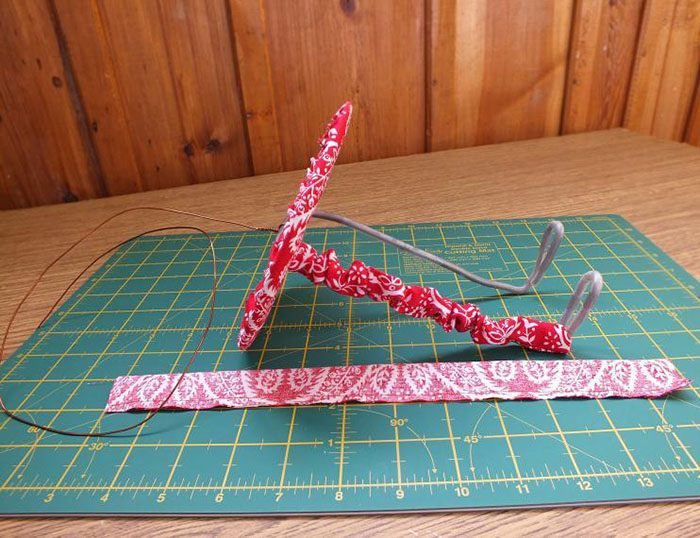
5. From colored fabric, cut out two rectangles approximately one and a half times longer than the length of the legs and about 4 centimeters wide. Fold it in half lengthwise, stitch it, turn it inside out. We stretch it over the legs and sew it to the bottom with a hidden seam.

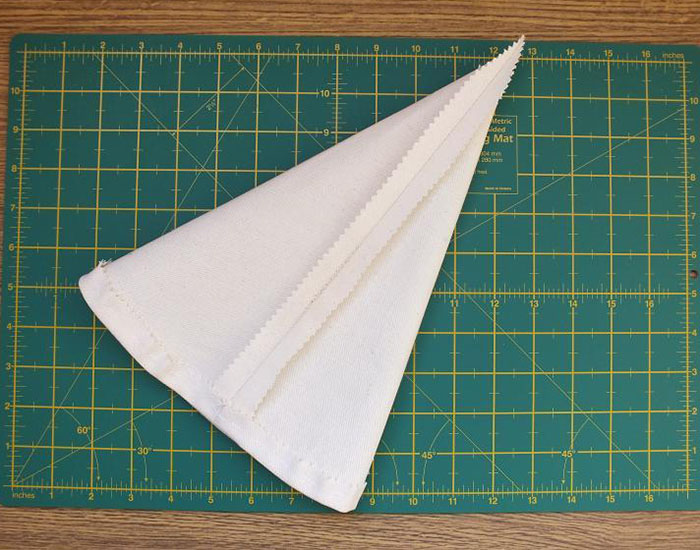
6. Cut out a cone shape from cotton fabric for the body. Fold it in half and stitch along the edge, leaving the last couple of millimeters at the top unsewn. We bend the edge around the circumference and baste. Turn the resulting cone out of the fabric.
 Body of Santa Claus
7. We put the cone on a thin wire, bringing its free end through the hole at the top. We stuff the body with holofiber. Make sure that while stuffing the wire remains approximately in the center of the cone. We sew the folded edge of the body around the circumference to the bottom using a hidden seam.

8. Cut out the soles from cardboard. Draw them arbitrarily, the main thing is that it is a little longer at the back and front than the wire loops. We glue the soles to the wire with hot glue, ensuring their stability.

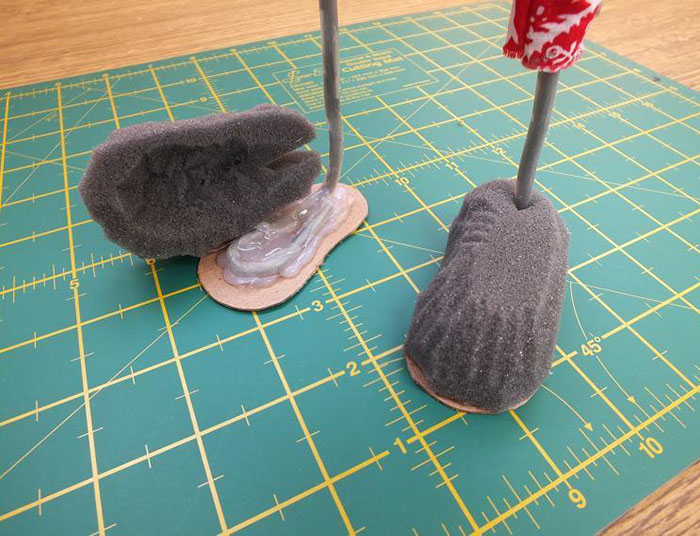
9. Using scissors and a utility knife, cut out the “boots” from foam rubber. We cut a recess at the bottom for the wire and cut a slot at the back in order to insert the “ankles” into it. What is more important here is not accuracy, but the symmetry of the “boots”. We glue the foam rubber with hot glue.

10. Cut out two ovals from red fleece of such a size that it is enough to cover the foam rubber “boots” with a small margin. At one of the elongated vertices of the oval, we cut out a sector in the form of a triangle, put the fleece on the foam rubber, sew up the back with a hidden seam and tighten the fleece around the cardboard sole.

11. We also cut out two ovals from felt of a suitable color, slightly larger than the cardboard sole. We glue the felt to the sole with hot glue, trim off the excess, and sew the felt to the fleece with a hidden seam.
 Fleece boots for Santa Claus
12.Draw approximate lines for the top of the jacket and the bottom of the cap on the body. There will be a face between them. We cut out a small circle from the fabric, put a ball of padding polyester inside, and tighten it along the edge. This creates a nose that needs to be sewn onto the face with a hidden seam.

13. Prime the face with white acrylic paint. We try not to go too far into the territory of future beards and hair, so that in the future there will be no difficulties with their fitting. What kind of face to draw is a matter of your taste and imagination.
 Drawing the face of Santa Claus
14. We cut out a jacket in the shape of a truncated cone from red fleece, fold it in half, sew along the edges, turn it inside out. We sew handles in mittens from fleece and colored fabric, leaving holes for stuffing, turn it inside out, stuff it, sew up the holes with a blind seam.

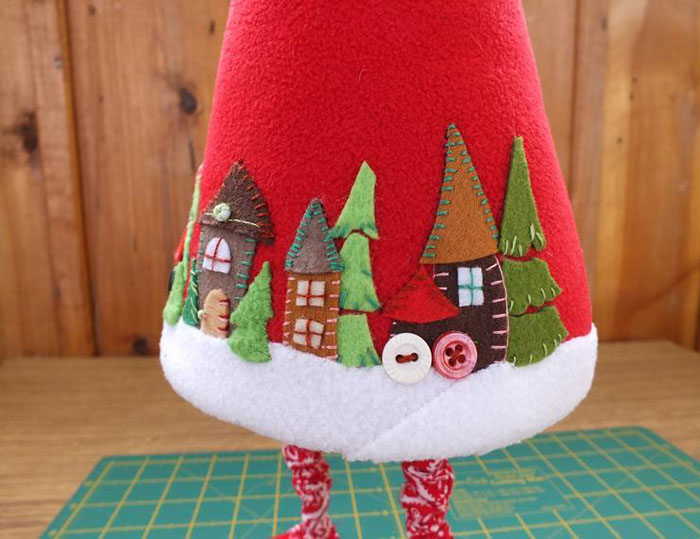
15. Stretch the jacket over the body, sew it at the bottom and along the neckline with a hidden seam. Temporarily pin the handles to evenly distribute the applique. We cut out the parts from felt, pin them to the body, and finally think through the placement of the composition.

16. We first fix the applique parts to the fleece with a drop of Moment glue so that they do not move, and only then sew them on. If desired, we use buttons, beads, beads, and decorative elements. We sew “snowdrift” ribbons made of white fleece with hidden seams.
 Fur coat for Santa Claus
17. Cut out the boot cuffs and cuffs from white fleece, fold them in half, and sew along the edges. We stretch it over the arms and legs and sew it on by hand.

18. Using the same principle, we cut out and sew on the collar. To maintain the “snowdrift” style, the edge of the collar, cuffs, boot cuffs and cap can be made wavy.

19.Sew the arms to the body with a strong thread using a button fastening. We tighten the thread a little, tie a knot and glue it with Moment glue for strength.

20. We tear off about 10 centimeters of wool from the combed tape, collect it into a bundle of the required thickness and carefully roll it with a felting needle, like a beard. Then we tear off a tuft of wool, 2 times thinner and about 20 centimeters long, and roll it in the middle under the nose, like a mustache.

21.Tear off two more tufts of wool, equal in length and thickness to the beard, and roll them on both sides of the face. Using the back of a felting needle, carefully comb and arrange the wool into a full beard.
 Beard and mustache for Santa Claus
22.We also roll and shape the hair on the sides and back of the head. If necessary, you can trim it a little with scissors and spray it with regular hairspray to prevent the fur from frizz.
 Hair for Santa Claus
23. Based on half of the cone, we cut out a cap that is very elongated and narrowed towards the top from colored fabric. The height of the cap should correspond to the length of the free end of the wire plus 1-2 centimeters for freedom of bending. We sew the parts, leaving the top open.
 Hat for Santa Claus
24. We turn the cap inside out, put it on the head, bringing the wire through the top hole, and sew it along the edge to the head. Bend the end of the wire into a loop. We sew on a white fleece lapel and a pompom, hiding the end of the wire in it.

24. Santa Claus is almost ready. If necessary, we add decor to complete the look. If you want, you can additionally sew a bag with gifts, a Christmas tree or, for example, a symbol of the year in a pair.

Santa Claus is ready! More real miracles for you!
Would you like to invite your favorite children's fairy tale character to your home? Then see how to make Santa Claus with your own hands. Let this tiny old man in a red fur coat and with a white beard give joy throughout the winter holidays and, of course, promise good luck in the new year.
And if making a fleece Santa Claus seems very difficult to you, involve your mother, friend or classmates in an interesting activity. Separating the processes of creating a toy will make the work quick and entertaining, and maybe very soon a little wizard will also live under the Christmas tree in your classroom.
To make Santa Claus you will need:
- cotton fabric (beige - for the base of the body, multi-colored - for clothing elements),
- fleece (white and red),
- felt - for applique on a fur coat.
- holofiber and a piece of padding polyester,
- foam rubber for boots,
- wool and needle for felting,
- floss threads, buttons, beads and beads,
- thick tin and thin copper wire,
- thick cardboard,
- acrylic paints, brushes,
- glue gun, Moment-Crystal glue,
- pliers,
- stationery knife.
1. First, make a Santa Claus pattern on paper. Choose the sizes at your discretion, but remember that they must match each other. The required cone pattern is easy to find on the Internet.
2. Cut out a circle from thick cardboard. Divide the diameter of the circle into three equal parts. Cut holes for the wire (Santa Claus's legs) at the joints.
Place a synthetic padding circle on a cardboard one and wrap them with a slightly larger fabric one. Pull the fabric around the cardboard circle using a thread and a needle.

3. Pierce the circle with a U-shaped thick wire, make feet. Screw a thin copper wire to the thick tin wire, as shown in the photo. Let it be 10 centimeters longer than the height of the cone.

4. Carefully glue the junction of the wires and cardboard with hot glue. The figure should be stable and even. The cardboard should not fall down.
5. From some interesting and bright fabric (preferably red), cut out two rectangles, one and a half times longer than Santa Claus’s legs, and about 4 cm wide. Fold the stitching in half on the wrong side. Turn it inside out, put it on the legs, sew it to the fabric circle.
6. Cut out a cone from cotton fabric, fold it in half and sew, leaving a few millimeters at the top unsewn. Fold the edges around the circumference and baste. Turn out the cone.
7. Sew the cone to the circle with a hidden seam, threading copper wire through the top and stuffing it with holofiber. While stuffing, make sure that the wire remains approximately in the middle of the toy.

8. Cut out the soles from cardboard. Glue it with hot glue. Let the soles be slightly longer than the wire loops. In this case they will be more stable.

9. From foam rubber, cut out boots for Grandfather Frost with a recess at the bottom for wire and a slit at the back. Focus on the photo.
10. Using fleece ovals, cover the boots. Tie the fabric from the bottom with thread.
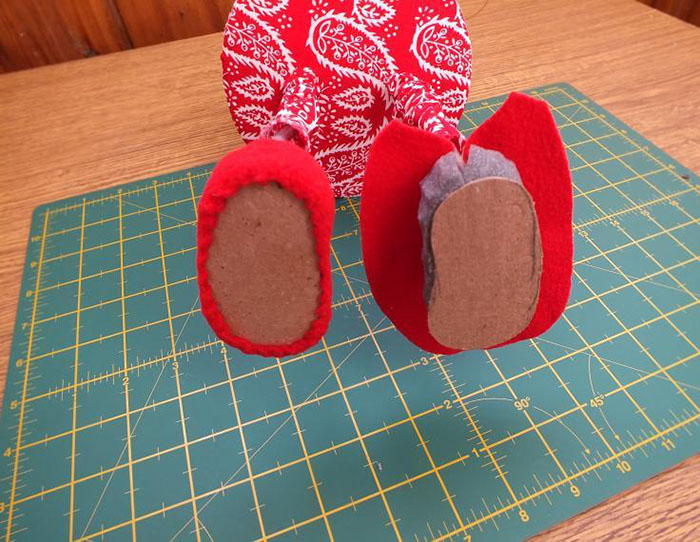
11. Sew felt soles to the boots, gluing the felt to the bottom of the boots. Trim off excess fabric.
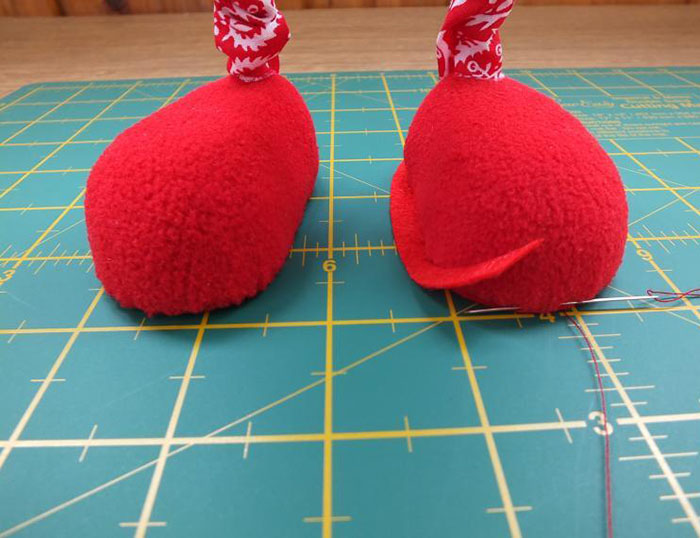
12. Mark on the cone the boundaries of the face, cap and fur coat of Santa Claus. Sew a nose from a pulled circle of fabric and a piece of padding polyester to the face.

13. Well done! Now you need to lightly cover the toy’s face with white paint and draw the eyes, cheeks and mouth.
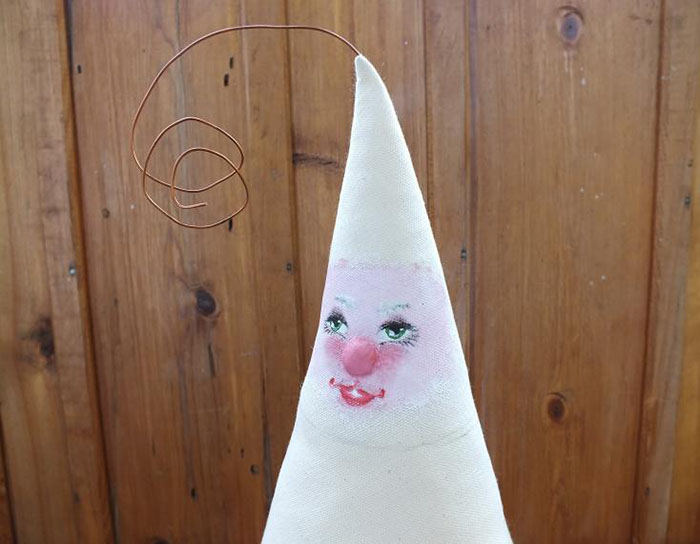
14. Make a fur coat pattern (truncated cone) from red fleece. Fold it in half, sew along the edge and turn it inside out. Using a paper template, sew handles with red fleece and colored fabric mittens, leaving an opening for stuffing. Turn it inside out, fill it with holofiber, sew up the hole with a hidden seam.

15. Dress the wizard in his fur coat, sewing it around the neck and bottom with a hidden seam. Cut out houses, Christmas trees, mushrooms from multi-colored felt and attach them to the jacket with pins. Try on the handles for Santa Claus and see if the applique is distributed correctly.
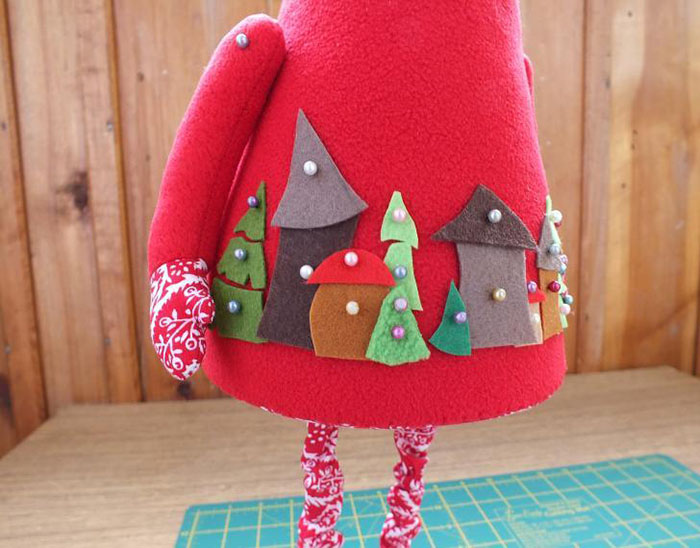
16. Glue the applique elements with drops of Moment glue and only then sew on with bright threads. Decorate the fur coat with buttons, beads, beads and sew snowdrifts of white fleece with a hidden seam.
17. Now is the time to make the cuffs and cuffs of the boots. Cut them out of white fleece, sew them, fold them in half and put them on the arms and legs. Sew it on.
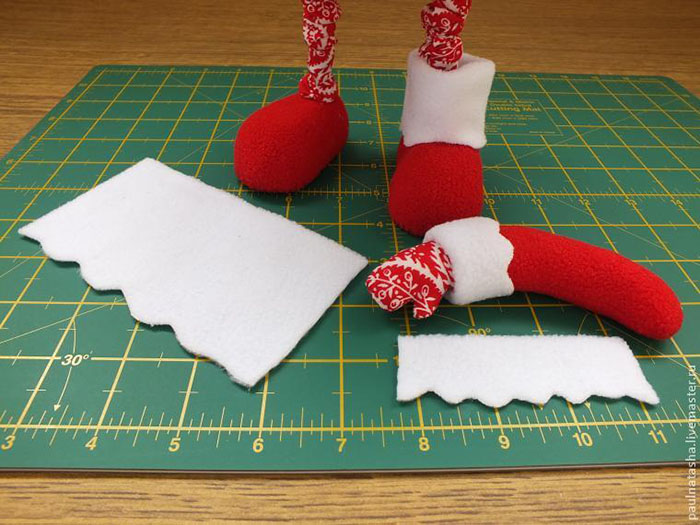
18. Cut a wavy collar from white fleece and sew it with a hidden seam.
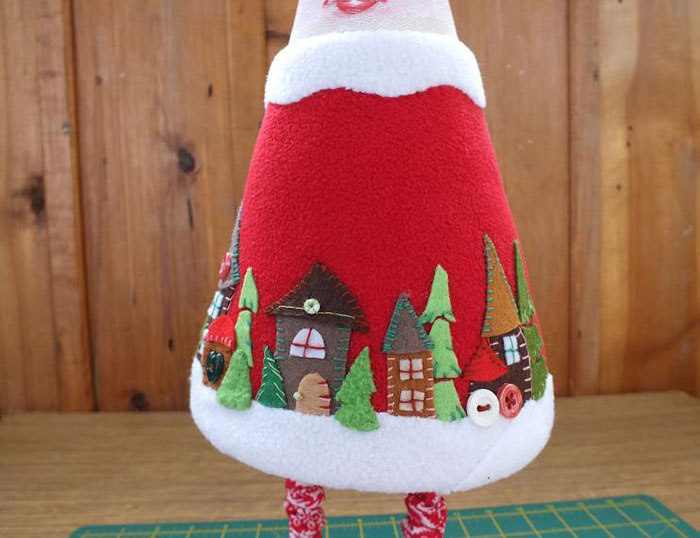
19. Having threaded a strong thread through the base of the handle and the button, tightly sew the sleeves of the fur coat to the body. Tie a knot and secure it with glue.

20. Separate part of the wool (about 10 cm) for the beard and use a felting needle to attach it to the “chin”. Then take a bunch that is a little thinner, 20 centimeters long, and begin to roll up the mustache.
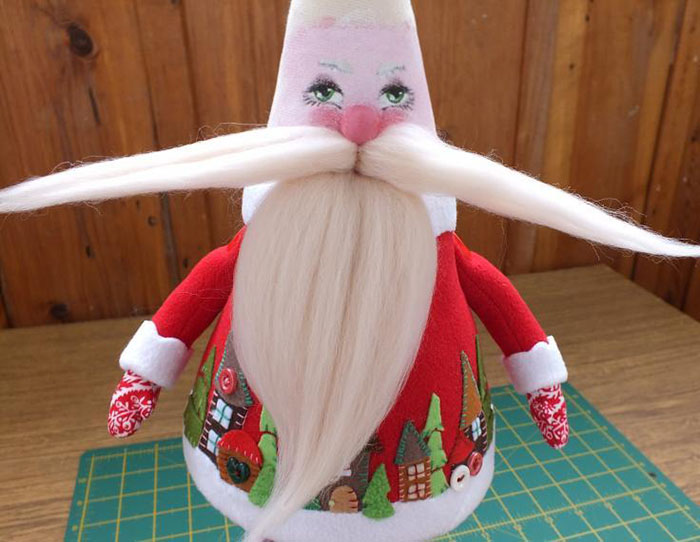
21. Take two more thick tufts of wool and lay them on both sides of your face. Like this:

22. Gently comb and style your beard. In the same way, roll Santa's hair, comb it and trim it with scissors.
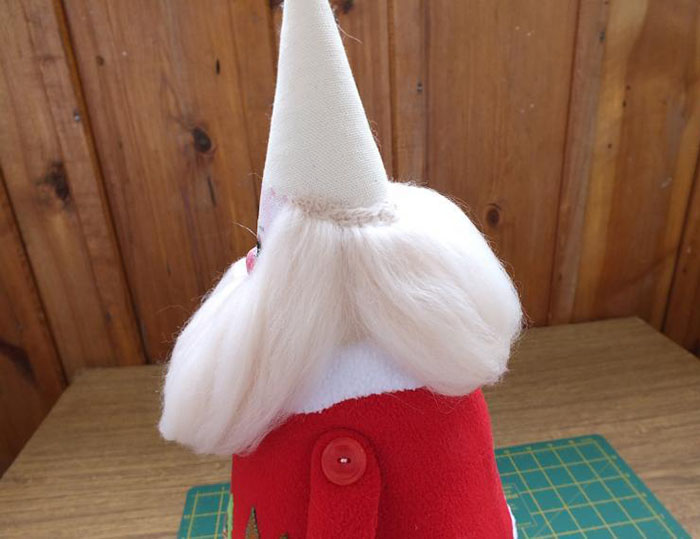
23. Let's move on to making the cap. Using colored fabric based on half of the cone template, cut out a long narrow cap. Its length should be 2 cm longer than the free end of the copper wire that you inserted into the toy before.
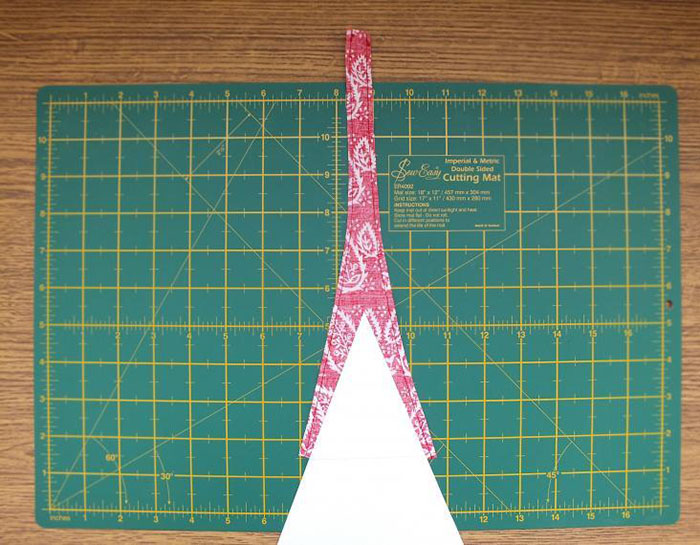
24. Unscrew the cap and sew it to Santa Claus’s head. Twist the wire in the middle of the cap into a spiral and make a loop at the end (there will be a pompom on it). Now make a white fleece lapel, a pompom stuffed with holofiber, and sew them to the hat.

25. Complete the look with a small green Christmas tree with buttons on the cap and, if desired, small green pompoms on the shoes.
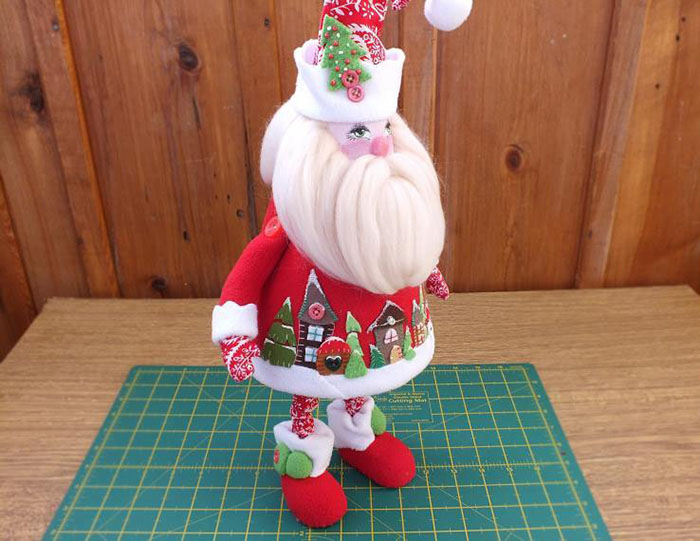
Hooray! Santa Claus is ready to charm the eyes of your loved ones and give an unforgettable feeling of the holiday.
You will find even more crafts for the New Year here:
Master class on the topic "DIY New Year's characters"
Making Santa Claus and Snow Maiden toys with your own hands. Master class with step-by-step photos.
Gordeeva Olga Nikolaevna, teacher of labor training, OGBU "Moryakovskaya boarding school for children with disabilities", Tomsk region, Tomsk district.
Description: The master class is intended for children 10-12 years old, teachers, additional education teachers, educators and creative parents.
Purpose: These toys can be used to decorate the New Year's interior, as New Year's gifts.
Target: developing skills in making fabric toys using step-by-step instructions.
Tasks:
Educational:
- familiarize yourself with the sequence of making New Year's toys made of fabric;
Educational:
- develop attention, memory, fine motor skills.
Educational:
- cultivate accuracy. creative abilities, aesthetic taste, organization of work activity.
To make toys you need:
- fabric for a fur coat in red and blue colors;
- white or pink jersey;
- artificial fur;
- thick fabric for the Snow Maiden’s hood;
- filler (sintepon);
- white yarn;
- red sewing thread. white, blue colors;
- needles;
- scissors;
- tailor's chalk;
- small beads to decorate the face of the toy.

Progress:

1. Using the patterns, we cut out the details of Santa Claus.
It should be made from red fabric:
body 1 piece, cap 1 piece, mittens 4 pieces (2:2 in mirror image)
From white knitwear you should get:
Santa Claus head 1 piece, nose 1 piece.
The faux fur should yield:
fur strip for the body 1 piece, fur strip for a cap 1 piece, beard 1 piece, mustache 1 piece, pompom for a cap 1 piece, cuffs for mittens 2 pieces.

2. Making the head of Santa Claus.
We assemble the section of the head cut detail onto a double thread with a seam “over the edge”, tighten it, and fill the resulting shape with padding polyester. We form an even ball, tighten the thread, and secure it.

3. We make a cap.
We fold the cap with the right sides inward, align the cuts, grind the cuts on a sewing machine, seam width is 0.7 cm.

4. Turn the cap right side out, decorate the lower part with a fur cuff, and sew a fur pompom to the top of the cap, which we sew in the same way as the head.

5. Place the head in the cap and secure it with several oblique stitches. Sew a nose and mustache to the head. beard We decorate the face by sewing two small beads in place of the eyes. The head of Santa Claus is ready!

6. We make the body.
We will gather the section of the body cut piece onto a double thread, stitch it “over the edge”, pull it together, and fill the resulting form with padding polyester.
Attention!
If the work uses fabrics, the sections of which are very frayed, then the sections of the body cut details must be glued with adhesive materials.
We close the cut part of the cuff into a ring, right side inward, and sew it together. Then we turn the cuff right side out, fold it in half lengthwise and sew it together with an over-the-edge seam. We sew the finished cuff onto the lower part of the body.

7. Making mittens.
We fold the cut parts of the mittens with the right sides inward, align the cuts, and grind them on a sewing machine, leaving an opening for turning them inside out. We turn the blanks right side out and fill them with padding polyester. We sew fur cuffs to the lower edges of the mittens.

8. We carry out the design of the finished product.
We sew the head and mittens to the body of Santa Claus.

9. Santa Claus needs to make a bag with gifts.
From red fabric, cut out a rectangular piece, fold it in half, right side inward, and sew the edges down in the longitudinal direction. turn it right side out and fill it with padding polyester. We tie the top cut of the bag with a beautiful cord. We attach the finished bag with gifts to Santa Claus's mitten.


File "/upload/blogs/ /upload/blogs/23441_db0eeca20d0f1eccc6d57ffcdcb781ec.jpg.jpg 3441_c17c9e2c982db5c8b0330565400581c6.jpg.jpg" not found!

10. Using the patterns, we cut out the details of the Snow Maiden.

It should be made from blue fabric:
body 1 piece, mittens 4 pieces (2:2 in mirror image).
From white jersey:
head 1 piece, nose 1 piece.
Faux Fur:
fur strip for the body 1 piece, fur collar 1 piece, cuffs for mittens 2 pieces.
Made from thick fabric:
hood 1 piece, side part of the hood 1 piece. back of the hood 1 piece.

11. Torso, head. We make mittens in a similar way. like Santa Claus.
12. We assemble the Snow Maiden’s hood.
We sew the side and back parts of the headdress to the back of the hood. edge loop stitch.

13. Design of the Snow Maiden’s head and face.
We turn the finished head of the Snow Maiden with the smooth side towards us. Sew the nose to the center of the resulting shape. The base of the head is ready. Now you can sew on the eyes, and the way you do this will determine the mood of the toy: whether it will smile or not. The eyes of smiling dolls are sewn on with simultaneous tightening as follows: with a pencil we mark on the head the points for the eyes and the points for the corners of the mouth. From the back side we bring a needle with a double white thread to the point for the eye, make a small stitch at this point and bring the needle to the point of the corner mouth (on the same side of the face). Leaving a small stitch in this place, we return to the eye point, tighten the thread well, put a small black bead on the needle and pull the needle through the eye point towards the back of the head. We pull the thread tightly so that the eye and corner of the mouth are in the recesses, and holding the eye with a finger, fasten the thread twice and cut it. Sew on the second eye in the same way. Then we embroider the mouth with a thin red thread.

14. Place the Snow Maiden’s head in the hood. We fill the back of the head with a small amount of padding polyester so that the head has a beautiful shape. We make a braid from white yarn and place it on the side under the hood. We decorate the toy's headdress with beads. We attach the hood to the toy's head with oblique stitches. The Snow Maiden's head is completely ready!

15. We gather the cutting detail of the fur collar onto a thread using a seam “over the edge” and tighten it a little. We sew the collar to the upper part of the Snow Maiden’s fur coat, and sew a fur cuff to the lower part.

To make Santa Claus you will need:
- cotton fabric (beige - for the base of the body, multi-colored - for clothing elements),
- fleece (white and red),
- felt - for applique on a fur coat.
- holofiber and a piece of padding polyester,
- foam rubber for boots,
- wool and needle for felting,
- floss threads, buttons, beads and beads,
- thick tin and thin copper wire,
- thick cardboard,
- acrylic paints, brushes,
- glue gun, Moment-Crystal glue,
- pliers,
- stationery knife.
1. First, make a Santa Claus pattern on paper. Choose the sizes at your discretion, but remember that they must match each other. The required cone pattern is easy to find on the Internet.

2. Cut out a circle from thick cardboard. Divide the diameter of the circle into three equal parts. Cut holes for the wire (Santa Claus's legs) at the joints.
Place the padding polyester circle on the cardboard one and wrap them with a slightly larger fabric one. Pull the fabric around the cardboard circle using a thread and a needle.

3. Pierce the circle with a U-shaped thick wire, make feet. Screw a thin copper wire to a thick tin wire, as shown in the photo. Let it be 10 centimeters longer than the height of the cone.

4. Carefully glue the junction of the wires and cardboard with hot glue. The figure should be stable and even. The cardboard should not fall down.

5. From some interesting and bright fabric (preferably red), cut out two rectangles, one and a half times longer than Santa Claus’s legs, and about 4 cm wide. Fold them in half and stitch them on the wrong side. Turn it inside out, put it on the legs, and sew it to the fabric circle.

6. Cut out a cone shape from cotton fabric, fold it in half and sew, leaving a few millimeters at the top unsewn. Fold the edges around the circumference and baste. Turn out the cone.

7. Sew the cone to the circle with a hidden seam, threading copper wire through the top and stuffing it with holofiber. While stuffing, make sure that the wire remains approximately in the middle of the toy.

8. Cut out the soles from cardboard. Glue with hot glue. Let the soles be slightly longer than the wire loops. In this case they will be more stable.

9. From foam rubber, cut out boots for Santa Claus with a recess at the bottom for the wire and a slit at the back. Refer to the photo.

10. Use fleece ovals to cover the boots. Tighten the fabric from the bottom with thread.

11. Sew felt soles to the boots by gluing the felt to the bottom of the boots. Trim any excess fabric.

12. Mark on the cone the boundaries of the face, cap and fur coat of Santa Claus. Sew a nose from a pulled circle of fabric and a piece of padding polyester to the face.

13. Well done! Now you need to lightly cover the toy’s face with white paint and draw the eyes, cheeks and mouth.

14. Make a fur coat pattern (truncated cone) from red fleece. Fold in half, sew along the edges and turn inside out. Using a paper template, sew handles with mittens from red fleece and colored fabric, leaving an opening for stuffing. Turn it inside out, fill it with holofiber, and sew up the hole with a hidden seam.

15. Dress the wizard in his fur coat, sew around the neck and bottom with a hidden seam. Cut out houses, Christmas trees, mushrooms from multi-colored felt and attach them to the jacket with pins. Try on the handles of Santa Claus and see if the applique is distributed correctly.

16. Glue the applique elements with drops of Moment glue and only then sew on with bright threads. Decorate the fur coat with buttons, beads, beads and sew snowdrifts of white fleece with a hidden seam.

17. Now is the time to make the cuffs and cuffs of the boots. Cut them out of white fleece, sew them, fold them in half and put them on the arms and legs. Sew on.

18. Cut a wavy collar from white fleece and sew it on with a blind stitch.

19. Having threaded a strong thread through the base of the handle and the button, tightly sew the sleeves of the fur coat to the body. Tie a knot and secure it with glue.


