Star news


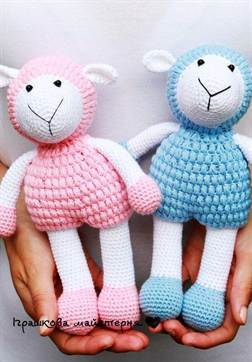
Light knitted toys. Easter egg - blue yarn
There are many techniques in knitting, each can be designed for specific products. Small toys are usually made in amigurumi technique. They turn out to be small, so they can be used as brooches, keychains, miniature souvenirs, Christmas tree crafts. There will be a souvenir a wonderful gift for any occasion.
 This technique began its existence in Japan. Translated from the local language, amigurumi is translated as “knitted - wrapped”. Amigurumi is a separate art made by crochet or knitting.
Originally Japanese craftswomen They created national cartoon characters using this technology. Most often, this technique is used to knit funny animals, but you can also make other objects: fruits, vegetables, dishes, doll toys.
Products, knitted, are more painstaking and complex work. It's easier to make small toys using a hook.
To knit correctly, you need to refer to special master classes. Japanese magazines offer a large number of knitting patterns for various characters. Moreover, many of them have already been translated into Russian.
Experienced craftswomen create knitted amigurumi toys without diagrams or descriptions. With some experience, every craftswoman can learn to create such products on her own. But when knitting, it is imperative to acquire a high-quality pattern.
Patterns of crochet amigurumi animals for beginners are easy to find on the Internet or in handicraft magazines. Usually such work is small. The smallest toys are about 1 cm in size . But the average size is 7 cm. In some cases, crafts can be up to 50 cm in size.
Materials for making toys
To make the product beautiful and neat, you must not only follow the description exactly, but also use the right materials. Before crocheting toys, you need to purchase the necessary materials.
What you need to prepare:
- High quality yarn. For small crafts must be used quite fine yarn. When using fancy yarn, you can create the appropriate effect.
- Hook. The thickness should be suitable for the selected yarn to perform the job. Some patterns need to be knitted alternately different hooks to obtain a certain volume.
To decorate and decorate the toy, you can use additional plastic elements, buttons, ribbons and other elements. It all depends on the specific model of the product.
Keychain in the shape of a ladybug
This keychain is very simple and quick to make, you just need to follow the description correctly.
Materials for work
Materials needed to create a keychain:

Step-by-step execution of the souvenir
Knitting is done in the round, the rows are not knitted together.
 To begin with, knit 2 stitches with red thread, then you need to knit 6 loops into the second loop. Each loop should be knitted, just like a single crochet. It is important to knit tightly, otherwise the product will not look neat.
Now you need to knit two loops into each loop. The third row is performed by alternating a loop and an increase. The fourth row must be knitted by alternating two loops and an increase. Next, 3 loops and an increase are knitted. The sixth row must be made of 4 loops and an increase. At this stage, 36 stitches should be used in knitting. Rows 7 and 8 are worked unchanged. Now the thread can be secured and cut.
Take a black thread and begin to sew the bottom of the product. It is made in the same way as the first 6 rows of the top.
Both parts must be placed on top of each other and tied with a black thread using single crochets. After half the circle, the workpiece must be stuffed and the binding completed. Now the main part is ready.
 To create a dividing strip, you need to knit a chain of air loops along the length of the workpiece. The strip must be carefully sewn to the top part.
For the head, cast on 4 chain loops, knit an increase, a simple loop, and in the last one you need to perform 4 loops at once. The circle ends with a loop and an increase. The oval workpiece continues to be knitted with two increases, a loop, 4 increases, again with a loop and the circle is completed with two increases.
Next, two rows of 18 loops are knitted. The thread is cut. All that remains is to assemble the workpiece. Attach the head to the main part and sew it on. Sew white beads to the head, and embroider the body with black beads. Finally, you need to sew on the mount for the keychain.
Crochet a funny cat
This cat will be a wonderful souvenir figurine or a New Year's tree toy. Any child will be happy to play with such a cute animal.
What you need to prepare:
- Yarn of any color, you can use melange or sectional threads.
- Hook.
- Plastic eyes and nose.
- Filler for stuffing the product.
- Thread and needle for sewing parts.
Technique knitting amigurumi consists of knitting single crochets in a circle. From now on, single crochets will be designated “sc”.
Knitting step by step:

Knitting should be done carefully and quite tightly, only in this case the souvenir will turn out to be of high quality. You can learn how to knit using this technique from magazines in which all the steps are described step by step. Or you can watch videos and master classes, which are often posted on handicraft sites.
Attention, TODAY only!
This article is for those who dream of learning how to crochet toys. Basic operating principles, selection necessary materials, step by step process– even a novice needlewoman can create a miracle with her own hands.
If you decide to crochet a toy, we suggest you familiarize yourself with the main points that will come in handy during the work process.
Choosing material for crocheting toys
- Yarn. If this is your first or one of the first projects, you should not experiment with textured yarn. Choose regular smooth threads - acrylic or cotton. The thickness can be any; the thicker the yarn, the larger the toy will be.
- Hook. Take a hook one number thinner than what is given in the thread recommendations. The fabric for the toy should be very dense. Due to this, the toy will keep its shape well, and the filler will not show through.
- Filler. Use padding polyester or holofiber.
- Needle for stitching material.
Rules for crocheting toys
- To ensure that the fabric is dense and the filler does not come out through the holes, take a hook a size smaller than indicated for this yarn.
- Crochet toys are crocheted in a spiral. One row goes into another without connecting posts and air loops at the end and beginning of the row.
- You need to knit on both sides of the loop. The exception is when another method is indicated in the description.
- Knit as tightly as possible so that the future toy keeps its shape well.
- Do not use cotton wool as a filler. The toy must be stuffed with holofiber or padding polyester.
- Knit all parts of the toy in separate parts, then sew them together. The exception is the author's idea, when the head-body or body-legs represent one whole.
- Sew with the same thread used for knitting. This will make the seam almost invisible.
- Hide the ends of the threads inside the toy using a thin hook with a sharp tip.
- For additional accessories, prepare beads, buttons, purchased noses and eyes, leftover leather, felt, wire or fishing line.
- You can tint parts of the toy acrylic paint or ordinary decorative cosmetics.
- Stuff the parts as tightly as possible so that the knitted toy is stable.
- Knit clothes for the toy from yarn that is thinner than the main one.
Basic elements of crocheting toys
Amigurumi ring
The basis of knitting every toy. The first row consists of 6 columns with which the ring is tied.
Single crochet
The classic version of the crochet toy consists entirely of single crochets, which are knitted in a circle. required amount once.
Amigurumi decreases and increases
To expand and then narrow a part, see how to do it correctly. The top pictures show correct execution increases, lower ones - decreases.
If you do everything according to this scheme, you will first get a hexagon. Don't feel like you're doing something wrong. That's how it should be. As soon as the increases are over and regular rows with the same number of loops begin, the corners will smooth out on their own.
Popular today are yarn toys that are knitted with my own hands. Making a bear or a cat does not take much time, but the result is something that causes a lot of positive emotions. A novice craftswoman will cope with the work if she knows its scheme.
How to crochet a toy
Novice authors prefer crocheted toys with patterns and descriptions. Craftswomen post many free master classes that allow you to create a magnificent creation. Products can be presented as a gift, depict symbols of love or the upcoming New Year. It’s more pleasant to give homemade items as a gift than to buy similar ones from a store.
Small crochet toys for beginners
Exist various schemes knitted toys, painted with detailed photos. Beginners may be interested in a simple Kolobok or Smiley. To make it you need to follow step-by-step technology. The following apply symbols:
- VP, GP – air loop;
- PS – half-column;
- SBN, STBN, stb.n, BN – single crochet;
- 2 in 1 – 2 single crochets knitted together;
- 2 together - 2 elements are connected with a single crochet.
Knitting pattern for a kolobok (smiley):
- Dial 2 VP, from the second tie 6 BN.
- Second row - knit 12 elements 2 in 1.
- Third row – 1 BN, 2 in 1 – repeat 6 repeats. Subsequent ones (4-10) are knitted with an increase in BN by 1 pc.
- From the 11th to the 20th sequence, only BN are knitted, the twenty-first - 8 RLS, 2 together.
- Then they begin to reduce the number of RLS to make a ball - there will be 28 sequences in total. Row 29 – 2 together – knit all the loops like this.
- Decorate the face, decorate with yarn hair, stuff with filler.
Small crocheted toys can be made in the form ladybug. Master class on knitting it:
- Using a red thread, cast on 2 VPs, knit 5 sc from 2 elements.
- Start each sequence with a VP lift, in the second, knit 2 BN from each element, on the third, 2 BN in the loop of the previous one, 1 BN. On the fourth, 2 sc, 1 sc in 2 elements, alternate.
- From the fifth to the seventh - sc, embroider crosses with black thread, on the eighth, ninth, knit 2 in 1 behind the back loop. Stuff with padding polyester, sew up.
- Knit the head with black thread: similar to the body, only there will be only 3 sequences. Sew it to the body, knit the horns.

How to crochet amigurumi toys
Knitted toys with patterns and patterns are especially popular among craftswomen. description of amigurumi- these are Japanese products that personify living or inanimate nature. By amigurumi we mean that the bears and bunnies will turn out cute and small in size. Knitting Stuffed Toys and knitting, but more often crocheted. The designations indicated above are used, plus new ones:
- P – increase;
- U – decrease;
- SS – connection.
Description of the classic knitted cat:
- Cast on chain VP and 1 lifting loop, knit 9 BN, 3 elements in 1, turn, knit 8 and 2 BN from 1, SS.
- GP, 22 BN.
- 10 BN, P, repeat.
- 3 BN, P – continue.
- Cycles 5-9: 30 BN.
- 3 RLS, U.
- 2 RLS, U.
- 1 sc, U. glue the eyes.
- Neck: 2 sc, p, 2 cycle – 3 sc, p.
- Body: 20 sc, row 2 – 4 sc, p.
- Tail: 6 sc, 5 sc with P repeat, 6 sc, cycle 2 – 5 sc, 6 sc with P repeat, 5 sc. At the end, cast on a chain of 13 VP, starting from the second loop - knit 12 SC.
- Cycles 19-21: 30 single crochets.
- 3 single crochets, U - alternate, in subsequent cycles decrease by 1 single crochet.
- Pull the ears, stuff them, decorate the cat's face. You can also knit a separate pillow for it.
The hedgehog is knitted like this:
- Using beige yarn from 6 VOPs, knit BN, make 6 P.
- The third cycle is knitted 1 BN, 1 P, up to the tenth - increase by 1 SC.
- From cycles 11 to 14, knit 60 stb.n., then from 15 to 20, knit with brown yarn. From the 21st cycle, knit 8 stb.n., 1 U, in each subsequent decrease by 1 stb.n., fill, make 6 U.
- Embroider a muzzle, glue on eyes, tie ears and paws with rings, decorate with flowers and beads.

Crochet dolls with patterns and descriptions
Children love things “from mom.” Knitted toys crochet with diagrams and descriptions, especially if they are dolls, will allow you to captivate your child with a hand-made fairy tale. Figures help develop imagination and give sincere emotions from contact. Give to children original product, made according to free master class for making a girl doll (there will be filler inside, you will need wire for the frame). Description of work:
- Using a flesh thread, cast on 2 VOPs, close them in a ring, and tie the face in the form of a ball according to the steps described above.
- Knit the torso by analogy, arms and legs in the form of long cylinders with single crochets to the required length.
- The shoes consist of semicircles similar to the balls from the first pattern, only increases are made, and then the knitting is closed. A backpack is knitted, you can sew clothes based on photos chosen from the Internet.
- The doll is decorated with a beret, hair, and a face.
- You can make a schoolgirl doll with a backpack, a diary, and other set of parts.
If you need to knit a boy doll, you can make a cool gnome or clown:
- The principle is used by analogy with a girl doll, only the result is a boy smaller size and more flattened. The colors are more strict.
- The gnome is decorated with a pointed cap, a beard, and the nose and ears are knitted separately.

New Year's crochet toys with descriptions and diagrams
Among the many crocheted toys with patterns and descriptions, the most popular new Year decoration, which even a novice craftswoman can knit. Option for knitting a Christmas tree:
- Using a green thread, dial on 200 VP, knit a Dc from the second loop (dc), 1 loop – 1 Dc. You will get a ribbon, which needs to be knitted by alternating rows with 5 dc and 1 dc.
- Use a white thread to tie a ribbon: dial 200 VP, knit in reverse side stb.n, make 1 VP lift, then alternating 4 loops of dc and 3 dc from 1 loop - repeat 6 rapports. Tie to the end.
- Crown: 5 VOP is knitted with 5 single crochets - 4 sequences, in the fifth - a P is made in each element, in the sixth - a repeat of 1 BN and 1 P, the last one - 5 DC are knitted in one loop, alternating with 1 BN.
- Make a frame out of cardboard, glue the tapes in a chaotic manner.
- Bottom: 6 VP in the 2nd sequence you need to knit P in each element, then 1 BN, 1 P with adding the number of sc in each subsequent row until the eighth, in the ninth - 5 Dc to 1 loop, 1 sc.
- Glue the flies together and decorate with beads.
The balls for the Christmas tree will turn out beautiful, crocheted, which are made by analogy with koloboks. They can be made multi-colored, knitted in a pattern with alternating threads, diagonals and rhombuses. Such products are decorated with pompoms, tassels, threads, fringes, and beads. If you show your imagination, you can make a snowman decorated with elements from 3 balls.
Do-it-yourself knitted toys always carry warmth and comfort and can be both decoration and joy for children’s games. To tie a simple toy maybe a novice craftswoman, starting with small simple circuits and improving your skills.
Knitted toys are usually soft: individual parts are knitted, stuffed with filling and sewn together.
Learning the basics
It is most convenient to crochet toys. There is even a whole knitting direction - amigurumi. These are funny small knitted toys (animals, dolls, cartoon characters) with filling inside, sometimes with moving limbs (paws).

For a beginning needlewoman, it will be quite difficult to knit such a toy right away, but there are several simple patterns for mastering this direction.
For example, you can knit a bunny like this:

For knitting you need:
- hook No. 1 or 1.5;
- cotton thread (for example, "Begonia" or "Almina") cream, white, orange flowers and green shades.
It is important that the rows are obtained without unnecessary holes and stretch marks, this way the knitting will look more neat, so we knit tightly. In order to understand where a new row begins, it can be marked with a small safety pin.
We knit all the details separately - ears, tail, head, torso, legs, front legs, carrots.
Designations:
VP - air loop;
s/bn - single crochet;
ss - connecting column.
pr - increase;
dec - decrease.
- First we knit the ears. There should be 21 rows. Make 6 single crochets in the second loop from the hook. In the 2nd row we make 6 increases, i.e. 2 s/bn in one loop. The 3rd and 4th rows are knitted with increases (1 s/bn, inc and 2 s/bn, respectively). Rows 5-7 - 24 s/bn in a circle. In the 8th row we decrease - we knit 2 s/bn together, then 6 s/bn and so on in a circle. Rows 9-11 - 21 s/bn in a circle. In the 12th row we decrease again - dec, 5 s/bn. Rows 13-15 - 18 s/bn in a circle. From the 16th row we begin to decrease through the row - dec, 4 s/bn and in a circle; 18 - dec, 3 s/bn; 20 - kill, 2 s/bn. Rows 17, 19, 21 are simply knitted in the round.


- Then we knit the tail - 4 rows. In the 1st row - 6 s/bn in the second loop, 2nd row - 6 inc, 3-4 rows s/bn in a circle.


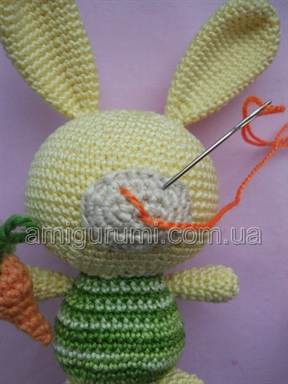
- We knit the head - the most voluminous part of the toy. We dial 5 VP.
1 row - 4 s/bn, then in one loop 3 s/bn and in the last loop of the chain on the other side - 3 s/bn, inc;
2nd row - inc, 3 s/bn, 3 inc, 3 s/bn, 2 inc;
3rd row - inc, 4 s/bn, inc, 1 s/bn, inc, 1 s/bn and repeat from the beginning;
4 row - 2 s/bn, inc, 5 s/bn, inc, 2 s/bn, inc and repeat from the beginning;
5 row - 1 s/bn, inc, 6 s/bn, inc, 3 s/bn, inc, 3 s/bn, inc, 6 s/bn, inc, 3 s/bn, inc, 2 s/bn;
6th row - 3 s/bn, inc, 7 s/bn, inc, 4 s/bn, inc, 4 s/bn, inc, 7 s/bn, inc, 4 s/bn, inc, 1 s/bn;
7 row - 2 s/bn, inc, 8 s/bn, inc, 5 s/bn, inc, 5 s/bn, inc, 8 s/bn, inc, 5 s/bn, inc, 3 s/bn;
8 row - 4 s/bn, inc, 9 s/bn, inc, 6 s/bn, inc, 6 s/bn, inc, 9 s/bn, inc, 6 s/bn, inc, 2 s/bn;
10 row - 3 s/bn, inc, 10 s/bn, inc, 7 s/bn, inc, 7 s/bn, inc, 10 s/bn, inc, 7 s/bn, inc, 4 s/bn;
Rows 9, 11-17, 19 are simply knitted in the round.


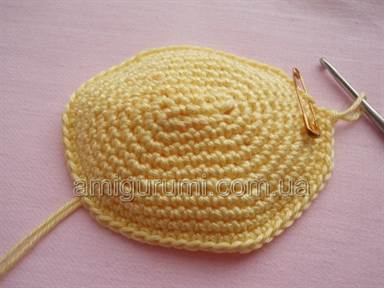


We fill the head with filler and slightly tighten the thread.


- We knit the legs: cast on 2 ch.
1 row - 6 s/bn in the second loop from the hook;
2nd row - 6 inc;
3rd row - 3 s/bn, inc;
4-5 rows - in a circle;
6th row - dec, 3 s/bn;
7-8 row - in a circle.

- For the front legs we also cast on 2 ch. In the 1st row we knit 6 s/bn in the second loop. We increase only in row 2 on all stitches. Rows 3, 5-6, 8 are simply knitted in the round. Decrease in rows 4 and 7 - dec, 4 s/bn and dec, 3 s/bn, respectively. In the 9th row we make 2 ss, 4 s/bn, 2 ss.


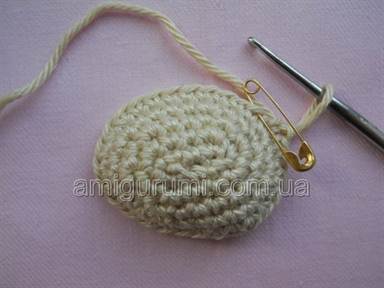
- For the body we cast on 2 ch. In the 1st row we knit 6 s/bn in the second loop from the hook. We make increases in 2 (6), 3 (1 s/bn, inc), 4 (2 s/bn, inc), 5 (3 s/bn, inc), 6 (4 s/bn, inc), 7 ( 5 s/bn, pr) rows. We knit rows 8-10 in a circle. From the 11th row, the decrease begins through the row - 11 (dec, 5 s/bn), 13 (dec, 7 s/bn), 15 (dec, 6 s/bn), 17 (dec, 5 s/bn). Rows 12, 14, 16 are worked in the round.


We also stuff the body with filler.
- For the muzzle we make a chain of 4 ch.
1st row - 3 s/bn, go to the other side: 3 inc, 2 s/bn, inc;
2nd row - inc, 2 s/bn, 3 inc, 2 s/bn, 2 inc;
Row 3 - inc, 3 s/bn, inc, 1 s/bn, inc, 1 s/bn and repeat from the beginning.

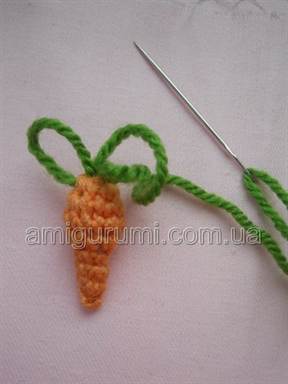
- For carrots, cast on 2 ch. In the 1st row we knit 6 s/bn in the second loop. We only increase in the 2nd row. Rows 3, 5-6 are knitted in the round. We make decreases in 4 (dec, 1 s/bn), 7 (dec, 1 s/bn), 8 (dec, 2 s/bn), 9 (1 s/bn, dec), 10 (dec) rows.
Using green thread and a needle, we make loops - tops.

Now that all the parts of the bunny are ready, you can sew everything together.


Let's embroider the nose and sew on the eyes.


According to the principle of amigurumi, you can knit and New Year's toys- balls and figures of animals, Santa Claus and Snow Maiden:


Simple volumetric Christmas tree:


You can knit a toy for the Christmas tree and more in a simple way- in a circle with beautiful edges according to principle knitted napkins. This is how you can make snowflakes:


Here are some knitting patterns for such jewelry:


Here are some more simple, “circular” toys crocheted with sewn additional elements:


Besides, Christmas decorations and decorations can also be knitted. Here, for example, are knitted cozy balls:


These balls are knitted using the raglan principle using stocking needles. 12 loops are cast on and distributed onto 4 knitting needles, then loops are added in every second row (on both sides of each knitting needle). The loops are also decreased in every second row.
Ball knitting patterns:


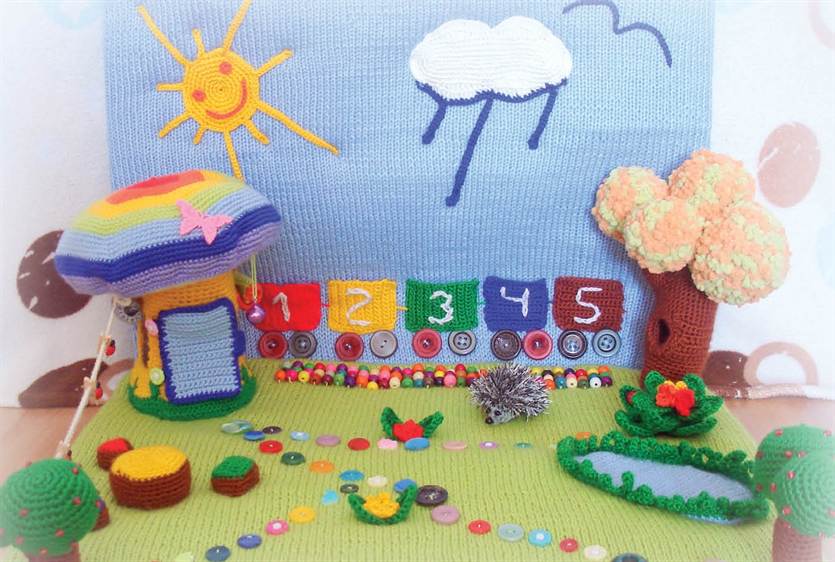
If you want to please not only yourself, but also your child, you can knit toys for children. First of all, these are educational toys - cubes, figures, balls. They can also be knitted according to the amigurumi principle or simply in the round, sewn into them with zippers, Velcro, beads and other items. You can tie boxes or balls and make a rattle out of such a toy.
Here are some photos for ideas and inspiration:


Video on the topic of the article
You can watch a video on how to knit toys.
The first steps in knitting are left behind. You confidently knit scarves and hats, wear a sweater knitted by yourself. And I already want to create something interesting, unusual. For example, master crocheted toys, neat and cute, pleasant to the touch and attractive, a knitted dog or cat. You can also knit a doll with knitting needles.
To learn how to crochet a toy, we invite you to visit our collection of video tutorials: it turns out that it is not so difficult, and soon your children will have a favorite crocheted toy, and upholstered furniture your living room will be decorated with bright design elements: after all, not only children can play with toys.
A cute bear cub, small, about the size of a palm, decorated with a scarf around his neck, with beady eyes and a knitted tail. Pekhorka yarn was used " Baby cotton", but it can be absolutely anyone. By using cotton, we eliminate the possibility of allergies in children.
To ensure that the knitting is tight and that the synthetic fluff with which the toy is filled does not penetrate through the holes, a very thin crochet hook with a diameter of 1.3 mm was used. Black thin threads The teddy bear's mouth and eyebrows are embroidered. The description of the entire knitting process is extremely detailed and clear.
Video lesson:

It describes in detail how to knit a small toy - a cat, quite simple and uncomplicated - the whole process of knitting from cotton yarn takes 40 minutes. The toy can be stuffed with any padding polyester or even plain cotton wool. Six loops are created and pulled together into a ring, after which a circle is knitted, which gradually turns into a conical surface.
This is how the cat’s head is knitted, into which you must not forget to tie beads-eyes. The head ends with ears. Next, the body is knitted and the tail is knitted separately.
When all the elements are ready, all that remains is to combine them into one whole to get a beautiful cat doll.
Video lesson:

The doll will need yarn of three colors: a dress will be knitted from blue, the face and hands will be white, and golden hair will be created from yellow. The work is not difficult if you follow the instructor's instructions. We begin to knit the head with white threads, first adding loops and then decreasing them. Before the last rows are closed, the head is stuffed with padding polyester.
Next knitting Bottom part the body, turning into the legs, and from the middle of the body the hem of the dress is knitted: we will also knit clothes for the doll. The head is attached to the body, all that remains is to tie the arms and sew them in place. Next, the eyes are strengthened and long hair is sewn on.
Video lesson:

The little toy is knitted from three colors of yarn and looks great in the photo. The amount of yarn is small and can be taken from various scraps. First, the hamster's body is knitted, the pattern on which is formed by changing the color of the thread in the right places. The body is filled with padding polyester, the ears are knitted separately and sewn to the head.
The four legs and tail are knitted the same way in the form of a small ball, pulled together from six loops. The nose and mouth are embroidered with black thread. The eyes are formed by two black beads, sewn into place with black thread. The hamster turns out to be very cute and neat.
Video lesson:

Legs, body and head are one knitted piece, knitted from two colors of yarn so that the bunny turns out to be dressed in overalls. To do this, you need to change the color of the thread in a timely manner. Handles, ears, a tail and a muzzle are sewn to the body.
The total height of the toy is approximately 20 centimeters (with ears - 26 cm), softness plush yarn and the safe fastening of the eyes, nose and buttons allows you to give the bunny to even the smallest children - it is safe for them.
The design of the doll is quite accessible for beginners. The bunny is filled with padding polyester all over, except for the ears, which remain flat.
Video lesson:

Four legs and a nose of a hedgehog are knitted from acrylic yarn. The belly is also knitted from acrylic, and grass is used on the back, which forms quite nice needles. Synthetic padding polyester or ordinary cotton wool can be used as filler.
Here are the patterns for knitting the arms and legs of a hedgehog: they differ from each other and are filled only in the fist. The body is knitted starting from the nose. The belly is knitted from acrylic, on last row the legs are sewn on, and the back continues with grass. The eyes are sewn on, and a nose is knitted from six loops. The toy will be a great gift for a child.
Video lesson:

Knitting toys is easy. The body of the piglet is knitted in the form of a slightly elongated ball, the legs with cloven hooves are a little more complex, the ears were knitted in the shape of triangles, but one edge is tied, and they maintain a slightly crooked shape. The tail, due to the additional thread, holds the shape of the hook. Any threads can be used, from leftovers, preferably pink shades to match the color of the pig.
Knitting begins with a tail, then it goes into knitting a spherical body with successive addition and decrease of loops. The toy is stuffed with filler and completely enclosed. The patch is knitted separately.
Video lesson:

It is enough to simply crochet a doll, creating such a cute cat from wool blend yarn. The main detail is the head, which turns into the body. It is knitted in the usual way: on six columns pulled together into a ring, ring rows are knitted with a gradual increase in stitches, and then a decrease.
The result is a spherical body, which is filled with padding polyester or other sealant. The cat's mouth is knitted from black yarn. The cat's paws, ears in triangles, as well as the tail and tongue are knitted separately. Used to create eyes decorative elements. All that remains is to put everything together.
Video lesson:

This master class will tell you how to crochet two figures - Melmon the hippopotamus and Pi the bird. Let's start knitting from wool blue color hippo head, stuff it with padding polyester. The muzzle is knitted next, the ears and pear-shaped body are knitted separately. It is also filled with padding polyester. Next, arms and legs are knitted sequentially.
All these elements are knitted in a similar way, only the number of loops and the order of their addition and decrease differ, since these elements have different sizes. The toy is put together, sewn together, and the eyes are glued on. A small bird figurine is crocheted in the same way.
Video lesson:

The Spider-Man costume is red and blue, so yarn is needed in these colors, as well as black and white floss and, of course, a hook. Knitting with red yarn is done in a ring, with gradual addition of rows. Next, all the loops are divided into three parts and a blue thread is put into action, forming the outline of a specific costume.
Next, the knitting bifurcates and the legs of the figure are formed. The hands are knitted separately with alternating red and blue threads, right down to the formation of the fingers. The outlines of the web on the head and body and the figures of spiders are embroidered with black thread (the spider is white at the back). Larger white eyes are cut out of plastic or cardboard and glued on.
Video lesson:

