Star news


A huge floor vase made of newspaper tubes. MK
A stylish vase is beautiful element interior and a great gift.
We invite you to make a stylish and original vase with your own hands
Master class “Vase made of newspaper tubes”
This master class is designed for work in a circle with children from 10 years of age and parents, the only difference is in the complexity of the chosen work.
Of all the variety of types of creativity, decorative and applied arts are probably the most popular. It is directly related to a person’s everyday environment and is designed to aesthetically shape and design the life of people and their habitat. Looking around, you can see that objects of decorative and applied art bring beauty to the environment at home, at work and in in public places. The presented type of creativity is called “remake” (from the English “remake” - remake). Many modern technologies bear this name. The raw materials for production are already used materials: fabrics, plastic, paper.
Target: development of the child’s creative and communicative abilities through self-expression through the production of paper products, the formation of practical work skills in schoolchildren, creative activity in the development of artistic taste.
She is standing on the table
Full of wildflowers.
I'll add poppy color -
The whole bouquet will burst into flames.
You can guess right away -
On the table we see... (vase).
Stylish do-it-yourself vase. Master Class
We will need:
for making a vase:
Paper towel tube;
Knife, scissors
for vase decoration:
Satin ribbons;
Glue “moment-crystal”;
Threads, needle;
Beads, buttons, etc.
Progress
1. Cut strips from newspaper. It is convenient to do this by folding the newspaper several times and cutting several layers at once with a knife.
.jpg)
2. Now we roll up the tube using a knitting needle, holding the knitting needle at an angle of 45°
.jpg)
.jpg)
3. At the end, lubricate the edge with glue so that the tube does not unfold.
.jpg)
.jpg)
4. Take the tube and start gluing the tubes, paste the tube in a circle. Then you can tie it with an elastic band so that the tubes stick tightly. We are waiting for it to dry. Cut off the top of the vase.
.jpg)
.jpg)
.jpg)
5. When the tubes are dry, take aqualac (sold in building materials stores) and, if desired, add to it the color of the color you want to make the vase. Cover the vase with varnish and let it dry. Glue the horizontal tubes.
.jpg)
.jpg)
.jpg)
6. Next, decorate the vase to your liking. I decorated it with flowers using the kanzashi technique. Let's make, in my opinion, the easiest flower to make. Let's take it satin ribbons, cut into squares with a side of 5 cm. We will need 8 squares.
.jpg)
.jpg)
7. Take a square and bend it diagonally. The ends can be “grabbed” with glue so that they “don’t move apart”
.jpg)
8. Bend the resulting triangle in half again, gluing the ends together.
.jpg)
9. And again in half
.jpg)
10. Cut off the bottom corner
.jpg)
11. And we singe the ends so that the fabric does not fray
.jpg)
12. Making 8 petals
.jpg)
13. Now we collect all the petals on a thread
.jpg)
.jpg)
14. We tie the ends, do not tighten them too much
.jpg)
15. Glue a bead in the middle, you can decorate it with a button, stones, whatever you have, add braid.
.jpg)
16. Glue flowers to the vase
.jpg)
The skill of turning waste paper into beautiful, and useful products called weaving from paper vine. Instead of throwing away the newspaper you read, you can use it to create either a pincushion or an entire laundry basket. And a photo of vases from newspaper tubes delight.
Where to begin?
To master the weaving technique, you will need desire and a set of certain tools and materials. First of all, you need paper:
- a newspaper that has already been read;
- brochure of any store (not glossy);
- packaging of newsprint or office paper;
- cash register tape, etc.

Experienced craftswomen prefer to work with purchased newsprint, but for a beginner, regular brochures are also suitable. Before twisting them, the material is cut into strips with a width of 7 to 10 cm. This depends on the knitting needle used in the work; the thicker it is, the wider the sheet of newspaper.

Additionally, you will need:
- It is a toe knitting needle, but it is advisable to use it with a thickness of 1 mm.
- PVA stationery glue or carpentry instant.
- Kitchen knife, sharpened.
- Scissors.
- Construction colors.
- Primer.
- Water-dispersed varnish.
- Braiding form.
- Decorative elements.

Sequence of work
Beautiful vase from paper straws It won’t happen in a few hours, but the time investment is worth it. By following all the instructions, in the end, from under the hands of the craftswoman, a product will come out worthy of being exhibited in a museum.


Making newspaper tubes
To do this, cut newspaper sheets along the length of the spread into three equal parts (at least 7 cm). We select one of the sheets and place it in front of us, place a knitting needle on the corner and wind the paper onto it. At the end of the twist, a drop of glue is added, which will hold the finished vine together. Remove the workpiece from working knitting needle and continue in the same spirit.

The angle between the knitting needle and the sheet should be made as small as possible.

The vine should not widen too much at one end and narrow at the other. Hollow tubes won't work either finished product desired look.

Dyeing the vine
There is practically no universal composition for coloring newspaper tubes. Each craftswoman, by trial and error, selects the paint independently. The most commonly used stains are water or alcohol stains. It is better to work with the latter outside or on a balcony with an open window, as they smell strongly.

And also, “Richard’s cocktail” is in demand. To create it you will need:
- construction primer;
- color (color at your discretion);
- water based varnish.

All ingredients must be mixed in a 0.5 liter jar. First, 300 ml of primer is poured in, followed by three tablespoons of dye and 10 tablespoons of varnish. This is an approximate scheme for adding ingredients and it all depends on the desired color of the future product.

After the tubes dry, their color fades a little.

IN Lately craftsmen often replace varnish with Dufa impregnation, claiming that it achieves the effect of gluing seams. You can paint several tubes at once with a brush.

You can dry the tubes with a hairdryer if you don’t have time to wait, or simply lay the painted vine on a plastic mat in a checkerboard pattern. This is necessary so that the tubes do not stick together and become moldy. You can see how to make a vase from newspaper tubes below.

Weaving the finished product
At the beginning, you need to choose a form for braiding, because without it a beginner will not be able to maintain the desired shape. For these purposes, any jar or bottle is suitable, which you can then leave in place and pour water into it.


Technical points
A master class on making a vase from newspaper tubes will require mastering some constantly repeating processes:
The growth (lengthening) of the vine occurs by pushing its thinner end into the expanding edge. To achieve an imperceptible transition, you will need to make cuts with scissors (at an acute angle) and then perform the procedure.


The braiding of the base tubes begins on either side. To do this, one tube is bent and applied (encompassing the main tube) as close as possible to the core of the crossed vine. The lower end rises up, and the upper end is brought under the bottom of the base lying next to it.

The walls of the product are woven in the same way, only now the top turns into the front, and the bottom into the back tube.

After completing the bottom, the working tubes are pushed into several rows of weaving using a knitting needle and carefully trimmed. This pattern is repeated when weaving the product is completed.

To form the bottom, you need to measure the volume of our shape in its widest part. And for every 1.5-2 cm there should be a tube of base. If the girth is 250 mm, then at the base of the bottom you need to put 7 newspaper tubes crossed with each other. As a result, there should be a snowflake with 14 ends on the work surface.

Step-by-step instructions for beginners
You need to start braiding the resulting snowflake, first grabbing two tubes at a time. When the distance between the main vine becomes a little more than two centimeters, they need to be divided. After reaching the required bottom diameter, the base tubes are lifted up.


You can lift the vine by bending one after the other through its bottom. The procedure is repeated until all the tubes are facing up.


You can complete the weaving by bending, cutting the tubes, or by placing posts between the loops. The right base tube is pushed towards the left one over three rows of weaving and so on until the very end.

The vase made from newspaper tubes is almost ready. To complete it, the product is primed several times using glue and water in a 1:1 ratio. After each treatment you have to wait completely dry. And at the very end, a layer of varnish is applied (several possible).

Weaving a vase from newspaper tubes will bring pleasure from the process of its creation and surprise to every guest. Let your braids bring only joy!


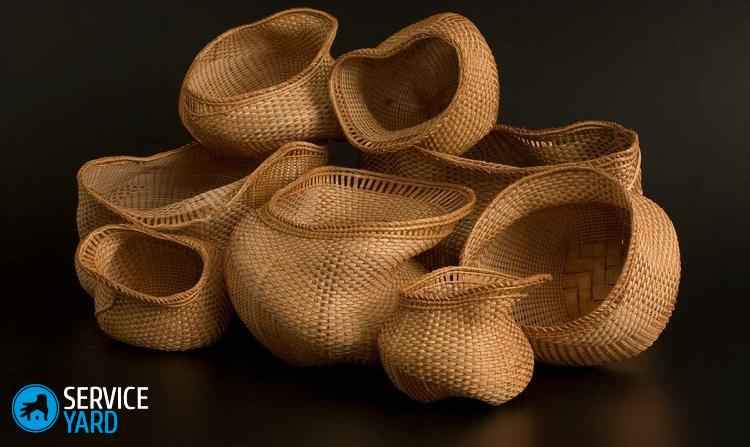
Photo of vases made from newspaper tubes


Using plain paper, magazines or newspapers you can make a very cute vase from newspaper tubes. This can be done in several ways, which we will discuss below. A vase made of paper tubes will look stylish in any interior, and making it couldn’t be easier; all methods are suitable for beginners.
Nowadays, doing something with your own hands does not take much effort, money and time, especially step-by-step master classes can be found for every taste. We invite you to make cute vases and candy bowls with us from the very available material- papers and newspapers. Let's get started!
First way

This vase will look great on the table. You can put fruits, candies or cookies in it. This vase is made very simply and step by step. To make it you will need:
- newspapers;
- thin stick (knitting needle, for example);
- PVA glue.
The first step is to roll newspaper tubes. We cut strips about 8 cm wide, wind the paper onto a thin stick, and fasten the end with glue. Leave until completely dry.

To get a flat vase, the tubes can be slightly flattened by pressing them with your hand.
We start weaving from newspapers by twisting the first tube into a spiral.

You need to roll it very tightly so that the structure is rigid. You can additionally coat the tube with PVA glue for greater reliability.

When the tube runs out, we can easily insert the next one into it, as shown in the photo. The tubes can also be fastened together with glue.

We twist the spiral until the size suits our design. You can simply weave in a circle, and then push the vase down a little. Or you can immediately weave the sides, first thoroughly lubricating the paper tubes with glue on all sides.

The finished vase can be coated with stain or acrylic paints any colors. A vase wicker from newspapers looks very stylish and beautiful! You can additionally coat it with varnish.

Floor option
Making such a vase is very easy. Let's wind the tubes in the same way as in the first master class - we wrap paper on a thin stick, and fasten the edge with glue. Let's let it dry.

It is best to make the tubes long, since we are making a floor vase, and it must be high enough.
Cover the surface with cling film or paper and glue the tubes to each other in one row. The width of the resulting structure should be equal to the diameter of the vase.

When all the tubes are glued to each other and the glue has dried, mark an oblique line from the upper left edge, as shown in the photo. And cut it off.


Now we take the structure, wrap it around the bottle and glue the outer tubes. Secure with tight rubber bands.

Let's start creating the bottom of our decorative vase from newspaper tubes. To do this, let's take thick cardboard and cut two circles out of it. The first will be equal to the internal diameter of the vase (without tubes), and the second will be equal to the outer diameter (with tubes).
Glue the inner circle. Let it dry. Can be used duct tape or hot glue.

Then external. Now you can paint the vase and decorate it as you like. You can use a spiral from the same newspaper tubes, ribbons, fabric blanks, beads, and so on.
The vase is ready!
Craft paper decor
Another option for creating a vase with your own hands is to decorate the jar using strips of craft paper.
For production we will need:
- round jar;
- double sided tape;
- craft paper;
- scissors.
We cut the craft paper into not too wide strips and carefully roll them into flagella, as shown in the photo.

Now let’s put the craft preparations aside for a while and start preparing the jar. Remove all labels and cover the jar with masking tape or double-sided tape.

Decorating time! Craft flagella should be carefully glued in a circle over the entire surface of the jar, pressing tightly against the tape. If necessary, you can use glue.

The vase can be painted, but it will look great as is. The vase is ready, you can insert flowers!

Can and cardboard
Using the same tubes, a jar and corrugated cardboard, you can make another cute vase for decorative flowers. It can also be used to store handicrafts or cosmetics.
We will use the rope technique to weave this vase.
Let's start work. First from corrugated cardboard Let's cut out two identical circles along the diameter of any jar, which will serve as a form for weaving.

Glue the pre-prepared tubes to one cardboard circle, then glue the second one on top. Thus, the bottom of the vase is ready.

The tubes that remain sticking out from the bottom must be bent upward and secured at the top with an elastic band.

We glue another tube to the bottom, slightly flattening its glued tip.
For many seasons now, handmade items have been in fashion. Crafts made from newspaper tubes are especially relevant now. Such popularity is well deserved, because even beginners can make them, and the creation requires a minimal amount of money. We will tell you how to make a vase from newspaper tubes - for beginners, you will find master classes in several ways in this article.
Material selection
First important point in the question of how to make crafts from newspaper rings, no matter how strange it may sound, the selection of material for future tubes. This really makes a difference if you don't want the fake to fall apart the next day.
The material must be durable:
- If you are new to this business, then it is best to use regular newspaper, which is the optimal solution.
- More experienced craftsmen It is worth paying attention to the sheets from the diary. They are usually quite durable and can withstand deformation.
Materials for work
To create tubes, prepare the following items:
- Scissors.
- Medium sized brush.
- Glue.
- Spoke.
- Ruler.
Making tubes
To make some kind of craft from paper tubes, you must first make required amount such details. For this:
- The surface on which you are going to work must be covered with very thick material.
- Place newspaper on top. If it is made of two sheets, but you need to cut them, it is best to manually use a knife along the side seam.
- Place a ruler on the long side of the newspaper and make marks every ten centimeters. Cut out the strips.
- Attach a knitting needle to the edge and wrap each of them.
- When ¾ of the strip is wrapped, stop and apply glue to the rest. Press it firmly with your fingers.
- Leave the tube for ten minutes until the glue is completely fixed, and proceed to create the next one.
To create a fake of such pipes you will need to make dozens, or even hundreds.
Vase
One of the most popular compositions made from newspaper tubes is a vase. It’s not that difficult to do, but you need to be patient and persevering. So, a master class on how to make a vase from newspaper tubes for beginners looks like this.
Bottom
Let's start creating such a basket by weaving the bottom:
- For this you will need longer tubes. They are easy to make - slide one into the other and secure with glue.
- Place two such tubes in parallel. Glue two pieces on top so that they are in the center.
- Weave another five to seven tubes into the hole in the center like a star, depending on the diameter.
- Starting from the first, weave the bottom.
- Don't forget to use glue to make the bottom strong.
- The ends need to be hidden and secured inside.
This way you should have a bottom.
Walls
Important! If you plan to create a tall vase, then you must use wooden guides so that the structure does not deform.
Make loops through which the weave will pass. Gradually increase the height of the walls. Once the basket is woven, tuck the loose ends inside.
Important! As for the form, it can of course be standard, but remember that non-trivial solutions are now in fashion.
Floor vase with lilies
How to make a floor vase from newspaper tubes? To create this craft you will need:
- Paper tubes.
- PVA glue.
- Scissors.
- Matches.
- Acrylic paints.
- Clear varnish.
- Gouache.
- Thin brush.
- Glitter.
Master Class:
- We also start with weaving the bottom. By its creation there is a large number of ways. One of the simplest is to fold three or four in the shape of a six-fingered star.
- Bend one of the tubes in half and begin tying the star with a rope. Grabbing three tubes at a time, make five to six circles, then grab two at a time, and after another five to eight circles, only one
- Once you reach the edges, cut off the protruding tubes and secure the bottom with glue.
- Under the last row insert the tubes and lift them up a little. Thus, the transition from the bottom to the walls will be more expressive.
- Use the braiding rope, working your way up to the desired mark.
- Next, weave the neck. It should be wide, but not too long, so that the structure does not fall due to overweight.
Most of the work has been done. Now let's move on to the most interesting part - creating the vase design:
- Before painting it, the product must be primed. To do this, you need to coat it with glue with a small amount water and leave for an hour or two until completely dry.
Important! Make sure that the entire surface is painted and no bubbles form.
She created such beauty Marie S
The secret of the beauty of this work, it seems to me, is in the beautiful proportions. In addition, this is the first time I have seen a thing spun from newspaper tubes in white. Surprisingly, the vase turned out to be taller than its creator :) :


Work process:
You will need 12 metal rods 175 cm long, they will give the direction for our weaving. 
To create a mold, you need to prepare rings of various diameters from polystyrene; for the base you will need plaster, as well as paper.
Before you start working, paint the tubes in the color you need. Dry it.

You can dry it in an open oven at a minimum temperature, turning it off periodically.

Let's make the bottom for the vase. Glue 12 tubes onto a circle of fiberboard. Which will serve as the basis for weaving.

Glue a circle of fiberboard of the same diameter on top.

Insert a cylindrical shape of the diameter you need inside, we will braid it.

Fold the guides up and secure. Can be secured with clothespins.


This is what it looks like on a vase.

To weave a tall floor vase from paper tubes, you need a strong and stable base.

Cut the base from a plastic round container and cover it with self-adhesive film.

Divide the base into 12 equal parts. Let's make marks. For a diameter of 15 cm you will need 11 -12 guides.

Moisten the ends of the metal rods on one side with oil so that they do not rust in the plaster.
Attach the wire to the base using clothespins; for this you will need an assistant. One of you will attach the wire to the base. and the second one holds the entire bunch in the desired position using a ring.

Prepare a mixture of gypsum and water and pour it into the base using a paper cornet. Maintain the wire in the desired position until the plaster hardens. This will take 10-15 minutes


When the plaster has set, lower the ring inside to press the wire to the edge of the base.

Fill the container completely with plaster. Allow the plaster to harden well. Dry.


Place rings of different diameters inside the guides to create the shape. The most big ring with a diameter of 25 cm we place at 1/3 of the height of the vase, a second ring with a diameter of 15 cm is placed at the height of 2/3 of the vase, a third with a diameter of 17 cm at the full height of the vase.

You can arrange the rings. Create your own form as you prefer.

Now we need the blank that we started to weave earlier. Carefully lift the prepared form with the rods and lower it into the started basket.

Let's align the rods and paper tube guides by carefully lifting wire frame vase and turning the woven base.

Prepare a tray; it would be nice to have one rotating around its axis. Having previously laid a napkin on the tray, and placing the napkin under the tray, place the workpiece on the tray.

After this, you can start weaving a vase. When weaving, turn the tray, so it will be more convenient for you to do the work.

When weaving, insert sheets of thick paper between the wire and paper guides.

Sheets of thick paper must be placed between the wire and paper guides until the end, as you move towards the top of the vase.

Coat the finished vase with varnish. Rings 2 and 3 can be carefully pulled out as you move upward when weaving, to do this, cut or saw them into pieces, and carefully remove them between the rods.


The white vase was made using the same technology, only rings of the same diameter were used.


I wish you success!