Star news


DIY flowers on a fabric dress: master class with photos and videos. How to make flowers from fabric Decorate a dress with flowers with your own hands
Too formal a sheath dress for a party - complement it with a rose made from handmade fabric. Too boring for everyday use - decorate it with an original contrasting flower. If you want to stand out from the crowd of brides, add a bright flower made from ribbons to your dress.
Small or voluminous, simple or multi-layered flowers become an extraordinary highlight of an outfit, attract attention and add a considerable amount of romanticism and charm to the image.


The most important thing is that such a decorative piece can be made independently from scrap materials.
A little imagination, knowledge of small tricks that we will tell you about, and step-by-step creation of simple flowers from fabric will help you create your own unique masterpiece.


Stages of creation
Pattern
If you haven’t found ready-made petal templates, you can draw them yourself using a ruler and pencil.
An ordinary circle can also serve as a pattern. It is done with a compass or by tracing a glass, cup or any round object.

There is another unusual and therefore little-known method - taking “measurements” from a living flower.

- Take the most beautiful flower and carefully disassemble it into petals.
- Trace each of them on cardboard, then cut out along the contours. Difficulties may arise with very convex petals. In this case, circle them with a slight deviation.
- The leaves are also outlined in this way, only at the base of the leaf blade you need to make a small protrusion if you are attaching them to the stem.
- The cut out elements are cut on the fabric “on the bias”. It is recommended to use a ballpoint pen to trace the templates, since the pencil often leaves a dirty mark. When cutting, the mark from the pen remains behind the outline.


Fabric selection
Almost any fabric of any density is suitable for a flower (organza, silk, satin, chiffon, crepe de chine, velvet, linen).
It is advisable to choose natural material, as it will stretch well and corrugate easily.
The same cannot be said about synthetics. It undergoes rapid overheating, which leads to deformation of the flower element. In a word, it requires more experience, strength and patience.


Petal coloring
Coloring is used when it is necessary to achieve maximum naturalness of the flower. Aniline and confectionery dyes, Rainbow ink, gouache and photo paints are suitable.
A piece of fabric can be completely dyed, or the petals can be painted separately.

The petals are moistened with water and laid out on glass. Using a brush, apply the desired shade. To make the shade bright, the paint is diluted with cologne. The alcohol base also allows the product to dry faster.
Preparation of material
To keep the flower in shape, the fabric can be starched or treated with a gelatin solution, which is very simple to do. In a glass of cold water, dilute 2 tbsp. spoons of gelatin and let it swell, and then heat it in a water bath.

Dip the fabric into the prepared hot solution and wring it out. Dry on a line. When it is dry, iron it with a warm iron.
Important to note:
- starching is done after dyeing the fabric;
- Thin fabrics are starched heavily, dense fabrics are starched less. Velvet is smeared with the solution only from the wrong side;
- if the material rustles, then it is ready for use. Otherwise, it will be difficult to form petals due to a weak solution or sticking of tools if the solution was overly saturated. It's easy to fix. Wet the cloth, let it dry and repeat the process from the beginning.


Shaping
The petals are curved in different ways, depending on the fabric:
- The contours of elements made of light material are burned with candles or a lighter. Only during work there should be no drafts.
- You can use the bulla tool. The petal from the heated instrument will become rounded. Curl the edges with a curling knife and a special hook. The heel will give the petal a convexity.


Making stamens and pistils
The resemblance to a real flower is achieved precisely due to the stamens.
They are made from threads that are impregnated with a solution of starch or gelatin, and about 30-40 paint colors. The latter can be replaced with melted wax.
For the pestle you need wire wrapped in paper and cotton balls painted in the appropriate color.

Flower core
The very heart of the flower is decorated with buttons, cotton wool, beads and everything that may be at hand.


Making flowers with your own hands
Now let's move on from theory to practice.
Having a small piece of dense fabric in an interesting color can be the beginning of creating such a cute flower.

- Cut out circles of the desired diameter.
- Fold each element in half several times.
- Secure the bottom edge of the resulting petals with a seam.
- Collect all the elements into one flower.
- Attach a piece of lace or knitted border to the center of the flower.
- Attach a button to hide the seams.


Rose
It is not for nothing that the rose is considered the queen of flowers - a symbol of beauty and love. Not decorating your dress with such charm is simply a sin.

We will need a red or pink ribbon 35 cm long.
Fold the edge away from you and begin wrapping the rose. Secure the base with thread, not reaching the fold line.

Sew the end of the ribbon on the wrong side, securing all layers.

Made from satin and chiffon

- Cut circles of different diameters, at least 5 pieces.
- Burn the edges.
- Collect the petals into a flower, starting with the largest one.
- Carefully pin all the layers together.
- Sew on the decor, pinning the petals together.


From organza
The pattern for a lush organza flower will be a stencil in the form of divided petals. The fabric can be selected in different tones and textures.

- Fold the material in several layers to make a square. It should be larger in size than the template.
- Trace its outlines and carefully cut it out. The number of petals depends on the size of the flower and the thickness of the fabric.
- Having placed the cut out shapes on top of each other and aligned the layers, use a thread to fasten all the petals in the center.
- You can decorate the middle with beads and beads.

From tapes
We would like to share another option for creating a flower from ribbons.
Of the required material, you only need ribbons of different colors, which can be pieces of any fabric, thread with a needle and beads for decoration.
Please note that the wider the ribbon, the larger and more magnificent the flower will be.


Flower using kanzansha technique
This technique requires perseverance, but the originality of the fabric colors compensates for this shortcoming. Sizes and colors can be very different, as well as methods of their application, while material costs are minimal.
Flowers are created from satin ribbon, using Moment-Crystal glue, decorative elements, cardboard, scissors and thread with a needle.
There are different ways to create flowers using the kanzashi technique. We'll look at a few.


Aster
To make a beautiful aster, cut the ribbon into pieces 7 cm long. The number of future petals is optional.
Fold each piece in half and cut at an angle with a soldering iron to form the top of the petal.

Fold the bottom of the petals in the opposite direction and singe the edges, thus connecting the ends of the ribbon.

From thick paper, cut out a circle corresponding to the diameter of the flower. Glue the petals, starting from the edge of the circle, gradually filling the entire space.

Convex flower
A convex large flower is made as follows:
- Cover the ball with a plastic bag. The size of the finished product depends on the diameter of the ball.
- Make petals.
- Connect 7 petals into a circle with thread and secure. A small flower will come out, which needs to be attached to the center of the ball.
- Glue the second row of petals between the parts of the first row.
- Glue the petals in rows, forming a flower of the desired size.
- When the glue sets, carefully remove the ball and plastic bag.

Since ancient times, flowers have emphasized tenderness and beauty, giving a unique look to any outfit.
Flowers decorate hairstyles, hats, decorate bodices of dresses or enliven the skirts of elegant dresses.
In the clothing collections of European designers, fabric flowers have already taken a strong place as a way to emphasize femininity and beauty.

Fabric flowers are used not only to decorate clothes, but also for accessories and decorations.

Fabric flowers can be created realistic or fantasy - lush roses and chrysanthemums, delicate lilies and irises, scarlet poppies, snow-white daisies.


Cut several layers of different sizes from the fabric.

Make sure that the flower petals bend in one direction. To do this, it is best to hold the flower above the flame, carefully lowering it and watching how the petals curl.

When the edges of all the flowers are processed, we assemble them into finished flowers. To do this, we insert smaller flowers into larger ones like nesting dolls in descending order of size. You get two flowers like this.

We select the central bead and sew it into the middle, at the same time fastening all our flowers in the middle into one voluminous flower.
Then we select small beads or beads and sew them around the central bead

You can arrange fabrics with different textures and colors. The main thing is that they look harmonious together.

If, instead of the shape of a flower, you simply cut out circles from fabric and also process their edges with a candle, then you can assemble a flower of a different shape.

Examples of dresses decorated with fabric flowers:

Belt with flowers in country style

Belt with flowers.
Using small fabric scraps such as lace, tulle, organza, and a few pretty pearl or crystal beads, you can create your own fancy belt.
Below are several belt design options. You can use one of them, supplement or change somehow.
The basis for the belt is a traditionally double-sided, wide satin ribbon.

Take some time to cut out the petals from your chosen fabric. Get creative a little by changing petal shapes, fabric combinations and patterns. Flowers should be grouped in a bouquet on a belt. This way they look more natural.

And here is the sequence of applying colors to the belt. 

To create a raised edge of the petals, use a burning candle.
You can also use a couple of petals made of mesh and lace, don’t melt them, just cut them out. In the example, 18 circles of different sizes were used for the central flower, the largest being 12 cm in diameter (before melting).
To get fluffy flowers, you can fold some of your circles in half or into quarters.

Sew the petals in the center to provide shape. Sew beads and pearls. Place the flowers close together on the satin ribbon and secure with pins.
For creativity, cut three leaves from a coarser fabric and insert them under the flower petals.
Cut out thin feathers from the remnants of the satin ribbon, singe the edges, and insert them under the petals. Once the bouquet is completely ready, sew it to the ribbon.


Good day has begun, and we, in turn, are starting a new series of articles “Fabric flowers on a dress - simple and fast.” I am creating this series not only for mothers of little girls, but for all those who want to decorate their owl’s dress with an elegant three-dimensional flower made of fabric.
Today I will tell you and show you how to make a lush carnation flower from fabric yourself. Here it is.
Yesterday I wrote an article about sewing a children's prom dress decorated with such a carnation. So, if you liked the dress in the photo, and you want to sew one for your daughter or for yourself (this dress model is universal, suitable for an adult girl), then you are welcome to the article, where I showed in detail how from scratch to the last seam sew your own children's prom dress. And then you can return to this article and make this lush flower from fabric using the following master class.
Before describing the process, I will focus on the fabric. It is better to choose a thinner fabric for the carnation (thin tulle, delicate organza, satin, silk, etc.) - the same fabric from which you made the dress will do. But keep in mind that if you take thick fabric for carnations, then for one element of the inflorescence you need to take not three circles, but one is enough.
Now you will understand everything - here in pictures I will show how everything is made from thin fabric.
We make flower inflorescences from fabric.
We will need to make 7 carnation inflorescences. For each inflorescence, you need to cut 3 circles from the fabric - if the fabric is thin. If the fabric is not very thin, then 1-2 circles will be enough for the inflorescence.
The radius of the circle is arbitrary. The length you want the carnation petals to be is the same length as the radius of the circles. They are easy to draw on fabric - if you trace a small glass, cup or cream lid with chalk.
The carnation inflorescence is made simply - we place three circles of fabric in a stack on top of each other (Fig. 2). We take a needle and thread and stitch through the circles folded together - so that the seam is in the form of a circle in the center of the stack of our discs (Fig. 3). Now (without making a knot) we tighten the thread, and our fabric disks themselves fold into an inflorescence bud (Fig. 4).
The tighter you tighten the thread, the more elastic the receptacles (“butts”) of our fabric inflorescences will be. I do not tighten it very much - so that later I can give the receptacles a flat shape where I need them (when they are fixed to each other).
In this way we make 7 inflorescences.
We arrange the inflorescences into a lush fabric flower.
Now we will arrange them in a lush fabric carnation. Everything is shown in the picture below. First, we place 2 inflorescences perpendicular to each other - we fix them by the “butts” with a thread and a needle. Then we add the third inflorescence - we also fix it, then the fourth. The inflorescences lie on their sides - each looks in its own direction as if on a compass - north, east, south, west.
These four inflorescences can be sewn not so tightly to each other - but leave a hole in the center (like a hole in a donut). Then we will insert three other buds into this hole, with ruffles towards the top.
We place the remaining three inflorescences on top of this base - so that they look up with their little frills. We also lay them one by one - I fix each one with stitches inside at the base. It turned out to be a nice lush flower. All fixing seams are hidden in the fabric petals.
Now all that remains is to sew the satin ribbon to the wrong side, and you can attach it to the dress.
There are also two ways to attach such a flower made of fabric to a dress - either sew the flower with threads - so that it is permanent and forever (I, of course, folded in about “forever” - you can also tear it off whenever you want).
Or another option. Take a pin of such a size that it can support the weight of the flower. And attach the pin to the flower made of fabric - that is, sew its pin back to the underside of the flower using regular threads. In order for the fabric flower on the pin to hold straight and not droop upside down, the pin needs to be sewn not in the center of the flower, but a little higher - closer to the upper edge of our voluminous floral applique.
Happy sewing.
Olga Klishevskaya, especially for the site “Women’s Conversations”.
Read also
womenstalk.ru
step-by-step master class on production, photos and videos
It is difficult to imagine a wedding ceremony and celebration without flowers: they are an obligatory component of the bride’s bouquet and the groom’s boutonniere; they are used to decorate cars and the banquet room. But sometimes living plants are not able to withstand too hot or cold weather, and temperature changes negatively affect their appearance. In the article you will learn what an alternative is, how to make flowers from fabric with your own hands so that they look beautiful on your wedding day and are preserved in memory of the joyful day without losing their original appearance.
Master class on making artificial flowers from organza
Artificial flowers made using organza look charming. This is due to the frequency of use of the material when sewing a wedding dress, which means that the accessory will go perfectly with the bride’s outfit. In addition, the fabric is very comfortable and pliable to work with, which will facilitate the process of creating a masterpiece, and the variety of color shades makes it possible to choose colors that best suit the decoration of the celebration.
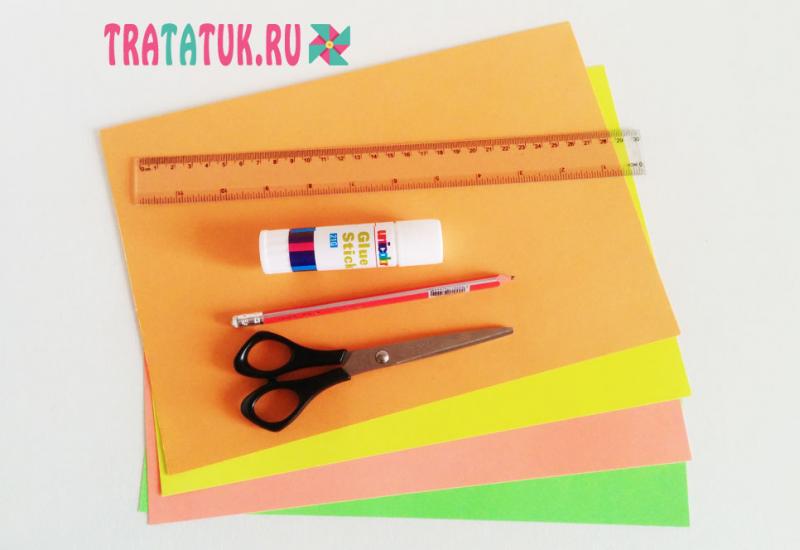
Required materials
To make organza flowers you will need:
- Organza. The color of the fabric depends on the preferences of the bride and the theme and style of the wedding. Materials of different shades can be used to create an interesting composition. If it is impossible to find organza, chiffon or satin will do.
- Sewing accessories - needle, thread, wire.
- Beads, beads for decoration.
- Candle, matches.
- Paper needed for drawing patterns and sketches.
Stages of creation
A detailed master class will help you learn how to make fabric flowers with your own hands:
- We are preparing patterns for future buds. To do this, draw several circles of different diameters on paper. To make the circles as even as possible, you should use glasses of different sizes or other round objects. After drawing, we cut out the elements and transfer them to the fabric. Using ready-made templates, we cut out several circles of each diameter from organza - we get blank petals.
- Light a candle. As you hold each petal, melt the edges a little. In order to determine at what distance from the fire to keep the fabric, practice on unnecessary sections. Small parts should be scorched, holding them with tweezers so as not to burn your hands.
- Let's start assembling. It is better to start with the large lower petals, gradually adding the rest. The middle needs to be decorated with beads or seed beads, sewing them on or stringing them on wire. The organza peony is ready.
- To create a rose from organza, during the first stage you need to make five shallow cuts on the finished fabric mug. When processing parts with fire, it is important to ensure that all the petals curl in one direction, then the bud will look neat and beautiful.
Simple decorative flowers made from ribbons
Many brides on the eve of the wedding are thinking about how to sew and make flowers from fabric so that they look beautiful, complement existing accessories and decorations, and blend harmoniously with them. Often the problem is the lack of necessary materials, skills and experience in creative work. But in order to create amazing exclusive flowers from ribbons, you don’t need special equipment or great skill. The main thing is a little patience and imagination, and a detailed master class will help you realize all this and create a real masterpiece with your own hands.
Required materials
In order to make buds from ribbons, you will need:
- Satin ribbons of two colors (main and for leaves). Particular attention should be paid to the width of the ribbons - the wider and longer it is, the larger and more voluminous the product will be.
- Threads, needle.
- If desired, beads or rhinestones can be used for decoration.
Stages of creation
Let's look at two options for how to make beautiful flowers from fabric, both are simple, but the result will definitely please you, and the finished accessories will serve as an excellent decoration. Master class No. 1:
- Cut a satin ribbon of the required width, 50 cm long. Fold one edge to form a triangle.
- We fold a small corner and secure it with a needle and thread.
- We collect the ribbon onto a thread, folding it to form a beautiful “accordion”. How to do it correctly, look at the photo.
- Having collected the entire ribbon, it must be wrapped around the base, forming a beautiful rose. Secure everything with thread so that the composition does not fall apart.
- To create a leaf, cut a ribbon 10 centimeters long, fold both ends into the middle, forming a triangle. Sew and tighten the triangle at the base. The leaf is ready. To create a beautiful composition, you need at least two leaves for one flower.
- We combine the flower with the leaves - the masterpiece is ready.
Master class No. 2:
- Cut a satin ribbon 35 centimeters long. We bend the edge away from ourselves and begin to twist the flower. We secure the base with a thread, not reaching the fold line.
- We bend the ribbon towards itself, forming a petal. We continue to twist the rose, wrapping the ribbon towards ourselves.
- We sew the end of the ribbon from the inside out, fastening all the layers with thread so that they do not fall apart.
- By analogy, we make the required number of flowers, from which we will make an accessory or decoration. Such textile accessories are perfect for creating a wedding topiary.
Large flowers made of fabric using the kanzashi technique
Fabric flowers made using the kanzashi technique are original and beautiful. Such accessories can be small in size and used to decorate a wedding dress, a headband for the bride’s hair, or boutonnieres for guests. If desired, in this way you can make a large flower, which will decorate the wedding procession or banquet hall. The advantage of this technique is the ability to make a flower of absolutely any color, size, without spending a lot of effort and money.
Required materials
To make a flower using the kanzashi technique you will need:
- Satin ribbon. For a large flower, a wide ribbon is needed. In order to get a multi-colored masterpiece, it is worth buying material of different shades; the golden elements in the product look good.
- Glue gun, Moment-Crystal glue.
- Threads, needle, scissors.
- For decoration - beads, seed beads, rhinestones, small decorative ornaments in the form of insects (butterflies, ladybugs).
- Cardboard or ball, plastic bag.
Stages of creation
To create large flowers in the kanzashi style, two methods can be used; we will consider both so that everyone can choose the most suitable and simple option for themselves. Master class No. 1:
- We cut the satin ribbon into 7 cm lengths. Fold it in half and cut it at an angle using a soldering iron.
- On the other hand, we wrap the tape in the opposite direction, singe the edge, due to which the two ends of the tape are connected. We make the required number of blank petals, which depends on the desired size of the flower.
- We take cardboard and draw a circle along which we will glue the petals. The larger the diameter, the larger the resulting accessory. Glue all the petals in a circle.
The second option for creating kanzashi involves creating a large, round, convex flower:
- Cover the ball with a plastic bag. The size of the finished product depends on the diameter of the ball.
- We make petals that will serve as the basis of the product.
- Using a thread and a needle, we connect the seven finished petals into a circle and secure them. A small flower comes out, which we attach to our ball in the center.
- Next we glue the petals, placing them between the elements of the previous row.
- We glue one more element to the petals of the first row, and two on each side to the parts of the third.
- By analogy, we glue the remaining petals until we get a flower of the desired size.
- We remove the ball and plastic bag, our masterpiece is ready.
Step-by-step video tutorial on how to create a lily with your own hands
In wedding floristry, lilies are used very often, since this flower symbolizes innocence, tenderness, and purity. But if it’s not the season for live lilies or you want them to last after the celebration, a great option is to make them from fabric. Even girls who have decided to plunge into the world of creativity for the first time and have not previously dealt with sewing or other needlework can make such an accessory. To understand how to make a lily flower from fabric, watch the video with detailed instructions:
svadbavo.ru
Dresses with voluminous flowers | Needlework
Since ancient times, flowers have emphasized tenderness and beauty, giving a unique look to any outfit.
Flowers decorate hairstyles, hats, decorate bodices of dresses or enliven the skirts of elegant dresses.
In the clothing collections of European designers, fabric flowers have already taken a strong place as a way to emphasize femininity and beauty.

Fabric flowers are used not only to decorate clothes, but also for accessories and decorations.

Fabric flowers can be created realistic or fantasy - lush roses and chrysanthemums, delicate lilies and irises, scarlet poppies, snow-white daisies.


Cut several layers of different sizes from the fabric.

Make sure that the flower petals bend in one direction. To do this, it is best to hold the flower above the flame, carefully lowering it and watching how the petals curl.

When the edges of all the flowers are processed, we assemble them into finished flowers. To do this, we insert smaller flowers into larger ones like nesting dolls in descending order of size. You get two flowers like this.

We select the central bead and sew it into the middle, at the same time fastening all our flowers in the middle into one voluminous flower.
Then we select small beads or beads and sew them around the central bead

You can arrange fabrics with different textures and colors. The main thing is that they look harmonious together.

If, instead of the shape of a flower, you simply cut out circles from fabric and also process their edges with a candle, then you can assemble a flower of a different shape.

Examples of dresses decorated with fabric flowers:

Belt with flowers in country style

Belt with flowers.
Using small fabric scraps such as lace, tulle, organza, and a few pretty pearl or crystal beads, you can create your own fancy belt.
Below are several belt design options. You can use one of them, supplement or change somehow.
The basis for the belt is a traditionally double-sided, wide satin ribbon.

Take some time to cut out the petals from your chosen fabric. Get creative a little by changing petal shapes, fabric combinations and patterns. Flowers should be grouped in a bouquet on a belt. This way they look more natural.

And here is the sequence of applying colors to the belt. 

To create a raised edge of the petals, use a burning candle.
You can also use a couple of petals made of mesh and lace, don’t melt them, just cut them out. In the example, 18 circles of different sizes were used for the central flower, the largest being 12 cm in diameter (before melting).
To get fluffy flowers, you can fold some of your circles in half or into quarters.

Sew the petals in the center to provide shape. Sew beads and pearls. Place the flowers close together on the satin ribbon and secure with pins.
For creativity, cut three leaves from a coarser fabric and insert them under the flower petals.
Cut out thin feathers from the remnants of the satin ribbon, singe the edges, and insert them under the petals. Once the bouquet is completely ready, sew it to the ribbon.


And more examples:


May 23, 2015Galinka
delaemrukami.info
DIY fabric flowers
The abundance of fashionable and affordable ways to decorate clothes and interior details creates enormous opportunities for creative self-realization, but often there is not enough time for delights or the object of decoration does not require or is not worth the colossal costs of serious decoration. It is in such cases that ingenuity and what is popularly called “grandmother’s secrets” come to the rescue - simple-to-use elements that can be made in a matter of minutes.
Plants using the appliqué technique have long become a common way of decorating clothes and accessories. A voluminous applique will help diversify a boring pattern, with which you can decorate the edge of the neckline of a dress, the hem of a coat or a handbag. Volumetric flowers look impressive if they are located asymmetrically on only one side of the product (for example, on the shoulder).
To decorate clothes with raised flowers you will need:
When planning to make convex flowers from fabric with your own hands, it is best to choose fabric whose edges do not fray when trimmed. The loose edge should be trimmed with curly scissors and an allowance should be left for the hem.
As a basis for convex plants, it is better to use dense material that is not prone to deformation.
Ribbon embroidery
Within the art of embroidery, there is a separate decorative direction, which involves creating pictures from ribbons sewn to a base. This is quite painstaking and difficult work, but using this principle you can decorate clothes even without experience.
You will need ribbons with the following width:
- 3 cm;
- 2 cm;
- 1 cm;
- a circle of fabric for the base;
- beads.
The optimal material for making such flora is satin ribbons or plain braid. An organza ribbon will also give an excellent result, but you need to get used to working with it.
- The tapes are folded one on top of the other so that their longitudinal axes coincide.
- Using a basting stitch, the ribbons are gathered together and slightly gathered.
- The bud is formed in a spiral and pinned to a round base. All that remains is to sew on the inflorescence, hide the unsightly ends of the ribbons and the decor with fabric flowers is ready.
This method can be used to create not only lush buds on the fabric, but also textured ornaments, and by “getting your hands on” you can dispense with the fastening element (base) and form a pattern on the product.
Volumetric printed decorations
Not limited to finishing clothes and accessories, you can make jewelry from flowers from fabric - a necklace, beads or bracelet. This simple idea from the point of view of production technology is based on the principle of sewing soft toys from two or more parts.
To make one printed flower you will need:
- nylon or dense (stretchy) fabric;
- padding polyester;
- decorative thread or thin lace;
- buttons;
- fastenings for jewelry (clasps, chain, connecting rings).
Using the template, you need to cut out two identical flowers from the fabric.
- Fold with the wrong sides facing out and sew along the edge (remembering to leave a gap for filling with padding polyester).
- Turn the product right side out and fill.
- Sew up the technological hole.
- Wind decorative thread crosswise in the recesses between the petals and decorate with buttons.
- Sew connecting rings and secure them to a chain or use pieces of a chain to connect several flowers in series into a complex decoration.
When working with nylon, you need to treat its edge with a candle because of the fabric’s tendency to fray excessively. Since you can make flowers from fabric that stretches well and strongly by pulling it with a rope, there is no need to cut out complex shapes - you can cut two circles from nylon.
Rose from a rope
Roses made from rope or strips of fabric are often used to decorate belts, headbands and other accessories. Such structures are secured manually using a seam over the edge or using glue.
- Fold a strip of fabric 5 cm wide in half along the longitudinal side with the wrong side facing out and stitch.
- Turn right side out (it is important that the seam does not twist).
- Using a basting stitch, gather slightly and sew to the product along the edge of the connecting seam.
- To decorate a handbag or hair decoration, the sewing edge (after forming a flower with pins) is smeared with glue and connected to the base.
A rope or thick decorative cord is immediately glued to the product during the formation of the inflorescence. For reliability, the cord is sewn to the base around the perimeter.
Knitwear decor
In most cases, to create fabric flowers, a master class requires a large number of step-by-step illustrations. You can make simple but expressive plants for decorating knitwear from any dense and fairly thick fabric that is not prone to fraying - felt or fleece.
You can make two types of flowers - double and simple with curved petals.
- For the first, you will need a long strip of fabric 4-6 cm wide, folded in half and stitched along the connecting edge (no need to turn it inside out).
- The resulting element should be rolled in a spiral and sewn to the product from the side where the layers meet (i.e., the place where the material is folded forms the front part) - you will get a rosette resembling a rose made from a rope.
- Using scissors, you need to make cuts in increments of 0.3-0.5 cm to create the petals of the inflorescence.
To make a textured flower with petals, you need to cut 6 petals from fabric (the base of the petal should be straight). Make an opposite fold on each one and assemble it into a bud using a needle and thread.
The middle of the flower can be decorated with beads or a bright button.
The leaves in such compositions are sewn to the product along the longitudinal axis.
Cosmic flowers
Inflorescences, whose silhouette is formed by folds of the material, can be used to decorate clothes, furniture covers, clutches and handbags. These elements are based on a circle and are good because they have minimal volume and practically do not lose their appearance after washing.
For production you will need:
- hard woven dublerin;
- decorative material;
- thread;
- bead or button.
When choosing dublerin, it is better to purchase the hardest one with the adhesive side.
- Using the template, you need to cut out a base circle from dublerin.
- The radius of each inflorescence is cut out 2 times larger than the base, so that the decorative material covers the doublet on both sides.
- If the decorative material is prone to shedding, then it must be cut using curly scissors with a margin of 0.5 mm for the hem.
- The doublerin is placed in the middle of the inflorescence blank from the wrong side and ironed through gauze so that the two fabrics stick together.
- The allowance is pressed to the wrong side.
- The material is gathered to the center, secured with thread and decorated with a bead or button.
It is important to remember that the decor will last a long time not only due to the absence of complex and multi-component elements, but also provided that the base fabric and the material for decoration have the same characteristics and care requirements - dyeing method, temperature and washing technique.
pro-prazdniki.com
How to make a flower from fabric on a dress with your own hands?
If felt can be called fabric, then here you go! A charming flower, very simple to make and suitable anywhere - on a dress (most likely winter), on a sweater, or even on a headband.
And this flower is made of organza or silk. More sophisticated and elegant. It will definitely suit the dress.
I think that the step-by-step photos show everything clearly and clearly and there will be no difficulties in the execution process :)
Sometimes you want to decorate a dress yourself, update it for the summer, or simply add some zest, an ordinary flower made of fabric will help us with this. You can do it in different ways. For example, from satin ribbons using the kanzashi technique, from organza or any other fabric that matches your outfit. Let me give you the simplest example of making a flower.
We make several paper templates in the shape of a flower, but different in size: larger, smaller, even smaller. We transfer them to the fabric, cut them out, process the edges so that they do not crumble (you can burn them with a candle, for example), fold them so that the largest is at the bottom and the smallest is at the top, sew them all together, you can glue or sew a bead or a rhinestone, attach to a dress, blouse or other outfit. And you will attract attention!
These are the roses I make for my daughter’s hairpins and elastic bands; putting her on a brooch and attaching her to a dress is not difficult. The fabric I took was tulle for curtains. I chose the one I liked in the store and asked to cut off 20 cm; this is enough for a flower, and there is still some left over. We cut a square, fold it in half, bend the corners down and stitch along the bottom with thread. We collect the thread. Next, we collect all the petals with glue. And blanks for brooches are sold.
A fabric flower for decorating a dress can be made from any piece of fabric with your own hands. The dressmaker always has trimmings in stock. Where to go? Of course, make a beautiful flower out of them and decorate your dress with it.
An excellent selection of master classes on making flowers from fabric with your own hands can be viewed here
And here are several video master classes on making various flowers from fabric on a dress:
Fabric peony
I will describe step by step the creation of an organza flower.
For production we will need:
- Using a candle, melt the edges of the petals.
- We collect our flowers, starting with the large lower petals. We decorate the middle with beads or beads, string each bead on a wire and stitch it.
I'll offer a few more options.
1) If you have an unnecessary brooch of approximately round shape, you can match the petals, in this case the option with raw edges:
2) You can also do the same with any shiny buttons and anything that goes into the middle:
3) Option when the petals are gathered with the raw edges up and the petals are gathered flat:
4) Flowers from the second option made from sweatier fabric will be more voluminous:
5) Option made of polyester or nylon tape with a special center:
6) Making a flower from assembled ribbon (these are sold in all sewing and handicraft stores):
7) From the circles, collect a petal like a daisy, put a button in the middle, and sew the flower to the dress:
There is such a cute flower made of fabric, you can make it yourself and decorate any of your outfits.
For our flower, we need to cut circles from fabric for the petals
now you need to fold them as in the photo
and once again, these will be flower petals.
We put everything together like this, our circles
Now, we stitch with a needle, as in the photo, all our blanks for the petals
and collect them into our flower.
For decoration, berm lace and attach it to the middle of the flower.
We can hide all our seams behind a bright and beautiful button, which will be the center of our flower.
And I will suggest you to make a poppy flower from fabric. This year in Ukraine the poppy for decorating clothes is in trend :)))
First master class. Artificial satin poppy. Cut out the petals and use an iron to make them corrugated. Then assemble the flower as shown below:
Second lesson. Tulle poppy. Make a flower from tulle. Take tulle, cut petals of different sizes from it, collect them into inflorescences and decorate your clothes:
Another option on how to make a beautiful flower from fabric to decorate clothes:
I wish you success!
I suggest you make a rose:
You will need
A scrap of fabric, threads of the appropriate color, a sewing machine,
Cut a strip 12 by 55-60 cm
Sew lengthwise with a shift
Place folds of 1-1.5 cm in the same seam
Get something like this
We assemble in a circle, securing with a needle and thread and giving shape
You will get such a beauty
This rose flower can be used to decorate not only a dress.
The flower can be made from almost any material. But satin or silk is best - the flowers will look delicate and very realistic. You can also use chiffon. You can see an example of making a rose from this material in the video:
I suggest you familiarize yourself with some more lessons on making wonderful flowers using the firing method:
You can watch how to make a rose from silk in this video:
Fabric flowers are suitable for decorating both clothing and home interiors. These flowers make cute head accessories or brooches for blouses.
info-4all.ru
make decoration according to master class
A formal dress can be complemented with a voluminous flower and make it festive. A boring everyday dress can be decorated with a large rose. And to add some zest to your wedding dress, decorate it with a contrasting flower made of ribbons. In our master class you will learn how to quickly and easily make flowers on a fabric dress with your own hands.
Large, small, multi-layered and single-layered flowers can give a dress a completely different look. Thanks to just one flower, your image can become a little more romantic. 
The most important thing in this matter is that such a decorative element can be made without much difficulty with your own hands from available materials. In our master class you will learn how to make a flower easily and simply.
Beautiful and original flower with a lace center
Making such a flower will not take much time. If you have a small piece of thick fabric, you can create the flower shown in the photo below.

- Make circles of the diameter you need
- Fold each piece in half twice
- Secure the bottom edge of the resulting petals with a seam
- Collect all the preparations into a flower
- Attach a small piece of lace to the center
- Attach a button to hide the seams
Making a delicate satin rose with your own hands with love
The rose is considered a royal flower and also a symbol of love. Agree, such decorations for a dress will always look advantageous.

To create this we will need red and pink ribbons about 35 centimeters long.
Fold the edges of the fabric away from you and begin wrapping the rose. The base should be secured with thread, not reaching the fold line.
To secure all layers, sew the end of the tape from the wrong side.
Flowers made of satin and chiffon - an unusual solution
The easiest flower to create from circles is shown in the photo below. In this case, it is advisable to use different materials.
- Make circles of fabric of different diameters. There should be at least 5 of them in total.
- Burn the edges a little
- Gather the petals together into a flower, starting with the largest circle.
- Pin all layers together
- Decorate the flower by pinning all the petals together.
Sale of a large organza flower

Use a stencil in the form of divided petals, which will serve as a pattern for a lush flower. The fabric can be selected in different tones and textures.
- Fold the material in several layers to get a square. Its size must be larger than the template.
- Trace the outlines of the petals and carefully cut them out. The number of petals directly depends on the size of the flower you want to make.
- Place all the finished shapes on top of each other, align the layers, and use a thread to fasten all the petals in the center.
- Use beads and seed beads to decorate the center.
Flower made of ribbons with delicate green leaves
Another interesting option for creating a flower from ribbons. Of the required material, you only need multi-colored ribbons, which can be ordinary pieces of fabric, thread and needle, and decorations.
If you want to make a lush flower, use wide ribbons.

- Take a 50cm ribbon and fold its edge to form a triangle.
- Tuck the sharp part of the triangle and fasten it with thread.
- Gather the ribbon in the shape of an accordion.
- From the resulting ribbon, collect a flower and secure it at the base with thread.
- To create petals, fold 10 centimeters of green tape into a triangle.
- Sweep it again and pull it off.
- Thus we have a leaf.
- Finally, assemble the parts together and decorate with beads.

Video on the topic of the master class
Sometimes we all lack inspiration to create a product of amazing beauty. Or having made a mistake in creation, we don’t take on other products. The main thing is not to be afraid and act. In our master class, we looked at all the main options for creating flowers, and you will find other examples of making flowers with your own hands in the selection of videos below. Enjoy watching!
sdelala-sama.ru
Making flowers from fabric – Crafts Fair
In this version, I paint only the middle of the blanks, leaving the edges white. There is no point in achieving absolutely identical and even workpieces, because... in living nature there is nothing symmetrical or identical. 
After the paint has dried on all the pieces, we move on to the next stage - cutting out the petals. To do this, cut the workpiece into 4 parts, not reaching the center by about 1-1.5 cm, and cut off the sharp corners of the petals. Then carefully and carefully process all the edges of the petals over the candle flame. 
Having processed all the “quatrefoil blanks” in this way, we arrange them according to size. Then we make a flower out of them in descending order, fastening them together with “hot” glue (or stitching them with threads). 
We add stamens (here small polystyrene foam is tinted in green), leaves and attach our animated flower using “hot” glue to the base for hairpins. In this case, I decided to leave the flowers more “open”, for which I used only 10-11 layers of blanks, leaving the middle free.  Option No. 2 (white chiffon) All stages are the same as in option No. 1, only in this case we paint not only the middle, but the entire surface of the workpiece.
Cut into 4 parts, “rounding” the edges. 
Burn the edges over the candles. 
We collect a flower. 
Add leaves and attach to the base for hairpins. To get these more lush flowers, I used 16-17 layers of blanks, completely covering the middle.  Option No. 3 (from colored fabrics) To make these flowers, I used fabrics left over from sewing a dress for my daughter. These are three types of fabrics: gray silk, colored crinkled chiffon and light gray organza. All stages of work are the same, only without dyeing fabrics. For clarity, I made two versions of this flower - one from blanks with 4 petals, and the other from blanks with 8 petals (the difference is clearly visible in the finished form).
  It’s even faster and easier to make such flowers - we cut them out, burn them, assemble them, fasten them....
And here is the result - a wonderful accessory for the dress is ready! 
Among the many different ways to make flowers from fabric, this option seems to me to be the most accessible, fast, and does not require special training or rare, expensive tools. At the same time, it allows you to achieve excellent results! 
By imagining and experimenting in toning, combination of fabrics and assembly options, you can get a wide variety of floral decorations and accessories. 


I hope my photo lesson will be useful and interesting: it will help someone remember a long-known type of needlework, someone will be inspired by new ideas, and someone with its help will decide to take the first step into the wonderful world of creativity! Good luck, inspiration and good mood ! May FLOWERS always bloom in your soul... :)
www.livemaster.ru

For any woman, the desire to look good is as natural as breathing. Of course, the concept of beauty and how exactly it should look good is very individual. But it is precisely because of this that such things exist. plenty of options for all kinds of decorations, decor and other things dear to a woman’s heart. First of all, we are talking about neck jewelry - after all, this type of jewelry is considered the most ancient.
What jewelry has not been made and is not made from - everything is used - bone, wood, plastic, textiles / Many ladies, wanting to have exclusive jewelry at their disposal, make them themselves or order them t from handmade masters. And fabric jewelry is firmly in the top three, next to beads and polymer clay.
An artificial flower and leaves made of fabric are the most common decorative elements with which we decorate a child’s dress and coat; we can decorate a headband and a wall panel with paper flowers. Fabric flowers, for example, made of knitwear, can become a decoration for both a dress and a headdress - a bride’s veil, or a straw hat.
 Jewelry made from various types of fabric can be an excellent accessory that will complement an outfit and become the same accent without which the image will be boring and ordinary. And it doesn’t have to be jewelry in the usual sense - beads, earrings or bracelets. This could be a belt decorated with a flower that stands out on the dress, or a flower that is part of the outfit, sewn into the main fabric of the clothing. The latter option is great for decorating clothes for small children and older children. For a child, such decoration will be a wonderful distraction and developmental moment, and little fashionistas will simply be happy with the bright and voluminous detail.
Brooches made in the shape of fabric flowers and neck jewelry that includes such flowers are also a popular option. Wrist bracelets decorated in this way are also not uncommon. Much less likely to prefer ladies earrings in the form of textile flowers- due to their bulkiness, but simply textile earrings invariably arouse interest. Original hairpins, decorated with flowers or other fabric elements, have almost been replaced by the art of kanzashi. But even satin ribbon flowers have failed to completely shift the popularity of jeans, which are used to make flowers for hairpins and headbands.
Gallery: fabric flower (25 photos)


Materials and tools
 Textile decorations mainly include flowers, and there are hundreds of options for making them. The most popular fabrics from which you can make beautiful flowers- these are organza, chiffon, tulle, denim and burlap. In addition, beads, beads, brooches, buttons and much more are used to decorate such jewelry.
Also, the work requires scissors, needles and threads in color; sometimes you need glue, usually hot, as well as a candle - in order to process the crumbling edges of the fabric.
DIY fabric jewelry from different materials
Chiffon flowers
 DIY neck jewelry is often made from chiffon. And even if you have a small piece of white chiffon at your disposal, you can make beautiful flowers of different colors, you just need to get some gouache. Of course, it is better to make a removable one from such flowers clothing accessory, for example, a brooch or a belt. Otherwise, it is better to use fabric paints, for example, Batik, which will not be damaged by washing. To work you will need:
- piece of cloth
- paints
- scissors, cardboard, compass, ruler
- candle and matches
- hot glue or thread and needle for assembly
First step– making a template. To do this, you need to cut out several circles from cardboard. The largest should be about 8 cm in diameter, the next three should be half a centimeter smaller than the previous one. Attach the templates to the fabric, trace and cut out 4-5 pieces for each size.
Second step– coloring. Lightly moisten fabric blanks with water. Place a dot with a diameter of no more than a centimeter in the center of the circle, and then apply paint in circles, so that the layers and colors mix a little with each other. Dry the fabric naturally; no need to use a hairdryer or place the workpiece on the radiator.
Third step– processing. After the dyed fabric has dried, use scissors to make four cuts, not reaching the center of the circle. Round the edges. As a result, each circle turns into a layer with four petals. Next, you need to carefully singe all the edges above the candle.
Fourth step– assembly. You can assemble the flower layer by layer using a glue gun, or sew it with several stitches. You can glue beads or a small brooch into the core.
Note: In order to get a flower with a more open core, you will need about ten layers, and if you want to get a flower similar to a peony, you will need at least 17 blanks.
Flowers of this type are perfect for making I am a brooch for a dress or jacket, you can also decorate a bag or a summer hat with them. This method is applicable not only for chiffon, but also for organza or silk, or satin. An original technique would be to alternate painted layers with layers of tulle. You can also use multi-colored fabrics; this will simplify and speed up the work, eliminating the step of dyeing the fabric.
 Burlap is so versatile. and at the same time an original material that can be used almost everywhere and in any style. It can be successfully combined with jeans, guipure, and lace. A flower made from such fabric will be a wonderful addition to a dress, bag, jacket and even a jacket. To work you will need:
- Compasses, scissors, cardboard
- Threads, needles
- Details for decoration - lace, a small round brooch or button.
The first step is cutting out the parts. Using a compass, draw a circle on the cardboard. If you don’t have a compass at hand, you can use any shape of a suitable size, for example, a cream lid, etc. Approximately 5 petals are required. Cut out blanks from fabric.
The second step is modeling. Fold each circle in half, then in half again. You will get a triangle with a rounded bottom. Sew the lower rounded edge loosely with thread, so that the fabric can be pulled along it; there should be one thread for all petals. Bring them into a circle, give the petals the desired shape, and secure the thread.
The third step is decoration. Form a core from several layers of lace and secure it in the center, sewing the bottom layer to the petals. You can sew or glue a brooch or button on top, which will hide stitches and flaws. A beautiful fabric flower is ready.
Jeans flowers
 Jeans is a very popular material not only among fashionistas, but also among needlewomen. They make a lot of things out of old, disused denim items. A denim flower can become the highlight of an image, complete it, and make it unforgettable. There are many options for making such flowers - they can be multi-layered, as in the very first tutorial, but the following method is the most popular. It will require:
- Denim
- Thread, needle, small pliers, thimble
- elements for decoration
First step. For a flower you will need a strip of fabric from five to eight centimeters wide. The length of the strip can be any; it determines how large the resulting flower will be.
Second step. Fold the blank strip in half along the long side and twist it in a spiral in the shape of a rose. The layers are periodically fastened with thread, preferably one at a time - then the flower will be more stable, you can even sew it on a dress, and not be afraid that it will fall apart during washing. Since jeans are a dense material, it is better to use a thimble, and small pliers are needed to pull the needle from one side to the other. You can sew beads into the core for beauty. The flower is ready. It can be used as a centerpiece for a neck decoration.
The second common option for denim flowers is spiral flowers. The spiral is drawn inside the circle and cut out. Then it is twisted in the direction from the tail to the center, and fixed there with thread or glue. The only disadvantage of such a flower is the edge that crumbles with threads. However, this can be avoided if treated with PVA glue. When dry, it will become colorless and securely fix the threads.
DIY satin fabric flower
 Atlas is a very beautiful, “rich” material, which is not very easy to work with, however, the result justifies the effort. So, how to make a beautiful flower from such fabric with your own hands? Three options from simple to complex. It would not be a shame to decorate any dress with such flowers.
The first option is the most basic, it won’t require any special effort and won’t take much time. All you need is the fabric itself, scissors and a candle, as well as glue.
Work process: Fold the fabric as many times as you need layers for the flower, cut out a circle. Using a candle, melt the edges, but melt deeper in some parts so that they are smaller in diameter than others. Fold the pieces according to the order and sew with several stitches in the center. Glue or sew beads into the core.
Second option. You will also need a piece of satin fabric, a candle, thread, needle and a decorative element such as a button or bead. In addition, you will need a little filler - synthetic fluff, holofiber or cotton wool.
Work process. Cut a circle of arbitrary diameter from the fabric, singe the edges over a candle. Step back half a centimeter from the edge and stitch around the entire circumference with thread. Pull the thread together to form a ball. Fill it with holofiber or other filler. Sew the resulting ball, but do not cut the thread, but pull it through the edges so that small slices are formed. Sew a button in the middle. It, in turn, can also be covered with satin. The flower is ready.
The third option is a rose made of satin ribbon.
 You will need a satin ribbon one meter long and 2.5 cm wide, a candle, a glue gun, threads to match the ribbon and a needle, as well as tailor's pins.
First step. Treat the edges of the tape over a flame to prevent them from fraying. Place the tape with the wrong side facing you, and step back 2-3 cm from the edge. This is the width of the petal. Having stepped back, bend the tape with the front side facing you, at an approximate angle of thirty degrees, and also bend the lower part of the tape along the edge at a slight angle, and secure it all with a pin.
Second step. Sew the fixed petal, it is best to use a stitch forward with the needle. By making such bends to form a sufficient number of petals.
Third step. Collect the flower, twisting the core tightly and further petals looser. Fix with hot glue. The flower is ready!
(No ratings yet)
A formal dress can be complemented with a voluminous flower and make it festive. A boring everyday dress can be decorated with a large rose. And to add some zest to your wedding dress, decorate it with a contrasting flower made of ribbons. In our master class you will learn how to quickly and easily make flowers on a dress made of natural fabric with your own hands.
Large, small, multi-layered and single-layered flowers can give a dress a completely different look. Thanks to just one flower, your image can become a little more romantic.
The most important thing in this matter is that such a decorative element can be made without much difficulty with your own hands from available materials. In our master class you will learn how to make a flower easily and simply.
How to create flowers on a fabric dress with your own hands in a step-by-step master class
Making such a flower will not take much time. If you have a small piece of thick fabric, you can create the flower shown in the photo below.

- Make circles of the diameter you need
- Fold each piece in half twice
- Secure the bottom edge of the resulting petals with a seam
- Collect all the preparations into a flower
- Attach a small piece of lace to the center
- Attach a button to hide the seams
The rose is considered a royal flower and also a symbol of love. Agree, such decorations for a dress will always look advantageous.

To create this we will need red and pink ribbons about 35 centimeters long.
Fold the edges of the fabric away from you and begin wrapping the rose. The base should be secured with thread, not reaching the fold line.
To secure all layers, sew the end of the tape from the wrong side.
The easiest flower to create from circles is shown in the photo below. In this case, it is advisable to use different materials.
- Make circles of fabric of different diameters. There should be at least 5 of them in total.
- Burn the edges a little
- Gather the petals together into a flower, starting with the largest circle.
- Pin all layers together
- Decorate the flower by pinning all the petals together.

Use a stencil in the form of divided petals, which will serve as a pattern for a lush flower. The fabric can be selected in different tones and textures.
- Fold the material in several layers to get a square. Its size must be larger than the template.
- Trace the outlines of the petals and carefully cut them out. The number of petals directly depends on the size of the flower you want to make.
- Place all the finished shapes on top of each other, align the layers, and use a thread to fasten all the petals in the center.
- Use beads and seed beads to decorate the center.
Another interesting option for creating a flower from ribbons. Of the required material, you only need multi-colored ribbons, which can be ordinary pieces of fabric, thread and needle, and decorations.
If you want to make a lush flower, use wide ribbons.

- Take a 50cm ribbon and fold its edge to form a triangle.
- Tuck the sharp part of the triangle and fasten it with thread.
- Gather the ribbon in the shape of an accordion.
- From the resulting ribbon, collect a flower and secure it at the base with thread.
- To create petals, fold 10 centimeters of green tape into a triangle.
- Sweep it again and pull it off.
- Thus we have a leaf.
- Finally, assemble the parts together and decorate with beads.

Video on the topic of the master class
Sometimes we all lack inspiration to create a product of amazing beauty. Or having made a mistake in creation, we don’t take on other products. The main thing is not to be afraid and act. In our master class, we looked at all the main options for creating flowers, and you will find other examples of making flowers with your own hands in the selection of videos below. Enjoy watching!