Star news


What can you make from old T-shirts? New life for old things: Interesting ideas on how to turn an old T-shirt into a fashionable item
For the reader's attention, a new short review dedicated to how you can take and remake old, perhaps no longer needed, T-shirts. After all, there's nothing wrong with finding a use for old, useless things.
1. Fluffy rug

Original fluffy rug, which can be made from scraps of old T-shirts, tied in a special way on a construction mesh.
Video bonus:
2. Bags

Colorful T-shirts that have stretched, worn out or are out of fashion are a great material for creating unusual handbags. For example, from any knitted T-shirt you can sew an original string bag in just half an hour. People who sew well can choose more difficult option and turn unnecessary t-shirts in a beautiful lady's bag.
Video bonus:
3. Necklace

Waste T-shirts cut into strips can be turned into unique, stylish necklaces and chokers. Moreover, there are a lot of options for creating such jewelry. For example, T-shirts can be cut into thin cords and made into a massive necklace-scarf, or thicker strips of knitwear can be woven into an original necklace, which can be decorated with suitable accessories.
Video bonus:
4. Grid

Lots of neat round cuts will allow you to turn an old tunic or long T-shirt into an original mesh dress. After the last cut is made, the T-shirt should be soaked in hot water so that the cuts are rounded and do not unravel in the future.
5. T-shirt with lace

The most ordinary T-shirt can be turned into a trendy item this season by simply sewing a small piece of lace or guipure to its neckline.
6. Original parts

Pieces of organase, lace or lace will help transform old, boring T-shirts. Lace inserts, organza petals, flowers and fabric bows will transform even the most simple t-shirt V exclusive item clothes.
7. Sandals

An old T-shirt, cut into shreds, is perfect for decorating old flip-flops and will allow you to transform them from simple flip-flops into original summer sandals.
Video bonus:
8. Earrings

An old T-shirt or top can be used to create stylish long earrings. However, to create such decorations, in addition to T-shirts, you will also need special accessories, which you can buy at a craft store.
9. Bracelets

From several T-shirts and small amount Using accessories, you can make countless different bracelets.
10. Laundry basket

A plain plastic or wicker laundry basket can be decorated with scraps of old knitted T-shirts, thus turning it into a stylish piece of furniture.
11. Pom-poms

Creative individuals will surely like the idea of turning unnecessary knitted T-shirts into bright ones. voluminous pompoms, which will become an original decoration of the apartment.
12. Fashionable cuts

Give a T-shirt a new look fashionable look original cuts on the back will help. To do this, armed with chalk, you need to outline a diagram of future cuts and carefully cut out all the necessary details. Ready product should be soaked in hot water and left to dry.
Video bonus:
13. Unusual painting

You can refresh a boring plain T-shirt with the help of original painting with an ombre effect. To do this, mix a quarter cup of dye, four cups of warm water and four tablespoons of salt in a plastic bowl. IN ready mixture Gradually lower the bottom of the T-shirt, hold for one minute and rinse thoroughly under running water. And in order to get the original spotted effect, you need to sprinkle the wet T-shirt with the rest of the dry dye, wait until the product dries and rinse again in cold water.
14. Fashionable print

Using special paints, cardboard stencils and a foam brush, you can decorate a nondescript plain T-shirt with a stylish print.
15. Romantic top

Minimal sewing skills and the presence of a sewing machine will allow you to turn a boring plain T-shirt into a charming and very fashionable top with bare shoulders and a shuttlecock.
Despite the fact that it is still cold outside, warm days It's time to get ready. Surely you have quite a few things lying around in your closet presentable appearance, but on various reasons haven't been dressed for a long time. We offer to remake them into stylish and fashionable ones, thereby giving them a new bright life. In search of something fresh and interesting, we have selected a few for you original ideas for updating and altering T-shirts, blouses, shirts and jackets. Let's share! Enjoy watching!
Transforming clothes from old to stylish with your own hands
Simply adorable! Sew a lace strip into the top of the blouse. The idea would also work for a good quality knitted T-shirt.

An interesting model - to widen the back if the blouse has become too tight
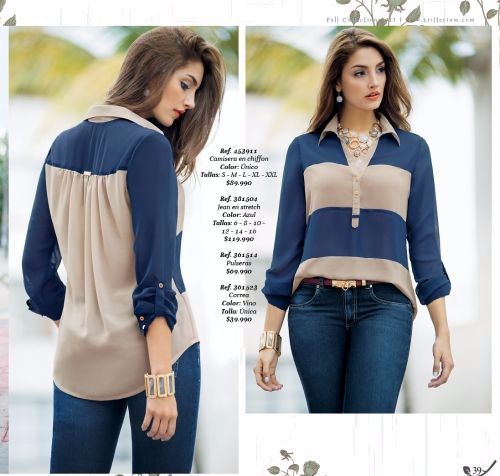
Same good idea: widen the blouse with stripes of contrasting fabric at the front and back

The fashion trend is a polka dot blouse. If the blouse was made of the same fabric it would be boring, but it’s not even bad, it turned out nice

It never hurts to freshen up the look of an old denim jacket or shirt. Especially if denim jacket some years. Denim + plaid is a great combination. Always fresh and original!

We transform old jeans that have become too small into luxurious skirt. In the first option, we only need the upper part of the trousers; in the second, we rip out the trouser legs and sew in ruffles from bright fabric.

Sweatshirt with lace sleeves- wonderful, I’ve never seen such beauty in a store before. So I’ll definitely take it and do it!

Sweatshirt sleeves can be combined with a shirt

Transforming clothes from old to stylish with your own hands

Upcycling knitted t-shirts is a favorite topic. Here's a simple and good idea to transform an ordinary T-shirt into a sexy item. We cut off the elastic (neck), rip out the seam on the sleeve and carefully hem everything. Sew on a satin strip. Simple and tasteful!

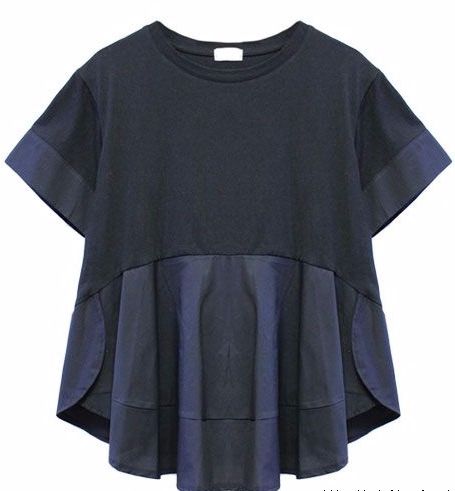
We turn an ordinary T-shirt that was tight-fitting into a chic, roomy item that will look great on a large figure. Simply add silk or fine cotton to the tummy area and sleeves.
We make something original out of two T-shirts. For the alteration, a large one (male) and a small one (female) were used. It turned out to be a cute country or home dress.

How to turn a T-shirt into a dress
And this dress made from a T-shirt is not only for home - you can also show it to the public

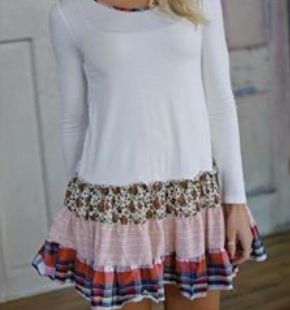
Options to remake knitted T-shirt or a jacket in a dress is a lot. For example, an unnecessary checkered shirt + gray tunic. The main thing here is to choose the perfect color combination so that the skirt and top match.

White jacket and old skirt, for example children's
Yes, as home clothes Fine
We make a fashionable top from a knitted T-shirt with light movements.

Making interesting backs on knitted T-shirts

A lace insert on a T-shirt will elevate and decorate a boring item

With this simple method you can expand a knitted sweater. From experience, it is better to insert knitted lace strips or knitted fabric into a knitted T-shirt.

A knitted sweater, of course, can be lined with regular fabric, but then keep in mind that an insert made of such fabric will not fit properly. Which is noticeable in the photo below. For home normal option, but not very good for the street.

Made from a T-shirt beach tunic. As you can see, everything is very simple

A beautiful idea is to decorate a T-shirt with bright fabric flowers. Just right for kids, especially if there is a permanent stain on their T-shirt

A regular knitted T-shirt can be decorated with velvet ribbons or unusual braid

An old but relevant idea: a T-shirt + a scarf is an attractive thing. Moreover, you can sew all the details by hand, without a sewing machine and problems.

An idea for those who want to feel like a fashion designer - something fit for the catwalk! T-shirt or blouse with chic sleeves.


If the neck of a T-shirt has stretched out and you don’t want to throw it away, you can do this: fold it over and sew it

How to widen a tight neckline on a T-shirt or tank top


A T-shirt with fabric inserts on the sides - we get a completely feminine option that is not at all tight on the stomach

Another stylish makeover for your favorite T-shirt

Making clothes from old to stylish with your own hands: Original alterations of blouses and shirts

How to make from men's shirts child dress
It's very easy to look stylish and modern when you have a gold credit card that someone constantly tops up, and you only wear clothes in branded and fashionable stores. But if you have an average salary and a closet filled with clothes that have long gone out of fashion (but are still in excellent condition), then becoming a “cover girl” is very difficult. Is not it?
In fact, there is a secret that can even turn dad's T-shirt into stylish top from latest collection Alexandra Wang. And for this you just need a little imagination, scissors, a needle and old things.
We offer 35 ideas on how to turn unfashionable, old, boring things into stylish new items, like the girls from fashion blogs.
1. Denim skirt No. 1
We will need:
Long denim skirt with buttons or press studs. It can easily be purchased in second-hand stores
piece of cardboard
chalk or soap
scissors

First of all, we decide how long our skirt will be. Depending on this, we draw a horizontal line on the wrong side.
Cut out a template with a rounded side from cardboard. The width of the template depends on the width of the bottom of the skirt (ours is 10 cm). On the wrong side of the product, applying the template to the line, draw semicircles along the entire length of the skirt. We cut the fabric with sharp scissors, following the intended pattern.
If desired, we can rub rounded edges pumice to create a fringe, or leave everything as is.
Voila! A stylish miniskirt is ready.
2. Denim skirt No. 2

We will need:
The bottom that remains from denim skirt on the buttons
scissors
sewing machine or needle and thread

This is a more complex option. We measure how long we want the skirt to be and cut off the excess top. We measure our waist, hips and cut off excess fabric along the line side seam, and then carefully stitch or sew.
We mark the undercuts and sew them together with a regular needle and thread. Then we make a small lapel at the waist and stitch it or sew it by hand. We fasten the skirt in front so that there is a large slit at the bottom.
The second minimalist skirt is also ready!
3. Stole skirt
We will need:
A large rectangular stole (scarf), preferably made of light fabric, which does not crumble.
thin cord
cardboard
sewing pins
scissors
needles and threads
First of all, measure your waist circumference. Now a little math, but not too complicated)))
Add half of it to this number. This extra length will give us the opportunity to gather the skirt at the waist, easily remove it and tighten it back. Then, divide the number by 3.14. This will be the diameter of our circle that we draw on paper. We draw two cross lines on it that pass through the center to make 4 sectors of the same size.
Here is the formula for perfect waist at 60 cm.
60 + 30 (waist plus half this value)
90: 3.14 = 28.5 (circle diameter)
Cut out a circle from cardboard. Then, fold the fabric in half twice. We apply to inner corner fabric one sector of the circle, circle it and cut it out. We bend the edge of the skirt (along the waist) by 2 centimeters and harden it with pins along the entire length. We cut holes along the fold line at a short distance from each other (5 cm). We thread the lace through all the holes. At the end, we tie knots so that the lace does not accidentally slip out.
And we have a completely new skirt ready!
4. Miniskirt made of stole or scarf

We will need:
Long stole or scarf
Wrap the scarf around your hips once. Then, we turn it over twice from the front and continue to wrap it around ourselves. We hide the end inside.
5. Black dress with a sexy neckline

We will need:
Old dress with high neckline
leather cord
scissors
needles, threads and pins
sewing machine

Draw a line in the front, right in the center of our dress, to create a V-neck. Draw a line from the neckline straight to the waist seam. The neckline can be made either low or high, depending on your modesty. Our version is definitely not for work.
Cut along the line with scissors. We bend the fabric to create a neckline and pin it together. We decide where we want to start our lacing, and from this point we divide the entire length of the neckline into five parts. Mark the points with chalk.
Cut the leather cord into 10 small pieces. We fold them in half, in the form of a loop, and attach them with pins along the cutout on both sides in the places that we marked with chalk. Sew the edges of the neckline to secure the fabric and attach the loops. This can be done manually or using sewing machine.
After all the loops are securely sewn, take a long cord and begin to weave it from the bottom up. We finish the lacing with a small elegant batik.
Sexual Evening Dress ready!
6. Short T-shirt dress
We will need:
Big T-shirt
scissors
rubber
needle and thread

Lay the T-shirt out on a flat surface, trim the sleeves, and then cut in a straight line just below the neckline.
From the sleeves we cut out two rectangles of the same size. This will be the top part of the dress. We measure the volume of the chest and the length of the rectangles, if necessary, cut off the excess.
We connect the top parts with the bottom ones, and then sew the sides of the dress.
We sew the elastic under the chest, at the junction of the parts.
And the summer short dress is ready!
7. Stylish dress with slits on the sides

We will need:
Big T-shirt
scissors
needle and thread
First of all, we cut off the sleeves from the T-shirt, and then cut it horizontally just below the chest. We take into account that the bra does not show.
Then, on the top of the dress in the front we make a small hole. There is a small cut on the lower part of the dress (near the waist). We insert the ends into the hole and sew them together or simply tie them.
Voila! The dress with slits, very fashionable this spring-summer season, is ready!
8. Beach dress from a T-shirt in 30 seconds

We will need:
Big long T-shirt
We put the T-shirt over the neck. We tuck the left sleeve on the right side of the chest, and the right sleeve on the left. This makes a cute off-the-shoulder beach dress.
9. Beach dress from an old skirt
We will need:
Old skirt and T-shirt
scissors
needles and threads
strap

Lay the skirt out on a flat surface and cut off the elastic at the waistband.
We attach a T-shirt to the skirt and cut out along the contour of the armhole and neckline.
We sew the harnesses using a needle and thread. You can use a sewing machine to be safe. We tie it with a belt and the dress is ready!
10. Stylish cocktail dress with a cutout at the belly

We will need:
Old dress
cardboard
sewing machine
scissors
needle and thread

First of all, cut off the sleeves and shorten the length of the dress. We bend the armholes and hem by 1-2 centimeters, press them with an iron and stitch them, or sew them by hand with blind stitches.
Cut out a small triangle from cardboard and trace it along the front center of the dress. We cut through the bottom of the triangle, then make a perpendicular cut up. We bend the fabric and sew all sides of the triangle with small stitches.
Most of the work falls on the sleeves. You need to work hard on them. And then, chic and fashionable Cocktail Dress ready!
11. Dress with fringe

We will need:
Short dress
scissors
floss threads different colors(on average five flowers that match the color of the dress)
bright thin belt
We choose a dress so that the fabric does not fray. Preferably monochromatic. We make small holes along the entire length of the hem and sleeves, at a distance of 5-10 centimeters from each other.
Then, we cut the floss threads into small bunches of the same length so that they easily fit into the holes on the dress. We pull the threads through the holes, alternating colors. We carefully tie each bundle with a thin thread so that it does not fall apart.
We tie the dress with a bright belt and cheerful summer look ready!
12. Skirt and top

We will need:
Long maxi dress
rubber
scissors
needles and threads
pins

First we turn the dress over so that the front becomes the back. Then we carefully sharpen out unnecessary decorative elements using nail scissors (pocket and braid with buttons). Cut the dress into two parts along the seam line at the waist.
We mark how long we want to make the top and hem its edge manually or using a sewing machine.
We take an elastic band, preferably a wide one, and bend the top of the skirt according to its width. Then we hem the waistband so that the elastic can be inserted inside.
After attaching the elastic to a pencil, knitting needle or stick, we pull it through the loop until it comes out the other side. After this, we sew the ends of the elastic and carefully sew up the hole in the belt.
Voila, the flight suit is ready!
13. Balenciaga White Top

We will need:
White long T-shirt with wide straps. Choose from thick fabric so that it does not fray and the edges do not curl
scissors
needles and threads

The first step is to cut out the back from the T-shirt so that its length is a few centimeters below the clasp of our bra. We cut it out, retreating slightly from the line of the side seams.
Then we turn the shirt over front side and mark the middle. Cut along a straight vertical line from the neckline to the very bottom.
We put on the top. We wrap the long ends around the waist and tie them at the back. The upper edges of the neckline can be folded under the bra or hemmed.
The result is exactly the same top as from the latest Balenciaga collection.
14. Short white top

We will need:
Large T-shirt (several sizes larger)
scissors
needles, thread or sewing machine
chalk

Cut off the sleeves from old t-shirt. Then we proceed to the cutout. At this point we need to determine what thickness of straps we want and what depth of neckline. Depending on this, we cut off the neck of the T-shirt.
Then, on the wrong side, draw a horizontal line at the level where our top will end and cut it off. The edges of the top can be hemmed. To do this, you first need to make an overlap of 1 centimeter on all sides. If the fabric is soft and begins to curl a little, leave the top as is.
Voila! The light and cute top is ready. Underneath, you can wear a bright swimsuit, bra or other T-shirt. Ideal for summer holidays or playing sports.
15. T-shirt with a heart

We will need:
Plain T-shirt a couple sizes too big
an old T-shirt or piece of cloth to cut out the heart
scissors
sewing machine
pins
chalk

First, cut off the collar to create a wide-neck T-shirt that falls off one shoulder.
Then, turn the T-shirt inside out and draw a heart. We draw lines inside the heart, at a distance of 2-3 cm from each other. Carefully cut them through.
From the wrong side we sew a piece of bright fabric onto the heart. Then, by hand, we sew each strip of the heart using threads that match the color of the fabric. Trim off the excess and stylish t-shirt ready!
16. T-shirt with bows on the back

We will need:
plain t-shirt in sizea piece of colored fabric or bright old T-shirt
sewing machine
scissors
needle and thread
chalk
We lay the T-shirt back up and mark the place where we want to make the neckline. Carefully cut with scissors. The neckline can go from the throat to the very bottom. It can end in the middle of the back, depending on personal preference.
We make it from colored material required amount bows (minimum 4). Their size directly depends on the width of the cutout on the back. When the bows are ready, manually sew them to the T-shirt, not forgetting to bend the edges of the neckline 0.5-1 centimeter inward. Then carefully sew all the seams.
17. T-shirt with original mesh

We will need:
Wide T-shirt
chalk
scissors
rivets

Lay out the T-shirt on a flat surface, turn it inside out and draw 10 vertical lines on both sides of the neckline at the same level (1-2 cm wide). We cut them and connect the strips in a checkerboard pattern using rivets. Then, we make a vertical cut of 20-30 centimeters at the bottom of one side of the T-shirt. We tie the edges with a knot.
Voila, the T-shirt is ready!

We will need:
Big T-shirt
scissors
Lay the T-shirt out on a flat surface and cut off the sleeves to create large armholes; we cut off the throat, forming a deep neckline, and shorten the T-shirt at the bottom. Don't throw away the bottom border, we'll need it later.
At the back we make the cutout a little larger than at the front. Then we tie the fabric between the shoulder blades on the back with a thin ribbon and wind the border on top, which we cut off from the bottom of the T-shirt. We make an inconspicuous knot and cut off the excess. We shorten the bottom of the T-shirt in front and beautiful summer T-shirt ready!
19. Denim shirt with cutout

We will need:
Denim shirt
scissors
ruler
pen
needle and thread
sewing pins

Turn the shirt inside out and use a pen to mark a horizontal line where we want to make the cut.
Cut the fabric along the seam lines.
Turn the shirt inside out and fold a few millimeters of fabric inward. We pin and sew with invisible stitches. Iron and original shirt ready!
20. Black cut-out shirt

We will need:
Black shirt (or any other color with a turn-down collar and button placket)
scissors
chalk
sewing pins
needle and thread to match the color of the shirt
glue

First of all, we put on a shirt and stand near the mirror to mark with chalk where we want to make the holes. We need to take into account their location so that our bra does not peek out. Once we have marked the hole on one side of the shirt, we need to copy the design onto paper so that we can then transfer it to the other side and get a symmetrical look.
We cut through the fabric, retreating 1 centimeter from the intended pattern. We make small cuts along the entire edge of the resulting cutout. To avoid wrinkles, it is best to sew on a mannequin or put the shirt on a pillow and pin it at the back. We sew with blind stitches along the entire length or glue with glue if you don’t want to sew. Finally, iron the edges and the shirt is ready!
21. Shirt with a cut-out back

We will need:
Oversized shirt
scissors
needle and thread

Turn the shirt inside out and mark the line where the neckline will be. Carefully cut with scissors along a line from one shoulder to the other.
We bend the edges 1 centimeter and stitch or sew with threads by hand. We retreat 5 centimeters on both sides and make a few stitches to fasten the top and bottom part backs of shirts.
Voila! Stylish thing ready!

We will need:
Plain button-down shirt with turn-down collar
beads of at least two colors
scissors
needle and thread

Lay out the shirt on a flat surface and sew the beads to the collar in a chaotic manner.
23. Sweater with an open back

We will need:
Sweater or sweatshirt (choose from a material that will not stick out or fray)
Velcro or button
scissors
needle and thread

Fold the sweater in half vertically and mark the middle. Then, cut it along the back in a straight line. We sew Velcro or a button on top so that the sweater does not undo itself. If desired, you can fold the edges, press them and sew them with blind stitches.
24. Original sweater

We will need:
Sweatshirt
colored tape
sharp scissors
needles and thread

First of all, we cut off the neck of the sweatshirt so that we get a fairly deep neckline that falls from one shoulder.
Then, using scissors or a cutter, we make about 15 rows of small holes at a distance of 1-1.5 centimeters from each other. The holes should be located at the same level. Their number gradually decreases, reaching bottom rows.
We put tape in the holes. The ends need to be sewn with several hidden stitches to the sweatshirt or simply tied with a knot.
That's all!
25. Sweater with patches on the elbows

We will need:
Sweater
shiny fabric or sequins
scissors
needle and thread
paper and pen

We use our hand as a template. We trace it on paper, forming an oval and cut it out.
We apply the template to the shiny fabric and secure it. Cut out the patches. We make sure that they are same shape.
We pin the patches to the sweater to make sure they are in the right place. Using internal stitches, carefully sew the patches to the sweater.

Patches can be of any shape and from any material.
26. Stylish T-shirt scarf

We will need:
Old T-shirt (the larger the better)
scissors
ruler
chalk

Cut off the hem of the T-shirt. Then we draw horizontal stripes on the wrong side, 2-4 centimeters wide.
We get a lot of rings, which we stretch one by one until they begin to curl inward.
Cut the hem of the T-shirt to create a long ribbon. We collect all the rings together and wrap the hem tape several times to secure the scarf. We tie it into a knot, cut off the excess, and tuck the ends under the ribbon.
The unusual scarf is ready! Looks great with long hair or a messy bun.
27. Bright jeans No. 1

We will need:
A pair of jeans
thin brush
paint or corrector
paper
First of all, we decide what kind of pattern we will apply to the jeans. We outline the places where the pattern will be located. Then we cut a stencil out of paper. We apply it to the jeans and very carefully paint over it with paint or corrector so that it does not spread beyond the boundaries of the stencil.
28. Bright jeans No. 2
We will need:
A pair of jeans
cutter
wooden board
sandpaper
marker
We lay the jeans out on a hard surface and mark the places where we want to make abrasions. Then using sandpaper, lightly rub these places.
We put a wooden board inside the trouser leg so as not to cut through the jeans and arm ourselves with a cutter. Making horizontal cuts different lengths at a distance of several millimeters from each other. At the end, we paint over the threads with a regular marker, bright color.
29. Fashionable skirt, shortened in front

We will need:
Long no pleated skirt
scissors
needle and thread
iron

Fold the skirt in half so that the curve runs through the center of the front. Place it on the floor and cut out a piece so that the mini-part smoothly goes to the bottom.
Every time we put on a skirt and see what happens. If necessary, we level it, because it is always better not to cut off than to cut off too much. Once we are satisfied with the long and curved line, we bend all the edges by 1 centimeter and smooth it with an iron.
Then we sew the edges of the hem with small stitches, using threads that match the fabric. At the end, we go over all the seams again with an iron.
Stylish skirt ready!
30. Denim overalls

We will need:
Denim overalls
scissors

We measure the overalls and note how long we want to make it. We cut off the legs not in a straight line, but with a slight rise to the top. Then carefully cut off the pocket on the chest.
To make the jumpsuit look modern, remove the buckles. We shorten the harnesses and make a hole at the end for a button. If desired, the edges of the shorts can be hemmed.
31. Gladiator sandals

We will need:
Sandals toe
long leather cord or thin tapes(4 meters)
scissors
glue

Sandals will look much more natural if you pull the lace through an existing hole.
We cut the cord into two even parts of two meters each. We pull it through the hole and glue it underneath if we don’t want it to slide into different sides.
Then we simply weave it along the foot tightly enough so that the lace does not fall down, and symmetrically so that the sandals look beautiful. We weave as high as we like and end with a small bow at the back.
32. Cat shoes

We have to:
Ballet flats (preferably plain with a round toe and sufficient quantity seats in the front)
black paint (acrylic), black marker
tassels
masking tape
white paint and white marker
First, cover the shoes with tape, tightly enough so that the paint does not bleed through.
We paint the socks with black paint to make it even color, without light spaces. When the paint is dry, remove the tape and draw small triangles for the ears. You can also use masking tape for this if it doesn’t turn out very smooth by hand.
To draw the eyes, use white paint, a marker or a corrector. With its help we draw a thin mustache and nose.
And voila! Last fashion trend appeared in our wardrobe!
33. New flip flops

We will need:
A pair of the most ordinary flip-flops
ribbon, matching shoe color
beads and beads suitable color
needles and thread
We wrap the flip-flops with tape and sew the tip at the bottom so that the tape does not unwind.
We sew beads and beads in a chaotic order with a thread of the same color as the ribbon.
In half an hour, stylish flip-flops are ready!
34. Freshening up black shoes

We will need:
A pair of black shoes, with a rounded or pointed
masking tape
brush
white and neon yellow acrylic paint

Cover the shoes with masking tape. Carefully smooth it out so that the paint does not leak underneath.
First, make one layer of white paint and let it dry for several hours. Then we paint it yellow. We remove too pronounced strokes and let the shoes dry a little.
Wet your fingers with water and run them over the paint to smooth out any rough edges and lines. We remove the masking tape when the paint is not completely dry, and then leave the shoes overnight.
Voila! And you get trendy shoes from your old, boring pair.
35. Sports bag

We will need:
T-shirt with bright print
sewing machine
scissors
Cut off the bottom border of the T-shirt and remove a little from the sides. We sew all sides on a sewing machine.
It turns out beautiful sports bag or a bag for going shopping.
36. New hat from an old sweater

We will need:
· unnecessary sweater
· finished hat (for template)
· scissors
thread, needle

Choose a sweater with elastic at the bottom edge. We cut the blank from the bottom of the sweater so that the elastic rests on the forehead, and one of the edges of the hat falls on the seam of the sweater.
Using the finished hat as a template, we cut off the upper part of the workpiece. Sew the top and side edges from the inside with a triangle.
Don't throw away any leftover sweaters! You can make a lot more out of them.
37. Sweater boots

We will need:
· sweater
· slippers
· sewing machine
· threads
glue gun
· decorations

Take measurements along your leg and cut out blanks from the sweater. Sew the side and top edges of the boots using a machine.
Having threaded the slippers into the bottom of the blanks, glue them using glue gun.
Finished boots can be decorated to your taste. For example, buttons or embroidery.
38. Ballet tutu (without sewing)
We will need:· unnecessary tapes
· wide elastic band

Make a belt from an elastic band. We thread the ribbons through, tying them in a knot at the waist.
To make the pack more voluminous, we make several layers of ribbons, repeating the rows.

We will need:
· long T-shirt or tank top
· scissors

Cut the bottom of the T-shirt into equal strips. We tie the strips, following the sequence in the photo.
40. Bag made from old jeans

I really love denim clothes. Breaking through a couple of bags of old jeans, you find a whole source of inspiration for creating new things. Sturdy material (which, by the way, never goes out of style) makes cute wallets and bags. Here is one of the options for creating unique bag from jeans.
We will need:
· jeans
thread with needle
· trouser belt
· piece of colored material
Cut off the top of the jeans with the pockets.
Sew fabric from an unnecessary colored dress or skirt to the bottom edges. Sew the bottom of the bag. We make handles from the belt.
41. Beach bag with fringe from a T-shirt (no sewing)

We will need:
· t-shirt
· scissors
· ruler
· chalk or marker

Having straightened the T-shirt, cut off the collar and sleeves.
We make cuts on the bottom of the T-shirt. You can use a ruler and chalk to draw identical stripes.
We tie the fringe as tightly as possible so that nothing spills out of the bottom of the bag.
42. Tie maxi skirt

You can make something out of old ties long skirt in hippie style.
We will need:
· ties
· threads
· sewing machine
· belt from an unnecessary skirt
We sew the ties at one end to the belt and sew the sides of adjacent ties together.
43. Tie miniskirt

We make a miniskirt in the same way as a maxi. You just need to cut the ties to the required length.
Voila! The sexy bright skirt is ready.
44. Unusual decoupage shoes
Using the decoupage technique, you can hide scuffs and cracks on your favorite shoes.We will need:
· shoes
· PVA glue
· scissors
· paper with drawings

Cut out the necessary figures from paper.
Apply PVA to the surface of the shoes (you must first clean and dry the shoes).
Since PVA dries very quickly, do not apply glue to all shoes at once. Apply it in sections. Having finished laying out the drawings in one area, move on to the next.
When the pictures are dry, you can show off at parties in unusual shoes.
45. Light summer sundress made of scarves

We will need:
· two large scarves or pareos
· ribbon
· threads
· sewing machine

We form a blank from scarves by folding them in the right way. For example, by forming a bodice from the corners of scarves.
We sew ribbons to the corners, the ends of which are secured to the back. We sew the sides of the scarves.
46. Gloves made from socks

We will need:
couple of socks· scissors
thread with needle
· decorations

Cut off the toe and heel of the socks.
To prevent the fabric from unraveling, we sew the cut areas with thread. We tuck the edges - the gloves are ready.
You can decorate them with bright appliques, embroidery or beads.
47. Stylish summer dress made of a baggy sundress

We will need:
old sundress
· tailored dress
· scissors
· threads
· sewing machine
· chalk

Choose a dress from your wardrobe that fits you perfectly. Using this as a template, place the dress on the front of the sundress and trace with chalk. We repeat the steps with the back.
Cut out the trim and sew the edges.
You can use leftover fabric to create a belt, bow, or fake pockets that will decorate your new dress.
48. Maxi skirt dress (without sewing)
We will need:· long skirt
original belt

We put on the skirt at chest level and tie it with a catchy belt. Ready!
Plus the dress: it quickly turns into a skirt.
49. Plaid poncho coat
We will need:
· plaid
· plate
· blade
· chalk
thread with needle
· belt
![]()
Lay the blanket out on a flat surface and fold it in half.
Place the plate over the neckline and mark a semicircle with chalk. Cut out excess fabric. Cover the collar with thread so that the fabric does not unravel.
At waist level (at the front of the blanket only), mark two slits with chalk and cut them with a razor blade. Sew the cuts with thread.
Insert the belt into the holes. The coat is ready!
50. Burberry scarf coat in a hurry
Burberry is fashion fabrics with an original checkered pattern. Finding such a scarf will not be difficult.We will need:
· Burberry scarf
· chalk
thread with needle
· blade
· buttons

Drape the scarf over your shoulders and mark with chalk where you want to sew buttons. Sew on the buttons and carefully use a blade to make holes for them on the opposite side. To prevent the fabric from unraveling at the cuts, stitch their edges with thread.
The advantage of this coat is that it is a transforming item. With a slight movement of the hand, the coat turns into a scarf again!

We will need:
· sweater
thread with needle
· chalk
· decorations

Turn the sweater inside out. Straighten the sweater, place your hand on the side and trace it with chalk. Repeat with the other hand on the opposite side of the sweater.
The blanks should be a little larger required size. Cut out the blanks and sew the edges.
After trying on, cut off the excess edges and turn the mittens inside out so that the seam is on the inside. Ready-made mittens can be decorated to your taste.
52. Unusual scarves from dresses

We will need:
· dress
· scissors
· costume jewelry

Cut off the hem of the dress. Cut strips on the bottom of the fabric.
Tie the ends of the strips at the bases into knots. However, this is not necessary, because the scarf already looks original.
The new thing can be decorated with a brooch or other jewelry.
53. Dress made of sundress and T-shirt

We will need:
sundress· T-shirt
thread with needle
· wide belt
Cut off the top of the sundress and sew the hem to the T-shirt.
A wide belt will not only complement the outfit, but will also highlight your waist.
The top can be decorated with a bow from the remains of a sundress.
54. Sexy lingerie made from a simple bra

Prices for beautiful lingerie can cause depression. And I really want to always be on top. Well, don’t despair, you can make an erotic bra with a minimum of effort.
We will need:
· bra
Packing of rivets for fabric
· pliers or manicure set 
Pierce the fabric of the bra with the sharp edges of the rivet so that the point comes out on the opposite side.
Gently bend the ends of the rivet with pliers.
Form the desired pattern.
55. Mesh from an old tunic

We will need:
tunic (cotton)· scissors
· basin with hot water
Cut out circles of fabric from the tunic.
Soak in hot water (this will curl the edges of the cuts and prevent the material from unraveling). Please note that you can only do this with clothes that fit you loosely. Cotton shrinks in hot water.
Dry it - ready! So easily and quickly a simple tunic turns into a seductive designer outfit.
Don't be afraid to experiment and be bright!
Good afternoon friends!
Today I have ideas for you on what to make from old T-shirts. After all, we have a lot of this stuff stored at home, and it’s a pity to throw away T-shirts that are worn or too small. So let's empty the cabinets and do original pillows, baskets, bags, rugs and other things made from old T-shirts with your own hands.
What can you make from old T-shirts? Ideas. Photo
From old T-shirts, like from other clothes, you can create many new products.
For many centuries, people have made rag rugs from scraps of fabric and old clothes. In modern times, of course, everything is available and can be bought. But handicraft and creativity are in fashion more than ever, and you can be proud of things you have made with your own hands, into which your soul has been invested and your creativity has been revealed.
In addition, this is also budget saving, and rich is not the one who has a lot of money, but the one who knows how to save and manage it correctly.
Here is just a small list and photos of what can be made from old T-shirts:
Pompoms are made from knitted yarn in the same way as from wool, by winding the yarn on a cardboard circle.
Ideas for decorating pillows with knitted flowers can be found here>>.
You can try to make a pillowcase from a whole T-shirt, and craftsmen make bags.
But even more interesting, in my opinion, are crafts made from yarn cut from an old T-shirt.
Such things can be knitted very quickly, literally in a day.
Moreover, the manufacturing methods can be different, not only crocheting, but also methods without a hook. Let's look at them in detail below using the example of making rugs, bags and baskets.
In the meantime, I’ll tell you about the kind of pillow I sewed.
Pillow made from an old T-shirt
I had a favorite knitted T-shirt, but I had completely outgrown it, so I decided to use it for a pillowcase. sofa cushion. The idea was sitting around and waiting for inspiration until I saw a photo of an interesting pillow made of fabric combined with a knitted insert.
Thus my new pillow was born. I’ll tell you now how to make a pillow from an old T-shirt.
In principle, nothing difficult.

Now I have this bright pillow made from an old T-shirt.
How to make yarn from knitted T-shirts
To knit or weave rugs and other products from old T-shirts, we will need to make yarn from them.
Yarn from a T-shirt is essentially ribbons cut from it, the width of which is 10-15 mm and does not have to be even and the same along the entire length, so there is no need to measure or draw anything.
You just need to cut ribbons from the T-shirt, moving in a spiral.
You can see how to do this better and more conveniently in the presented video tutorial from Marina Ryabova:
We carefully wind the cut ribbons loosely into skeins, without tightening the yarn, which already tends to stretch.
We connect short pieces of ribbons together in the following way.
- We make small holes at the ends of the two ribbons.
- We pass one ribbon through the hole on the second ribbon.
- We insert the opposite end (without a hole) of the second ribbon into the hole of the first ribbon and tighten the yarn.
To be honest, I don’t really like this method, because there are still holes left here. When crocheting rugs, this connection can still be used, but for more elegant products better yarn sew with a needle and thread to match the yarn. And during the knitting process it will only be possible to sew ribbons of yarn.
The ends of the overlapping ribbons should be sewn carefully along the edges in a straightened form. Then the tape will shrink and the seams will remain inside it.
Bags made from old T-shirts
Beautiful bags can be crocheted from yarn cut from old T-shirts of different colors.

And there is more interesting way creating a creative summer beach or shopping bag.
For this we need a ready-made basket, the kind we use for household needs.
We cut the yarn from T-shirts into small strips of equal size and tie each one, inserting it into the holes of the basket, simply wrap the handle with ribbons.
Makes an adorable shaggy bag from an old T-shirt!
Basket made from an old T-shirt
A basket made of knitted yarn can also be crocheted in the usual way, here’s how Easter basket, For example. By the way, a great idea for a holiday! Take a thinner hook so that the knitting is tight and the basket holds its shape.
There is another option, also crocheted, but using knitting yarn - acrylic or cotton, you can just use the leftover yarn.
In this case, the T-shirt ribbons will remain inside the yarn loops. I think that the principle of such knitting will be clear from the photo.

Rugs made from old T-shirts
Perhaps for rugs made from old T-shirts there is greatest number manufacturing methods. And they are very popular now.
These rugs are light, soft, wash well, and the yarn is inexpensive compared to expensive cord.
And you can knit rugs not only round, but also of any other shape, even in the form of napkins.

Crochet rugs
Since yarn from old T-shirts is quite thick, the size of the hook for knitting rugs should be about 8-10.
The most simple circuits you can use it for knitting rugs from here, where you can also learn more and watch a video on how to knit a rug from old T-shirts.
The unusual yarn itself gives them a beautiful effect.
And the second option for knitting rugs from T-shirts is the same as when knitting baskets using regular knitting yarn.
Rugs without hook
What is especially noteworthy is that rugs from old T-shirts without a hook can be made, that is, not by knitting, but by weaving and even embroidering!
Weaving rugs
First way. Rug made of braids
We connect two ribbons: we sew one in the center of the other (see photo).
We have three ends on which we will weave a long braid.
Then we lay the braid in a spiral in a circle, at the same time sewing it with a zigzag on a machine, or with blind stitches by hand.

Second way. Weaving rectangular rug on the frame
Here we need additional device– frame.
We stretch vertical strong threads on it or the same ribbons from old T-shirts.
And then we weave ribbons between them horizontally.

Check out other interesting home and garden decor ideas using the weave method.
Third way. Round mat on a hoop
Weaving is similar to making a rug on a frame. But only a round frame is probably problematic. The craftswomen came up with the idea of using a hoop instead.
Additionally, you need to cut out a circle from cardboard, draw diagonals on it closer to each other, cut the circle along the diagonals from the edge of the circle and in the center.
Then place the cardboard circle in the center of the hoop and stretch the threads, pulling them through the cuts and through the center, and attaching them to the hoop.
And then ribbons from old T-shirts are woven between the stretched threads.

In my opinion, it is a labor-intensive process, but for information it is necessary to mention it; someone may need to weave a rug in such a creative way.
Rugs on mesh
You can even make fluffy rugs from old T-shirts.

I have already talked about this method of tying threads using the example of fluffy pillows.
These rugs are usually made on a construction or garden mesh.
The hook in this method of creating rugs is used only as an auxiliary tool for pulling up the yarn.
Bargello style rugs
Now we come to the last version of rugs made from old T-shirts, which I like best, and this is a relatively new idea.
This method is beautiful embroidery bargello. But if delicate work on embroidering pillows, tablecloths and other elegant things requires special skill and a lot of time, then embroidering, or rather stretching, thick knitting yarn It's much easier through the mesh.

Double-sided tape is used to secure the ends of the tapes along the edges of the mesh.
Well, that’s all about what you can make from old T-shirts with your own hands, my thoughts and ideas. What did you like, what did you want to do, what other ideas and advice do you have?
Best regards, Olga Smirnova
Check out others creative ideas for needlework:
- What to make from an old sweater: ideas, photos, how to sew
- DIY creative curtains for your dacha
- Stylish things from old jeans
- Elegant decor from old tulle
- Beauty and elegance. About burlap crafts
Whether you've decided to start spring cleaning or are just sorting through your clothing stash, a pile of t-shirts should make you smile from ear to ear. You wouldn't believe the number of ways you can transform a classic T-shirt - everything from woven accessories to woven throws, maybe one day you'll cut off a piece of fabric the right size and start weaving. The following are 50 things you can do with old T-shirts that should definitely spark some inspiration for you to think about before you pigeonhole them and give them to your little sister to wear.
Accessories from an old T-shirt
- To make this simple round scarf, which does not require sewing, must be cut out under the sleeves and trimmed with fringe along the edges. You can make an effort by adding knots to the fringe, for example, to make the scarf look professional.

- Braided wooden bracelet. Adding large wooden beads to the t-shirt, wrapped into a bracelet, takes it up a notch.

- Official necklace. Make a statement with a gold hoop and strings woven from a gray, blue or black t-shirt.

- Braided sea necklace? There is an exit! Electrical tape adds a nice touch cool shade to these neat accessories.

- Want to try the turban trend? Try making one of these from a T-shirt - roll it up and tie it into loops with strips of 18-20 cm.

- You're intrigued by this style because it's half scarf, half necklace. The scarf includes two tassels for a colorful look, or you can hold them high and tight, like a bib.

- Patterned bracelet, wrapped around the hand. Proof that strength comes when you weave a T-shirt into a patterned bracelet that you can wrap around your arm.

- Who knew that burlap could turn into a sought-after and roomy item? We love how the tee brings new life to this country bag. Use fabric paints to create geometric shapes or other patterns to add extra appeal.

- A hole in your favorite T-shirt? Don't just toss it into the rag pile—cut it up and turn it into a stunningly formal accessory.

- Make your own cocktail ring. Add a folded fabric flower as a simple accessory, like leather gloves.

- We believe that hardware stores- girls' best friends. Just look how chic these t-shirts are, decorated with pieces of metal pipes.

- Have you ever thought that a colorful T-shirt could become a bag? We are here to tell you that dreams really do come true. Add this project to your weekend “to do” list.

- Turn a piece of your classic t-shirt into a versatile headband that will add some flair to your cardio workout hairstyle.

- Fringe for a skirt made from pieces of a T-shirt? It's so funny!

- Let us know when you're done ogling this golden gorgeous polka dot scarf. There's no rush.

- Super cute idea: use t-shirt fabric to make fancy pendants. We love the special added contrast with the stitching, it can even bring it to a party.

- We promise you'll get plenty of ways online to use a T-shirt as a woven belt. Try our option!

- Here's an ingenious way to breathe new life into beaded jewelry. The T-shirt fabric tightens perfectly around each thread embroidered bead.

- Instead of weaving a formal necklace out of scraps of fabric, add a few strands of chains - the results will amaze you.

- You would definitely get cozy in this scarf any time of the year. Let it hang loose when the sun is shining, wrap it around your neck, or keep it away from places where you get cold.

- You are beautiful enough with this clutch made from a T-shirt. Unusual design, right?

- We're obsessed with color combinations, so of course we'll go ahead and make a three-color circle scarf! Technically this was done with a sweater, but you can use the same method with a t-shirt. Don't be shy, be bold.

- The secret is out! The amazing chevron pattern on this t-shirt necklace was created using dyed dried pasta. Incredible!

- They come in cheap discount stores with a fashionable (and comfortable!) woven T-shirt strap.

- Sea necklace take two! We can imagine this swinging necklace in the style of some faraway houses.

- Five loops and three strips of Velcro tape are all it takes to turn a T-shirt into a durable case for your iPad.

- Twisted clutch with pattern " crow's feet" Bend a rope mess into this travel clutch. And the houndstooth pattern is totally respectable.
Home products made from old T-shirts 
- Dangling fabric looks dreamy in this lantern field: what a cool way to salvage white t-shirts!

- Support for flowers in the shape of a heart. Knit a heart from an old neon T-shirt? Why not a knot? You must do this.

- Give your feet comfort, because this “rag” is a carpet. It may be the coziest thing you've ever had at your feet.

- Take a closer look: These eye-catching neon vases were made from a T-shirt! We fell in love with them at first sight!

- This striped crochet pillowcase is perfection. We would certainly do everything to decorate the entire sofa in this style.

- Round pompom. Add a special touch to your giveaway party with a pom pom made from a T-shirt. Trust me, people will want to figure out what the pom pom is made of as much as possible!

- We're obsessed with these gorgeous tapestries that add intricate character to any modern house. Add extra charm with a string of metal beads.

- . Wow! The ombre look of the spiral rug is something. Plus, this piece of decor is made by your own hands. Your toes will be very grateful for this design.

- What room in your home couldn't use neon brushes made from a T-shirt? Here's what we thought: They can be used in every room!

- Add some warmth to your bed by dimming your table lamp with a knitted shade. This may be the key to consistently sweet sleep.

- If you're starting your wardrobe from scratch, then this mega t-shirt basket is definitely for you! We're amazed by its fabulously random color palette.

- Yes, the above method of weaving a basket can perhaps be mastered by beginners. So, start with a spiral coaster! Set up this small scale project before your next dinner party.

- Come closer: Pet house made from T-shirt scraps? Brilliant!

