Star News


How to decorate a Christmas tree with cones. New Year's crafts and toys from cones
And of course, do not forget about the beautiful Christmas tree. Earlier, I devoted a separate article to this topic. And now I propose to make a Christmas tree from cones on your own, with your own hands.
This is a very exciting activity. And most importantly, you will get a great result. Of course, you need to do everything with your family, because this is a family holiday. Therefore, call the children, moms and dads and let's start crafting!
The most common method for creating a Christmas tree is gluing cones to a cone. The fastest way to make it is from thick cardboard (sheet A4). There are several options for its formation. I'll show you two of the neatest.
For the first method, let's take:
- cardboard,
- scotch,
- pencil,
- stapler,
- scissors,
- centimeter tape (compass).
We take a sheet of cardboard. With a centimeter tape or compass, we measure the short side of the cardboard.
Then we apply the beginning of the ruler to one corner and mark the desired size from it along the entire width of the cardboard. We connect the marks with a pencil - we get a semicircle. Cut out this piece.

From it we turn the cone and fasten the seam in the wide part with a stapler. We connect the top with tape.
Now we make the bottom of our Christmas tree. To do this, take the cone and put it on the rest of the cardboard. We cut out the resulting circle and pierce a small hole in its center with scissors.

Then, using adhesive tape, glue the bottom to the base of the Christmas tree. We glue the bottom tightly so that the cone does not stagger and does not go to the sides.

Insert a sushi stick, knitting needles or skewers into the hole.
For the second method, take:
- cardboard sheet,
- compass,
- glue,
- ruler,
- scissors.
We measure the narrow side of the cardboard with a compass and set aside this value from the corner.

Cut out the resulting piece.
Now we measure 5 ml from one straight side of the part with a ruler and mark this line with a pencil. We will bend it.
From the top and bottom we make two oblique cuts so that the edge easily curls inward.

Then we coat this part with hot or any other glue and turn the cone so that the adhesive part catches on the second side.
That's all the cone is ready.
Now you can put cones on hot glue. For this, any, spruce and pine, are taken. But pine ones are longer and they are not as convenient to decorate as spruce ones.

We glue the material on the entire surface of the cone.
If you add decor to the cones, then you can glue them in a chaotic manner, but if you use only this material, then follow the order of the rows. Also, you need to glue the cone on all sides at once, distributing the material over the entire surface. Otherwise, you just might not have enough cones.
Options for using cones:
- Glue whole cones.
- Cut the cone along with secateurs and glue these halves. This is useful when there is little material or you like the clear shape of the Christmas tree.
- Cut the cone across and glue its parts.
- Gut the cone into scales or inflorescences and use them.
The bottom is always glued first. Follow the rows, so the craft will look neater. Move from the bottom wide edge of the cone to the top.

Then it remains only to decorate.
If you want to make a stand, then for this purpose you can use flower pots, small flat jars, the bottom of a plastic bottle, caps from varnish or hair foam, etc. In order for the stand to hold the Christmas tree well, it can be filled with alabaster, gypsum, polyurethane foam or plasticine, iron coins for weighting.
You can also use foam cones. You can also trim them yourself if you have a piece of the right width on hand or buy it in craft and craft stores.
So that the cone does not shine through with its whiteness, glue it with corrugated or kraft paper. Or you can wrap it with burlap.

And see how you can assemble a Christmas tree on a cone from the scales of a cone and its branches. For example, from pine.

From spruce. We divide the cones into scales or small inflorescences. We begin to glue them onto the cone with hot glue.
If you have scales, then you need to do this from the bottom up. Spread the scales in rows. If you just have small parts, then you can glue them both up and down and generally randomly.

Here's what happens.

And in this master class, you can clearly see that parts of the cone are used.


Of course, this is a very painstaking business, but also very interesting!
Do-it-yourself sisal Christmas tree for kindergarten
Sisal decor is very simple and beautiful. This fiber is now sold in stores for decoration and crafts. And it comes in completely different shades. Balls from it are made very simply - they roll by hand. Therefore, such a craft can be done with a child and taken to kindergarten.

Let's take:
- paper cone,
- several types of sisal,
- hot gun,
- bumps.
We separate small parts of the fiber from the sisal with our hands and roll them into balls.

We try to make them the same.

Then we attach cones to the cone in different places, leaving room for sisal balls. In this space we glue our balls.
You can decorate with beads, ribbon bows, Christmas tree beads, decorative berries, etc.
Christmas tree made of cones and balls
Now let's look at how else you can diversify the bumps. Of course Christmas balls. To do this, you need to take the balls a little less than the cones. It looks prettier that way. Sizes should be chosen miniature so that they do not spoil the overall shape of the Christmas tree.
And we do everything as usual. Look at the instructions.

Balls can be glued to a cone or put on branches.
See how the decor was originally placed on the base.

You can also play with shapes.


Choose balls according to the general tone of the craft. Bright ones look more elegant, but pastels are more stylish.


Balls go well with a garland and other elements of the New Year - gifts, inscriptions.
Christmas craft "Herringbone" of cones and walnuts
Walnut shells are very often used in crafts. It has a pleasant relief, as well as small size. But I suggest using the whole nut completely, because we will make the Christmas tree without a base cone.

Let's take:
- walnuts,
- cones,
- thermo gun with glue rods.
We will not use a cone, but simply start gluing the cones to each other, forming a circle.
The biggest fruits go to the bottom.

Starting from the second row, we slightly reduce the number of cones, and also alternate them with nuts.

And we make row after row, observing the shape of a cone.

Attach a cone to the top. Don't feel sorry for the glue. The structure must hold up well. More glue may be needed for nuts.
If desired, the Christmas tree can be painted with balloon enamel or decorative elements can be added.
Christmas tree ideas from cones and oranges (dried citrus fruits)
Now the fashion for everything eco-friendly. What can we use based on this trend? dried fruits - candied fruits, shells, pods and sprigs of spices (cinnamon, vanilla, star anise, cloves).
But also in winter it is very easy to make candied fruits from citrus fruits. Moreover, this is just an orange-tangerine season.


Pieces of lime, tangerine or orange can not even be dried, but only slightly dried. This is necessary so that the juice dries up and does not drip down the Christmas tree. But what a fragrance comes from it.


Looks very elegant and expressive!
How to make crafts with acorns for the New Year
A very beautiful Christmas tree is obtained if acorns are added to the main material. They have a smooth surface and look beautiful after staining. Usually no one from the first time can guess what is added to the cones.

Let's take:
- cone,
- acorns,
- cones,
- thermo gun,
- paint.
We will make the base of cardboard in advance, as described above. We will not make the bottom or put it in a pot.
Now let's start decorating. We will put all the elements on hot glue.

It turns out such a preparation.

If you silver or gild acorns, then it will not be noticeable at all that they are. It will give the impression that these are Christmas decorations.
Craft for beginners, video mini Christmas tree
Also for beginners and for small children, I offer lightweight versions of this green beauty.
The video details the process of making a Christmas tree from just one thing.
A similar process is shown in this step-by-step photo.

And also some more interesting ideas for you.


I also like this option. It is very original in that the cone "stands" on a saw cut tree.

Such mini crafts can be a great present for the New Year, if made with a soul.

And also a very concise version of crafts. Simple, but style and taste are felt.
Christmas tree made of cones and tinsel to school
A very simple version of crafts from cones and tinsel. It is done in an hour, and with dexterity it will take even less time. Even a small student will cope. It is important to buy tinsel in combined shades in advance: blue, green, silver, etc.

So let's take:
- tinsel,
- cones,
- Styrofoam,
- thermal gun,
- acrylic paint,
- paper cone.
First, we divide the foam into particles, they will imitate snow. And glue them on the bump. Didn't find foam? Then skip this moment.
Glue the cones onto the cone in a spiral.

Glue tinsel between them, also in a spiral. You can take one fluffy one or several multi-colored ones, it depends on your desire.

Now we take the most beautiful cone in your opinion and paint it in white acrylic paint.

Glue it to the top.
Master classes from branches and cones
And now it's time to see how you can make a Christmas tree with branches. We will consider two master classes. For the first, we need live spruce branches. And for the second, take a vine or dried tree branches.
For master class number 1, take:
- pots,
- cellophane,
- floral sponge (oasis),
- spruce or pine branches,
- cones,
- tinsel,
- wire.

Cellophane should be placed in the pot. In which we will put a damp sponge. This is necessary so that the branches do not dry out longer. If desired, the pots can be decorated with tinsel.

We mark the diameter of the planter and cut out the same size from the oasis so that it fits in the planter.
Now insert the oasis and give it the shape of a cone.

Insert branches into it.

We insert the longest branches at the base, then reduce their length. And closer to the top we insert very small and short branches.
We make a loop from the wire and wrap it around the cone. Then we insert the edge of the wire into the sponge.
For master class number 2, take:
- branches (vine),
- thick rope,
- thermal gun,
- cones,
- decor.

The first step is to make a round base from the branches. For this we take branches. They should not be overdried, otherwise the circle will not work. Therefore, it is better to look for a vine or prepare material in the fall.
Then we take 7 branches of the same length - these are the stiffeners of the cone. And we braid them with a vine. Can be fixed with hot glue.

We are trying to braid all the stiffeners to the very top. If you have a thick rope or twine, then you can alternate rows with them.

We fix the bottom with hot glue or coat with silicone. This is important so that our tree does not unwind back. We also coat it from top to bottom in different places.

Let's move on to decor. Of course, we will not do without cones. We glue them in a random order. For decoration, let's take more natural material: vanilla sprigs, walnut shells, etc.

The final step is to glue the beads and other decorative elements. it can also be entangled with a garland.

Well, it's time to show you a lot of different ideas.


See how you can combine spruce and pine fruits.


Cones are very easy to color. And if you have paint that is not water-soluble, then the Christmas tree will feel great on the street.


Use of different arrangement and different size of material.


Well, my dear, are you inspired? I am sure that I will get a positive answer)) All the best and bright to you!
Don't miss the pine cones! This is the perfect piece for Christmas decor. Crafts from cones, created with your own hands, will give the interior a special comfort. What style is best for them? What compositions to come up with? In our review - 25 ideas!
We invite you to consider interesting and simple options for crafts from cones. Today we will tell you how to create New Year's compositions without much effort and financial costs.
Each style has its own
Cones are a natural material. They conserve natural energy. Making crafts from cones with your own hands, you create warmth and comfort in the house. Cone decor looks best in an interior where there are many natural raw materials, for example, in eco-style. The main criterion in such decoration is naturalness and simplicity.
You have a Scandinavian-style interior - wonderful. To create a Christmas composition, you need to take some cones and arrange them around the candle. In combination with a wooden box and antlers looks perfect.
A vintage chandelier is easy to transform if you attach cones to it. First, they should be lightly painted with white paint. Then use a string to attach it to create a floating effect.
In eco-style, dry twigs are welcome. They give the interior dynamics and lightness. You can create the simplest crafts from cones. For example, select small cones and glue them on branches, put them in a vase decorated with birch bark. Or fill a glass container with buds and place twigs in it. Complete the composition with a luminous garland.
And of course, you should take care of the festive decor in advance. You will need burlap, some cones, Christmas decorations and satin ribbons.
You can also decorate beautifully chairs and napkins for the festive table.


Adding colors
Cones are good because it is easy to create New Year's compositions from them. And it is not even necessary to paint them, leave the spruce "fruits" in their natural form. Small color details can emphasize their natural beauty. For example, green flower pots. Place large cones in them and arrange between the flowers. If you want a predominance of a different color - use Christmas decorations in one color scheme.
Our opinion:
If you find quite a bit of time, it will not be difficult for you to make crafts from cones with your own hands. Or rather, add bright colors to the interior. Red, green, silver, white - great combinations. Aerosol paints are quite suitable for color decoration of cones.


Exterior decor
Create a New Year's mood right from the street. Such options are suitable if you have your own yard or you plan to celebrate the New Year in the country. Flower beds on the terrace will be an excellent basis for New Year's compositions. Fill them with large cones, Christmas decorations and green pine branches.
Hang an arrangement of cones in a rustic manner on the door. Use plaid fabric instead of satin ribbons. Although a simple twine also looks attractive.
If you additionally make felt hearts, such a composition will be filled with the energy of love. The mood will rise right from the threshold.
Create your own wreath of cones. You can dream up and make it in the form of a snowflake.


Simple New Year's compositions from cones
The aroma of the New Year is easy to create if you hang fresh spruce branches with cones above the table, on a large forged chandelier.
A composition of cones with a colorful satin flower on the door looks beautiful and coquettish.
Dry twigs in a transparent vase mixed with cones and transparent Christmas decorations make the atmosphere airy and light. And spruce twigs add green touches.
If the cones are placed on a tray mixed with candle containers and tied with a ribbon, you get a great festive composition.
Cut out a Christmas tree, a star and a heart from paper, attach them to the strings and hang each of them on the cones. Simple, but creates a festive atmosphere.


We light candles
Candles are a symbol of new life, renewal and rebirth. Place them on the table, for example, on wooden stumps, use cones as an additional decor. A cozy and warm environment is provided for you.
You can buy candles in the form of cones. Put them on a tray and place them around the room. And on New Year's Eve, do not forget to light them.
Our opinion:
There is a tradition that the youngest member of the family lights a candle with the oldest. This symbolizes the connection between generations, and the new fire brings new life.


We will send the material to you by e-mail
The desire to decorate your home for the New Year is common to almost every person. It is doubly interesting not just to purchase ready-made decor, but to make something original on your own. We suggest going to the coniferous forest and preparing more cones for winter creativity. The editors of the site offer to find out what kind of New Year's crafts you can make from cones with your own hands, photos and tips from creative masters, as well as the pleasure of getting to know wonderful creations.
If a person’s entire idea of \u200b\u200bcrafts from the gifts of spruce, larch, pine and cedar comes down to kindergarten hedgehogs, then it makes sense to expand the boundaries of one’s own horizons and be surprised at the beauty and elegance of New Year’s compositions from cones.
There are many ways to use these gifts for the benefit of your apartment. From cones make:
- candlesticks;
- fairy lights;
- wreaths;
- Christmas decorations;
- Christmas trees;
- decorate a chandelier;
- make a frame for a photo;
- make animals, birds, flowers;
- beautiful interesting pendants.
For each type of work, some preparation of the material and the selection of additional decorative elements are required.
Can buds be bleached?
On the Internet, there are photos with the design of rooms where bleached cones are used as decor. Let's make a reservation right away, it is unlikely that it will be possible to repeat the effect so much, and the masters are reluctant to part with such secrets. But we will show you how to achieve a decent whitening of a wood cone.
First, we will collect all the fallen coniferous inflorescences and clean them of resin residues. We lower everything into a container with an alkaline agent - for this purpose, the Krot pipe cleaner is suitable. After 2-3 hours, wash the cones and leave them to dry.
Important! Do not be surprised: with prolonged contact with the liquid, the coniferous inflorescence will develop. With subsequent drying, the petals will open again.

All cones will soon sink and close. We tightly cover the container with a lid and, for reliability and safety, put it on the balcony. It is best to forget about the jar for the whole night. In the morning we will take out all the closed inflorescences and dry them at low temperatures in the oven until they are fully opened. If necessary, repeat the procedure with whiteness.

Save Time: Featured Articles Every Week by Mail
The abundance of ready-made Christmas decorations and various items for decoration saturated the market for some time, and the art of creating various “homemade” interior gizmos for the New Year holiday slowly began to be forgotten. But gradually, in the last decade, we were covered by the world's love for "handmade" - handmade products. I had to urgently remember the skills acquired in childhood and generate new ideas.
To create New Year's decor and Christmas decorations, it is most logical to use such natural material as cones - spruce and pine. They blend beautifully, naturally with popular Christmas trees, are easy to work with, look elegant, and can be used for a variety of purposes. Kids really like cones, so you can work with them with the whole family, this will only benefit the closeness of parents and children.
Materials and tools for work
Decorating cones is a creative process, but not at all expensive, it does not require very expensive equipment, and the main material for work can be collected in any park where Christmas trees and pine trees grow. You need to pick up fallen cones - those growing on trees are still too juicy and may not dry out completely, so the finished work can fail - become moldy or acquire an unpleasant odor. In addition, the collection of cones is an exciting, useful and environmentally correct activity.
In addition to cones, for home crafts, you can use acorns, chestnuts, various berries, which have a beautiful color and retain their shape and color when dried.
To work with such materials, you will need the following tools and accessories:
- Glue gun and a supply of special glue in sticks. If the work is carried out with young children, adults will have to glue or buy small light appliances for the kids, explaining in advance that their “stings” are very hot and you can get burned if you are not careful and careful.
- Scissors for cutting out details.
- Wire cutters.
- Pliers.
- Brushes.
Necessary materials:
- Vegetable raw materials (cones, acorns, chestnuts, berries, bark, branches, leaves, and so on).
- Trimmings of fabric, preferably with non-shrinking edges (cloth, felt, dense interlining, and so on), pieces of leather and suede - artificial or natural.
- Buttons, beads, beads, ribbons, small artificial flowers and leaves, braid, lace and similar small decor.
- Wire, ready-made frames, coasters, plastic tubes, wooden sticks and more.
- Paints.
- Lucky.
- Decorative coatings.
In the process of work, you may need ordinary sewing trivia, as well as glue for fabric and paper, a pencil and paper for marking and making patterns, and much more that is usually at hand in any home.

How to process cones for crafts
Before starting work, you need to prepare cones for crafts. Heavily soiled can be washed and dried away from heat sources, in a well-ventilated place. The rest can simply be thoroughly cleaned of earth and debris with a stiff brush, shake off and, if necessary, dry.
If the cones are collected unripe and not fully opened, they can be placed in a slightly heated oven, be sure to leave the door ajar to let the moisture out. This is necessary in order for the cones to open, the fruits to spill out, and the open scales to resemble spruce branches. This should also be done with cones in order to get rid of possible moisture in them and protect them from damage to the finished product.
Blanks can be left in their natural form, partially or completely painted, varnished and decorated with decorative materials, such as artificial snow. The appearance and effectiveness of the future thing depends on your imagination and ingenuity.

Means and methods for painting cones
Spruce and pine cones are beautiful on their own, but if the products involve the inclusion of a color component, they will have to be dyed. Since the surface of the cones is porous and matte, it perfectly absorbs and retains paint. You can paint them with anything, even ordinary gouache or tempera, but such a coating will be short-lived and will become dirty. It is best to choose more resistant paints, such as acrylics. Ideally, for work, you should have the following components:
- A set of acrylic dyes in jars or tubes for applying individual strokes or creating textures.
- Paints in aerosols (you can use car enamels - they give a beautiful dense and uniform coating and dry fairly quickly).
- Aerosol metallic paints in different colors. With their help, you can achieve particularly expressive special effects.
- Finishing varnishes, it is also most convenient to use aerosol packages, with their help the varnish is applied easily, quickly and evenly.
- Dyes and varnishes for creating special effects - with a "frosty" coating, with sparkles, artificial snow and so on. Applying them is one of the easiest ways to decorate a pinecone, even if you're short on time to work.
The technology of working with paints and varnishes, especially aerosol and automotive ones, which have a pungent odor, provides for their use in ventilated non-residential premises or in the open air. It may be necessary to apply several coats of coating, with each previous coat being completely dry. It is possible to continue working with the painted material only after all layers have completely dried, otherwise the drawing or coating already made may be damaged.


Christmas toys and decorations from spruce and pine cones
With a certain diligence and accuracy, you can make almost any toy out of cones. Kids really like gnomes, and making them is not at all difficult.
- To do this, a fir cone is used as the body of a gnome, while it is best to leave it natural.
- The head of the figurine can be made from a plastic or foam ball, draw a face on it and glue a beard from threads.
- The legs and arms are made of wire wrapped with padding polyester and covered with fabric (you can use tights, including colored children's ones).
- Clothes are sewn by hand or on a sewing machine, and shoes are made of leather or thick felt, cloth or thin felt, dense interlining can be put on caps.
If you wish, you can show your imagination and make gnome girls with funny braids of thread sticking out from under a bright cap.


Long fir cones can be used as spectacular interior decorations and Christmas decorations. To connect them with hot glue, attach ribbons and tie them together with a large beautiful bow or lay the braid with a rosette. Such a pendant is hung on walls, doors, a Christmas tree, or even used as New Year's tiebacks for curtains, decorations on the corner of a tablecloth.


Cones give a huge scope for imagination. With them, you can create many decorative compositions, decorate the table, make children's and Christmas figurines, make elegant wreaths on the front doors, elegant candlesticks and topiaries, many figurines and cute little souvenirs.
New Year's candlesticks from cones
One of the easiest projects for beginners is to create decorative and truly Christmas candlesticks. They can be made from small and large buds, as well as from a mixture of various plant and artificial materials. To make a candlestick from small cones, you will need the following materials:
- A large candle or a small glass candlestick with a candle.
- Cardboard stand, flat saucer or plate, small tray or box lid with low sides.
- Accurate decor - beads, beads, rhinestones, tinsel, berries, dry or artificial flowers, and so on.
A candle or candlestick is set on the base, and the prepared, painted or varnished cones are carefully glued with hot glue, stacking them so as to get a beautiful ring arrangement. For additional attractiveness, you can use various decorative elements and details, including flowers, twigs and small decorations in the composition.
In order to make the product more voluminous and expressive, the tips of the scales need to be painted over with colored paint that contrasts with the color of the cone. For the same purpose, you can make a beautiful golden or silver coating, use artificial snow, sparkles, or even stick rhinestones or beads on the tips of the scales of cones.

From large cones with a loose core, you can make small candles that look beautiful on a festive table between dishes and glasses. To do this, you need to cut off the upper narrow part of the cone with wire cutters, and in the remaining part, align the area under the candle as much as possible.
If the surface still turns out to be very uneven, you can fill it with liquid wax or stearin from a melted candle, wait for it to harden and glue a decorative candle on it. You can use tablet candles for low lights, or you can use tall, narrow candles for candlesticks.
A long and thick “gypsy” needle is stuck into the base of the cone, on which a candle is then carefully and carefully pricked. To prevent the finished candle from turning over, you need to make a flat and even base at the bottom of the cone, glue it with hot glue on a small saucer, best of all on a heavy glass rosette for jam.
You can decorate the finished composition for every taste - leave it as it is, paint, decorate with tinsel or small details, berries or artificial, dry flowers.


Decorative Christmas trees from cones
For those who do not want to buy a live Christmas tree or put up an artificial tree, as well as to decorate offices, classrooms, public spaces, corridors and rooms in houses and apartments, you can use elegant and simple Christmas trees made of cones as a spectacular decoration.
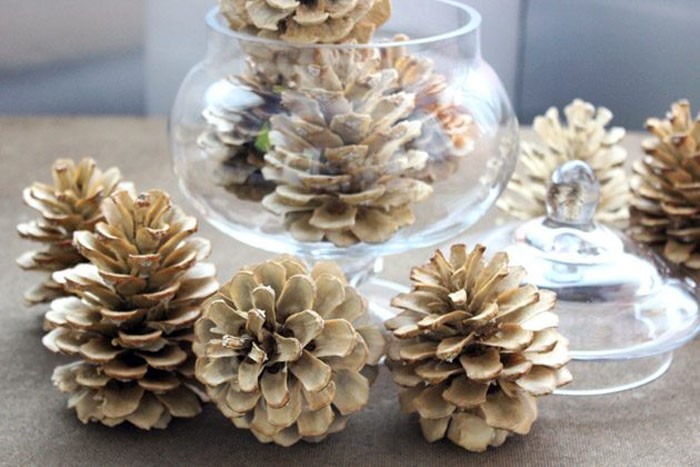
Large cones are almost ready-made Christmas trees. They need to be placed in a beautiful stand, for example, a spectacularly painted or draped clay or plastic flower pot, a jar of cream or any other cosmetics, low capacity.
You can fill it with a piece of foam or even crumpled paper, and glue a circle of thick cardboard on top.
A beautiful large cone with open scales is painted green, sprinkled with silver or gold paint, artificial snow is sprayed on the edges, and after drying it is decorated with elegant beads and tinsel.

If there are a lot of cones, you can make a larger Christmas tree that can be placed on the table. To create it, you need a foundation. You can buy it in a specialty store in the floristry department, or you can make it yourself by gluing a strong cone of thick cardboard and fixing it on a plate or tray.
The cones are glued to the base with hot glue, or they are pierced onto a cone of foamed "oasis" using wire or pins stuck into the base of the cones. Work begins from the bottom, carefully attaching the bumps. The appearance of the product depends on the laying method - small pine or long spruce cones glued in a spiral will set a clear rhythm, and laid out randomly will give a more informal, modern look to the product.
Additional decorations are added according to the taste of the creator of the product. Just don't forget to top the Christmas tree with a smart star at the top.

Wreath of cones for the New Year
Festive decoration of the home begins with the front door. Before the holidays, I want to decorate them more elegantly, replacing the autumn wreath, which has already lost its relevance, with its winter version. You can stick cones on a different base - use a ring from a floral oasis for dried flowers, a foam product woven from flexible branches, or make a base for a wreath yourself, taking thick cardboard, a stapler and several layers of newsprint for the required volume.
Before starting work, it is worth making a sketch, and then laying out all the selected components of the composition. This will help you see what is superfluous or missing in it, adjust the shape and size, change the style a little or change the materials. If you plan to make the wreath multi-colored, the cones are painted before gluing, they are glued already completely dry. If the wreath is planned to be made more or less uniform, finishing work is carried out after gluing is completed and the workpiece has solidified.
Such a wreath is very beautiful on a dark door, if it is covered with white spray paint, and on top with silver and artificial snow, on a light surface, dark cones with gilding, ruby and emerald inclusions look better.


Christmas star made of cones
The range of decorative products made from cones is not limited to toys and the usual round wreaths with candlesticks. If you have a large enough supply of cones, you can make a very effective and quite versatile decoration - a star. You can use it in different ways - hang it like a wreath on a door or wall, decorate the top of a Christmas tree, attach it to a chandelier, put it on a rack as an element of room decor, or even put it on a table as a candlestick or just decoration.
To create such a product, it is best to use beautiful fir cones - they have an elongated shape and scales, more elegant and pressed to the body, they are much easier to assemble into an expressive composition.
To begin with, lay out the future product on a sheet of cardboard approximately as it will look in finished form. Remember that the star must have the correct shape and neat outlines. No need to lay out all the cones in one plane - make the product more voluminous by placing the parts at different angles. You can connect the cones to each other with hot glue, and for hanging products - also additionally using wire.


Figurine of Santa Claus from cones
Making such funny toys is very easy and simple, even for kids. Finished products can be presented as souvenirs to all guests of the holiday.
To create figurines of Santa Claus, they take wide “pot-bellied” opened pine cones and paint them red. This is the body of the future Santa Claus. Now you need to make a head out of a large bead or a plastic ball, stick hair and a beard of cotton wool or yarn on it, attach a red cap or hat. The head is glued to a bump, boots are made of felt, and a rather wide shiny black belt with a buckle is girded around the vast waist of the New Year's character. Such a figurine can be supplemented with a loop on the head and hung on the Christmas tree as a decoration.


Topiary of cones for the New Year's holiday
A good idea for a festive winter interior decor is compositions of cones in the form of cut trees - topiaries. To create them, you will need plaster, a beautiful or hand-decorated clay or plastic flower pot, a cylindrical stick made of wood, a ball of plastic, foam or floral sponge. The ball is put on a stick, its second end is inserted into a pot, which is filled with gypsum or concrete mortar. It is necessary to monitor the strict verticality of the "trunk" of the future topiary. When the material in the pot hardens and dries, you can begin work. There are two ways to attach cones:
- Top inward, base outward. This method creates original “dense” and fairly even balls, the gaps between the cones are decorated with beads, rhinestones, dried rose buds, lavender sprigs, spikelets and many other details.
- Base inward, top outward. In this case, the tree will turn out to be “fluffy” and voluminous. Cones must be well selected in height and width, otherwise the product will turn out to be sloppy and disheveled.
The surface of gypsum or concrete in a pot is covered with various materials, moss, cloth, straw, covered with small pebbles, glass pebbles or beads.


Interior balls from cones
According to the principle of creating a topiary, a decoration in the form of a ball is also made. It does not require a pot or a stick, only a base in the form of a ball. Here, too, you can stick cones with their tops in or out, and paint the finished product as you like and decorate with various decorative elements.
A large ball can serve as a focal element for decorating a coffee table, it can be hung by first making a loop when gluing cones. If you use small cones to create balls, you can put several decorative elements at once in one basket, on a tray or plate.


Decorating the New Year's table with cones
One of the easiest ways to decorate the New Year's table is to make cards from cones to accommodate guests. You can simply insert a finished card into the cone, making a drank in it with a jigsaw, or turn the cones into funny little figures. In this case, you can get not only a catchy table decor, but also small stylish souvenirs that guests can take with them.


Festive garlands of cones
You can complement the bright and festive New Year's decor with garlands of cones. You can make them very simply - just stick an ordinary tailor's pin with a ring at the end into the base of each cone or screw in small threaded loops. Next is a matter of technology. Decorated elegant cones can simply be strung on a wire or cable, and if you need to fix the position of each thread, just tie a knot on each loop or drop a little hot glue on it.


In the manufacture of products from cones, only two things are important - your creativity and accuracy, then the resulting things can become real works of art.


Elizabeth Rumyantseva
For diligence and art there is nothing impossible.
Content
In order to develop the imagination and fantasy of a child, it is necessary to instill in him a love of creativity from early childhood. Especially popular are natural materials that are absolutely safe for children. They are available to everyone, the main thing is to have time to prepare them. Crafts from cones are often found among the works of children, they are used to participate in competitions or exhibitions, and can also complement the interior. Below you will find master classes with a step-by-step description of creating products that will help you make a unique masterpiece using spruce fruits.
What can be made from cones with your own hands
With the use of cones, various figurines, decorative elements, and interior decorations can be created. The creative process of creating crafts will appeal not only to children, but also will not leave adults indifferent. With the use of such natural materials can be created:
- Animal figurines - a mouse, a squirrel, a hedgehog (for example, using a bottle or additionally using only plasticine), a swan, a crocodile, an owl. Children can create such crafts, the creative process will give them a lot of pleasure, good mood, and the finished result will take pride of place at an exhibition at a school or kindergarten.
- Compositions for interior decor, which are able to enliven the room, create additional comfort. These crafts include: ikebana, topiary, a wreath on the door, a candlestick.
- New Year's crafts that will give a special festive mood, and due to the fact that they are created with your own hands, the products will be much more valuable. As such decorative ornaments, toys, garlands for the Christmas tree or the festive tree itself can be created.
Step-by-step instructions for making crafts from cones
Natural materials are often used to create applications, accessories, interior decorations. In order to make an original craft using cones, you need imagination. But sometimes imagination is not enough or there are certain difficulties in composing a composition. In the absence of inspiration or knowledge about the nuances of creating a particular work, use detailed master classes and diagrams.
How to make a Christmas tree from cones for the New Year
It is difficult to imagine the New Year holidays without an elegant beauty of the Christmas tree. It is not always possible to place a natural tree indoors, this may be due to the small area of \u200b\u200bthe room or for security reasons. In this case, the ideal solution would be to make a Christmas tree yourself, using cones and decorative elements to decorate crafts.
For work you will need:
- cones;
- polystyrene foam or thick cardboard (it is acceptable to use any high-density paper);
- acrylic paint;
- glue;
- decorative elements.

Step-by-step creation of a Christmas tree:
- Using cardboard, make a cone or cut it out of foam.
- Using a silicone gun, glue the cones to the base so that they are facing outward with the open side.
- Cover the buds with gold or silver acrylic paint, if desired, a green tint can be used.
- After the coating has completely dried, decorate the Christmas tree with decorative elements: small toys, beads, sparkles.
- To learn another option for creating a Christmas tree, watch the video:
Master class on making Christmas decorations from pine cones
Decorating the Christmas tree on the eve of the holiday is a fascinating and favorite pastime that is enjoyed not only by children, but also by adults. In order for this process to be even more interesting, and the tree to become more beautiful and original, it is necessary to decorate it with hand-made toys using natural materials. You should take care of decorations in advance, because before the New Year holidays there will be many other worries, and it is not always possible to find the gifts of nature to work under the cover of snow.
Materials required for work:
- cones (spruce, pine, cedar);
- acrylic paints;
- ribbons;
- sequins.

Step by step creation of Christmas decorations:
- Tie a thread to the base of the cone, for which the decoration will be hung on the Christmas tree.
- Using a sponge or brush, cover the toy with paint and sprinkle with sparkles.
- Hang the accessory by a thread, let it dry.
- Cover the jewelry with varnish, this will ensure the long-term preservation of the jewelry and allow it to be used in subsequent years.
- Tie bright, beautiful ribbons with a bow, glue cones to the base. Additionally, decorative elements can be used, which will give the decoration originality.
- Watch the video to learn more about the procedure for making Christmas tree decorations using natural materials.
Topiary - a tree of happiness from cones, acorns and decorative elements
Using materials of natural origin, original trees can be created, which, in addition to their decorative function, according to beliefs, can bring happiness, joy, prosperity to the house. To create a topiary, completely different things can be taken from coffee beans and artificial flowers to chestnuts, cones, acorns, leaves. The tree created using cones and additional decorative elements looks original.
For creativity you will need:
- pine or spruce fruits;
- small box;
- a sheet of paper, cloth or bamboo napkin for decorating a vase;
- tree branches;
- glue;
- gypsum;
- foam ball;
- paint in a balloon, gouache;
- decorative elements: ribbons, beads, sequins.

How to create a composition step by step:
- It is worth starting work with preparing a flowerpot for the future tree. To do this, it is necessary to glue the selected plastic box or other container with a bamboo or straw napkin. If desired, it is worth additionally decorating the accessory with ribbons or a bow.
- Make a hole in a foam ball painted brown, stick branches into it (fix everything with glue so that the structure holds well).
- Glue the ball over with cones, then sprinkle everything with white paint to give originality to the craft.
- Place the tree trunk in a pre-prepared flowerpot and fill with plaster, which is diluted in accordance with the instructions. Wait for the material to fully set and decorate a creative masterpiece using moss, beads, ribbons.
- For a detailed description of the creation of the topiary, see the video:
Christmas wreath of cones and fir branches
To decorate the room on New Year's Eve, you need to prepare decorative elements in advance. An ideal door decor would be a wreath created using cones and other gifts of nature that can retain their properties for a long time and not lose their original appearance. It is worth attracting a child to the creative process - this will help to have fun, exciting and useful time, creating a unique masterpiece for your home.
For work you will need:
- tree branches (vine);
- grass;
- cones;
- glue;
- rowan twigs, other decorative elements.

Instructions for creating a New Year's wreath:
- Twist branches, grass into a three-dimensional wreath. Wrap with rope or wire for strength and reinforcement.
- Use a glue gun to glue the cones onto the wreath. If desired, the product should be coated with golden or silver paint or left in its natural form.
- Add decorative elements: rowan, beads, spruce branches, beads, and more.
- Attach the tape to the back of the product with a loop for fastening.
- Watch a video with another option for making a New Year's wreath:
Children's craft hedgehog from cones and plasticine
The process of creating a toy using natural materials for a child and his parents will be fascinating and interesting. Making such a product is very simple, and the finished result will delight. To work, you need to prepare the following tools and accessories:
- bumps.
- plasticine of several shades.

Step by step creation of a hedgehog:
- Using light-colored plasticine, mold the muzzle of the animal and attach it to the back of the cone (to the place where the cone was attached to the Christmas tree).
- In order to make a nose, eyes for a hedgehog - it is necessary to roll up several balls from a dark-colored plasticine mass, place it on the “face”. Additionally, create ears, attach them to the crown.
- Make paws using the base color plasticine, glue them to the base of the hedgehog.
- Using multi-colored plasticine, it is worth molding an apple, mushrooms or a leaf and pricking decorative elements on the “needles” of the hedgehog.
- Watch the video to see another option for creating an animal figurine:
Christmas decoration made of cones - candlestick
A lit candle in a beautiful candlestick can decorate the New Year's table. Create such an accessory with your own hands, using natural materials for this. A variety of details, accessories, decorations can be used for work, which will help make the craft unique and very beautiful. For work you will need:
- cones;
- disk or cardboard circle;
- glue gun;
- acrylic paint in a bottle;
- decorative elements (beads, Christmas decorations of small sizes, shells, artificial twigs);
- other natural materials: chestnuts, acorns, nuts.

Step-by-step creation of a New Year's candlestick:
- All natural materials that will be used in the work must be laid out on a newspaper and covered with plenty of paint. If desired, sprinkle with sparkles or mother-of-pearl. It is desirable to carry out all manipulations in an open space or in a well-ventilated area.
- Glue a candle in the center of the disk, and place the parts covered with paint around. When creating a composition, you should also use the material in its natural form, New Year's beads, toys and other decorative elements. A sprig of spruce looks beautiful in such a craft - natural or artificial.
- Watch a video describing the process of creating other simple candlestick options:
How to make a basket of cones with your own hands
It is realistic to create a beautiful basket for flowers, fruits or sweets with your own hands, using improvised and natural materials for this. Such a masterpiece will become a true decoration and add some zest to the interior. For work it is necessary to prepare the following materials and tools:
- pine cones;
- glue gun;
- cardboard;
- wire 0.2 and 0.5 cm thick.

How to make a basket step by step:
- The first step is to create a circle using the bumps and the wire that needs to be wrapped around them for a secure fit. We connect the cones to each other, attaching the first to the second and wrapping a wire around it. So connect 10-20 cones in a circle, leaving the base of the cones outside.
- Similarly, make the second ring, but slightly smaller in diameter. If there is a desire to create a high basket, it is additionally worth creating a third circle.
- Connect the rings together, fixing with glue.
- Make a basket handle using thin wire and cones, attach to the product with glue.
- Glue thick cardboard to the bottom.
- Look at the photo for examples of ready-made baskets and options for their use:
Video tutorials: how to create beautiful crafts from cones
Natural materials are unique elements that are often used in creativity, in children's needlework. This is due to their safety, accessibility (they can be collected in the country, in the forest, park) and a wide range of applications, the ability to create a wide variety of crafts using, for example, cones. Sometimes children and their parents do not know how to make this or that product with their own hands. For inspiration on new masterpieces, check out the selection of video tutorials below.
Autumn Crafts in kindergarten "Flowers in a Vase" / Use a pumpkin and cones / create beauty
Did you find an error in the text? Select it, press Ctrl + Enter and we'll fix it!
