Star news


Crochet summer. Crochet patterns for women's summer blouses
Crocheted summer items came into fashion several years ago and are firmly holding their position in the current warm season. The models that are obtained as a result of such needlework have a number of advantages: they are absolutely not hot even in the midday summer sun, they are incredibly beautiful and feminine, and they can also be created with your own hands.
What to crochet for summer
This is interesting: Knitted sweaters for women: crocheted, knitted, for summer + DIAGRAMS with description and 140 PHOTOS

Most women acquired knitting and crocheting skills at school while still very young. Today's fashion sets trends, which are a great opportunity to remember the techniques learned in labor lessons and treat yourself to a new trendy item.
Do you have free time and want to spend it on something useful? We offer you to replenish your wardrobe with something created with your own hands. What can you crochet for the hottest season?
1 Sundress. Girls often prefer summer dresses, which are perfect for both romantic meetings and office work. Sundresses do not restrict movement, make a girl more tender and sophisticated, and they are also not at all difficult to make with your own hands.
2 Tunic. Long blouses are worn both in everyday life and on the beach. Depending on the knitting technique and the variety of patterns, you can knit a tunic for the purposes you need.
3 For lovers of something extraordinary, knitting a swimsuit would be an excellent choice. A girl wearing such a product will certainly look like a beach queen.
4 Cardigan or bolero. On a cool summer evening, you want to throw something over your shoulders without making your look earthy. It is a crocheted cardigan or bolero that will decorate any outfit and will not allow a light wind to spoil walks under the moon.
5 Shorts. Knitted models, of course, should not be chosen for city walks, however, when going on vacation, you should definitely put them in your suitcase.
6 T-shirts or tank tops. The presented wardrobe item will become an indispensable item that can be worn for a walk, to work and even to a celebration, if successfully complemented with elegant jewelry.
We offer crochet patterns for the most successful summer outfits.
Cotton tunic

The presented model is designed for women with breast volume eighty-eight - ninety-two centimeters.
For production you will need:
- Thread (cotton) with a density of three hundred thirty-two meters per hundred grams of yarn (by weight approximately five hundred grams). You can choose any plain thread, but the most advantageous color will be white.
- Hook size No. 3.
- A large gypsy needle with a wide eye or a thin hook (depending on what is at hand, the quality of the product does not depend on it).
- Sharp scissors (we will use it to cut the thread). Due to the strength of cotton yarn, you need to choose very sharp scissors.
When choosing a hook, it is necessary to take into account that the ideal knitting will be obtained when the ratio of the thickness of the thread and the hook is one to two, that is, the yarn should be twice as thin as the hook.
Knitting density
Before proceeding with the actual production of the product, it is necessary test for tightness of knitting. To do this, you need to cast on thirty air loops and knit them with regular double crochets. Repeat for another twenty-eight rows. If the yarn and hook are chosen correctly, the result will be a fabric ten centimeters high.

If you get other sizes, you must calculate the error for each row and take it into account when knitting a tunic.
You can also check the quality of the thread by placing the knitted piece in water for twenty minutes (temperature thirty to thirty-five degrees), then remove it and dry it. If the dimensions have not changed, the thread is of high quality; if the fabric has crawled, shrunk or stretched, it is better to choose another material, since you wear such a product only until the first wash.
Pattern
The presented model is quite difficult to manufacture, therefore you must follow the diagram very carefully. It is better to hone the patterns separately, when knitting small areas.
We begin production from the front wall.
We cast on seventy-five cast-on stitches (chain stitches). This will be ours first row.
Scheme 1
Second row knit from the fourth loop, starting from the row of the set, into which we stretch the thread and make a slip stitch (throw the working thread onto the hook, insert it in the fourth loop, pull out the working thread, get it on the hook three loops; pull the working thread through all the loops at once). All the remaining loops in the row (and there are seventy-three of them) we knit in a similar way.

We repeat the pattern for the next twenty-two rows, which we knitted the second row. At the end of the twenty-fourth row, close the loop and cut the thread with scissors.
Scheme 2
In one of the corners of the resulting canvas attach a new thread by knitting a single crochet, pick up two chain stitches (from the bottom double crochets). We knit the next seventy-three lower stitches one stitch at a time with a double crochet in each loop.
Repeat the pattern for the next four rows. Close the outer loop of the fifth row and cut the thread.

Scheme 3
We attach the yarn to the lower right corner by knitting from the corner loop of a double crochet. We're getting there 2 VP, and the following 60 columns(lower ones) we knit in the same way, and repeat all the steps again 4 rows.
Close the area and cut the thread.
Scheme 4
We attach a new thread to the bottom left by knitting a double crochet from the corner left loop. We pick up two air loops, and knit the next sixty lower columns in the same way and repeat the pattern for four more rows.
In the corner of the resulting yarn we attach the yarn by knitting one simple stitch. Cast on a couple more chain stitches and the next ninety-three stitches knit with double crochets. Repeat the pattern for ten more rows. Cut the thread.

Scheme 5
Attach the thread to the bottom right loop by knitting a regular single crochet. Next we repeat scheme 3. We close the canvas.
Attach the yarn to the bottom left loop when washing knitting a simple stitch. We get two loops (air loops), from the next eighty-six loops we make cap stitches. Repeat the pattern for the next five rows. We close the canvas.
Scheme 6
Turn the product to the wrong side, find the angle and We fasten the thread with a single crochet. Let's knit some more one hundred twenty loops cap posts. We repeat second and third rows. At the end of each row we make a lifting loop and from each of the one hundred and twenty-one lower columns we make another one cap post at a time.
Scheme 7
We start the fourth row of the wrong side with an air loop. In the first loop of the lower knitting row We knit a single crochet. Next, we cast on three air loops, and three loops of the bottom row knit with double crochets, followed by a single crochet stitch. This combination must be repeated twenty-nine times. After this, according to the scheme We knit the fifth and sixth rows four times and repeat the fifth again.
We close the canvas.

Scheme 8
To the top right corner loop we attach the working thread by knitting a regular stitch, without crochet. Next we knit 112 simple stitches, single crochet, and in the end we get one hundred thirteen simple columns. We knit according to the same pattern third, fourth and fifth rows. After receiving five rows of arches, we reach the middle loop of the row and make five instead of three air loops, turn the product over to the other side and we knit in both directions only the received part of the fabric, turning it over at the end of each row.
When we get seven air arches left (depending on the knitting density, a larger number is possible, the reference point must be taken in centimeters– the neckline should be about seventeen centimeters), starting from the next row we increase the air arches to five loops instead of three.
Scheme 9
At the end of the stage, attach the thread to the second half of the lower fabric and repeat the pattern on the other side. Both parts of the product must have the same pattern and be symmetrical in shape.
Scheme 10
To the bottom right loop with a column Without a crochet we attach the working thread. We cast on two air loops. We knit one hundred and fifty-six double stitches. We knit the second, third, fourth and fifth rows according to the presented pattern. Close the working area and cut the thread.
| Scheme (technical) No. | Air loop | Double crochet | Single crochet | Half column |
|---|---|---|---|---|
| Techn 11 | Attach the thread to the corner loop on the left | |||
| Two loops | 156 columns | Repeat the technique for 4 more rows and close | ||
| Techn 12 | We fasten the yarn to the beginning of the row with one stitch. | |||
| Two loops | 144 columns | Repeat second, third, fourth, fifth row | ||
| Techn 13 | Attach the thread to the corner loop on the right | |||
| Two loops | 163 columns | Repeat the technique from the second to the sixth row | ||
| Techn 14 | Attach the thread to the corner loop at the bottom left | |||
| Two loops | 163 columns | Repeat the technique from the second to the sixth rows | ||
| Techn 15 | Two loops (for lifting) | Repeat tech 14 | Attach the working thread | 2-6 rows repeat |
| Techn 16 | Attach yarn to the bottom right loop and make another 112 simple stitches (113 in total) | Technique 16 repeats pattern No. 8 (see above) Complete the row and cut the thread | ||
| Techn 17 | Attach the thread to the corner loop on the left + 112 stitches | |||
| One loop | We repeat the technique for another forty-two rows (repeat pattern 16) | |||
| Techn 18 | We fasten the working thread and knit 52 rows using technique No. 16 | We knit until the fabric is seven centimeters long, then there are five lifting loops in the row instead of three. We close the canvas. |
Scheme of the back and bed for a tunic
Koemka
We fasten the thread to the left corner with a single crochet. We make two chain loops and knit three double crochets into each arch. And in each double crochet stitch of the bottom row we knit one double crochet.
Back
The back of the product is knitted similarly to the front, taking into account the toe cutout with a depth of not seventeen, but ten centimeters. When the neckline is ready, in the middle of the row following it, we knit nine air chains of five loops to the middle, make five air loops instead of the three lower ones, turn the product to the wrong side, knit only this half of the fabric. When the remainder is six arches, you need to cast on five loops instead of three links of the lower air chain. Cut the thread. Attach the thread to the other corner and tie the rest of the fabric in the same way.
Product assembly

To assemble the product you need to take a water diffuser, a gypsy needle with a large wide eye, threads that match the color of the yarn used as the basis for the product.
Before directly sew parts of the fabric, which we have obtained, it is necessary to wet the product and lay it out on a flat surface, let dry. After the moisture has completely evaporated, we place the parts of the tunic one on top of the other according to the parts of the body. It is necessary to stitch from the shoulder fold.
After this it is necessary knit the neckline. Near the shoulder seam we fasten the thread with a single crochet and make two air loops. After lifting along the entire border, we knit double crochets and knit every ninth and tenth row together (we pull the working thread simultaneously through the loops of the ninth and tenth rows).

In the next row we do three lifting loops, make two double crochets, one chain stitch, three double crochets, one chain stitch. Scheme required knit to the end of the row.
Delicate and airy swimsuit
If you are going on vacation and are in pursuit of the perfect, original, elegant swimsuit, we suggest making it yourself.
Knitted swimsuits have been in fashion for the third summer season, so demand for them increases and prices rise. However, the technique for making such a thing is quite simple and can be mastered even by beginners in crocheting.
To make an openwork swimsuit you will need:
- Acrylic yarn (approximately one hundred to one hundred and fifty grams). The thread should be monochromatic, predominantly sea colors;
- Hook size No. 1.5 (in millimeters) and 3 (in millimeters);
- Sharp scissors;
- Drawstring made of stretchy material.
Before starting work, it is necessary to check the tightness of the knitting. To do this, take the purchased yarn and hook size 1.5. We cast on twenty-one loops (cast-on row) and knit eleven rows with double crochets. You should get a canvas size ten by ten centimeters.
If you get a different density, you need to calculate its deviations for each row and knit the product taking into account the calculated error.
Also recommended check the quality of the purchased yarn. To do this, you need to immerse the test sheet in warm water for fifteen minutes, then remove it and dry it naturally. If you choose good threads, the dimensions of the fabric will not change.
If the changes are minor, also calculate the error and knit taking it into account. If the size of the piece has changed noticeably, better buy another yarn, since something like a swimsuit is designed to stay in the water for a long time, and low-quality thread will not allow you to enjoy the knitted item for several days.
Every girl, woman and even grandmother wants to look attractive. They are helped in this by the widely developed cosmetics industry, various sports and, of course, the efforts of all fashion houses led by famous couturiers. A properly chosen outfit can highlight your strengths and disguise your figure’s flaws. A dress or blouse that matches the color and cut can brighten the color of your hair and eyes, present your skin tone in a favorable light, make your silhouette slimmer or, conversely, rounder.
In recent years, crocheted items have increasingly appeared on catwalks and in the collections of famous designers. After all, they combine the originality inherent in original works, the individuality characteristic of things made by hand, and, of course, all the beauty and delicacy of “magic loops”.
To create something equally amazing with your own hands at home, just go to the nearest craft store. A variety of yarns, fittings and accessories for crocheting of different composition and color will help bring the idea of a designer product to life.
Gorgeous openwork crocheted blouses will become a beautiful and irreplaceable item in your wardrobe with the arrival of summer. This article presents several diagrams of such gizmos. General recommendations are given here, while the imagination of the needlewoman herself will suggest the required shade or composition of the threads.
White blouse made from motifs.
Required:
- 500 - 600 g of white yarn (60% cotton, 40% acrylic, 196 m / 100 g);
- Hook No. 4.

The figure shows several sizes; before you begin the work, you need to make a full-length pattern according to individually taken measurements. The openwork motifs are connected to each other during the knitting process of the last row.


The first motive must be fulfilled completely.
Connect a chain of 4 air into a ring. loops
- First r. Tie 4 air into a ring. lifting loops, 2 tbsp. with 2 yarn overs in the same base loop with one top, 4 air. loops, *3 tbsp. with 2 yarn overs with one base and top, 4 air. loops*, knit from * to *, finish with 3 connections. in columns.
- Second r. 1 tbsp. without crochet in the same arch, knit 8 arches of 7 air. loops securing them st. without a crochet in the middle of the arches of the row below. Complete the row with 4 connecting stitches.
- Third r. 1 tbsp. without crochet, 5 air. loops, knit into the next arch *(1 double crochet + 6 double crochets + 1 double crochet), 5 double crochets. loops, 1 tbsp. without crochet in the next arch, 5 air. loops*, knit from * to * 2 more times, then knit (1 double crochet + 6 double crochets + 1 double crochet), 5 double crochets. loops, finish 1 connection. in a column in the first st. without a crochet.
All remaining motifs are attached to each other during the third row (indicated in gray in the diagram), following the full-size pattern.
Delicate pastel pink blouse.

Size 42. You will need:
- 250 g yarn;
- Cotton balls for buttons (8 pcs.);
- Hook No. 3.
Before you begin, you need to make a full-size pattern. If you plan to knit a blouse of a larger or smaller size than indicated in the example, you need to knit a small sample of the pattern (10x10 cm) and recalculate the initial number of loops.

Dial 121 air. loop.
- First r. knit with arches of 6 air. loops, securing them with 1 half double crochet in every fifth loop of the chain, replace the first half double crochet with 2 double crochets. lifting loops.
- Second r. 3 air lifting loops, 4 air. loops, 1 half double crochet in the arch, * 8 tbsp. double crochet in the next arch (“fan”), 1 double crochet in the next arch, 4 air. loops, 1 half double crochet in the next. arch*, knit from * to *, at the end 4 air. loops and 1 tbsp. with a double crochet into the lifting loop of the row below.
- Third r. 3 air lifting loops, 1 air. loop, 1 half double crochet in the first arch, *in st. with a fan crochet, knit 1 tbsp. double crochet alternating them picot, 1 half double crochet in the next. arch *, knit from * to *, finish 1 half-stitch in the arch, 1 air. loop, 1 half column in the lifting loop.
- Fourth r. 3 air lifting loops, 1 air. loop, *1 tbsp. with a half double crochet row below, 5 air. loops, 1 half-column with the third picot of the “fan”, 6 air. loops, 1 half-column in the fifth picot of the “fan” 5 air. loops*, knit from * to *, finish row 1 tbsp. with a half double crochet row below, 1 air. loop, 1 tbsp. double crochet into the third stitch of the row below.
- Repeat from rows 2 to 4.
Knit 24 rows (approximately 23 cm) and begin to increase, as highlighted in the diagram. Knit the back in the same way. The last row of the product is knitted as the third row.

Tie the front and back (except for the back neck), starting from the bottom of the sleeves, in one row according to the following pattern: 1 tbsp. single crochet in a half double crochet row below, 1 air. loop, 1 tbsp. with a half double crochet, knit in each picot (1 chain stitch + 1 single crochet). Tie back neckline st. without a crochet.
On the front sleeves, make 4 buttonholes (at a height of 1 cm from the edge of the sleeve, at a height of 2 cm from the neck, and 2 more buttonholes at equal intervals) as follows. Attach a thread, an arch of 8 air. fasten the loops with a half-column into the sixth loop of the bottom row, knit 12 sts into each arch. without crochet, fasten 1 tbsp. single crochet into the loop of the base of the arch.
Button. You will need 8 pcs.
Tie 2 air. loops.
- First r. In the second loop from the hook, tie 6 tbsp. without a crochet, finish connecting. Art.
- Second r. Knit 2 tbsp into each stitch of the row. without a crochet.
- Knit the third and fourth rows 12 tbsp. without a crochet.
- Fifth r. Knit 1 tbsp through 1 loop. without a crochet. Place a cotton ball.
- Sixth r. Knit 3 tbsp. single crochet with one top.
Sew buttons.
Close the shoulder seams 12 cm from the neckline. Close the side seams completely.
Blouse with Irish lace elements.

Size 42. You will need:
- 300 g of 100% cotton pink thread;
- Hook No. 2.

Before you begin, you need to make a full-size pattern according to individual measurements.

Knit the sleeves and back of the product according to pattern 1 with fillet mesh.

For the front, connect several motifs according to schemes 2 and 3, an example of the layout is given below. Baste the motifs from the wrong side, place them on the pattern and tie them together with a mesh with an adjustable mesh size (increasing or decreasing the number of air loops in each arch of the mesh). Tie the neckline, bottom of the product and sleeves with 2 rows of art. without a crochet.
Tie a chain of 6 chains with a ring. loops
- First r. knit into a ring 3 air. lifting loops and 15 tbsp. double crochet, finish the row with a connecting stitch.
- Second r. Knit 2 tbsp into each loop. without a crochet, replacing the first st. without double crochet for 1 air. lifting loop, finish with connecting st.
- Third r. Knit 8 arches from 5 air. loops, securing them with 1 tbsp. Single crochet in every 4th stitch of the row. Start and end the row in the same way as the previous one.
- Fourth r. Knit into each arch (1 single crochet + 1 half crochet + 3 double crochets + 1 half crochet + 1 single crochet).
- Knit further according to the pattern.
Sheet. Sheet sizes vary by increasing or decreasing the number of initial stitches and the number of stitches. without a crochet in each row.
Dial 13 air. loops
- First r. 1 air lifting loop (ignore when knitting), 12 tbsp. without double crochet, in the last loop of the chain (central loop) knit 5 tbsp. without a crochet, knit 9 tbsp on the back of the chain. double crochet
- Second r. 1 air lifting loop (ignore when knitting), knit 12 tbsp. without double crochet, knit 3 tbsp into the central loop. without crochet, again 12 tbsp. without a crochet.
- Follow the pattern.
Light turquoise blouse.

Size 46.
Required:
- 300 g of mixed yarn (47% cotton, 53% viscose, 400 m / 100 g);
- Buttons;
- Hook No. 1.5.


Before you begin, you need to make a full-size pattern using individual measurements.
The top front and back are knitted in one piece, as shown in the picture. Tie the main part of the sleeves and front with the back with a background mesh.
Connect the motifs according to the basic pattern. You need 7 squares for the front and back and 2 squares for the sleeves. Connect them together during knitting, as indicated in the diagram V. Small flower connecting motifs knit according to the pattern G. You need to connect the squares to the main fabric according to the diagram e.
Make the bottom of the blouse with a background mesh; to expand the fabric, increase the amount of air. loops in arches.
Make a strip for tying the two sides of the front halves according to the diagram b.
Tie the bottom of the sleeves, front and back according to the pattern h.
Sew on buttons. Instead of loops, use openwork holes in the strip.
Close shoulder seams.
Next blouse connected not from bottom to top, but along and across. It seems complicated only at first glance. The blouse consists of 4 stripes. As can be seen from Figure 2, the length of the side stripes should be equal to the planned length of the product from the bottom of the front to the bottom of the back (without taking into account the binding), and another 2 stripes in length, taking into account the neck.

Make a full-size pattern according to individual parameters, according to the sample in the picture.
Scheme 1 shows one half of the strip. Perform the second in a mirror manner from the original chain of air. loops

Half a strip.
Dial a chain of air. loops
- First r. 1 air lifting loop, 9 tbsp. without crochet, *3 air. loops over 2 loops of the row below, 2 tbsp. double crochet, 3 air. loops over 2 loops of the row below, 20 st. without crochet*, knit from * to *, finish with 3 air. loops over 2 loops of the row below, 2 tbsp. double crochet
- Second r. 3 air lifting loops, 3 air. loops, in 1 tbsp. with the row below, knit 3 tbsp. double crochet with one base, *3 air. loops, skip 1 tbsp. without crochet bottom row, 18 tbsp. without crochet, 3 air. loops, in 1 tbsp. double crochet, knit 3 tbsp. double crochet, 3 air. loops, in 1 tbsp. double crochet, knit 3 tbsp. double crochet *, knit from * to *, finish row 9 tbsp. without a crochet.
- Third r. 1 air lifting loop, 6 tbsp. without crochet, *3 air. loops, in 3 tbsp. with the row below, knit 3 tbsp. double crochet, 3 air. loops, in an arch of 3 air. loops knit 3 tbsp. double crochet, 3 air. loops, 3 tbsp. with a double crochet of 3 tbsp. double crochet row below, 3 air. loops, skip 2 tbsp. single crochet row below, 14 tbsp. without crochet*, knit from * to *, finish 3 tbsp. with a double crochet, knitted in an arch of 3 air. loops
- Fourth r. 5 air loops, in the third (leftmost of 3) sts. double crochet, knit 3 tbsp. double crochet, 3 air. loops, 3 tbsp. double crochet, *3 air. loops, skip 2 tbsp. Single crochet row below, 10 tbsp. without crochet, 3 air. loops, 3 tbsp. with a double crochet of 3 tbsp. double crochet row below, 3 air. loops, 3 tbsp. double crochet with one base in the first st. double crochet, 3 air. loops over the second st. double crochet, 3 tbsp. double crochet with one base in the third st. double crochet *, knit from * to *, finish row 5 tbsp. without a crochet.
- Fifth r. 1 air lifting loop, 2 tbsp. without crochet, *3 air. loops, 3 tbsp. double crochet, 3 air. loops, 3 tbsp. double crochet, 3 air. loops, 3 tbsp. with a double crochet in an arch of 3 air. loops of the row below, 3 air. loops, 3 tbsp. double crochet, 3 air. loops, 3 tbsp. double crochet, 3 air. loops, skip 2 tbsp. without crochet, 6 tbsp. without crochet *, knit from * to *, finish row 3 tbsp. with a crochet knitted into an arch of 3 air. loops
- Sixth r. 3 air lifting loops, 3 air. loops, in the third st. double crochet, knit 3 tbsp. double crochet with one base and top, 5 air. loops, 3 tbsp. double crochet with one top in 3 tbsp. double crochet row below, 5 air. loops, 3 tbsp. double crochet with one top in 3 tbsp. double crochet row below, *2 air. loops, skip 2 tbsp. Single crochet row below, 2 tbsp. with 2 double crochets, 2 air. loops, 3 tbsp. double crochet with one top in 3 tbsp. double crochet row below, 5 air. loops, 3 tbsp. double crochet with one top in 3 tbsp. double crochet row below, 5 air. loops, in st. double crochet, knit 3 tbsp. Double crochet with one base and top, over next st. with a crochet knit 3 air. loops, in the third st. double crochet, knit 3 tbsp. with a double crochet with a common base and top, 5 air. loops, 3 tbsp. double crochet with one top in 3 tbsp. double crochet row below, 5 air. loops, 3 tbsp. double crochet with one top in 3 tbsp. double crochet row below*, knit from * to *, finish with 2 chain stitches. loops 1 tbsp. with 2 yarn overs in a lifting loop.
- Seventh r. 3 air lifting loops, 2 tbsp. with a double crochet in an arch of 2 air. loops, * 7 air. loops, 1 tbsp. with 2 yarn overs into a common top of three sts. double crochet, 7 air. loops, 1 tbsp. with 2 yarn overs into a common top of three sts. double crochet, 7 air. loops, 1 tbsp. with 2 yarn overs into a common top of three sts. double crochet, 7 air. loops, 1 tbsp. with 2 yarn overs into a common top of three sts. double crochet, 7 air. loops, over 2 tbsp. with 2 yarn overs in air arches. loops knit 1 tbsp. double crochet, 2 tbsp. double crochet, 1 tbsp. double crochet*, knit from * to *, finish 1 tbsp. with 2 yarn overs in the third lifting loop.
- Eighth r. Knit with arches of 8 air. loops, securing them with 1 tbsp. Single crochet in the middle of each arch of the row below. Finish row 5 air. loops, 1 connecting st.
- Ninth r. in each arch, knit (7 double crochet stitches, 1 connecting stitch in the middle of the next arch, unfold the work, from these 7 double crochet stitches, knit (2 chain stitches + 6 single crochet stitches)), 6 chain stitches. loops, 7 tbsp. with a crochet in the arch where the connecting stitch was knitted. etc.
The strips are connected to each other according to scheme 2 as follows.
- First r. Knit a chain of air. loops securing its connection. Art. to the extreme stations without crochet the last row of the strip (4 chain stitches are placed between each two outer loops) knit in this way until the end of the strip.
- Second r. In every 4 air. knit loops 2 tbsp. double crochet + 2 air. loops.
Now connect the strips, knitting 3 air. loops and securing from 1 tbsp. without a crochet, alternate between two stitches. with a double crochet on one strip, then on the other.
Air quantity loops can be varied to change the width of the connecting rows. Tie the bottom, neck and armholes of the product according to any convenient tying pattern.
Is it possible to combine warm days and crocheted clothes? Not only is it possible, but it is also necessary. Because it is in the summer that we are open to the views of others, we can change every day and surprise with original outfits and a stylish look. And what could be more original in the warm season than crocheting for summer!
Crochet for summer - fashionable and comfortable
Crocheting for women has long ago ceased to be associated with grandma’s leisure time. And all because modern knitted items look as impressive as possible. Especially summer crochet models, thanks to the combination of original design and amazing comfort. Each crocheted model for women for the summer is a work of exclusive applied art. That is why it is worth updating your wardrobe for the hot season with crocheted clothes.
Features of crochet for summer
The main rule of crocheting for summer for women is to use natural materials to the maximum - cotton yarn, natural silk in combination with viscose. Such knitted items will not lose their relevance either during the sweltering heat or during the cool of the evening.
Colors and styles of summer clothing models
To stay on trend in summer, you should give preference to models in bold colors and styles. This summer is a time of rich colors and good mood. When else, if not in the summer, can you show off and show off your outfits to others! Crochet for women for the summer - these are items and accessories in a bright and colorful design that fit perfectly into the everyday style of clothing, making it spectacular and a woman’s image memorable.
How to wear knitted items in summer
Knitting is a process that is addictive. The desire to create something original using a crochet hook increases with each successfully crocheted item. And, of course, you want to wear everything at once. This is the main mistake of fashionistas-craftswomen. Each knitted item individually is a real find. But if you overload your look with knitted items, you risk getting lost in the abundance of openwork. Give yourself the opportunity to remain light and a little playful - one, maximum two, knitted items is a limit that should not be violated.
Get inspired and knit
No ideas on how to realize your knitting desires for the summer? This is easy and simple to fix - summer crochet of bright dresses for women in a colorful design, patterns with descriptions are widely presented on our website. We choose the model we like for the summer, select the yarn and create an exclusive one. You and I, dear needlewomen, have one undeniable advantage over other fashionistas - we can create unique stylish images for ourselves, which means that the chance of catching interested glances is much higher than everyone else.
Every woman has a crocheted item in her wardrobe; such products are distinguished by an endless variety of openwork patterns that are impossible to pay attention to. Crocheting itself is considered an attractive applied art, and there are few people who do not know such needlework; they have probably crocheted at least one thing with their own hands. Learning to use a crochet hook is not difficult, the main thing is to correctly and carefully perform the elements indicated in the diagram. Another point is the matching of the threads and the hook number so that the patterns are clear and even.
Choosing threads and hooks
Knitting a beautiful thing is the dream of every knitter, but no one thinks that the process can become tedious and irritating due to the wrong hook or yarn. The thickness of the threads is selected according to the size of the hook. Cotton threads are used for knitting, some of them have a synthetic or silk insert, this allows you to quickly complete the work and gives the product expressiveness and shine.
Depending on the density of the item being created, the threads are selected to the appropriate thickness. The thinner they are, the lighter and more delicate the canvas will be. Napkins and thin summer blouses for women require thread sizes 20 and 30, but for large and dense items, yarn size 10 is used. You also need to take the choice of hook seriously, firstly, pay attention to the number indicated on the package or on instrument, and secondly, the strength of the handle, it can be plastic or wooden. The hook is made of durable, rigid stainless steel.
Feature of the hook - summer openwork items made of fine yarn
Summer is the hot season of the year and woolen clothing is inappropriate here, unless it is an openwork blouse or top. They are knitted from thin yarn, for which a suitable hook is selected. Cobwebs made from thin threads are created using a hook with a diameter of 0.6 to 1.5, but if a more spectacular design is being made, it is better to use frequently used thin yarn and a hook with a size of 1.5 to 2.5. It is advisable to use a metal tool with the correct tip; it should not be sharp or slippery when gripping the thread.
Hooks for thin yarn have a short length to the handle so that the loops do not become elongated, and this can disrupt the texture of the pattern. A flattened handle is considered more convenient than a rounded one; it puts less pressure on the fingers and prevents the tool from slipping.
Patterns
The thickness of the fabric and softness are influenced by the selected pattern. If a sweater or cardigan is made with embossed flowers, the pattern is knitted tightly. But blouses or jackets with lace that do not hide underwear, top or shirt should be made with openwork motifs. Crocheting allows you to create many patterns of clothing: blouses, skirts, dresses, hats, etc.
Knitting techniques
Any crochet pattern is performed using several techniques:
- air loop (the main element of knitting, forms a chain from which any product begins);
- yarn over (thread is thrown onto a hook where there is already a loop; the more yarn overs, the higher the stitch);
- half-column (a loop is taken out from the previous row and knitted together with a loop on the hook);
- double crochet (knitted with and without crochet); picot (edge binding).
In order not to get confused in these details, diagrams are drawn up with the designation of each element. Sometimes you have to make complex patterns, as in the “broomstick” knitting technique, which uses an additional long object (a knitting needle or a ruler). The task of the technique is to perform even large air loops, which are then tied in a bunch with five single crochets, thus forming a figure eight.
But for the Tunisian pattern, you need to select a long hook so that it is comfortable to hold like a knitting needle or a pencil. The fabric is knitted on one side only, it does not turn over, as when knitting. Here one row is knitted from left to right and, conversely, from right to left. In the front stitch, the loops are knitted immediately, and in the purl stitch, all the loops are first thrown onto the hook, and then knitted one by one. The choice of hook does not correspond to traditional knitting; if the selected yarn requires a hook number 2, then according to the Tunisian technique, 2.5 is taken.
There are also a lot of patterns that are knitted using a special technology, and each is interesting in its own way. And in the catalog, things appear unique, since the pattern and style of the product are combined.
Real needlewomen probably know such an activity as crocheting for women - fashionable models of 2015 with descriptions have been waiting for your creative experiments for a long time. After all, you can crochet not only warm winter things, but also light summer items that will look elegant and exclusive. We invite you to familiarize yourself with the knitting process elegant summer blouses and dresses that you can wear for a special occasion.
Crochet for women: fashionable patterns 2016 for summer with description
In summer, you especially want to look beautiful and stylish. And what else looks so elegant and unique as exclusive knitted items created by yourself! If you crochet for the summer, there are many patterns and patterns open to you, simply unlimited space for imagination! These include all kinds of patterns that imitate lace, and incredibly beautiful fillet knitting, which gives a feeling of lightness and weightlessness to each product. In the summer you can experiment with patterns, colors and textures and create truly unique things. You can make almost anything with a hook and yarn:
- dress;
- sundress;
- summer top;
- jacket;
- cardigan;
- and even a swimsuit.
Crochet summer blouses for women: models for the 2016 season
In summer, you need to protect your skin just like at any other time of the year. But only from the sun and overheating. Ideal in this case would be light openwork blouses, which you can knit yourself using natural yarn and, of course, all your skill and imagination. Today, handicrafts, including crocheting, are at the peak of popularity - patterns and descriptions of summer blouses for women are truly exclusive. We invite you to familiarize yourself with knitting patterns for summer tops, blouses and tunics.

Like this openwork blouse will become your favorite outfit on cool summer days.

 An openwork top is a great option to pair with denim shorts.

This is just a stunning swimsuit cover-up – very stylish.

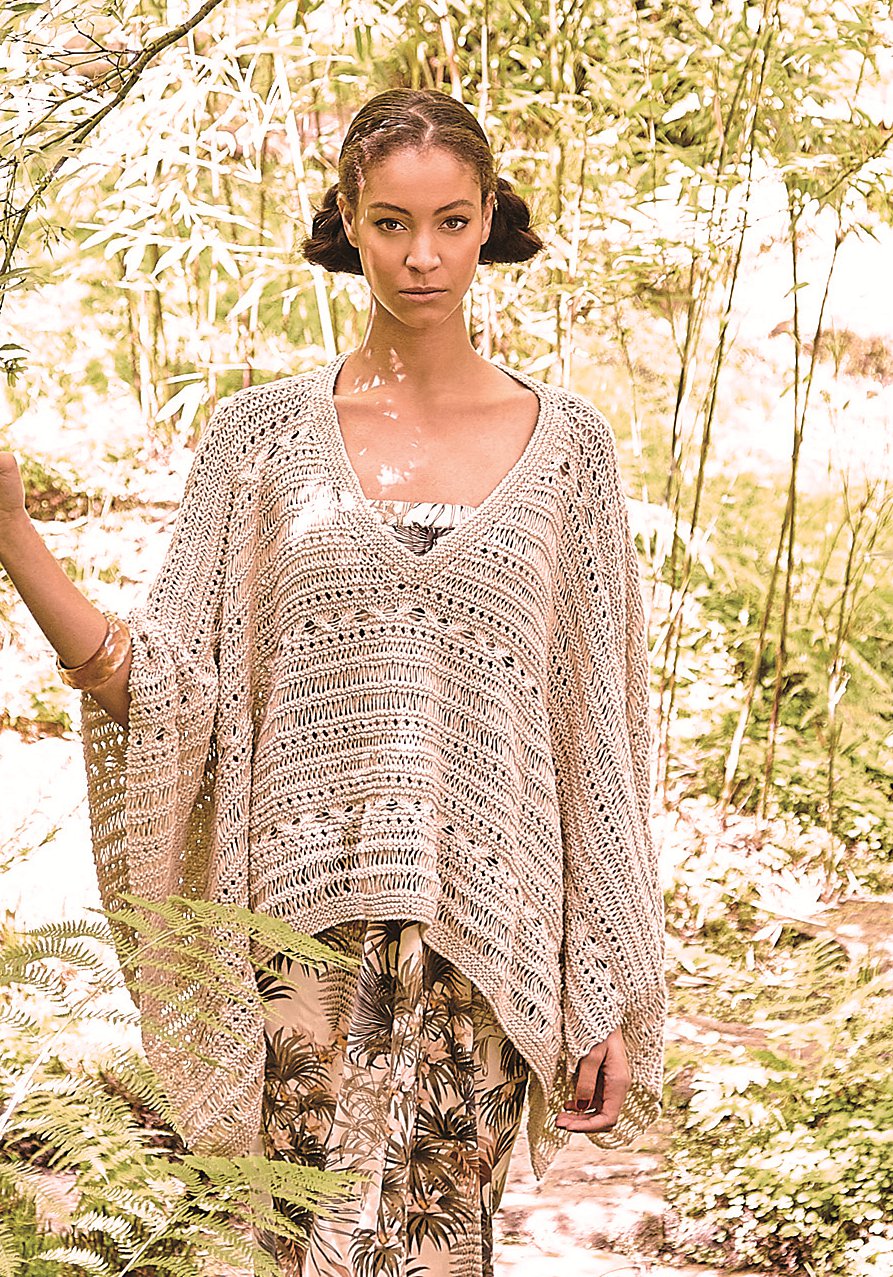
Lace summer pullover– a gentle and alluring outfit.

And this is an unusual T-shirt with beautiful trim at the bottom.

 The knitting technique of the product itself, as well as flowers for decoration, their motifs can be seen in the diagram.
Crochet summer top: detailed master class for beginners
And we want to acquaint our craftswomen with a detailed description of the process of knitting a summer top with a cup. This open option will show others your bronze tan and attractive shape.

 1. Take thin yarn.
  2. We start knitting with a cup. We knit according to the pattern and get the first cup.
 3. We make a lining for the cup from knitwear and sew it to the knitted base.
 4. Select the inserted foam cup according to shape and size.
  5. Sew the insert to the knitted cup.
 6. Using a similar pattern, we knit the second part of the bodice and connect the 2 cups together.
 7. Connect the cups of the top along the sides using a chain of air loops. We knit the same loops along the bottom edge of the bodice.
 8. We make the pattern according to the diagram.
 9. We knitted the top part of the top. It turns out very nice, this option can even be leave it as a swimsuit.
 10. We continue to knit according to the pattern.
 11. We need to tie a white (or other) ribbon. And stretch it under the bottom of the bodice.
 12. Make small bells at the ends of the braid. This will give her a more finished look.
 13. We process the upper part of the back and the cup of the top with a white border. To do this, we knit 2 single crochets and a picot from three air loops.
 14. We also stretch a braid between the cups, reminiscent of a corset.
 15. Using a single crochet we knit a strap on which our bodice will be attached.
 16. This is the nice appearance the finished product will have.

Knitted variety for summer: fashionable models of 2016
In summer, not only T-shirts and tops are relevant. You can knit all kinds of tunics, boleros, dresses, sundresses for your summer wardrobe. Knitted items are extremely fashionable this season. A lightweight, elongated models that are so relevant in 2016, are ideal for overweight women who want to hide their flaws and emphasize their strengths.

This delicate tunic, consisting of individual square motifs, will decorate your summer outfit.

In the summer, sometimes you want to wear your favorite jeans, and an openwork elongated tunic with a simple pattern will go with them.


This is the kind of lace beauty you can create with crochet, study the knitting pattern.


Try it knit a light weightless tunic, and you will become a real queen of the beach.


As you may have noticed, openwork compositions are now at the peak of popularity. We invite you to create several products using similar motifs from the diagram. This way you won’t hesitate for a long time between knitting a vest, cardigan or sweater, but will create all these products one by one, (or simultaneously) because the pattern is almost the same. And even if during the work you suddenly change your mind about which of these masterpieces you should knit first, it’s okay. You will definitely have a great outfit, like in one of the photos.


How to crochet a summer dress: a detailed diagram for beginners
In summer, the most popular outfit is a dress. We offer you this delightful option to knit with your own hands. This dress can be worn to the beach, to a party, or just for a walk along the warm coast.

Prepare everything you need for work:
- 450 g of yarn (the composition can be 70% cotton to 30% polyamide);
- hooks size 3.5; 4; and 4.5.
Pattern We will knit according to pattern No. 1. We start with the loops that are before the rapport and repeat the repeat loops. At the end we knit the loops that come after the rapport.

We knit the mesh according to pattern No. 2. Repeat knitting the first and second rows.
We determine the knitting density as follows::
- pattern (let's call it “shells”) 19, 5 loops and 7 rows with crochet number 3.5 – (10 x 10 cm);
- “shells” - we knit 14 loops and 6 rows with crochet number 4.5;
- mesh - 19 loops and 11 rows crochet number 3.5.
Front of the dress(its lower area) is knitted from top to bottom, bevels on the sides will be formed due to the different thickness of the hook. The upper part of the dress is knitted from the bottom up. Pay attention to the location of the arrows on the pattern.
The lower part of the dress along the back is crocheted No. 3.5. We make a chain consisting of 85 air loops and knit a pattern. After we get 23 cm of knitting, we switch to hook No. 4, and after 50 cm we take hook No. 4.5. After we knit 62 cm, we finish work 5 rows according to the pattern.
Upper part of the dress along the back: We knit the upper edge with a hook No. 3.5 cm, casting 86 loops. And then we knit with a mesh. When we knit 5 cm, leave armholes on both sides for the sleeves (9 cm). Having knitted 19 cm, we leave 40 loops in the middle for the neckline. And on the sides we knit a 3 cm mesh. Let's finish the job.
Bottom and top of dress in front. We knit in the same way as the back, but we knit the upper part of the front 11 cm, and then we close 40 loops in the middle, and we knit 11 cm on the sides.
Sleeves. Take a 3.5 cm hook and cast on a chain of 50 loops. We knit 1 row with a single crochet. After this we knit with a mesh. To form bevels, add one loop on each side 3 times per row. Then add loops in each row. We knit 15 cm and finish the job.
Assembling the product. Sew along the shoulder line. We tie the neckline with a hook No. 3.5 using a connecting post (1 row). We sew the product along the sleeve line and on the sides.
Video tutorials: crocheted fashion models 2016

