Star News


Machine mask. How to make a papier-mâché mask - create a festive look
If you are going to celebrate a holiday in an unusual way, whether it is New Year, a party or a birthday, then you can prepare a mask for this occasion for yourself and maybe for the rest of the participants.
Making a mask is not difficult, you just need to know a few simple rules and have the necessary materials with you.
You can find several not very difficult mask making workshops here, including New Year's and carnival masks, as well as masks for children and adults.
DIY carnival masks
You will need:
Scissors
Black fabric paint
cling film
Mask template.
Glue (moment, superglue, fabric glue)

1. Prepare the template for the mask using paper and a marker or printer and place it on the table. Cover the template with cling film.

2. Prepare a tulle and cut a rectangle from it with dimensions of approximately 25 x 13 cm.

3. Start tracing the black part of the mask with fabric paint.

4. Let the paint dry, and then carefully remove the tulle from the film.

5. Cut out the mask, including the holes for the eyes.

6. Prepare the tape, and cut 2 pieces from it, each about 50 cm long.

7. Using glue, attach the tapes to the mask. Let the glue dry.

You can make the ribbons shorter. The main thing is that you can tie them freely.
How to make a cat mask

You will need:
Scissors
Lace trim
Satin ribbon
Small decorative feathers, optional
1. Cut the lace trim so that you get two equal parts.
2. Connect the halves of the inlay, as shown in the image. You should get the main part of the mask. Glue in the middle.
3. Cut off unnecessary parts to get the desired shape.
4. Glue the feathers so that they resemble cat ears.
5. Prepare a satin ribbon, cut it into two equal halves and glue each piece to the left and right ends of the mask.
How to make a Halloween mask

You will need:
Nylon mesh
Lace
Scissors
Super glue
sticky aerosol

1. Prepare the mask template first.

2. Put 2 rectangles of nylon mesh and lace on the mask pattern (lace first, and mesh on top). The size of each rectangle is approximately 25 x 13 cm.
3. Connect the fabrics together using a sticky spray. Put the workpiece under something heavy, and wait a bit.
4. Using scissors, cut out the mask, including the holes for the eyes.

5. Prepare the tape, cut it in half and glue each half to the mask so that you can put it on.
DIY New Year's masks

You will need:
Artificial flowers
Sequins.

1. Cut out the mask from felt, having previously drawn it with a simple pencil. To make it easier to figure out where to cut the holes for the eyes, attach the mask to your face and circle the approximate place with a pencil.

2. Separate the petals from the artificial flowers and stick them to the mask as you like.


4. Glue or sew the tape to the back of the mask so that it can be put on.


DIY paper mask

You will need:
Scissors
Stationery knife
Thread (preferably elastic) or not very wide elastic band
Pencils/markers, etc.
Hole punch, if desired

1. Prepare a sheet of thick paper or cardboard and fold it in half.
2. Use a utility knife to cut out holes for the eyes.

3. Make holes for attaching thread or elastic with a hole punch or knife.
4. Decorate the mask to taste. If this is an animal, you can draw a nose, mustache, ears, etc.

How to make a carnival mask

You will need:
Mask template (available from specialty stores) or cut out a mask from cardboard.
colorful feathers
sequins
Super glue
Toothpick

1. Prepare a sample mask and think about how you want to decorate it.
2. To gently stick the rhinestones, use glue and a toothpick - dip it into the glue and apply to the mask. Glue rhinestones around the eye holes.

3. You can stick rhinestones on the top side of the eye hole, and apply glitter on the bottom. To do this, apply glue to the bottom and gently sprinkle glitter on it.

4. Also add multi-colored feathers with glue. How many feathers, and where they will be placed, you choose.

5. It remains to add an elastic band or tape to put on the mask and leave the glue to dry.

DIY cardboard mask

You will need:
Scissors
Leaves of different colors and sizes
Sticks, twigs, seeds, feathers, etc.

1. Cut out a mask from cardboard
2. Glue the leaves as shown in the image (or choose your own option) to make the mask look like an Indian attribute.
3. Start decorating the mask with various details to your liking, the main thing is not to overdo it and make everything symmetrical.
How to make a paper mask. Decorate with paper roses.

You will need:
A simple papier-mâché or plastic mask (without drawings or patterns) bought at a store or you can cut it out of cardboard yourself
corrugated paper
Scissors
Feathers, optional

1. You will need to cut approximately 25 strips of corrugated paper. Their length can vary from 25 to 40 cm. Fold each strip in half.

2. To make a rose from a paper strip, start twisting it, as shown in the picture. As you curl the paper, flip the strip 180 degrees. To keep the flower, you can fix some places with glue.

If you want to know what other flowers can be made from paper, check out our articles:
3. Start gluing the roses to the mask. Add glue to the bottom of each flower.

4. If desired, you can add decorative feathers.


You can try different colors and types of paper.
Masks for children with their own hands. Animal noses.

You will need:
Egg carton
Tassels
Rubber
Thread and needle
Heavy paper
Scissors

1. Take an egg carton and cut out the details with indentations - they will play the role of noses, which you need to decorate next.
2. To be able to breathe through the nose, make several small holes in the workpiece - use a needle or carnation.

3. Start decorating the cardboard nose with the colors of your favorite animal. Draw some details like nostrils, teeth, etc. Look in books or on the Internet for what animals look like to create a better mask.
4. Prepare thick paper and cut out the antennae from it. Glue them to the workpiece.
5. It remains to sew on an elastic band so that the nose can be put on.
New Year's masks for children

You will need:
mask pattern
Fabric (purple in this example)
Lining fabric (thin fleece);
Lace (in this example, the color is black)
Thread and needle
Scissors
pins
Velvet Ribbon
Decorations.

1. Prepare the main and lining fabric and cut out the details of the mask using a pattern.

2. If your lace has a seam on both sides, you need to cut the seam on one of the sides.

3. Using pins, attach the lace to the sides of the mask (you need to do this from the wrong side), while making medium-sized folds.

4. Now the lace needs to be sewn to the main part and cut off the excess.


5. Insert a velvet ribbon under the lace and secure it with pins.

6. Using a sewing machine, sew the lining fabric to the main part, as well as the slits for the eyes.
7. Decorate the mask to taste, for example, you can add a small spider or a snowflake.

DIY masks (photo)


DIY Venetian masks


The carnival mask has always been an attribute of the holiday. They act as an addition to or purchased in stores. You can often see masks made in China. They are made of melamine, a material even more toxic than formaldehyde. New, as you know, well-forgotten old. Papier-mâché (French for "chewed paper") is a versatile material suitable for making any product - from cups for stationery to toy furniture, including carnival masks. By the way, a do-it-yourself mask can become. How to make a papier-mâché mask, detailed instructions will tell.
Making a papier-mâché mask
Tools and materials
Step-by-step instruction
- To make the base of the mask, we knead the sculptural plasticine in our hands and form a cake. We put it on the face, giving it the shape of our outlines, especially the areas of the nose and cheekbones. We mark the open area (around the eyes).
- We leave the plasticine mold-matrix on a flat surface. Grind porous thin paper for papier-mâché with your hands into pieces measuring 15 x 15 mm. Modern newspapers are not suitable for this purpose, it is better to use toilet paper and a little craft paper for compaction.
- We prepare a weak solution of PVA glue and water and soak part of the paper in it. We cover the plasticine template with the first layer of wet paper. We follow the uniform distribution of the paper, smoothing it with our hands (after drying, it will be much more difficult to level it). We glue the laid layer with glue and put the second one on top.
- We repeat this procedure two more times (or more), wetting the paper and soaking it with glue. We follow the exact correspondence of the mask to the base. The layer thickness must be at least 3 mm.
- To fix the shape of the future mask, lay out the fifth layer of gauze. Add two more layers of plain paper and finish with craft pieces.
- Paste the last top layer (and preferably two) with white paper: it is easier to apply paint.
- We leave the product for 2-3 days until completely dry, cut off the excess, adjust the size, grind if necessary with sandpaper and outline the contours of the drawing with a pencil for coloring.
- It is easier to work with acrylic paints with a foam sponge (especially on large areas). Small details are drawn with an artistic brush. You can varnish the product at the final stage.
- Along the edges of the mask, you need to make holes for ties (braids or elastic bands). All holes are easier to make in the wet mass. After drying, they will have to be drilled.
- We decorate the accessory with beads, feathers, lace, sequins, fringe, rain, sticking them with any transparent universal glue.
The video on how to make a papier-mâché mask will show in more detail. This is standard technology. It is already possible to make any volumetric mask on it. The technique of working with papier-mâché is much simpler than with modern vinyl plastic, not to mention safety (they need a special burner for heating).
Papier-mache mask - according to a simplified scheme
Let's see how to make a papier-mâché mask with your own hands in a slightly different way, halving the time it takes to make it. For such a mask, a papier-mâché working mass is needed, which is better saturated with glue, lays down more evenly, and dries faster. In addition to toilet paper, paper egg trays can be taken as raw materials.
How to prepare mass for papier-mâché
- medium quality toilet paper or paper egg bins;
- flour paste or with the addition of starch or glue;
- blender or other grinder;
- utensils for cooking.
Step-by-step instruction
- Put toilet paper rolls in a saucepan and pour water (pre-soak the egg trays for 5 hours).
- We put on fire and cook, stirring, until the mass becomes homogeneous.
- Strain through a colander and squeeze out excess water with your hands.
- Grind first with your hands, and then with a blender (when wet).
- Spread out in an even layer and dry.
- If necessary, mix the prepared cellulose with a paste or glue and knead the dough of medium density until it stops sticking to your hands.
- Do not overdo it with glue: the mass in the work will stretch and form poorly. You can add a little wood glue (1:10) to the paste or prepare glue from PVA and CMC (two wallpaper for one part of PVA).
- Store the rest of the dry mass in a bag in the refrigerator.
Paste preparation
- Pour 250 ml of water into a saucepan and put on the stove.
- Pour a glass of flour 200 ml with cold water (half a glass) and mix until smooth.
- Pour batter into boiling water in a thin stream while stirring constantly.
- Boil with constant intensive stirring and cool.
Master class on making a Venetian papier-mâché mask
- a plastic matrix for a Venetian mask (in our case, this is Doctor Plague);
- petrolatum;
- food film;
- rolling pin or other rolling device;
- mass of papier-mâché, prepared according to standard technology;
- decoration material.
Step-by-step instruction
- Lubricate the plastic matrix evenly with petroleum jelly so that you can easily separate the dry mask from the base.
- We cut off a piece of cling film and lay a lump of the prepared mass of papier-mâché on it. We cover everything with foil.
- Roll the lump through the film with a rolling pin into a large pancake with a thickness of about 3 mm (after drying it will be thinner). Remove the top layer of the film and lay the workpiece on a plastic base. Without removing the cling film, smooth the cake on the matrix, forming the future mask.
- We clean the edges, ironing with our hands, through the film we make cuts for the eyes and on the sides for the ribbons.
- Remove the film and leave the mask on the plastic matrix until completely dry. It is better to dry at room temperature for about 4 days. If you try to remove it half-baked, it may deform.
- We remove the dried mask, decorate it to our taste and delight ourselves and the environment.
Making a papier-mâché mask can seem like a pretty difficult undertaking. Indeed, the main difficulty lies in the manufacture of a frame for applying paper pulp or pieces of newspapers. Often this can be done far from the first time. However, these difficulties can be avoided. Use a little trick from this article, and you will get a beautiful mask with your own hands, you can find videos of various creation processes at the end of the article.
Option 1: Papier-mâché mask on a finished basis
For beginners, this method is good. The master class involves the use of such materials:
- plastic base mask;
- paper napkins or white toilet paper;
- water;
- PVA glue;
- fat cream or petroleum jelly;
- hot glue;
- satin ribbon;
- braid and feathers for decoration;
- acrylic paints.
1. Finely tear the paper. Dilute the glue in half with water, soak the paper in this mixture, let it sour.

2. Lubricate the plastic base with cream or petroleum jelly, cover with a paper-glue mixture. We are waiting for it to dry completely.


3. After that, carefully remove the workpiece from the base. With a pencil, we outline the outlines of the eyes, the desired shape of the mask in the future. Cut along the lines. We will have a Venetian cat mask.


4. We cover the mask with white acrylic paint, decorate with golden braid.


5. With a hole punch, we make holes for fastening the ties, glue the feathers, draw the details.


The mask is ready! A bright do-it-yourself papier-mâché mask made according to this lesson will be a wonderful gift or addition to a carnival look.

Option 2: papier-mâché mask from scratch
In the second manufacturing option, we do not have a ready-made plastic mask that we can paste over, so we will have to make the base ourselves.
1. To do this, we sculpt a generalized face from clay or plasticine. We put it on a larger board, smear it with petroleum jelly and coat it with creamy alabaster. We make sure that the layer is at least 2 cm. We wait for a day to dry, then we separate the form. It should turn out approximately the same as in the photo.

2. For work, now we need: gauze, paper and paste.

3. We take a piece of gauze so that it is larger than the shape and the edges hang freely.

4. Wet the gauze so that it fits better in shape.

5. We start gluing pieces of paper from the deepest place. At first they should be small, then the size can be increased. We also glue the side so that the mask does not warp during drying.


6. Leave the molded mask to dry overnight. In the morning, pull the gauze in different directions, but not up. The workpiece itself will jump out of the mold.


7. Turn the mask over, leave it to dry for another day.


9. We outline and cut out the eyes.


10. Cover the mask with primer. It is convenient to use construction putty. To avoid cracks, the layer should not exceed 3 mm. Let the primed mask dry.


11. Sand again.
Master class on making a carnival mask "Volto"
Master class "Carnival mask"
The master class "Carnival Mask" is intended for students over 12 years old (In accordance with the theme of the lesson of the 4th quarter of the MHC subject of grade 8.) It can be used in extracurricular activities to consolidate the material, in order to decorate the interior or make masks for theatrical activities.Target:Development of creative abilities through acquaintance with the culture and customs of other countries.
Tasks:
- Introduce the concepts of "Venetian mask" and "carnival".
- Develop painting skills, in compliance with the laws of composition on complex forms;
- Introduce students to the technique of papier-mâché;
- To cultivate respect for the culture of other countries, curiosity and patience.
Carnival in Venice is one of the most anticipated events of the year, both for the inhabitants of this ancient city and for tourists. Carnival is a costumed holiday before the start of Lent before Easter. A mask means a face, it is an item that is put on to be unrecognizable. Real Venetian masks are handmade creations that are made from papier-mâché. At the Venice Carnival, masks were obligatory, and the traditional carnival masks in Venice themselves are divided into two groups: the masks of the commedia del arte, which means the comedy of masks, and the classic masks. It is not surprising that in the 15th century there was a whole profession, the profession of a masker.
The classic Venetian masks include Baut masks (the name of this mask most likely comes from the name of a fictional character that scared children, like the Russian Babai or Buka. This mask always has only two colors - white and black).

Venetian lady (there are several varieties).

Cat, Doctor of the Plague (at that time, doctors, entering the premises where there were plague patients, wore masks with a long nose, which was of quite practical importance, there were various herbs and aromatic substances, the task of which was, as it was then believed, to protect the doctor from plague infection).


and Volto (the most neutral mask, it copied the shape of a human face and was attached to the head with ribbons (or some Volto masks had a handle on the chin).

This mask has another name - Citizen.
This type of mask, we will make.

Materials:
Paper (any: writing, for printers, newsprint)
Printed sheet with notes;
PVA glue;
Gouache or acrylic paints;
Brushes (No. 5 or No. 6 and No. 1 or No. 2);
Blank for papier mache "Venetian mask" made of plastic.
Manufacturing process:
1. We put two layers of paper moistened with water without glue on the mask so that the mask can be easily removed from the mold.

2. Lubricate the subsequent layers of paper with PVA glue. The process is easier if the paper is already wet, then the pieces come off easier and overlap more evenly. Then we simply lubricate the layer itself with glue.

3. The work is painstaking and takes about 20-30 minutes. But if you are planning multiple masks or adjusting the shape, this will save you a lot of money.

4. I used newspapers and printing paper alternately. This makes it easier to see if the layers overlap evenly.

5. For the last two layers, it is better to use white paper. Also, the last layer is covered with PVA glue. In total I got 7 layers. If the mask is not for the interior (performance or masquerade ball), then at least 10 layers of paper are needed.

6. Dry the mask with the shape. I just left her at the window for the night.

7. After drying, the mask can be easily removed from the mold.

8.Remove the mask and trim the edges with scissors if necessary.

9.Check if there are any bumps or scratchy edges on the inside of the paper.

10. We cover the mask with white gouache paint.

11.

12.

13.

14. Apply arbitrary patterns with a pencil.

15.

16.

17.

18. It is better that the lines are as thin as possible.

19. We take a printout with notes.

20. Using the break method, we make several arbitrary pieces.

21. We cover them with PVA glue on top too, so that printer or printing ink does not wear off.

22. We paste pieces of music paper in several places.

23. We take shades of mother-of-pearl or paint with a metallic sheen (if any).

24. A mask completely painted with mother-of-pearl colors will look spectacular in the interior in different lighting conditions.

25. We apply a golden color to some areas of the mask, on one side. According to our idea, the mask will be painted in any form (both of its sides will be different).
26. We take gouache paints (You can continue with acrylic paints).

27. It is better to choose several shades of color and alternate them for a color transfusion effect.

28. We pick up red gouache on the brush.

29. Fill in the gaps of the curls, trying to gently slide over the shape of the mask.

30. Often the intended pencil drawing does not coincide with subsequent brush movements. Or the idea changes along the way.

31. We try to keep one side of the mask in warm shades, and the other in cold ones.

32. We pick up white gouache on the brush.

33. Add white dots and lines.

34. We take a lilac color.

35. Add purple curls of arbitrary shape.

36. We take black gouache.

37. With a thin brush, we repeat the lines in the shape of the face, avoiding the repetition of mimic wrinkles.
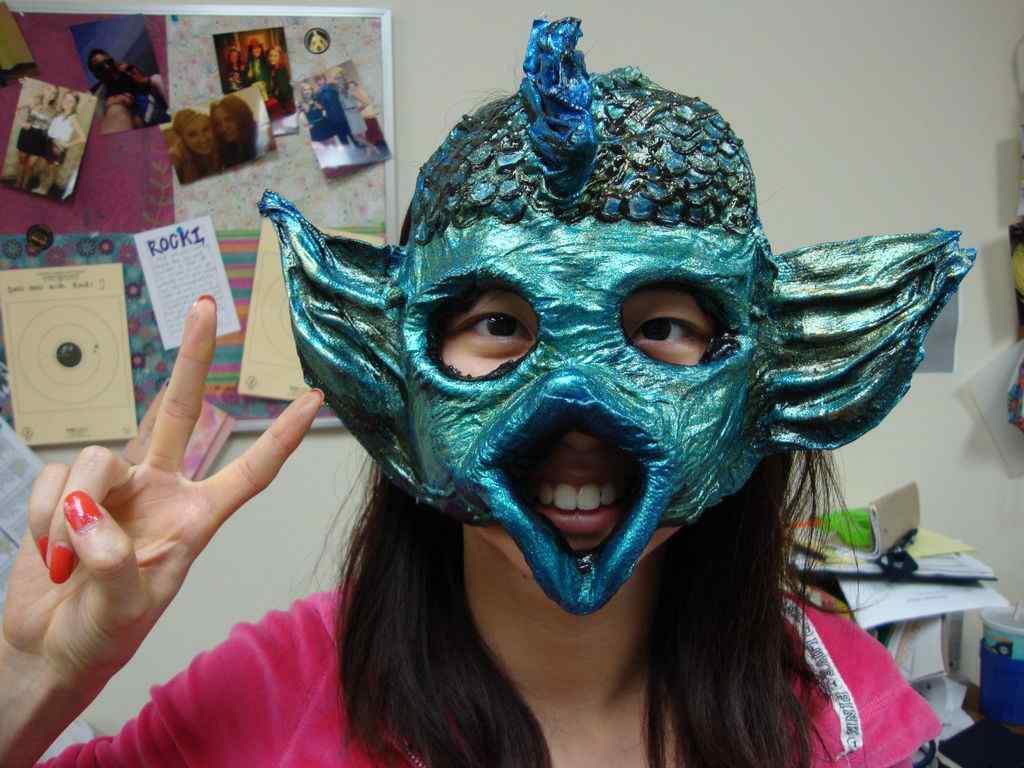
Before the holidays, it's time to think about the right outfit. And if this is a children's New Year's party, a carnival party or even a masquerade ball, then perhaps the most important accessory of the invented image should be a face mask. To date, on sale you can find a lot of bright and colorful masks and choose the one that fits the chosen outfit. But papier-mâché masks created with your own hands from available materials will look much more harmonious and interesting.
"Papier-mache" is translated into our language as "torn paper", which fully reflects the essence of this material. Papier-mâché is nothing more than paper pulp with the addition of PVA glue or paste for paper bonding. It is best to use old newspapers to prepare the mass with your own hands, the paper of which is most suitable for papier-mâché, but in the absence of the proposed material, they can be replaced with toilet paper, paper napkins or towels.
Previously, before you start creating a face mask with your own hands, it is important to worry about choosing the basis for it.

For this, a number of methods for manufacturing various bases can be proposed.:
- An old face mask. A simple mask without any extra bumps can be used as a base. It is only worth remembering that before covering it with papier-mâché mass, it is worth wrapping the surface of the old mask with cling film to avoid the material sticking to the base.
- Inflated balloon. The most suitable base for beginners. Thanks to the smooth rubber surface, it will be easy to make a mask, since the papier-mâché will not stick to the base and after the material hardens, the balloon can be easily removed.
How to make a Venetian papier-mâché mask (video)
Papier-mâché face mask
The problem with many purchased carnival masks is that they do not fit snugly on a person’s face, which in turn leads to its constant slipping. But during the holiday you want to have a good time, and not constantly correct the annoying accessory. Therefore, an accessory made with your own hands based on a cast of your face will be a great solution, because the mask will not only look original, but the canvas will also sit, which means it will cause less inconvenience.
To make a cast of the face yourself, you can use sculptural clay.

A sufficient amount of material must be carefully kneaded in the hands and give it the shape of a pancake with a layer thickness of about two centimeters. After that, the resulting pancake is applied to the face (before this procedure, it is recommended to lubricate the skin with a cream with a greasy texture) and carefully shape the shape of the face into plasticine.
They remove the plasticine form from the face very carefully so as not to damage the result of the procedure performed, and lay it on the work surface. After that, the base for the mask, made by hand, is ready.
But this method has one undoubted minus - not every person may have sculptural clay at hand. Therefore, the basis for manufacturing can be made from a more affordable material - food foil. The foil must be folded several times so that the resulting web is sufficiently hard, but at the same time easily takes the desired shape. After that, the resulting piece of foil is applied to the face and with the help of finger pressure, we give the foil the shape of the face.

The almost finished base must be removed, if there is, to correct irregularities and make cuts in the foil for the eyes and nose. The resulting shape can be corrected by adding plasticine to it in the right places. After that, the base is wrapped in cling film and it is ready for papier-mâché.
Papier-mache masks: instructions for making
During a small master class, you will learn how to make a mask on your own and about several options for its design.
In order to make the desired mask, you need to collect some materials and tools that will be needed during the creation of the accessory, namely:
- The basis for the mask.
- Paper (newsprint, toilet paper or paper napkins).
- Water.
- Glue (it is preferable to use PVA).
- Brush.
- Dyes, ribbons, feathers, beads, or other decoration material.
To make the necessary papier-mâché accessory, you need to follow the general instructions step by step, which will help you through the whole process from kneading the paper pulp to decorating the finished mask.
Instruction:
- Finely tear the paper into small pieces and soak them in a solution of water and glue. In this case, glue and water are taken in a ratio of one to one.
- Cover the hand-made form with the resulting papier-mâché and wait for the mixture to dry completely.
- After drying, the resulting workpiece must be carefully removed from the base so as not to spoil the outlines.
- We make the necessary holes for the ties so that the mask can stay on the face.
- Then you can decorate the mask, according to the wishes and the chosen outfit.

How to paint a papier-mâché mask
Before decorating the resulting workpiece, it is necessary to draw the outlines of the desired shape on its surface with a pencil or felt-tip pen. Next, along the outlined contour, carefully cut out the final shape of the mask. After that, you can apply the necessary paints and decorations.
The most common design option is the Venetian mask, made in the Italian style. When designing a mask, you can use combinations of several colors for the background of the mask, various feathers and ribbons as decoration.
Another of the most popular examples of design is a cat (cat) mask, which will look relevant at any theme party.
The main attribute of a hand-made accessory is the ears, which can be made from any material or immediately give the appropriate shape to the workpiece.

Also, as an imitation of animal fur, you can use ordinary feathers for decoration or artificial fur.
For boys, the most relevant outfits are the images of superheroes (Batman, Spiderman), the main attribute of which is the mask. Looking at the faces of the characters, you can try to make their papier-mâché masks, the main thing is to use an identical color scheme.
The examples listed are not the only options for decorating carnival masks with your own hands, for example, you can choose an African style using a brown palette and stretching out the shape of the mask, or create your own, embodying your imagination and sense of style.
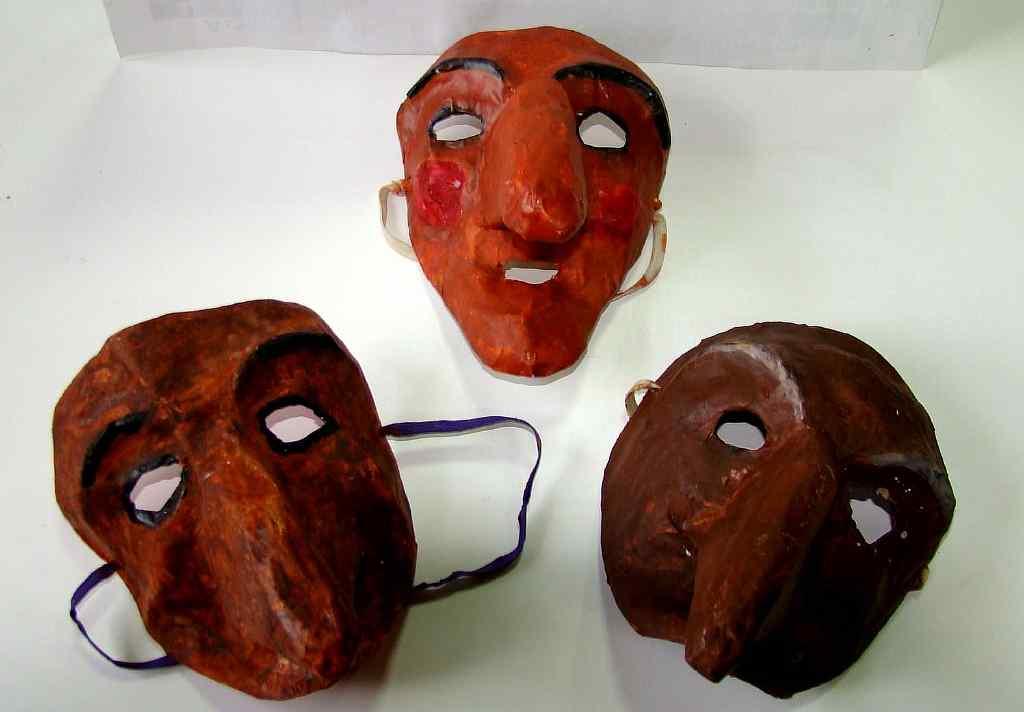
Papier-mâché masks from the USSR
In the Soviet Union, carnival masks were an inseparable attribute of New Year trees, children's matinees and carnivals. Most often, at these festivities one could meet various animals (bunnies, chanterelles, cockerels, bears, wolves) and fairy-tale characters (Babu Yaga, Koshchei the Immortal, Chipolino).

A feature of such masks was the bright saturated colors used to decorate accessories.
Do-it-yourself papier-mâché masks (video)
Today, such masks are very rare on store shelves, most often they can be purchased only from individuals who have preserved such masks. But if you really want to make a splash at the upcoming event, then you can try to reproduce this accessory yourself. To do this, you need only a little free time and the ability to work with your hands and papier-mâché masks in the style of past years will make a splash at any thematic event.
Examples of do-it-yourself papier-mâché masks (photo)


1.jpg)


