Star news


")


Crochet chicken diagram and description of amigurumi. Crocheted chickens
Easter is a wonderful occasion to gather in the warm company of family and friends! It has long been a tradition to visit with painted ones, but in addition to them, you can also give them as gifts. We’ll talk about how to make cute ones with your own hands :)
To knit one we will need:
- white and yellow yarn of the same thickness
- hook matching size
- eyes (for example, black half-beads)
- any decorations (for example, a bow)
- filler (sintepon, Thinsulate, holofiber)
- wooden skewer
Legend:
VP - air loop
sc - single crochet
pr - increase (2 sbn in sbn of the previous row)
dec - decrease (we knit 2 sc together)
Description of the knitting process
We begin knitting with white thread:
1st row – amigurumi ring of 6 sc
2nd row – 6 inc = 12 sc
Row 3 – (1sc + inc) repeat 6 times = 18 sc
Row 4 – (2sc + inc) repeat 6 times = 24 sc
5-6 row – 24 sc
Row 7 – (3sc + inc) repeat 6 times = 30 sc
Row 8 – 30 sc with yellow threads behind the back wall of the loop

Row 9 – (4sc + inc) repeat 6 times = 36 sc
10-14 row – 36 sc
15 row – 36 sc with white threads for both walls of the loop
Row 16 – 36 sc behind the back wall of the loop
Row 17 – 36 sc
Row 18 – (4sc + dec) repeat 6 times = 30 sc
Row 19 – (3sc + dec) repeat 6 times = 24 sc
Row 20 – (2sc + dec) repeat 6 times = 18 sc
Row 21 – (1sc + dec) repeat 6 times = 12 sc
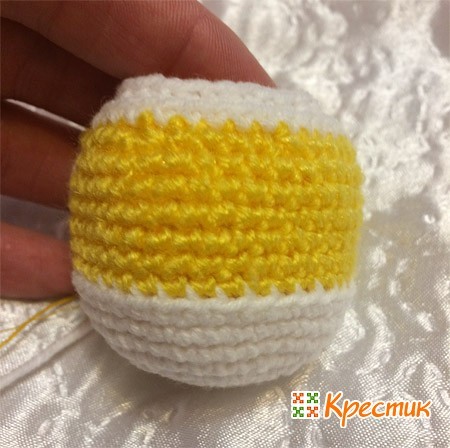
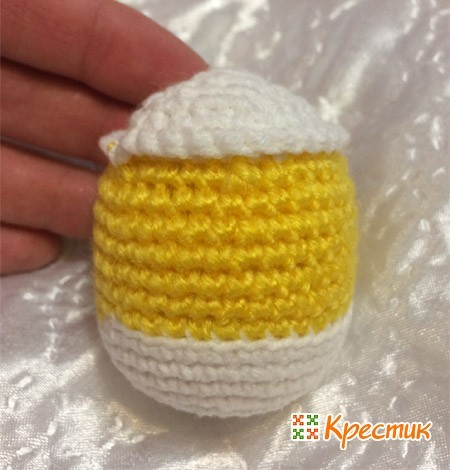
We stuff the chicken tightly, but so as to get the shape of an egg, do not make the body too round.
Row 22 – 6 dec, tighten the hole not very tightly, we will attach a wooden skewer here, secure the thread and hide it.

Now we return to our left front walls during the color transition, knit the shell, fasten the white thread on the first stitch and knit one sc in each loop in the round - we get beautiful protrusions.
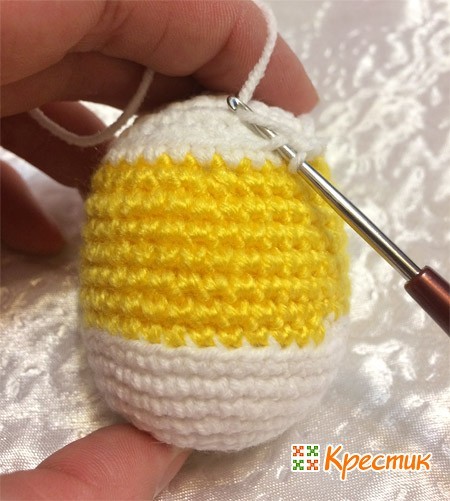

We fasten the thread and hide it. We do this on the top and bottom of the chicken.

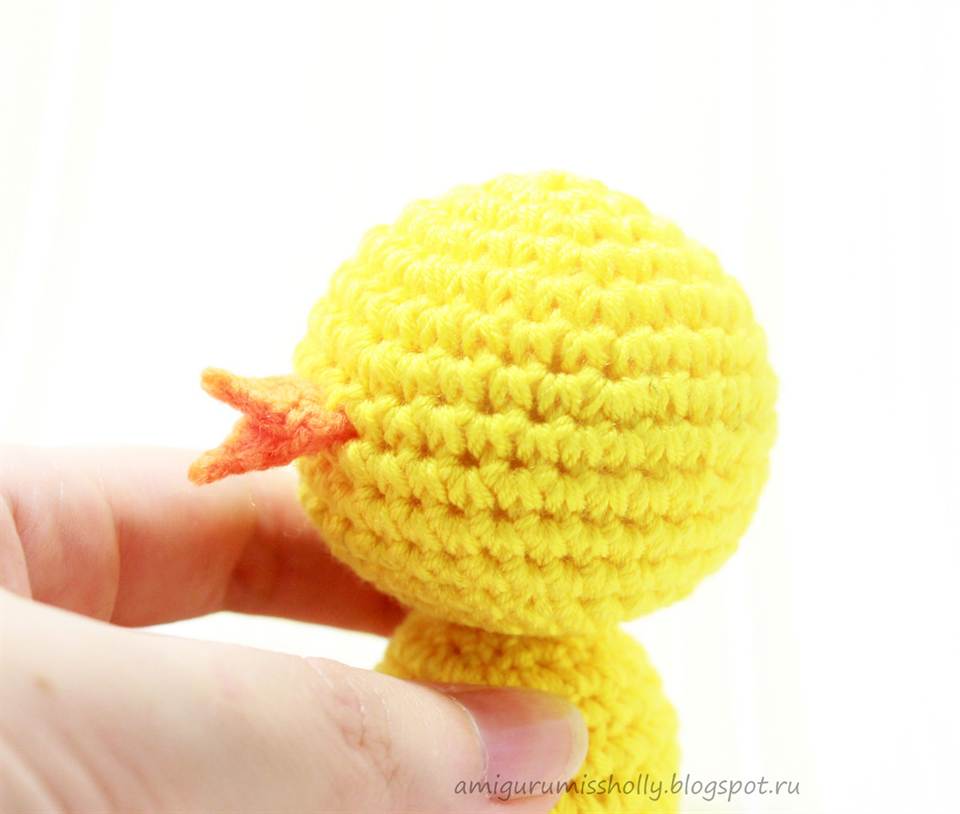
Beak
We cast on 2 ch, in the second loop from the hook we knit 3 sc. The beak is ready.

Let's move on to decorating the chicken. Sew on the beak with a needle, glue on the eyes and bow.
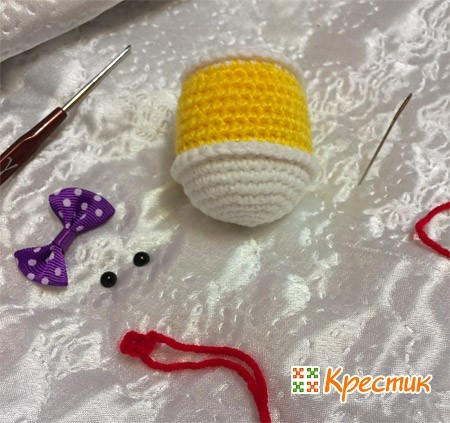

First, carefully insert the skewer into the body of the chicken, make a hole, and then remove it. Lubricate it with glue and insert it back - this way the skewer will hold well and will not fall out. The chicken is ready!
The promised master class of chicken souvenirs for EasterQuite recently I hatched such a family. A very detailed master class with photos below.
The MK cockerel and hen can be viewed here: http://www.liveinternet.ru/users/4021981/post155888946
http://www.liveinternet.ru/users/4021981/post155964261
I tried to knit them, but I didn’t like them at all, so I unraveled them and decided to do everything my way (photo above),
And now I’ll tell you and show you how I knit.
I dial 5 air. p., - I close the connection in a ring. st.. I knit 8 sts into the ring. without heat + air lifting point

We also knit the second part of the head, but do not cut the threads.
I sew a black bead into the center of the two halves.
Now I begin to connect the 2 parts of the head.
We connect art. without nac. for the outer half loops.
For a pot-bellied chicken (you can see it in the photo), we knit 13 tbsp. , I like small ones better (they knit faster), so I knit 14 sts.
The result is a head like this

I move on to the torso. 3 air rise stitch (on the side seams I try to place the stitches as close as possible so that there are no “holes”. In each loop I knit a stitch with a tension + air stitch, etc.
I got 14+ lifting loops.
Now it's time for the scallop and beak.
I use thin red threads to mark the beginning of the scallop. I knit arches. 3 air p., art. no air, 4 air p, art. no air, 3 air P..

I unfold the knitting and in the 1st arch I knit half stitch, st. without nak., art. with nak., half-st.
in the 2nd half, art. without nac., 2 tbsp. with nak., art. without nak., semi-st.
in the 3rd as in the 1st.
Now I cut a larger thread from the comb and use it to embroider a voluminous beak.

It turns out to be such a head

I cut off the red thread and proceed to knit the body with convex stitches. with nak.
3 lifting loops, into an air arch. p. of the previous row I knit convex one at a time. Art. + air etc. and so on until the end of the row.
We connect the connection. Art. to the top! first convex Art. (the remaining rows also go to the top)

2nd row - 3rd air. p., 1 convex Art. knitting the next one! arch (there will be a hole at first, but it will move later), then I knit alternating convex. Art. and air p. in a checkerboard pattern
3rd row also
4th row convex Art. already without air. loops, then our chicken will be beautifully rounded.
And here he is, only his tail is missing

I fold the chicken in half and knit an arch of 4 chain stitches. p. In the arch 3 tbsp. with nak., art. without nak., half-st.. I thread the thread inside, tie it and cut it off.
The bottom remains.
I also knit as part of the head, in a ring of air. p. I knit 7 tbsp. without nak.. Next row - 14 tbsp. with nak., I cut off the thread and sew it with a needle with the same threads, having first filled the chicken with padding polyester. You can also crochet it, but I find it more convenient to use a needle.
So I hatched this chicken, as a gift for someone else.............

Using this master class, my mother easily knitted such a chicken, although she had never held a hook in her hands.
Very easy to knit and quick.
Good luck and patience in your creativity!!!
Convex st. with nak.

A knitted chicken can be a great decoration for Easter. It is quite simple and quick to do even by beginners with very little needlework experience. For those who doubt this, we suggest reading this article: “Chicken using a hook: master class.”
Crochet a chicken: master class with necessary materials
Most of the materials you have may not match ours, for example, you can take yarn of a different color or make the eyes colored. A lot depends on personal tastes and preferences. Below is a list of materials and a description for each.
- Yarn. We used Jazz Magic yarn. Which was made of 100% microfiber and had 1074 color.
- Yarn 1690 colors. Weighing 50 grams. One hundred percent acrylic.
- Yarn 9560 colors. Weight 150 grams. Also made of acrylic.
- Two-millimeter hook.
- Crochet size 1.75 mm.
- Filler.
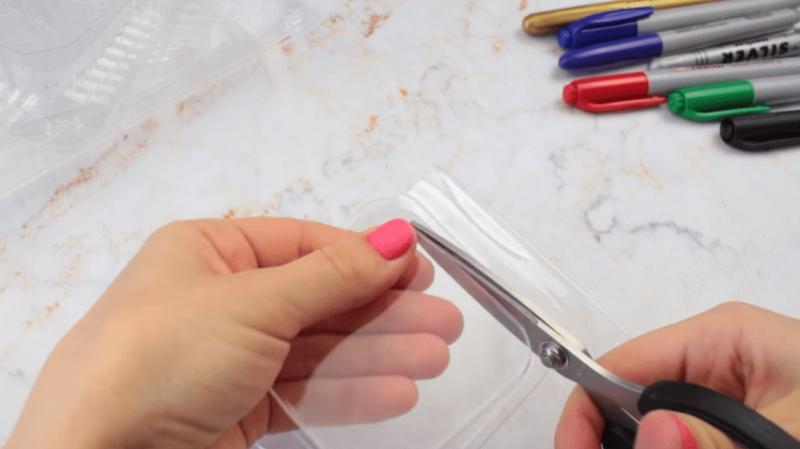
- Eyes. You can make them yourself from paper.
- Wire. Eight segments of six centimeters each.
- Wire cutters, awls and round nose pliers.
- Glue. Be sure to look for clear ones.
- A pin that acts as a marker.
- An ordinary table fork. We will need it to make a pompom.
For the body we use yellow yarn. We knit with a two-millimeter crochet hook. Here is the knitting pattern for each row:
- We knit six single crochets and close the amigurumi ring into them.
- We make twelve increments in each of the columns of the first row.
- We knit one single crochet and increase. Repeat six times.
- We knit two single crochets and increase. Repeat six times.
- We knit the fifth, sixth, seventh and eighth rows in the same way. We make twenty-four single crochets in a circle.
- Two single crochets and a decrease. Repeat six times.
- We knit eighteen single crochets in a circle.
- We make a single crochet six times with a decrease.
All we have to do is fill the body with filler. Fasten firmly and cut the thread. Be sure to leave a small tip in order to sew the head to the body.

Again we use yellow yarn and the same hook. Scheme:
- The first row is done the same way as for the body
- We make an increase in each column
- Single crochet and increase. Repeat six times.
- Two single crochets with an increase. Repeat six times.
- Three single crochets with an increase. Repeat six times.
- We knit thirty single crochets in a circle.
- Four single crochets with an increase. Repeat six times.
- From the eighth to the eleventh row, inclusive, we knit thirty-six single crochets.
- Four single crochets with decrease. We alternate six times.
- Three single crochets with decrease. We do it six times.
- Two single crochets with decrease. Repeat six times.
- Single crochet with decrease. Repeat six times.
- We repeat the decrease six times.
Tighten and secure the thread tightly, leaving a tip for attaching the head to the body.
Wings.We knit with the same tool and material as the head.
- Three rows are performed. Each of the rows is done similarly to the row from the head.
We fold the resulting wing and knit two air loops. We tie the edge with a half double crochet. Sew the wings to the body.
We knit a beak.For the beak, as for the previous parts, a description of the circuit for beginners will be given. We knit in red and crochet 1.75 millimeters.
- Four air loops.
- We knit all the loops, starting from the second, like this: three single crochets, a chain loop and a turn.
- Decrease, knit one single crochet, turn.
- We reduce the thread, fasten it and cut it off. Don't forget to leave a small tip for sewing.
The first half of the beak is ready. We just have to make the second one, it does exactly the same as the first one. Sew the two halves together. The beak is ready.
Cap.We knit the hat with lilac yarn. And a two-millimeter hook.
- We knit forty chain stitches and close the x into a ring.
- We knit forty single crochet stitches.
- From the third to the sixth row we knit the same way. Two front embossed columns, a decrease, a purl relief column.
- Two front embossed columns, the back side embossed.
- Two facial reliefs, decrease
- Two front embossed stitches and one back stitch. Repeat until the end of the row.
- We make a decrease, one knit stitch and one purl stitch. Repeat until the end of the row.
We tighten all the loops that remain with a needle.
Video on the topic of the article: knitting a scarf
The scarf is very easy to knit. Thirty-five air loops and two lifting loops are made. From the third loop we must knit thirty-five half double crochets.
When all the elements are ready. All we have to do is unite them into one. Our beautiful chicken is ready! The chicken can be placed in a large egg, from which it will peek out. There are many different ways to decorate. The choice is yours.
We invite you to watch some interesting videos.
We all love to receive gifts. Even if the gift is not rich, but from the heart, it is already pleasant. But most of all we like handmade gifts. Such gifts are usually treated with care. For example, parents really value their child’s crafts; friends treasure gift cards from their friends; Brothers and sisters enjoy it when they surprise each other. But what kind of gift can you give yourself? If you know how to knit, then with the help of your skill and our master class, making a crocheted chicken will be as easy as shelling pears for a pleasant surprise for a loved one.
In any work or in creating something, patience, time and diligence are always required. Where would we be without this? So, if you want to make amigurumi, you can follow the description below to create a chicken.
Working moments
Here's what we'll need:
- yellow, purple and orange yarn;
- 2 hooks (one – 1.70 millimeters, the other – 2 millimeters);
- eyes;
- filler;
- chenille wire (8 pieces of 6.5 centimeters each);
- nippers, awl, round teeth;
- wire for glasses frames;
- needle;
- glue and pins;
- cutlery - fork.
Legend:
- PR – add;
- UB – decrease;
- SON - double crochet;
- PSN – 0.5 double crochet;
- LRSSN – front embossed double crochet;
- IRSSN - purl embossed double crochet.
Attention! The number of loops in a row is indicated as follows: /…/. When you start a new row, mark it with a marker.
Even for beginners, creating this cute chick is easy! The scale of the craft is approximately 15 centimeters.
Let's start making
Let's divide the creation of a chicken into 9 stages.
- We knit the body of the chicken from yellow yarn. We use a 2 mm hook.
Six single crochet amigurumi ring. PR in each column /12/. 1 single crochet, PR – six times /18/. 2 single crochets, PR - six times /24/. Knit 24 single crochets in the round. 2 single crochets, UB – six times /18/. Knit 18 single crochets in the round. 1 single crochet UB – six times /12/. Fill the resulting ball with filler.
Fasten the connecting post, cut the thread, leaving a little for sewing the chicken's head to the body. The body is not round in shape, but in the shape of an egg:

- We knit a chicken head using yellow yarn. We use a 2 mm hook.
6 single crochets in an amigurumi ring PR in each column /12/. 1 single crochet, PR - six times /18/. 2 single crochets, PR - six times /24/. 3 single crochets, PR – six times /30/. In this way we knit 36 single crochets in a circle. 4 single crochets, PR - six times /36/. Knit 36 single crochets in the round. 4 single crochets, UB – six times /30/. 3 single crochets, UB – six times /24/. 2 single crochets, UB – six times /18/. 1 single crochet, UB – six times /12/. UB – six times /6/. Fasten and cut the connecting post, leaving a small end for tightening the loops. Taking a needle, tighten the other loops and remove the thread into the piece.

- We also knit the wings for our bird from yellow yarn with a 2 mm crochet.
6 single crochets in an amigurumi ring. PR in each column /12/. 1 single crochet, PR - six times /18/. Fold the piece exactly in half and knit two air loops. We tie the edge using PSN. The remaining thread is secured and cut, leaving a small thread for attaching the wings to the body.

- It's time to make the chicken's beak. For this we use orange yarn and a 1.75 mm hook.
We make four air loops. During the second loop from the hook, make three single crochets, a chain loop and a turn. UB, single crochet, chain stitch and turn. UB, secure the thread and cut it, but only leave a small end for tying. Working according to this principle, tie the other half of the beak. Then connect and tie them.

- Let's decorate our chicken by adding an accessory - a hat.
We use purple yarn and a 2 mm hook. As we finish each row, we add two air loops for lifting. The rows themselves will need to be connected with a connecting post with 2 air loops.
We make forty air loops. We close them into a ring with a connecting post. Forty SLEEP. (Two LRSSN and two IRSSN) - repeat until the end of the row. Two LRSSN, UB IRSSN (two LRSSN, two IRSSN, two LRSSN, UB IRSSN) - 4 times, two LRSSN, two IRSSN. Two LRSSN, IRSSN, Two LRSSN, UB IRSSN - repeat these actions five times. Two LRSSN, IRSSN - repeat these steps until the end of the row. Use a needle to tighten the loops that remain.

Now it’s the scarf’s turn. We also make it from purple yarn, using a 2 mm hook.
We cast on 35 lifting chain stitches. When we reach the third loop from the hook, we knit 35 hdc.
- Now let’s do the final touch – the chicken’s feet.
From the photo below you can make them:


Build time!