Star news


Bear made of cones. Craft for children's creativity - do-it-yourself bear from pine cones How to make a bear from pine cones step by step
Making crafts from pine cones with your own hands is, at first glance, a difficult task to accomplish. At the same time, it is the most affordable material that can be found in large quantities. Crafts made from pine cones and plasticine lift your spirits and make gray everyday life brighter. This is a lucky find for all needlewomen.
What can be done
You just need to apply imagination and desire to get extraordinary toys created with your own hands. To decorate your home or apartment, you can create interesting Christmas wreaths. Snowmen and Christmas trees will happily settle under the New Year's tree, and the small zoo will amuse the child.
Benefits of work
Cones are an environmentally friendly natural material. It has no age restrictions. Working together on various topics will give a lot of positive emotions to adults and children and will help decorate the interior of the apartment.
Treatment
Pine cones have an incredible natural scent that is used to scent a room. It is necessary to properly process the material, otherwise it begins to release thick resin, which spoils the appearance of the cone and things.
Processing Guide:
- Collect cones that match the parameters for the craft.
- Next, place in an airtight bag, tie and put away for several days.
- Remove the bag, fill a bowl with warm water, and then add dish soap. Pour out the cones and leave for about 30 minutes, then rinse, dry and place on newspaper.
- After complete drying, coat them with varnish.
If this material has been lying around for a long time and has not been used, then consider some tricks when working. Thus, at room temperature the material can change shape, so it must be fixed. To do this, place it in glue for 30 seconds and then dry it.
If the material is deformed, then simple water will return its shape. It is necessary to put it in water and moisten it until the petals begin to bend. Then take it out and dry it using ropes.

Required materials and tools
The main material for work is, of course, spruce or pine cones. To diversify the creative process, auxiliary tools are used. Thus, the product or decoration will become more attractive to the eye.
Necessary materials:
- spruce or pine needles;
- acorns, chestnuts;
- herbariums from herbs or tree leaves;
- plasticine;
- paper of different colors;
- paints;
- threads, wire, ribbons;
- beads;
- remnants of fabric, felt;
- toothpicks;
- cotton wool, etc.
When working you will need the following tools:
- scissors;
- glue;
- tassels;
- ruler;
- pencil;
- stationery knife;
- paper clips, buttons, etc.

Autumn themed decor
The beginning of school classes in schools and kindergartens makes parents think about new crafts. The bright colors of autumn inspire and lift your spirits. Come up with a lot of interesting things that will please the eye.
Basket
To work you need:
- cones (about 50 pieces);
- hot glue;
- wire of two sizes;
- cardboard.
Basket weaving begins from the base. Wrap a thin wire around the pine cone and twist the two ends of the wire. Place the second one and also wrap and twist it with wire. You will get a ring with the fluffy side inward. Next, create a second row, but with two fewer pieces. You can add a third if you wish. All blanks are glued together.
For the handle of the basket, you need to make a frame from thick wire and secure the material to it using thin wire. Next, connect to the base. The bottom of the basket can be made from cardboard and glued.
Autumn bouquet
You need to prepare:
- hot glue;
- wire;
- scissors;
- ribbons;
- beads, sparkles;
- paints.
Attach cones or beads to the ends of the wire using glue. You can paint them or sprinkle them with glitter. Combine individual long sticks or branches into a bouquet and tie with ribbon. Fill the resulting void with satin bows and acorns. You can put this wonderful bouquet in a vase or give it to your loved ones.

Multicolored bouquet
For this decoration use:
- branches of the required length;
- hot glue gun;
- paints and brushes;
- oilcloth (on the table).
Decorate the branches and set aside to dry. Next, you need to paint the material with a brush or pour paint into a glass and dip it. Wait until it dries completely and glue the branches and cones together with hot glue. The result is a flower.
Clamp the bouquet or place it in a vase as shown in the photo. A light autumn bouquet with the scent of spring will delight the whole family.
Children's jewelry
Make a funny menagerie at home, because your child will be happy with his new friends. You can come up with a lot of funny crafts: from big bears to cute little hedgehogs and owls made from pine cones.
Bear
You will need:
- twine;
- glue;
- beads for eyes;
- plasticine.
Wrap a piece of twine around a bump for the head, having previously stuck plasticine on it, and a second one for the belly of the bear. Glue the little eyes and paws onto the twine.

Squirrel
Necessary:
- hot glue;
- scissors;
- sample;
- felt of different colors;
- coin.
The step by step process is as follows:
- Cut out the elements.
- Glue the eyes and nose onto the squirrel's face.
- Glue the tail on the other side.
- Gluing a small coin to the base from the paws will give stability.
- Glue the acorn pieces together.
- Glue the paws and acorn and the cute squirrel is ready.

Plasticine products
Soft, flexible plasticine is the most popular material. Children are delighted with multi-colored plasticine blocks, which can make wonderful animals. They can be used to decorate a room or play a fun game. Use your imagination, because this is how creativity develops. Applications using cardboard sheets and molded products will harmoniously fit into the interior.
Chanterelle
Use:
- plasticine in orange, green, white and black;
- autumn leaf;
- stack.
From orange plasticine you need to mold a nose and ears, then a tongue. A round black nose ball is attached to the bump. Roll out eyes from white plasticine into a semicircle shape and pupils from green oval shape. Then stick the tails of leaves on your eyes; these will be eyelashes.
Make the tail and paws out of orange and cut out the cuts using a stack. Attach all the accessories to the material and plant the chanterelle on an autumn leaf.

Penguin
You will need a knife for plasticine and colors of different shades.
Roll out a head and two wings from black. From orange - two legs and a nose. For the eyes you will need two round cakes and two small black balls. Stick it on the pine cone and the little penguin is ready.

Hedgehog
You will need fluffy fir or pine cones of elongated shape and multi-colored plasticine.
Roll out a brown muzzle into an oblong shape and stick it on. Build two legs in the shape of sausages. Make eyes from white and black.
Complete the hedgehog with a pourable apple and a cute mushroom on the back.

New Year's toys
A huge number of different New Year's crafts can be made from pine cones. Use your imagination and start with small compositions of Santa Claus or a Christmas tree, and continue decorating the interior with panels or garlands. Fill your home with a fabulous atmosphere.
Herringbone tree
Apply:
- hot glue;
- wine cork;
- tassels;
- paints;
- star, sparkles.
Paint the product green and leave to dry. You can paint the tips of the petals white. Sprinkle glitter on the Christmas tree.
Cut the wine cork in half with a knife and hot glue it to the bottom.
Place a star on the top - the tree is ready.

Garland
To work you will need:
- twine;
- a can of golden paint;
- glue for gold leaf;
- spray varnish;
- sponge;
- hard brush;
- gold leaf sheet;
- hooks;
- pliers.
Collect and clean the material from debris with a stiff brush. Apply glue with a sponge, then dry. You can apply only to the upper tips of the petals.
Prepare hooks with a loop at the end, cover with paint and leave to dry.
Wrap the material in gold leaf and press down. After waiting a little, brush off the foil with a stiff brush. Use varnish to fix the coating. Next, use pliers to carefully screw in the hooks.
Repeat all steps with the remaining cones, and then proceed to the final stage. Cut the required amount of twine and attach the pine cones, tying knots to prevent them from rolling around on the rope.
A new accessory for your home is ready.

Wreath
Required:
- several types of wire: thick and colored;
- pliers;
- wire cutters
Using thick wire, build a round frame from several rings. Gradually, using colored wire, wrap the cones tightly to each other with the fluffy side up, starting from the inner ring.
You can come up with any decor and decorate a wreath of pine cones using many ideas for inspiration.

New Year's ball
Required:
- PVA glue;
- toilet paper;
- balloon;
- water;
- paints;
- ribbons.
Pour water in a 1:2 ratio to PVA glue, dip toilet paper into the solution. Leave it.
To prepare the ball, inflate it to the desired size, wrap it in toilet paper from the solution and leave it to dry for about a day.
Paint the resulting ball, then start gluing the natural material, but be very careful so that the ball does not burst. Glue close together. Leave to dry.
Decorate the New Year's balls at your discretion.

Dwarf
You will need:
- felt;
- glue;
- head ball.
Cut out caps and scarves from felt. Glue them onto the gnome's head, and the head to the pine cone. Decorate the cap with a bell.

Candlestick
Nessesary to use:
- cardboard;
- scissors;
- compass;
- pencil;
- wire;
- glue.
On thick cardboard, draw a circle with a diameter of 20 cm, and inside a small circle with a diameter of 10 cm. Cut it out.
Glue the cones in a circle onto the resulting base. Next, decorate the candlestick with spruce branches and orange peels to add aroma.

Topiary
To work you will need:
- flower pot;
- foam ball;
- dye;
- glue gun;
- mounting mixture;
- thick stick for the base;
- pins.
Glue the foam ball with a stick, which must be painted in advance. Fill the flower pot with the mounting mixture, leaving about 3 cm at the top. Insert the stick with the ball inside and hold for several minutes to fix it.
Using glue, stick the pine cone onto the head of the pin. Insert pins into the crown of the ball and distribute them closer to each other. Cover the polyurethane foam with moss and distribute it around the perimeter of the pot.

Crafts are a great tactile activity for parents and babies. Practical exercises develop hand motor skills, and the environmentally friendly product will not have a negative impact on health.
Combine business with pleasure, because you can create many more wonderful figures from pine cones and plasticine:
- monkey;
- rooster;
- turtle;
- bear;
- snowman;
- bird;
- peacock;
- little man;
- goblin;
- swan;
- chimpanzee;
- shell, etc.
Video about crafts
In the video you can get acquainted with new ideas for inspiration and reproduce them in reality.
Creative activities with a child are always interesting and exciting. If you like to make things together and are looking for new ideas, a pine cone bear will be a great option for you. These souvenirs can be made so unusual and original that they will be an excellent gift for grandparents, and can also decorate any interior.
Crafts made from natural materials: the benefits of such creativity
It is very useful for a child to engage in any kind of artistic skill. This develops fine motor skills, fantasy, imagination, and the ability to follow an adult’s instructions. Working with natural materials has several advantages:
- everything the child makes from is natural and therefore safe for health;
- collecting and preparing cones, acorns, leaves, flowers can be turned into a fascinating educational process;
- These materials provide ample opportunities for creativity.
Any bear, hedgehog, fox, mouse is suitable for a child. Children love making animals. In addition, animals are heroes of folk tales. You can make a whole theater out of these characters that the kid made with his own hands.
Preparation of materials
All elements of natural origin must be collected in dry weather. It is advisable to let them sit indoors for a while until completely dry. After some time, a wet, fresh fir cone will turn from thin to large, open. This needs to be taken into account. If it is necessary to maintain the shape, coating with an aqueous solution is used. After a few days, modeling can begin. Everything that you find in nature should not have visible damage: holes, dents, mold, rot. High-quality materials will allow the craft to maintain an attractive appearance for a long time.
It’s better to sort through and sort the cones, acorns and everything else right away. Smooth, neat ones should be used as a whole, and those with missing scales and caps can be disassembled into parts and used separately. If you want a bear made from pine cones, acorn caps or pine flakes work well as ears.
Combination of materials
In any artistic work, the technique of contrast looks impressive: color, texture, shape, size. This is one of the composition techniques with which harmony is achieved. A bear made of cones and plasticine, threads, balls, grains, and nuts will look good. You can use chestnuts, acorns, sticks, matches as additional elements. Natural and artificial textures combine well. For example, you buy ready-made plastic eyes or noses at a craft store, intended for soft toys. They will give your animal a certain facial expression and facial expressions. Although they can also be made from plasticine, peppercorns, and pebbles. In a word, you need to show your imagination, and then your pine cone bear will turn out magnificent.
Fir cones
Tips common to all work were stated above; now specific options and methods for their manufacture will be considered: how to make a bear from spruce, pine cones, and their combinations. You can make the animal in a large size or in the form of a miniature tabletop souvenir. Very simple samples will be offered that even a small child can handle on their own; others will require joint efforts with an adult.
Any work begins with preparing everything necessary. In the illustration, which shows a craft made from pine cones, the bear is made in a rather simplified manner. It is made using material collected from under the Christmas tree.

To handle this job, you will need to follow these steps:
- Find pine cones in the forest or park (one large one for the body, one smaller one for the head, four medium-sized ones for the paws and two identical ones for the ears).
- Assemble all the elements as shown in the picture. They can be secured with glue, wire or pins, on the heads of which all the parts are again glued.
- Decorate the product with a ribbon.
Craft No. 2
What if it’s a long drive to the spruce forest? How to make a bear from often planted right in the park and on Use this material. It also makes wonderful souvenirs.

A bear like this can be obtained in several ways. Option 1 includes the following steps:
- Assemble the body from several large elements.
- Attach a head from one cone to it.
- The ears are made from previously separated scales.
- For the paws, also take two elements.
- Use white thread to make pompoms: round for the muzzle and cut to shape for the feet and ears. They are produced by winding yarn onto a cardboard blank in the form of a ring, then cutting along the perimeter and pulling it into a ball. Any shape can be obtained using this method.
- Attach the pompoms with glue or wire to the desired places.
- Install eyes, nose. Decorate with a scarf.
Option 2 is made using a completely different technology. This bear made from cones is very easy to make with your own hands. Take an old soft toy and cover it with pine scales, leaving the paws, inner parts of the ears and muzzle fluffy.
Next is the simplest bear made from pine cones. The photo clearly demonstrates this. Even a child can make such a craft. The cardboard shape can be cut out as one piece or individual elements. In the first case, two cones are used for the body on both sides of the workpiece. In the second version, the legs and head are inserted between the scales and glued.

Beautiful combination
If you don’t have a shortage of materials, feel free to combine them. You will get the same cheerful bear made of pine cones, a sweet couple or a whole family.

So, do the following:
- Take a good large fir cone for the body.
- Attach an open, flattened pine tree to it as a head.
- You get the muzzle and ears from the caps of acorns.
- The eyes and nose are made from peppercorns.
- Use four small pine cones for the paws. Try to strengthen them so that the craft is stable.
Bear made of cones and plasticine
In the previous examples, the elements were connected using glue or wire. The same can be done with plasticine. The most important thing is to use the appropriate color so that it is as invisible as possible among the brown scales. Try to press the elements tightly against each other and take a sufficient amount of plasticine.

By the way, it can also be used as decoration. Then choose any color. It is used to make a muzzle, eyes, ears, and jewelry.
Big bear made of pine cones
If you need monumental interior decoration, use the following sample. This figure is assembled from a huge number of elements. You will have to spend a lot of time in the spruce forest. This type of work is suitable as a collective work.

To build such a sculpture, you will need to perform the following steps:
- You make a frame. If you make it using the papier-mâché method, you can use a ready-made solid form of sculpture. Then it will turn out hollow. Newspapers and paper are stuffed inside. It is worth putting something heavier in the lower legs, for example, bars to stabilize the structure. If there is no ready-made wooden bear, it makes sense to create a mold yourself from a mass of paper mixed with plaster, starch or glue. Large forms are also created from polyurethane foam.
- At the second stage, the outer layer of cones is made. Of course, you can completely construct a sculpture from them, but in this case you will need a lot more of them. Choose for yourself. In any case, all elements are connected using glue. You can use a heat gun. In it, under the influence of temperature, special glue rods melt and the composition enters the nozzle, from which it is squeezed out to the joint. Work with this tool must be carried out under adult supervision.
- When the basic shape is made, decorative elements are made: the muzzle, the inner parts of the ears in the form of pompoms made of thread, as well as a scarf made of any material, natural or artificial.
Now you can make the same magnificent bear from pine cones. The master class will definitely help in creating a sculptural masterpiece.
Fashionable teddy bear
If you have already decided to get creative and are going to make souvenirs for your own pleasure or as gifts to relatives and friends, try dressing your hero in bright things. Items from his wardrobe can be crocheted or knitted, sewn, or even used as doll clothes.

Ideas for decorating are very different. Let it be a bear made of cones, dressed as Father Frost or Snow Maiden. A great gift for the New Year. There is absolutely no need to dress up the souvenir from head to toe. It is important not to overdo it and preserve the beauty of the natural material. A Santa Claus cap or a Snow Maiden crown will be enough.
If you want to give a gift to one of your friends or relatives, decorate the bear with an item of clothing that is most characteristic of this person. An original hat, scarf or bow will be enough.
Polar bear
In addition to decorating with additional things, it is worth using the magic of color. Use plasticine in bright colors or even paint to create a specific image of your character. If you paint the pine cone in the craft shown in the photo white, you will get a polar bear.

You can also make a panda bear, a clown, an artist. It all depends on your imagination.
Subject composition
The bear is a frequent hero of fairy tales. The child will be interested in acting out theatrical scenes with the help of his crafts. To do this, you will need to build other animals. In addition, it will be interesting to imagine the fairy tale "The Three Bears". You can also come up with a simple souvenir consisting of several objects united by a common theme:
- New Year's with a tree, toys and gifts;
- cook - as a souvenir for the kitchen;
- a bear cub with a bouquet of flowers, a barrel of honey, butterflies and bees;
- with a briefcase and a primer for September 1;
- wearing glasses with a book, globe or other attributes of a school teacher;
- The figurine can be supplemented with characteristic objects of any profession.
So, you have been presented with detailed practical material on how to make a bear from pine cones. Both adults and children can make a beautiful and original craft. The best thing is joint creativity.
Each of you knows what forest cones are, but not everyone realizes that from these seemingly simple things you can create incredibly beautiful and original products that will become a wonderful decoration for your home. Most often, pine or spruce cones are used as material. To collect them, you don’t have to go into the forest. Trees of this species also grow in residential areas, such as parks or recreation areas. If you have children, then it is best to engage in such developing activities together, of course. This will help encourage children to be creative from a very early age, expanding their knowledge and horizons to the world around them. After all, nothing will please your kids more than creating something together with you.
Necessary material and tools for work
Before you start work, you need to stock up on the necessary materials that will be required for the work. To make crafts from pine cones you will need:
- Common cones;
- Silicone Glue;
- Glitter powder;
- Decorative tape;
- Sequins and rhinestones;
- Threads and scissors;
- Colored paints;
- Cardboard or fiber paper (felt);
- Awl and tongs;
- Beads or sequin beads;
- Artificial snow, etc.
Important! When working with sharp and piercing objects, it is important to take precautions. Do not trust children with work where there is an occasional risk of injury.

Decor on the theme of autumn
Autumn is not only a wonderful time of year, but also a source of creative inspiration for many people. Step-by-step instructions for simple crafts from pine cones given in this article will help you create a truly beautiful, designer decor from scrap materials. After all, with the advent of the Internet in our lives, the need to attend professional master classes has disappeared. Today, finding a detailed description of the process, where step-by-step steps will be presented with photographs attached to them, is a matter of five minutes.
Very often, kindergarten teachers, as homework, ask your kids to make an unusual composition of pine cones on an autumn theme. It can be absolutely any miniature, the main thing is that it conveys a festive, autumn mood.

A decorative wreath of pine cones will be an excellent decoration for the front door
Making such a wreath is quite simple; all you need to do is take an ordinary plastic or wooden blank in the shape of a ring and glue pre-prepared acorns and cones to it. To make the product more attractive, it can be tied with a decorative rope.
Making funny hedgehogs from dried cones is even easier, because their shape resembles the body of animals. A triangle made of felt material and having rounded edges is glued to the prepared workpiece, on its sharp part. He will play the role of the face of our future crafts. After this, you just need to revive the resulting workpiece. To do this, the eyes and nose are glued to it. Congratulations, the pine cone hedgehog is ready.


This beautiful decor is made as follows. An old pot that you were probably going to throw away is filled to the top with green moss. After which small cones are carefully inserted into it so that they fill almost the entire area of our craft. To fix the cones, you can use glue, this way you will eliminate the possibility of them falling out when the moss dries out.
Despite the fact that such decoration will not last long, it is guaranteed to give you a good and cheerful mood for a couple of weeks.

Miniature trees made from cones, acorns and walnuts
Making an owl out of cones is probably one of the simplest tasks that even a five-year-old child can cope with. The set of necessary materials is quite simple. The body, as usual, will be the bump itself; you just need to add the missing elements to it, namely: eyes, nose, legs and wings. To do this, you can use the same fibrous fabric (felt) or ordinary acorns, which are also an excellent material for making crafts.


To make your products look more realistic and beautiful, use them to create them, which always attract increased attention.
Baby decoration
There are a lot of ideas for children's crafts, and even the youngest family members can take part in their creation. Decorating with forest cones is a very exciting and entertaining process that will unite the whole family at one table. The result of joint creativity will be beautiful decorations for your home.
A handmade product made from forest gifts will allow you to create a cheerful and festive atmosphere in your home, because with them you will make the dreams and desires of your kids come true.
What crafts can be made from pine cones:
New Year's decorations (Christmas trees, garlands, toys);
Figurines of fairy-tale characters;
Models of birds and animals;
Flower pots and vases;
Original gifts and decorations;
Home furnishings;
Beautiful figurines;
Wall and other small designer decor.
This is just a small list of what can be made from spruce and pine cones. In fact, the number and variety of crafts is limited only by your imagination. However, you need to start small and only then, having gained experience, can you begin to manufacture more complex products.

Beautiful children's crafts made by hand from scrap materials


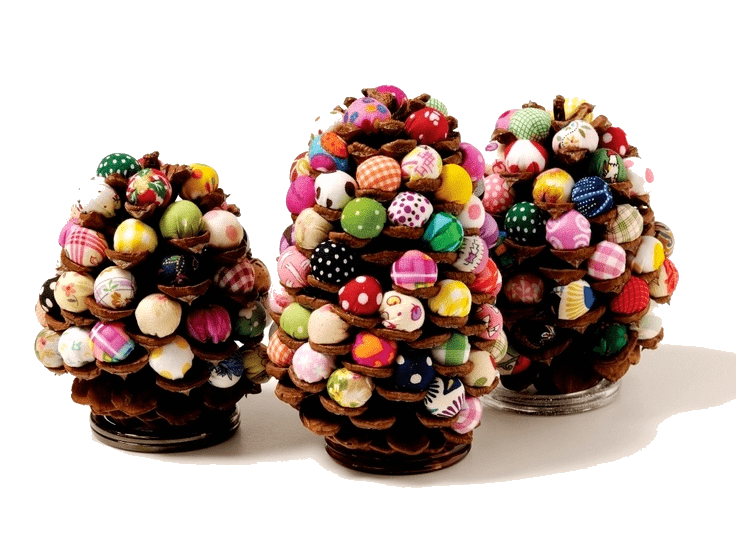
Another wonderful craft that will undoubtedly delight your kids is a decorative Christmas tree made from pine cones. To make it yourself, you will need a pine cone with open petals, multi-colored felt balls and silicone glue.
The process of creating a figurine is quite simple. A small drop of glue is applied to the ball, which can hold it at the tip of the petal. Then you should wait for it to dry completely, and then check the reliability of each ball. The craft is ready!

Handicrafts are an excellent activity for developing tactile sensations and improving hand motor skills. That is why creating crafts for kindergarten from pine cones is not only a pleasant, but also a very useful hobby. Moreover, cones are an environmentally friendly product, which, in addition to their aesthetic beauty, have a pleasant pine smell.
Having received a couple of practical lessons from their parents, then children will be able to independently engage in this creativity, which will captivate them. Finished products can become a wonderful decoration for your home or a good gift for friends.


To make a turkey or turkey from a cone, you will need felt, a pine cone, tongs, and glue-on eyes. The craft is done like this:
To prevent the future turkey's body from becoming too elongated, the sharp part of the cone must be carefully bitten off with tongs;
Next, using a pre-prepared template, a tail, paws, beak, head and neck are cut out of felt paper;
All elements are fixed to the workpiece using glue;
Now all that remains is to revive the figure. To do this, the eyes and beak are glued to the head. The pine cone turkey is ready!

Plasticine products
Plasticine is an excellent choice for making your children creative. It has been proven that when working with This material develops not only fine motor skills of the hands, but also children's speech, and the sculpting process itself brings immense pleasure.
Products made from plasticine for kindergarten are also not uncommon homework for your kids. After all, the benefits of this work are obvious and indisputable. Most often, children are asked to create a composition on the theme of autumn, and this is not without reason. There are so many beautiful and beautiful things you can come up with at this time of year, especially when there are so many available materials (acorns, chestnuts, fallen leaves).

Red squirrel - a wonderful craft made from pine cones and plasticine
Squirrel represents a symbol of thrift and thrift. This craft will be a great toy for your children. To make it you will need orange, black and white plasticine and 3 cones (2 large, 1 small).
To begin, combine 3 cones into a single composition, 2 (large) of which will be the body and tail, and the third (small) will be the head. To do this, you can use glue or plasticine itself;
We make 4 legs from orange plasticine. We attach them to the squirrel’s body;
Next you need to sculpt the muzzle and ears. We fix them on the head;
Roll two balls of the same size from white plasticine, stick two black ones to them, only smaller ones. This way you will get eyes. Having flattened them a little, we fasten them in the upper part of the face;
All that remains is to sculpt the squirrel's nose. To do this, roll a ball from black plasticine, approximately twice the size of the white one, and stick it on the tip of the muzzle. The squirrel is ready!


Funny figures that you can make from pine cones with your own hands
Leaf Crafts
Tree leaves are an excellent material for creating voluminous crafts. They can be used either alone or with other natural materials. And one of these materials is a cone.
There are plenty of creative ideas for using this natural material; you just need to decide on the direction of the style, whether it will be a painting, a wreath, or just a regular display. Any cones, open or unopened, large or small, are suitable for making products.


You can create original compositions from cones and leaves on absolutely any topic. When finished, they can decorate not only your home, but also yours. In addition, your kids can take part in their creation. You just need to organize a small step-by-step master class for them, after which they will happily do it on their own.
Crafts made by miniature animals and people are especially popular. They are made quickly and simply. Auxiliary materials for their manufacture can be pieces of fabric, shelves, tree branches, metal wire, tree bark, acorn caps, etc.


Autumn is perhaps the most beautiful time of the year. Her beauty has become an inexhaustible source of inspiration for many creative personalities: writers, artists, sculptors and others. It is in autumn that the foliage of trees acquires its bright, beautiful color and then falls.
Experienced craftsmen are sure that such beauty should not be wasted. With their own hands they make incredibly beautiful crafts from fallen leaves, which sometimes look like a real work of art. Well, forest cones only complement the overall picture.

Beautiful decor of leaves and cones on the theme of autumn
New Year's toys
New Year is the main family holiday, which both adults and children look forward to. Well, what holiday would be complete without toys and gifts? After all, on this day your kids are waiting for a special atmosphere and a real miracle. To surprise your family, you can, of course, go to the store and buy everything there. However, such a surprise should not be ordinary; it should be interesting and original. Therefore, the best option is to make gifts and decorations with your own hands.
To create a magical and festive atmosphere, decorating one Christmas tree will not be enough. On this day, everything around should be beautiful. Do-it-yourself New Year's toys made from pine cones will help you solve this problem. After all, there are a huge number of New Year’s themes for decorating your home with crafts made from pine cones. Let's take a closer look at each of them.


If you have old toys that your child has not played with for a long time or they are no longer used, you do not have to throw them away. They can be given new life by turning them into original Christmas tree decorations. Making such a toy with your own hands is as easy as shelling pears. For this you will need cones, glue and other auxiliary material (sticks, beads, buttons, etc.)
- The first thing to do is paint the pine cone in gold or silver. It is best to use special cans of paint for this;
- Next, you need to attach the head to the bump. A glue gun will do the job perfectly. Paws and tail can be made of any material; felt is ideal;
- A thread in the form of a loop is tied to the finished products at the base of the neck. With its help, toys will be hung on the Christmas tree.


New Year is a bright and cheerful holiday in which there is a tradition of decorating not only the Christmas tree, but the whole house. Your mood will depend on how well the decor is chosen. It is best to decorate the ceiling and walls with beautiful white snowflakes, the windows with multi-colored garlands, and the furniture and floor with sparkles and confetti.
A composition of cones will go well with the legs of a pine or spruce tree. Add colored ribbons and toys to it and you will get an incredibly beautiful New Year's composition that will become the center of attention at your holiday.

A pine branch decorated with cones is a very popular element of New Year's decor.

New Year has its own traditions and one of them is lighting candles

Traditionally, the main colors associated with the New Year are green, red, blue and white. Of course, the color scheme can be supplemented with several other colors, but the main thing here is not to overdo it.
For example, blue or red, against the green background of the Christmas tree, will look bright and rich, emphasizing the beauty of the green beauty characteristic of it at this time of year. It will help to dilute bright colors. This could be artificial snow for decoration, paper snowflakes, silver-coated cones, tinsel or garlands spiraling around the tree.

It’s not at all difficult to make a New Year’s composition using forest cones with your own hands; you just need a little imagination and patience, as well as skillful hands capable of working miracles.
- First you need to collect as many cones as possible in the forest, preferably pine cones. The cones should have a neat appearance without visible damage. It is advisable that all the petals are fully open, so the craft will look more voluminous and richer;
- Next, using regular gouache, cover each tip of the petal with a thick layer of paint. For added elegance, you can sprinkle glitter on top.
Ready-made pine cones can be used as a decoration for a Christmas tree, or you can make a luxurious garland out of them and decorate a portal with it, for example. They can also be placed in a transparent container and used as a decorative element.


As you can see for yourself, forest cones are an extremely easy-to-handle natural material from which you can make stunning decorative items on absolutely any theme with your own hands.
With the help of correctly selected decorations, you can create a unique interior of a country house or apartment.

Don’t be afraid to make a mistake, try, fantasize, experiment and we are sure that everything will work out for you!
If the weather is good on the weekend, we play in the yard almost all day. Around the playground, a certain smart person planted a dozen chestnuts, walnuts, maples and rowan trees. A little further on grow wild grapes, mulberries and apricots.
It must be said that in autumn, colorful trees present an incredibly colorful sight. It's a pity that there are no artists in our family. Rich colors, accompanied by sunny weather, greatly lift your spirits and inspire creativity.
After playing outdoors, my daughter and I go to make crafts from natural materials collected in the yard. From last season we still have cones of Crimean and common pine, as well as fairly dried chestnut peels. Precisely, today we will make a wild animal out of them - a brown bear. Join us!
To work you will need:
- - Crimean pine cone,
- - plasticine,
- - quartered chestnut peels,
- - autumn leaves for decorating crafts.

First, we will distribute responsibilities with the child. The daughter sculpts plasticine parts, and the mother corrects possible defects. We will need two round flat ears, eyes, an oval brown muzzle with a black button nose.
The craftsmen completed the difficult task with excellent marks, but the mother will have to attach the finished elements to the bump herself. Jewelry work cannot be rushed; you need to firmly press the plasticine parts to the scales so that they do not lose their shape.

We put the body and head of the craft aside and take up the thorny paws of the beast. Last year's chestnut peel quarters are an ideal material for decorating the limbs of all shaggy animals. If necessary, parts are reduced in size, and sharp corners are cut off with scissors.

We will attach the paws to the body of the craft using pieces of plasticine. The bear must stand firmly on its feet and not tip over.

Here he is, a forest predator, raising his paw in greeting. Now the beast will roar throughout the impenetrable thicket.

Crafts for children made from natural materials.
Main details: fir cone; four half-opened pine cones; an open pine cone with a round crown; acorn cap. The bear's body is a fir cone.
The remaining parts will be attached to it using the “scale under scale” method. To connect the cones “scale under scale”, you need to move them
towards each other so that the scales of one fall under the scales of the other. To secure the connection, you must first apply glue
(place a piece of plasticine) under the scales of one of the cones.
Then, when the scales are connected, the other cones will stick.
A good cone has very elastic scales, so breaking them is not at all easy. When connecting the pine cones “scale by scale,” don’t be afraid to press them harder. The bear's paws are half-opened pine cones. In this case, the hind (lower) legs should be slightly larger.
Place a fir cone on the top of the head and attach the hind legs. In order for the bear to sit comfortably, the paws must be placed on one side of the bump-body, slightly apart, as you see in the photo.

Make the head for the bear from an open pine cone. Glue the acorn cap to the highest point of the top of this cone (slightly away from the center) so that the bear’s face stretches forward. The dark nose and eyes can be made from peppercorns or plasticine. Glue the nose to the tip of the muzzle. Place something light under the eyes to make them stand out: circles of light birch bark, white (light) plasticine.
If the pupils are moved towards the nose, the bear will have a good-natured appearance. In any case, the eyes should cover the center of the crown of the cone-head.
Strengthen the front (upper) paws over the hind paws.
Ears can be cut from birch bark or acorn caps can be used, but flatter than for the muzzle. Strengthen them by inserting them under the scales
cone heads.
That's all. If you want to do something differently, or add some details, then no one will bother you. Crafts made from natural materials provide so many opportunities to fantasize and make your fantasies come true!
Of course, the bear is a big animal, but it is also very trusting. In many fairy tales, the bear is deceived and even laughed at.
MORE OPTIONS FOR BEARS FROM CONES


