Star news


Spring flowers applique for school. Lesson summary "Applique - spring flower"
Both children and adults look forward to spring. Therefore, it is not surprising that children very often have the desire to make applications on an interesting and relevant topic of spring.
The subjects of works on this topic can be varied. These are spring landscapes with streams and thawed patches, and the first flowers, and birds and animals. Everything that grows, lives and develops can be safely attributed to the theme “Spring”.
Applications can be made from different materials, using available materials and gifts of nature. However, the master classes described in this article will use familiar and familiar materials. These are paper, cardboard and cotton pads, as an alternative to cotton wool or foam rubber.
Let's start getting acquainted with the works with an easy application for the youngest creators.
Making appliques on the theme of spring: making a sun out of napkins
This application is perfect for kindergarten as a group activity. It will charge everyone with positive emotions and spring mood for a long time.
You will need:
1) Whatman paper;
2) Gouache paints;
3) Yellow napkins;
4) Scissors;
Stages of work:
1) Cut the napkins into squares with a side of 5 cm. Roll each into balls.
2) On whatman paper we draw a circle - this is a template for the sun.
3) Let's start drawing the rays. To do this, we apply paint to the child’s palm and make prints around the circumference of the future sun. You get these kind of rays.
4) Then glue the napkin balls inside the circle.
5) At the end of the work, cut out the sun according to the outlines of the palms.

What can be made from cotton pads? Of course, a craft! This soft material will be an excellent replacement for the usual cotton wool or fluff. Let's look at the example of making a spring panel to see how cotton pads can be used in creative activities.
You will need:
1) Colored paper;
2) Cardboard;
4) Scissors;
5) Cotton pads;
6) Pencil.
Manufacturing process:
1) Cut out blanks from colored paper. A yellow circle and stripes are for the sun, from blue and light blue paper we will make a stream and the sky. We will cut out stems of lilies of the valley from green leaves, and birds from black ones.
2) We begin the design by gluing large parts. This is the sky and the stream. We place them on a silver background.
3) We make the sun. We attach the yellow circle to the upper right corner of the picture, we make rays from strips folded in half, which we glue to the base.
4) From cotton pads we make snowdrifts and blocks of ice on the stream. We place lilies of the valley on the snow, the flowers of which will also be made from disks.

You will need:
1) Corrugated colored paper;
2) Green and blue paper;
3) Scissors;
4) Glue stick.
Step-by-step instruction:
1) Make petals. To do this, cut a rectangular strip of yellow paper, twist it in the middle and fold it in half in the same place.
2) We give the tips an oval shape, we get one of the six necessary petals for one flower.
3) Cut out a strip measuring 5 by 15 cm from corrugated white paper, which we then fold in half lengthwise.
4) Wind it onto a pencil and glue it, preventing it from unwinding. This is the future middle of the flower.
5) We arrange the petals in a circle, gluing only at the base. Then we attach the middle without removing it from the pencil.
6) Cut out leaves and stems from green paper. First we glue the stems, then the leaves, the upper part of which remains loose.
7) Make the rest of the flowers in the same way.
Spring craft is ready!

We create the applique “The Coming of Spring” from colored paper
Another version of the applique on an interesting and light spring theme with templates. Suitable for school age children.
You will need:
1) Watercolor paper;
2) Colored paper;
3) Scissors;
5) Pencil;
6) Insert from a box of chocolates;
7) Felt pens.
Templates:

Step-by-step instruction:
1) Cut out branches of any shape from brown paper and glue them to the base.
2) Cut out a circle from golden paper. This is the future nest in the picture. Glue it onto the branches.
3) From the liner from a box of chocolates, cut thin strips of various shapes, which we use to decorate the nest around the perimeter.
4) Cut out parts of the sun from yellow paper and glue the image onto the base. We make leaves from green paper, which we then place on branches.
5) Let's start making chicks. From sheets of colored paper we cut out the necessary parts (body, head, paws).
6) Glue the white eyes onto the yellow circle heads. Using felt-tip pens we make pupils and eyelashes. Glue on the beaks and legs. Then we attach the wings and tails along with the crests.
7) Place the birds in the nest.
8) Cut out butterflies from colored paper and add them to the applique
"Spring came!" - literally every detail in the resulting picture says so.

Video on the topic of the article
APPLICATION. "SPRING FLOWER"
Target. Teach children to cut out a circle by smoothly rounding the corners of a square, cut the circle in half along the fold; to compose from parts - circles, semicircles and a narrow strip - images of unblown and blossoming flowers; use two shades of the same color in the application; reinforce neat gluing techniques.
Material. The teacher has a card or illustration with a picture of a flower and buds; flannelgraph and parts of a flower: two semicircles of a light shade and two semicircles of a dark shade (petals) for a blossoming flower and two circles of different sizes for a bud, several green semicircles (leaves), a strip (stem), glued on the back side with flannel; square to show cutting techniques. Some children have squares5 x5 cm And4 x4 cm the same color, but different shades, others have squares5 x5 cm and 2,5 x2, 5 cm for buds; for two children green squares for leaves6 x6 cm, 4 x4 cm several pieces each; narrow stripes13 x0,5 cm (stems); scissors, glue, rectangular sheets of thick tinted paper for gluing the applique.
Move classes. The teacher says that in spring many different flowers bloom in the meadows, flower beds in gardens and parks. Shows an illustration of blooming flowers and buds. He explains that all the petals of a blossoming flower are visible, but the petals of a bud are still curled up and those inside are not visible.
He says that today children will learn to depict a blossoming flower and bud.
Places a flannelgraph in front of them, on which two green stems (straight strips) were previously attached. He says that a bud can be depicted from two circles - a large and a small one. Its petals are curled (he places a large circle on the stem), and those inside the bud are just beginning to show (he places a small circle so that it is halfway over the large one). Asks children what color big andsmall circles that made up a bud (pink, but in different shades, the large one is lighter, and the small one is darker).
“What is missing from our unblown flower? - asks the teacher. “Leaves can be made from semicircles.” Calls the child and invites him to attach the leaves to the stem. Asks the question: “Are the green leaves the same shade?” (Different.)
Then the teacher lays out a blooming flower. First the upper petals, which are slightly apart, then the lower ones. Draws children's attention to the fact that the leaves can be attached to the stem in a different way than those of the first flower - with the convex side down.
Invites children to look at their squares and guess who will represent a bud and who will represent a blooming flower.
Explains and shows how to cut a circle from a square. You need to start cutting the circle from the middle of the side of the square and round the corner to the middle of the other side so that it falls off. All four corners should fall off, then the circle will be the desired size.
Children can put a square in front of them and show with their finger where they will make a cut with scissors to make a circle (“Put your finger on the place where you start the cut...”, etc.).
The teacher asks the children where to start working. Will everyone have to cut the circle in half for the flower head? (The one who will make the buds does not need to cut the circle in half.)
During the work, it is necessary to ensure that children, when cutting out circles, use the entire surface of the squares, and with their left hand smoothly turn the square towards the scissor blades. It is advisable to start with the flower head and then glue the stem.
At the end of the lesson, the teacher displays children's works on a stand close to each other. He says: “You see, children, it turned out to be a flowerbed on which many spring flowers have grown, blooming and not yetblossoming buds. There are pink and orange... (children name the color of the plants), and each bud and flower has petals of the same color, but different shades.” The teacher invites one child to “pluck” flowers from the flowerbed with goodrounded petals, and the other to “pluck” round buds. He says that the children who made these flowers and buds have already learned how to cut smoothly rounded circles.
In the evening, children's works can be arranged into a common frieze to decorate a veranda or other room.
Preparation of materials and tools
Elements of spring applications can be a variety of flowers - from crocuses and snowdrops emerging from under snowdrifts to daffodils and tulips growing in flower beds, flowering trees, melting snow, running streams and much more. And if, when planning to engage in this type of creativity, you still do not know exactly what you want to depict, then it is best to stock up on all the tools and materials that may be needed during the work. At the same time, if you will be making spring applications together with your child, it is important that there are two sets of tools. In this case, the little master will be able to repeat the necessary actions after you, for example, draw petal patterns, cut out stems or leaves.
The materials you will need are colored paper, cardboard, preferably white and colored, standard sheets, corrugated paper, quilling tapes, white and pink napkins. Now about the tools. You need comfortable scissors, glue (you can use either a pencil or PVA), a stapler, a simple stapler, and, well, don’t forget about a small towel that you can use to wipe your glue-stained hands while making the applique.

Applique: bouquet of spring flowers
In spring, forest glades and flower beds are full of a wide variety of flowers. These include bells, tulips, daffodils, lilies of the valley, and snowdrops. So why not combine them all into one bouquet?
First you will need to cut out. To do this, you can prepare templates from cardboard in advance, which is especially important if, for example, you make lilies of the valley, or draw flowers directly on the back of colored paper. In addition, the “Spring Flowers” applique implies the presence of stems and leaves. When all the parts are ready, all that remains is to glue them to the base in the appropriate order. It is important not to forget that the flowers must be arranged in such a way that they look like a bouquet. That is, they should be superimposed on each other, creating a volume effect.
The “Spring Bouquet” application will look even more original if the flowers are placed in a vase or basket. To do this, you need to cut out a container that you prefer from colored paper and stick it on top of the bouquet so as to half cover the stems.

Making spring flowers
At this stage, you need to decide what flowers your spring appliques will consist of. The most common ones found in spring are tulips, bells, lilies of the valley and snowdrops, so these are what we will talk about next. Let's start with the bell. To make this flower, you need to fold a sheet of blue paper in half and draw half of the product on it, cut it out, and then lay it out. As a result of such actions, you will get a symmetrical bell. Using a similar scheme, you can create a lily of the valley. True, you will need white paper and on the applique, unlike the bell, it should be much smaller in size.
The “Spring Flowers” paper applique can also consist of tulips and snowdrops. It is worth noting that both of these flowers are cut out according to the same pattern. The differences between them are their size, color and location on the stem. The first ones “look” up, and the second ones look down. In order for the child to understand more clearly what the applique will consist of, it is worth preparing pictures with their images in advance. There is no point in demanding maximum precision from a small master; the main thing is the manifestation of his creativity.
Making sepals and stems
Now the sepals and stems. You need to cut them out of green paper. For stems, a regular colored one will do. The stem of a tulip will be a straight strip 12-15 cm high and 1 cm wide. But for snowdrops and bells, it is necessary that their “heads” “look” down. To do this, the stem must have a slight rounding at the top. These two flowers also have sepals. They can be cut from a square, approximately the same size as a bell or snowdrop, as follows: fold the shape diagonally and use scissors to make a triangular indentation on one of its open sides.
As for the lily of the valley, its stem consists of several elements - one long, curved at the top, and 5-7 short ones attached to it, on which the flowers “hang”.

Leaves for spring flowers
The “Spring Flowers” applique should also have leaves. For some plants, for example, lilies of the valley, it is better to cut them out of corrugated paper, since its texture is more reminiscent of real ones, but for the rest, regular colored paper is suitable. Snowdrops and bluebells have pointed leaves at the top, but the former are narrower and the latter are wider. The leaf for a tulip should have the same height as the stem, be wide (2-3cm) in the middle and pointed at the end. It can be attached to the base only with the lower part, and the upper part can be bent. The lily of the valley leaf resembles an elongated oval, slightly rounded at the top. To make it, as already mentioned, it is best to use corrugated paper.
Volumetric applique “Spring Fantasy”
Spring applications do not have to consist of flowers. After all, at this time of year there are many other phenomena that deserve attention. For example, melting snow or flowering trees. These are the ones you should pay attention to and create a voluminous applique.

For the base you will need cardboard. It should be positioned horizontally. The lower part of the base will be occupied by snowdrifts, and the upper part will be occupied by a flowering tree branch. To make snow notes, you need to take two white paper rectangles with a height of 5-6 cm and a width that matches the base. Both blanks must be folded together and, using scissors, give their upper part a waviness. First, you need to glue a white part to the lower part of the base, and then, moving down a little, a blue one.
Now a flowering branch. It is necessary to cut strips from brown or gray paper, one 1.5-2 cm thick and 5-8 pieces of 0.5-1 cm each. The branch should be glued to the right side of the base, and on it flowers, made as follows: white and The pink napkin should be folded into a square and fastened in the middle with a stapler. Then draw a 5-petal flower on it, so that the staple is in its center, and cut it out. Next, straighten the product and glue it to the branch. There can be as many flowers as you wish. At the final stage, you will need to cut out leaves from green paper and place them on the same branch. The “Spring Fantasy” application is ready!
Seasons change each other: spring, summer, autumn, winter, and so on year after year. And it’s not for nothing that we started the list in the spring, because spring is the time of the birth of new life, in the spring the grass blooms, the trees turn green, the rivers are freed from their icy shackles. Applications on the theme “Spring” are especially popular in kindergartens and schools, because we are all so happy about the arrival of spring! For children, spring is a harbinger of summer, which means holidays.
Spring has come, and with it came interesting ideas for crafts and applications that can be made both in kindergarten and in 1st grade. Such applications can be made from anything: from cotton pads, from napkins, from colored paper, from cereals and pasta. There are really a lot of ideas and materials, the main thing is to choose an interesting and beautiful plot, because spring is a time of inspiration!
Spring forest

The first master class on the theme “Spring” with templates is one of the versions of applications on spring themes. We will create a spring forest that has just woken up from its winter sleep.
To make crafts, take:

- Colored paper. You can also use velvet paper for some elements;
- White paper;
- Colored cardboard;
- Glue;
- Pencil;
- Black marker or felt-tip pen;
- Ruler;
- Scissors;
- Cut out templates (see photo).

It is better to cut out the templates in advance and distribute ready-made cut out figures to the children.

Before starting work, remind your kids about safety precautions when working with scissors so that children do not damage their clothes or fingers.
So, let's get to work.
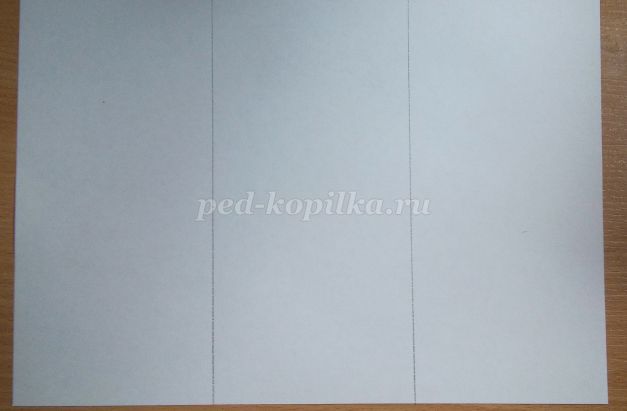
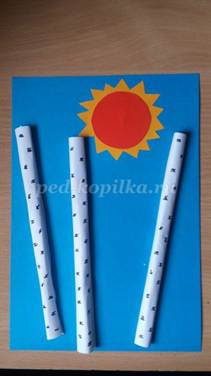
- Let's work on the details first. Take white paper and cut it into three identical strips. Let's twist the strips so that we get three identical tubes - these are birch trunks. Using a marker, we will apply a design on them - thin black markings on the bark.


- Next, trace the sun template on yellow paper and cut it out. From red velvet paper, cut out the center of the sun according to the template.


- When the parts are ready, we start working with glue. First glue the yellow sun onto the blue cardboard, then place the red center on top of it.

- Now let's glue the birch trunks. You can arrange them however you like.
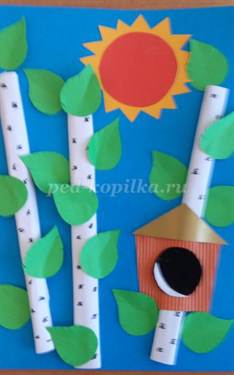
- Next, we’ll make a birdhouse. From colored paper or cardboard, cut out the birdhouse parts according to the templates and glue them to one of the birches.


- Then we move on to birch leaves. Take green paper, trace the leaf templates and cut them out. To get several leaves at once, you can fold the paper in several layers and only then cut out the leaves. Use scissors to give them volume, slightly cut them, and bend them in half. This way our picture will look more voluminous. We glue the leaves to the birch trees.


- Cut out bird patterns from black paper. You can use velvet paper to show texture.

- We glue the birds onto tree trunks, and glue wings cut from any colors of paper to them.


In addition to birds, butterflies can be placed in the picture. The application is ready! This application will be easy for kindergarten, school and extracurricular activities.

Crafts made from cotton pads

Applications made from cotton pads can be found more and more often in kindergartens and schools; this is already a fairly common material for creative projects. The application on the theme “Spring” did not bypass this “field” of ideas, the next master class is about this.
We will need:
- Colored cardboard for background. It is better to choose blue, silver or lilac colors;
- Brown colored paper;
- Multilayer cotton pads;
- Paints and brushes;
- Glue.
Let's get to work. Cut out a tree branch from brown paper and glue it onto the cardboard.


Let's give each part a round shape using scissors.

Now we need to turn each of the resulting circles into a miniature ball. To do this, bend the outer edges to the middle. Look at the photo, it clearly shows how to do this.

We will need as many of these lump balls as there are branches on your cut branch. Let's glue the balls to it.


And stick it to our work.

Now let's start coloring our “cotton” picture. You can use any paints - watercolor, gouache, acrylic. We cover each leaf with green paint. To create different shades, you can experiment with water: for a more saturated color, use more paint and less water, and, conversely, to get lighter shades, use more water, less paint.
Do not overdo it with water, because cotton wool absorbs it very well, so you just need to barely touch it with a brush and the entire fragment will become colored.

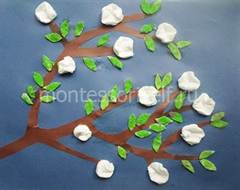
Then we move on to coloring the flowers on the branch. They can be made pink or scarlet. You can not cover the entire flower with paint, but drop colored water into the middle of the flower, and then the water will spread across the cotton wool in interesting patterns. You can drop a more saturated shade into the center, and then add a little more water so that it “spreads the color” throughout the flower.

Let's wait for the paint to dry completely. And finally our spring tree is ready!

You can experiment with the size of flowers and leaves, with different colors and shades - there are no limits to your imagination! And this applies not only to this work, but also to spring applications in general.
Video on the topic of the article
Also, don’t miss a special video selection on the theme of spring applications.
Three-dimensional paper applique for children over 7 years old. Master class with step-by-step photos
Spring panel for elementary school children "Chicks in the nest"
Derkach Egor, 9 years old, student of the creative association "Peacock", MBOU DOD CDT "Commonwealth", Novosibirsk
Supervisor: Derkach Anastasia Sergeevna, Additional education teacher, MBOUDOD CDT "Commonwealth", Novosibirsk
Description: This master class is intended for children from 7 years old, additional education teachers, and parents.
Purpose: Gift, home decoration.
Target: Creating a volumetric application
Tasks:
- develop practical skills in working with paper and waste materials;
- develop interest in artistic creativity;
- develop fine motor skills, eye, imagination, aesthetic taste, compositional skills and spatial thinking;
- consolidate skills in handling simple tools - scissors, paper
- improve design and application skills and abilities;
- cultivate independence, accuracy in work, patience, perseverance
Manufacturing technique:
- applique
- paper plastic
Materials and tools:
For work we will need:- sheet of watercolor paper, A-3 format
- colored paper (can be used for photocopier)
- scissors
- a simple pencil
- PVA glue
- waste material (liner from a box of chocolates)
- pink parchment
- medium-sized openwork paper napkins
- felt-tip pens (black and blue)

Safety rules when working with scissors
1. Use well-adjusted and sharpened scissors
2. Scissors must have blunt, rounded ends
3. Place the scissors in the rings towards you
4. Watch the movement of the blades while cutting
5.Do not leave scissors open
6. Pass the scissors rings first
7.Don’t play with scissors, don’t bring it to your face
8.Use scissors as intended
Rules for working with PVA glue
1. When working with glue, use a brush if necessary.
2. Take the amount of glue that is required to complete the job at this stage
3. It is necessary to apply the glue in an even thin layer
4. Remove excess glue with a paper napkin
5. Try not to get the glue on your clothes, face, or especially your eyes.
6. After work, close the glue tightly and put it away
7. Wash your hands and work area with soap and water
Templates:

Progress:
Panel No. 1 Master class with photoTake a sheet of A-3 size watercolor paper.
This will be the background of our work

Cut out branches of any shape from brown paper

Glue branches to the background

Cut out a circle from gold paper. This will be a nest

Glue it to the branches

Taking an insert from a box of chocolates

Cut it into straws of any shape

Tape off the nest


Cut out the details for the sun from yellow paper and glue it to the background.


Cut out leaves of different sizes from green paper

Glue them to the branches


Making chicks
Cut out all the necessary parts from colored paper

Glue eyes onto the yellow circles

Using colored felt-tip pens we draw pupils and eyelashes

Glue the beaks

Legs

Wings

Tails

Tufts


The chicks are ready. We put them in a nest


Cutting out butterflies

Glue them onto the picture


The work is ready

When making this panel, many details remained: leaves, branches, rays for the sun, butterflies, straws for the nest...
We thought about it, added more material and made a second panel.
Spring panel No. 2 Master class with photos
First, glue openwork paper napkins to the background.
It will be the clouds

Sun

Branches

Nest

Making chicks


Tufts


We put the chicks in the nest

Making a caterpillar


Glue it

Cutting out flowers

