Star news


Sew the product using the patchwork technique. Creative patchwork: beautiful and easy for beginners
Patchwork techniques
At first glance, the technology for stitching patches is simple: you cut and sew, bringing your idea to life.
In fact, patchwork requires artistic taste, hard work, perseverance, accuracy, and the ability to sew.
The results are sometimes stunning in their beauty! Don't be afraid to experiment and give free rein to your imagination.
Looking at finished products, you sometimes wonder: how are different patterns created using identical elements (squares, triangles, stripes, corners, diamonds)? It turns out that the issue here is in the ways in which these elements are stitched together.
Let's look at the most popular of them.
Technique "Quick squares"
This technique is called that for a reason. It is based on squares that are cut from pre-sewn strips of fabric. In this case, 4 types of fabric in contrasting colors are used as a basis.First, you need to sew together 2 strips of one color, then another, i.e. we sew together blue, and then brown pieces of fabric. Then we lay the strips face to face and sew them together. You will get something like a sleeve.
The next step is cutting the squares. We measure an angle of 45 degrees, applying the ruler first to the upper edge of the sleeve, then to the lower one. Do this along the entire length of the original strip. This way we will get squares sewn from 4 types of fabric. Such squares are also called prefabricated square blocks or “quick” squares.
Having cut the required amount, you can combine and sew together square blocks in any order. Four squares are enough for a pillow; for a blanket you will need more (about 24 for a child and 42 for an adult). Watercolor technique This technique is quite popular and also uses squares. The main condition is choosing the right color scheme. A combination of light to dark fabric will create a watercolor painting effect. As a basis, you can take 7 types of fabric with a small pattern, for example, a floral print, then it will not be difficult for you to put them together into a beautiful pattern. Patchwork blanket “Strip to stripe” technique The pattern in this case is assembled from multi-colored strips of fabric, the arrangement and combination of which can vary in different ways. A large patchwork bedspread or a playful rug in the form of parquet boards, which are laid in a zigzag, corners, diamonds or ladder, will bring you a lot of pleasant emotions.
Log Cabin Technique This patchwork method is also based on stripes that are gathered around a central square and arranged in a spiral. The central square can be moved to a corner, then the drawing will turn out different.
“Magic Triangles” Technique The triangle is a very common element of patchwork. Triangles are easy to use: you can use them to make both simple squares and complex stars.
Most often, isosceles triangles are used in patchwork. By connecting the short sides, we get patterns of variegated multi-color stripes, and by sewing together the long sides - colored squares. Triangle patterns have names such as “Mill”, “Diamond”, “Star”. “Patchwork corners” technique A distinctive feature of this technique is that the corners do not need to be cut, they need to be folded from strips of fabric or squares. The resulting corners are sewn into strips, from which a three-dimensional fabric is then sewn.
“Chess” technique Small squares are placed in a checkerboard pattern. If we turn the squares with an upward angle, we get a checkerboard of rhombuses.
If you wish, you can first sew several small squares into “chess” blocks, which you can then sew together like diamonds.
“Russian Square” technique Assembling this pattern is quite complicated. It is based on a square; isosceles triangles make up the upper and lower tiers. The following tiers are assembled from triangles and stripes. The tiers can be the same in size and can “grow” from the center to the edges.
“Honeycomb” or “Grandma’s Garden” technique A pattern reminiscent of a honeycomb is assembled from hexagons. It is easy to assemble a flower from hexagons, the middle of which can be highlighted with a button covered with fabric. A master class on assembling a patchwork block of hexagons will help you understand all the intricacies.
“Lyapochikha” technique A very unique, mischievous, national Russian invention. Colored raw strips of fabric stitched onto the base create a voluminous fabric. Old knitted items, such as T-shirts, can be used here. It is better if the fabric does not fray much.
The patchwork technique is so entertaining that you can talk about it non-stop. There are as many variations of patterns as there are so many techniques in patchwork.
Where is patchwork applied?
Look around you and update the interior of your home with patchwork.
Any wardrobe items (except shoes) can be made from scraps: for an autumn jacket, quilting or Japanese patchwork techniques are suitable. Smart blouses, vests and skirts are made from crazy fabric. Using the patchwork technique, sew cute little things for your kids.
In addition to clothes, you can sew wallets, bags, and cosmetic bags using the patchwork technique.
The skill of working with fabric, with a sewing machine, as well as desire, hard work, passion and perseverance will help you become a patchwork master. Piece by piece, stitch by stitch, patchwork will become one of your favorite hobbies!


Evidence of ancient people engaging in this type of activity dates back to 980 BC.
A little history
Of course, then no one thought to call the possibility of repairing clothes or creating new ones from the remnants of old ones with the now fashionable word patchwork. The ideas of that time were also very different from modern ones and had completely different meanings. After all, patchwork is sewing from scraps. And if now, to create a certain color of a product, a craftswoman buys whole pieces of new fabric in the appropriate store, then previously such things were obtained not out of a whim, but primarily out of desperation, and only thanks to the innate desire for beauty in a person, the finished items had an aesthetic appearance .
Old clothes were altered many times, and multi-colored patches were placed on the holes. It is unlikely that primitive people could have thought that centuries later patchwork, the ideas for creating which essentially belonged to them, would be so popular, and that someone would specifically buy and cut new fabric in order to create something original from the scraps. Over time, patchwork became one of the types of American folk art and, thanks to the love of this people for travel, it gradually penetrated into the countries of Europe and Asia. It is worth noting that today in each country the patchwork style has its own original distinctive features that are characteristic of only one nation.
Not everything is as simple as it seemed
Patchwork, the technique of which at first glance seems elementary (they say, what could be easier than sewing multi-colored scraps of fabric together), actually requires quite a lot of time and labor. In addition to good creative inclinations that allow you to invent, model, and then bring to life a certain pattern, ornament or mosaic, you need to have at least an average level of sewing skills. Connecting individual pieces together so that they hold well and look neat is sometimes very difficult even for an experienced seamstress.

The main stages of working in patchwork style
Patchwork technique consists of three main stages:
1) selection of material;
2) creating a diagram and sketches of the future product;
3) connecting the shreds into a single fabric.

Basics of patchwork technique
Practicing masters of this type of needlework say that for each new product in the patchwork style, ideas usually come while looking through and selecting scraps of fabric with a similar texture. From these, the main drawing is compiled, and the necessary parts are purchased in the store. Of course, the opposite also happens. First, fabric of the main color is purchased from the store, and then the pattern is complemented by existing pieces of fabric.
If you have little experience in performing work in the patchwork style, the technique of which is quite complex, it is better to first use ready-made patterns, which can be easily found on the pages of handicraft magazines and other information resources on the relevant topic. Then the flaps are first sewn together into separate blanks, these parts are fastened together, and at the end of the work a lining is sewn to the canvas, the main purpose of which is to hide all errors, seams and the filler used in the product.
Don't forget the tools
If you still decide that this type of needlework suits you, or you have an irresistible desire to create something exclusive for yourself or as a gift to loved ones, then before you start working in the patchwork style, the technique of which is unique (which means you can declare with an absolute guarantee , that no one will have a second such thing), be sure to prepare all the tools necessary for the work. Of course, these should be threads, pins and needles, scissors, a sewing machine (if the plans are grandiose), as well as chalk or a pencil, a ruler, cardboard or thick paper for creating a pattern, a crochet hook or knitting needles. Very often in stores of the relevant profile you can find ready-made kits for patchwork, including suitable materials, a diagram for the pattern, as well as all the necessary tools.

Grandma's handicraft
Most often, handmade craftswomen in our country choose a bedspread from the variety of crafts in the style we are considering. Patchwork is perfect for creating such a thing. The resulting models are very different: from simple ones, presented in the form of squares or rectangles of the same size sewn together, which do not create any specific pattern, to indescribable masterpieces, consisting of the smallest patches, sewn in a certain order and using the appropriate technique, as well as forming stunning, varied patterns among themselves. Moreover, sometimes these are real paintings, and not just geometric shapes or ornaments. One of the distinctive features of Russian patchwork is the successful combination of the experience of other peoples, as well as the obligatory presence of appliqué or ornament on a variegated fabric. From time immemorial, quilts have been a mandatory and integral part of a bride's dowry. It was from them that an opinion was formed about what kind of housewife she was, and also a conclusion was drawn about perseverance and patience.

Pillows made in patchwork style are very common today. The same story, the same deep folklore content, only presented in a slightly different size. Grandmother's handicraft is the affectionate name for the patchwork technique in Russia. With their own hands, needlewomen create real masterpieces that you would not be ashamed to use in everyday life or give to friends.
Try making a pot holder in patchwork style - you won’t regret it!

Everyone knows that it is better to try once than to read many times. You need to start with something simple, even basic. After all, even experienced craftswomen sometimes cannot handle a large amount of work, let alone beginners. There are frequent cases when even very talented needlewomen are simply discouraged from taking up this activity due to the fact that they took on a difficult task. Try making an oven mitt or a small napkin for your kitchen in a patchwork style with your own hands. It will take very little time, but the result will definitely please you. There is no need to immediately run to the store for expensive fabric. Open the wardrobe. There is hardly a woman who has only those things that she constantly wears. Some are small, some are large, and some are just boring. Use them. The only condition is that the fabrics must match each other as much as possible in structure and be non-flowing (so that no additional processing of the seams is required, and the finished product looks neat). Take thick paper, place your palm on top and trace it. Now add a couple of centimeters to the resulting pattern (depending on the required final size of the tack and taking into account the internal seams). From the available pieces of fabric, we lay out the blank of the future product according to the template and fasten it with pins or baste it - whichever is more convenient for you. Try to make your first piece from large scraps so there are fewer seams. We sew the parts together manually or by machine, and trim off the unnecessary parts. Using the template, we cut out the second, back part of the potholder from a single piece of fabric, and from padding polyester or batting, which are the best fillers in this case, another one or two, depending on the required thickness. We sew all the blanks together from the inside out, like a simple mitten. Ready! Before sewing, do not forget to steam the seams on the front side of the product with an iron.

Homemade amulet
Today, a variety of denim products in patchwork style are very common. You can see ideas and examples of some ready-made gizmos in the photos presented to your attention. In addition to its attractive appearance, craftswomen value the durability, ease of use and further care of the resulting product in this fabric. It has been quite common lately to create clothes, pillows, bedspreads and other household items from knitted scraps, and many simply join pieces of fabric together using knitting.

Patchwork with knitting or crocheting is a technique as interesting as the one described above. Crafts can also be created from leftover yarn, regardless of the thickness of the thread and its quality. On the contrary, the more types of yarn you use to create each element, the more impressive and attractive the finished product will look. And how beautiful the knitted blanket looks! Patchwork will help lovely housewives to decorate their home in an original way, making it even more cozy and warm. Products made using this technique will be a wonderful gift for any occasion, including anniversaries and weddings. Why buy ready-made things in a store? And even pay exorbitant prices! Try creating them yourself. This is such space for imagination - patchwork! Pillows, potholders, napkins and other items sewn from multi-colored scraps look very original, reflect the spirit of the home, are imbued with love and turn into a kind of amulet.
You always want to create coziness in your apartment and express yourself through interior details. And, if you are also a creative person, then you can do it yourself. For example, there is a patchwork technique that allows you to create masterpieces from pieces of fabric. The name is English, but in Russia it is called patchwork. This type of technology has been known for a very long time, and archaeologists and scientists have found products created using this method all over the world, both in America and in Asian countries. I think that this was primarily due to the high cost of fabric in ancient times, so they took care of every scrap and tried to use it functionally.
In Russia, this method has also become widespread among peasants due to the high cost of fabric. The products were initially sewn together in a chaotic way, but gradually patterns began to be invented. Today we will look at patchwork for beginners so that you can repeat it beautifully and easily.
I have seen many beautiful works using this technique: blankets, pillows, potholders, bedspreads. When a sofa bedspread combines fabrics and colors of the overall color tone of the interior, it looks simply wonderful. Housewives have come up with a huge variety of schemes and templates, which can be very simple or quite complex and labor-intensive. But the effect is always amazing.

This technique is suitable for any interior style, but for rustic styles it is simply irreplaceable.
This technique is not at all as complicated as it might seem at first glance, but for a beginning craftswoman, you first need to gain experience and get better at it, so there are a few tips that will help you enjoy the process and not tire you out.

First, you need to prepare your workplace; the fabric should lie flat on the surface. This will allow you to cut and mark the lines evenly. Also, the fabric must be well ironed before work! This is very important, otherwise creases and unevenness may result.
Secondly, if you are just starting your activity in this direction, then take larger pieces, it will be easier for you. I understand that you may want to immediately repeat some drawing, but start with simple patterns just to get your hands on and achieve neat drawings.
Thirdly, always maintain an even cut, this will also give accuracy to your work.
To prevent the parts from moving out, use pins.
Try to sew so that the machine foot is flush with the edge of the piece. This allowance will be approximately 6 mm.
If you started making seam allowances of 6 mm, then adhere to this figure throughout the entire work. Otherwise, the drawing may turn out unclear or uneven.
Patchwork technique for beginners: step-by-step photos
Of course, to get started you first need to find where to start. Pardon the pun, but you can often find instructions for beginners that will bring tears to your eyes. Today I will offer two of the simplest techniques that everyone can do.
The main thing is to do everything carefully and then you can decorate the interior of the nursery, for example, with such a cute blanket.
There are many techniques in patchwork, but we will look at two: the well and Jacob's ladder.
Patchwork technique “Well”
The drawings created using this technique are very beautiful in two-color design. The diagram is shown in the figure below.
 Scheme "Well"
 You can use any fabric, but for a beginning craftswoman it is better to use cotton. It will not crumble, there is no need to pick up the pile, etc.
 “Well” technique
 We will need:
- Base – 20*20cm
- 2 multi-colored stripes, 3 cm wide, up to 1 meter long
- Square 4*4 cm
Before work, iron all the details well.
- On a backing made of cotton fabric, we find the middle by connecting two diagonals.

- Next, we place a 4*4 cm square in the middle, so that the corners of the square coincide with the lines.

- We sew only one side. Important! The edge of the fabric matches the edge of the foot.

- Place the strip with the front side facing the square and stitch. All edges must match perfectly.

- Thus, we have already made two seams.
- Now cut the strip exactly along the lines.

7. Bend the stitched patch with the front side up.

8. Place the next red strip with the right side facing inward and stitch.

9. Cut the strip again and bend the sewn end.

10. We also sew and cut off the fourth side of the square.

11. Repeat the same steps with a strip of a different color.

12. Alternate the strips in a circle until the base runs out.
The beautiful drawing is ready, the squares can be alternated.
To get a harmonious combination of colors, when choosing a fabric tone, be guided by. The tones should be the same saturation and the same lightness. I already wrote about the color wheel, although it applies to the interior, but it works with any color selection. Therefore, I invite you to read it.
Patchwork technique “Jacob’s Ladder”
This pattern also looks unusual and, despite its simplicity, is easy to do. The drawing itself didn’t manage to become an eyesore, so let’s take a look at it as well.

The photo shows the blog Jacob's Ladder, which consists of two bases: one of squares, the other of triangles.
 Jacob's Ladder technique
 You will need: 5 blocks with 2*2 squares, 4 blocks of triangles squares. Highlighted in the photo.

First, we make blocks of 2*2 squares.
To do this, we will need two strips, 7 cm wide. We place one on top of the other with the front side inward and sew at a distance of 6 mm from the edge.
 Making a blank from squares
 You need to iron the resulting part.

We make two such stitched strips, then place them on top of each other with the front sides inward, aligning the edges. And cut strips 7 cm wide.

Without separating the strips, we immediately sew them at a distance of 6 mm from the edge.

We iron the blanks and make 4 more such parts.

Now let's start creating a block of triangles. Take 2 squares with sides 13.5*13.5 cm.

On a light square you need to draw a diagonal.

Now we fold the two parts with the right sides inward and fasten them with pins.
Now we sew two strips, at a distance of 6 mm from the diagonal on each side.

When laying out the block, you need to carefully ensure that all the squares from the triangle with the bright side facing inward.

After you have laid out the blanks, we begin to sew them together.
I think you should get both drawings right the first time.
Schemes and templates for patchwork sewing
I’ll also give you a few diagrams, and, most importantly, I’ll bring to your attention the beautiful works of craftswomen that will decorate any apartment. In general, this is exactly our goal, right?
Let's consider the first scheme using triangles. The sequence is shown in numbers.

The finished result can be seen in the figure. This scheme is for those who have already gotten their hands on it.

The following scheme, on the contrary, is very simple and easy. It consists of connecting triangles in a certain sequence, as in the figure.

An example of the finished product can be seen in the photo. With the right combination of colors, you can always create a very beautiful product!

Another interesting version of the drawing is shown in the picture below.

Simply connecting squares can also make beautiful things, for example, another version of a baby blanket.

I think that you can start with the simplest techniques and, if you have imagination, make very beautiful and functional things; below we will consider a few ideas for inspiration.
Patchwork Ideas for Beginners
I came across a lot of ideas for the nursery. Here you can make a kit for each child. Choose a color scheme for both girls and boys.
Another option for decorating a nursery is a set of pillows and blankets made using this technique.

Also in the bottom photo, an idea for a color scheme for patchwork.

Bright and interesting ideas can be implemented and please your kids. Every child will be delighted with such a set depicting their favorite characters.

But, moving away from the nursery, here are a few more ideas. For example, oven mitts.

Another option for a home or bathhouse can be seen in the bottom picture.

I think that these schemes are enough to get you started, and if you have ideas, then share them in the comments!
The patchwork technique has long been known in many countries. It consists of composing various compositions - mosaic patterns - from scraps of fabric cut out according to a template, both variegated and plain. In our country, such creativity is called patchwork (chintz) mosaic.
In compositions made using this technique, there are no visible seams on the front side of the product, in contrast to applique (sewing patches onto a single background). Both directions can be present and perfectly combined with each other in the same product.
The history of patchwork is of interest to many. How and when did this unusual tradition of “assembling” things from pieces of fabric arise? In what country did it originate? Let's go back in time for a moment.
The history of patchwork
England is considered to be the birthplace of this technology. But in fact, the history of the appearance of patchwork sewing is connected with much more ancient times. In the National Museum of Cairo there is an example of an ornament on display, the material for which was leather fragments of gazelle skin; scientists date it back to 980 BC. e. The Tokyo City Museum houses an ancient outfit of similar age with patchwork patterns. In 1920, the English archaeologist A. Stein discovered a Buddhist carpet dating back to approximately the 9th century, sewn by monks from many pieces of pilgrims’ clothing.
The history of the emergence of patchwork in European countries is no less interesting. There is an assumption that this craft came from the East along with knights returning from the Crusades, who brought with them carpets, banners, clothes and fabrics as trophies. Then, at the end of the 18th century, settlers from England, Holland and Germany brought the patchwork technique to America, where it was significantly improved and turned into a national form of creativity.
The Western name for this technique is patchwork. This practical and inexpensive type of arts and crafts originally existed in England, where, from the 16th century, excellent bright patterns and colors were brought from India. A characteristic sign of wealth in the house was an Indian blanket luxuriously decorated with printed patterns or embroidery.
England as the birthplace of patchwork
Since not everyone could afford genuine colonial goods, English factories quickly mastered the production of counterfeits - locally produced blankets made from imported fabrics. Since 1712, the government of England, in order to develop its own manufacturing industry, prohibited the import and sale of Indian chintz and products made from it. Since then, the history of patchwork in the country has received impetus for development.
Chintz became smuggled and expensive. Having sewed clothes from it, thrifty Englishwomen used the remaining fabric for other products - mainly appliqués for woolen and linen fabrics. The smallest scraps were collected into a mosaic, forming a single canvas.

History of patchwork in Russia
In our country, references to this technique have been found since the 19th century, with the appearance of expensive overseas chintz on sale. This art reached its peak at the end of the 19th century, which is associated with the beginning of the development of machine-made chintz in manufactories and the widespread distribution of inexpensive cotton fabrics with printed patterns. Thus, in our country, the entire history of patchwork is briefly reduced to the emergence of industrial production in the textile sector.
Calico shirts and sundresses have become firmly established in everyday life. Their decoration, as a rule, was a patchwork pattern. Thrifty housewives managed to collect many useful products from the smallest scraps of cotton left after cutting clothes - blankets, curtains, rugs, pillows, and much more.
Made in Russia
The history of patchwork in our country traditionally comes down to the technique of “rustic” patterns - a simple mosaic of triangles, squares, stripes and contrasting inserts of bright colors. The most interesting and noteworthy are the volumetric technologies characteristic of Russian sewing.
The essence of this technology is as follows. All scraps are cut out according to a pattern in the form of a square or circle and folded into triangles. They are grouped in rows and attached in a circle to the base, which is thick fabric. Another option is to cut the fabric into strips, from which long strands are twisted. Then a braided cord is woven. Several of these braids of different colors are laid out on the fabric in a circle and sewn together.

What about these days?
In the twentieth century (namely in the 70s), there was a new surge in fashion for clothing, jewelry and interiors in folk style, in the wake of which interest in this technique was revived. Museums became interested in this type of folk art and began collecting samples of products.
As a result, entire collections of folk masterpieces appeared (which is not surprising, since the history of patchwork goes back many decades). And they are stored in the All-Russian Museum of Decorative, Applied and Folk Art in Moscow, the State Russian Museum of St. Petersburg, the Ivanovo Calico Museum and many city local history museums. The patchwork technique has attracted a huge number of modern professional artists.
Is it easy to sew from scraps?
This technique is not as simple as it might seem at first glance. The artist is required not only to have sewing skills, but also a subtle sense of style, color and, of course, taste. A good result is possible only with high precision cutting and stitching of elements. A difference of just a few millimeters can lead to misalignment of the entire product. Requires mastery of both hand and machine quilting (the term "quilting" means stitching through a pad of wadding, a layer of batting, or any other material placed between two layers of decorative fabric). The stitch can have various patterns that further decorate the product.
What craftswomen don’t sew from multi-colored scraps! They create a wide variety of things - from blankets, tablecloths, pillows, curtains, potholders, rugs to panels and paintings, as well as bags, jackets and vests. Having a developed taste, the artist has complete freedom in choosing fabrics and creating her own, always unique design.
Mastering the intricacies of this original art requires patience and time. Beginning needlewomen can be advised to take up a simple, small-sized product, for example, a potholder. When making any item using the patchwork technique, first of all, you need to master connecting a pair of rectangular triangles of the same size of different colors into a square, then composing strips from similar squares, followed by stitching a number of strips into a continuous fabric.

What is required from an artist
A necessary component of success is the presence of accuracy and artistic taste. So that the composition does not dazzle the eye, the pieces of fabric must be in harmony with each other in color. A successful geometric solution can give a composition a truly unique flavor. Difficulty arises when working with patches that, in addition to the main pattern, have many additional colors and shades. When composing a single canvas, the master has to check the achieved effect every minute. And the main thing in his work is not the theory of color combinations, but his own intuition.
The extraordinary variety of patchwork crafts amazes and attracts attention. In the kitchen decoration, tablecloths, elegant napkins, colorful potholders are striking; in the bedroom - blankets, all kinds of rugs and pillowcases. Getting into the living room, we pay attention to and the wardrobe stores accessories in the form of a wallet, bag and even clothes - they can be cozy or in a folk style.
Modern tendencies
Nowadays, patchwork attracts both professional artists and amateur craftsmen. Someone is passionate about sewing blankets, making it a national art, while others chose to make clothes, enriched with the decorative diversity of Russian folk costume.
In any of the cases, one can see the interweaving of modern sewing techniques with folk traditions, and through this, penetration into the cultural heritage of the past. Patchwork works of the Russian style are characterized by a special brightness and “fun” of colors. There is always multicolor in the patterns; various motley motifs and fabrics of several textures are harmoniously combined in an incomprehensible way.

In a number of Russian cities, fans of this original, wonderful creativity have organized their own clubs. Patchwork lovers hold joint events, meetings, exhibitions and festivals, including the implementation of international projects.
The history of the development of patchwork sewing is by no means complete today. All over the world, this craft is being revived; many countries claim priority in this area of applied creativity. Perhaps it is most correct to consider it international art - belonging to the whole world. Like other methods of artistic expression, it serves as an accessible and understandable language for interaction between representatives of different faiths and nations.
A blanket made of “quick” squares in a “patchwork” style is a warm and soft home decoration. Read here how to make it yourself. Schemes, patterns and step-by-step instructions for beginner needlewomen.
Content:
Grandma's colorful blanket, patchwork rugs and bedding, bright pillows and potholders with multi-colored appliqué have been familiar to us since childhood. Such cute little things always filled the house with warmth and comfort. Unfortunately, only grandmothers remember the technique used to make those cozy and cute blankets. And every girl and woman should get acquainted and make friends with patchwork in order to be able to fill her hearth with something dear and close.
Fabric for making a patchwork blanket

Patchwork is patchwork sewing from fabric of various household and decorative items - beds, blankets, bags, clothes, tablecloths, kitchen utensils, etc. The technique, known for thousands of years, is popular all over the world. Skilled craftswomen create all sorts of outlandish works of art using the patchwork method. And novice needlewomen are advised to start with wide blankets made from “quick squares”. Such products are practical and aesthetic, and are also optimally suited for mastering such a delicate science.
Today, patchwork is considered one of the most popular patchwork techniques. It consists of stitching together various pieces of fabric according to the mosaic principle. In the hands of experienced needlewomen, bright pieces of material are transformed into luxurious products that surprise and delight. But not all fabrics are equally good for patchwork patchwork.
To choose the right material for creating a patchwork quilt, you can follow the traditions of our grandmothers: simply save all the scraps and leftovers from sewing clothes or bed linen. From such different-sized shreds you will certainly get a motley blanket. Or you can do it much simpler - purchase a set of fabrics for patchwork in any specialized store. Since the most difficult process in the patchwork technique is working with the material, the fabric must certainly not only be beautiful in appearance, but also of sufficient quality.

Cotton fabrics are considered the ideal material for patchwork because they meet all the important requirements:
- Do not wrinkle;
- Don't rush;
- Do not shrink;
- They do not shed;
- Easy to cut.
Sewing material stores offer customers a huge selection of cotton fabrics of different colors and densities. But, unfortunately, they are not always suitable for patchwork. Some options fray too much when cut, others are hard to iron or sag after washing. It is, however, recommended to buy special fabrics for patchwork that have undergone special pre-treatment. This material is very easy for beginners to work with.
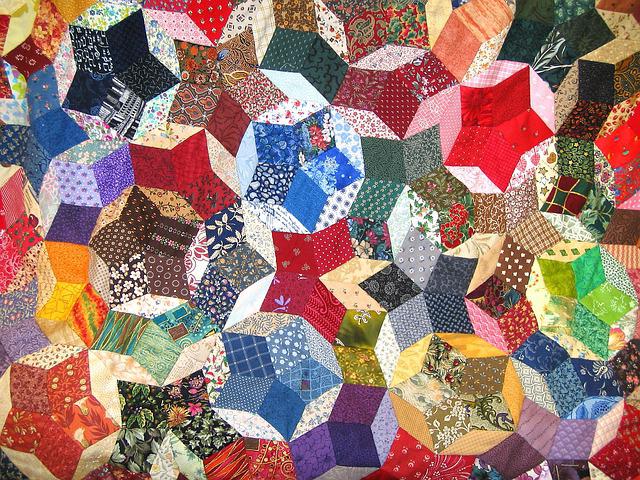
Popular types and patterns of patchwork

The patchwork style is a wide field for ideas and experiments, which has no boundaries in combinations of shapes, colors, and types of material. Here, any creative idea of the author can be brought to life. Fancy patterns, applications with animals and flowers, geometric mosaics and other equally interesting options can easily be folded into a warm bedspread or comfortable blanket.
Of course, you can create a diagram for a product with your own hands, armed with imagination and a sharp pencil. Or you can use ready-made ones, of which there are hundreds of thousands, depending on the types of patchwork.
Let's look at the most popular types of patchwork:
- Classic English. In this version of patchwork, all parts of the same shape and size are used, usually in two primary colors. Patterns for English patchwork are very primitive. For example, squares of two shades arranged in a checkerboard pattern, or symmetrically stitched triangles.
- Eastern patchwork. The manufacturing principle is similar to the classic one, but differs in the use of various decorative elements - ribbons, beads, zippers, etc. Most patterns for oriental patchwork products allow greater freedom in the shapes and sizes of parts. For example, these can be arched and wavy patches, connected and decorated with satin ribbons.
- Crazy patchwork. The most “free” look. Characterized by its aesthetics and attractiveness. As a rule, the shape, color and size of parts are not limited by anything other than the pattern used. And the designs can be incredibly diverse: images of nature or flowers, floral or geometric patterns, complete abstraction.
Making a patchwork blanket step by step
Of course, the abundance of various complex patterns and variations of products using the patchwork technique surprises even those craftswomen who have devoted decades to this type of art. And for beginners, there are more primitive, but no less beautiful and functional options. For example, a blanket of “quick” squares. It’s better to start from there.
Preparatory stage

First of all, you should decide on the color scheme and size of the future product. Although for the first time any available pieces of various shades will be suitable. Prepare in advance a piece of fabric for the wrong side of the blanket, corresponding to its future dimensions, and the same piece of padding polyester. Don't forget about the fabric for the edging. It is better to buy it with a reserve. In our case, to make a blanket from squares you will need chintz of three colors, scissors, a ruler, pins, chalk, a template and a sewing machine.
It is recommended to pre-soak chintz fabric in hot water, then rinse with cold water, starch and iron. A tablespoon of starch is diluted in a glass of cold water. Then the mixture is poured into 2 liters of hot water and stirred thoroughly. The chintz is rinsed in a slightly cooled solution, ironed while still wet and dried.
After preparing the material and collecting all the necessary tools, you can begin preparing those very “quick” squares that will make up the blanket.
Preparing “quick” squares for a blanket

The production of the elements we need begins with the preparation of the strips. From two pieces of fabric of different colors, cut two strips of the same width. Then, placing them face to face, stitch along one edge. At the next stage, cut a wide strip from the third piece of chintz, corresponding to the size of the previous two together. Sew the resulting third strip to the first two on both sides, first folding them face to face, just like the first time. As a result, you will end up with something like a sleeve turned inside out.
At the next stage, cut the resulting sleeve with an even zigzag into isosceles triangles. To do this, use a square, triangle or triangular ruler template. As a result, from one long “sleeve” you will get several double triangles, and, accordingly, squares in the spread.
Assembling squares using patchwork technology

To create a product in the patchwork style, a wide variety of patterns and styles are used. The squares you have can be folded into zigzags, scales, triangles or diamonds. The choice of style depends only on the taste of the craftswoman. It is not recommended to rush in such a matter. It is better to fold the parts in several different ways, among which it will be easier to determine the most successful one.
The assembly of “quick” squares is carried out as follows: first, the parts are sewn together into longitudinal strips, only then the strips are sewn together. The main thing is not to forget to iron the finished seams. Essentially, the front side of the quilt is complete at this stage.
Making a blanket from “quick” squares

You can use any fabric, preferably natural, as the back side of the blanket. Batiste or chintz will do the job best. To quickly assemble a blanket, place the prepared fabric for the wrong side face down, then spread a layer of padding polyester and place a piece of squares on top, face up. Using a sewing machine, stitch around the perimeter of the future product. The border can be the edges of the picture or the edges of the squares.
Before the process is complete, all that remains is to make the edging of the luxurious blanket. To do this, you need to cut a strip of suitable fabric 8 cm wide and slightly longer than the side of the product. Apply the resulting strip to the front edge of the blanket, aligning the edges. Use a sewing machine to stitch the strip to the blanket, then fold it over to the wrong side, turn it under, and stitch again to the right side. Finish the remaining edges of the blanket in this way.
At this point, making a blanket from “quick” squares is considered complete. For the first time, such a product is considered optimal in terms of complexity. But even if the result is not entirely ideal, you should not be upset. The second try will certainly turn out better!

Nowadays, patchwork creations have become more popular than ever. In between the noisy bustle and tiring workdays, you really want to touch something warm and cozy. Even those women who have never thought about needlework before begin to confidently master patchwork. Decorative sofa pillows, aprons, coasters, colorful panels, curtains for a country house, ultra-modern bags and many other things can be created by experienced craftswomen.
Beginning needlewomen should pay attention to a few useful tips:
- Before using new fabric, it must be washed, ironed and only then cut. This will prevent accidental shrinkage, loss of color, or other problems.
- The color of the thread used should match the color of the shred or differ by a couple of tones.
- For drawing, use a pencil or soap. It is prohibited to use a pen.
- Cutting is done along the shared thread. In this case, the part will not warp.
- When cutting, leave a 1 cm indent on all sides. If the fabric is loose - 1.5 cm.
- Ideal templates are made of plastic.
- Without a ruler, patchwork is impossible.
- The resulting fragment must be ironed after each line.
Patterns for making a blanket using the patchwork technique

Depending on the chosen patchwork technique, the needlewoman may need one or another pattern pattern:
- Square technique. It involves creating a product from square patches or square blocks of different colors. In this case, a pattern in the form of a regular square or a pattern of strips from which a square block will be made will be useful.
- Strip technique. This is parallel or circular stitching of strips of different colors and lengths. To create a product using this technique, you will need to cut out different strips.
- Triangle technique. Much like squares. Most often, patterns of isosceles triangles, identical in size, but different in color, are used for it. Parts can be sewn along a short edge to form a strip, 4 pieces to form a square or in the shape of a star.
- Honeycomb technique. It got its name thanks to the end result. Upon completion of the work, the design of the product will resemble the pattern of a honeycomb. For production, patterns of symmetrical hexagons are used.
- Lapachikha technique. It is considered the most interesting and at the same time difficult. Pieces of fabric with raw edges are attached to the canvas, thereby forming a three-dimensional drawing of a certain pattern or a chaotic image of a three-dimensional abstraction. If a specific pattern is chosen for the product (bird, animal, flower, etc.), patterns for each part will be needed. If you plan to randomly sew on different patches, you can do without patterns altogether.
Products made using the patchwork technique are not only beautiful and cozy home decorations, but also positive emotions from the process of making them. Agree, a few pieces of fabric, a sewing machine and imagination in combination can work wonders.

