Star news


Sewing with a double needle on a Janome sewing machine. Double needle: setting up the machine for a good seam
To simplify and speed up the process of sewing on a sewing machine, many additional accessories are available. One of them is the double needle. This is a special removable accessory for the machine, which contains two needles at once and allows you to make two parallel lines, which are displayed on the front side.
And on the wrong side you get a beautiful zigzag stripe. As a result, you can get a beautiful elastic seam, which is often used when processing the bottom of products. Buying this tool is an excellent alternative for owners of machines without an overlocker. Let’s figure out how to properly sew on a sewing machine using the “double needle” tool.
First, it should be noted that not every machine is designed to use this model of tool. It is important that the device can perform a zigzag seam.
Some modern devices are initially designed for its installation, and already in their design have two racks for working threads. When choosing such a tool, it is necessary to take into account the design aspects of the device itself, since the gap between the needles should not exceed the width of the hole for them. In order not to manually measure the distance, you can look at the instructions where it is indicated maximum possible zigzag width
. It is this parameter that will determine the purchase.
- Thus, we can highlight the main points without which it is impossible to use a double needle:
- The device provides for a zigzag seam;
- the gap should not exceed the maximum possible width of the zigzag stitch;
It is worth mentioning separately features of threading. When performing this, it is important not to pull the upper working threads too tightly, since the only lower thread is secured simultaneously by the two upper ones. Incorrect tension can cause rupture.

Types of needles
According to their intended use, double needles can be divided into the following groups:
- universal devices that are suitable for any fabric;
- jeans– this model is intended for use when sewing thick fabrics, such as jeans;
- super stretch used when sewing knitwear, its peculiarity is the rounded tip, which does not pierce like sewed, but gently pushes the threads apart.

The numbers of such needles have a standard numbering. When marking, two numbers are indicated separated by a fraction: the first indicates the diameter, and the second the gap between them.
Installation
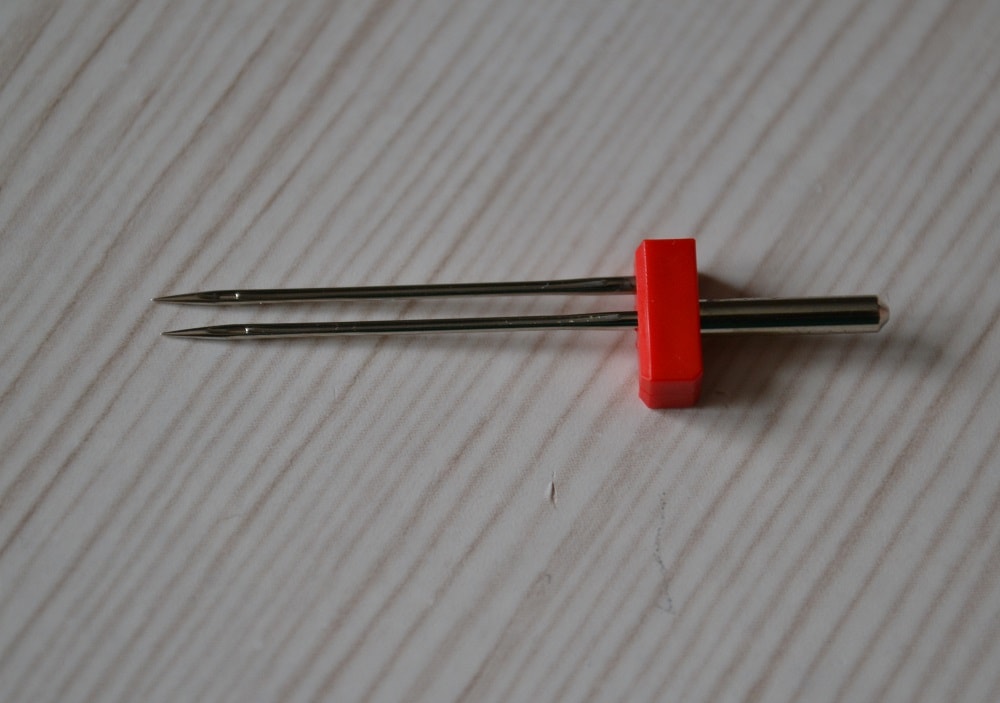
The installation of such a device is no different technically from the placement of a traditional needle. It is worth remembering that the cut should be located at the back, and the round side should be facing the seamstress. It is best if each coil has separate holder, but if this is not the case, then you can do as shown in the image.

When threading, the actions are no different from regular sewing. Simply, when passing through each hole and thread guide holder, you should do this for two threads at once. But you will need to separate the threads before the last thread guides, and then thread them into the eyes of the double device. Some models have only one lower thread guide. In this case, the left thread is passed through it, and the right one goes next to it and is threaded directly into the eye.
When working, you should monitor the position of the sewing mode switch. A double needle is used exclusively in straight stitch mode. If you install a seam with an offset, for example, a zigzag, the needle will simply break on the plate.
It is best to place the spools of thread in such a way that one unwinds clockwise, and the other counterclockwise.
This will protect the threads from tangling while working. Using the minimum speed will also prevent them from getting confused.
Application options
Many people think that the use of the device in question is limited only to the stitching for finishing and hemming, which involves two straight lines running in parallel. But this is far from true. Thanks to this tool and the capabilities of the sewing machine itself, you can make a huge number of not only decorative, but also useful stitches.
If the machine involves making decorative seams, then you can always try original stitches for decoration, which will look beautiful, especially if made in various colors. The tool in question is no less useful when embroidering, because it allows you to immediately embroider identical designs parallel to each other.

Sew on the braid
It is very convenient to use such a device to sew on braid. To do this, you will need to choose a model that is slightly narrower than the finishing tape itself. Thanks to the even, parallel double seam, the braid will lie nice and even.
Ruffles with elastic
It also makes it much easier to assemble the fabric when using this seam for the elastic. You should wind a thin elastic band onto the bobbin of the machine, and use threads that match the material as a working thread. Now you can start sewing. It is best to set the pitch to 2-2.5 mm when performing such an assembly. Due to the fact that the elastic is placed in the shuttle mechanism, you will get a uniform and beautiful assembly on the material.

Such decorative patterns can also be made using the tool in question. True, this requires special pintuck foot. It differs from the standard one in that it has special grooves on the sole, which lift the material while the work is being done. When doing this type of stitching, the pattern will be influenced by the number of reliefs on the foot itself and their depth. The larger they are, the more embossed the material will be.
It is worth remembering that the thread tension regulator should be set to maximum. At the same time, the material consumption when designing the specified pattern will increase significantly.
It is worth understanding that the beauty of the relief of the entire pattern will depend on the accuracy of the first tuck. Such reliefs can be used as simple decoration or for neat decoration of recesses.

Reliefs with cord
To perform such an operation, you should take foot for making a raised tuck or sewing in beads. In the place where the cord will be located, it is worth drawing a line with chalk or a disappearing felt-tip pen. The cord should be pinned from the wrong side. Then the material of the product is placed under the foot so that the cord is between the needles. Now you can start sewing.
The twin sewing machine needle is ideal for hemming knitwear. When performing such an operation, it is best to use zigzag foot or satin stitch. Parallel stitches are laid from the front side, while it is worth leaving a small edge free, which will subsequently be cut off near the very edge of the completed stitch.

Thus, a seamstress whose machine supports the use of a double needle must have such a component in her arsenal.
USING DOUBLE NEEDLES FOR A SEWING MACHINE
Any sewing machine sews with a double needle - this is not a function of the machine itself, but of the needle that you insert. You need to thread 2 spools of thread on top, then insert the threads into 2 eyes of the needle and sew. Since there is 1 bobbin at the bottom, the bottom line looks zigzag, and the top line looks like 2 parallel lines. It turns out beautifully when the tension of the upper threads is slightly tightened, then the seam on the knitwear turns out to be convex.
When you get the hang of it, try threading two different colors of thread up and using a double needle to make a decorative stitch, it’s very beautiful! Just be careful at the beginning, some machines make such a mistake that the width of the decorative stitch goes the entire width of the foot and the second tail of the needle risks hitting the foot.
But! I would like to note that any machine can use double needles if the thread is inserted into the needle from the front. And now, I suggest you familiarize yourself with useful information on this topic, taken from various sources
The twin needle can be installed in any sewing machine that has a zigzag stitch. The main thing to pay attention to before buying a twin needle is the width of the needle plate hole. The distance between the needles should not be wider than this hole. How to sew and how to use a double needle? Just like you use one needle, only with two top threads, passing both threads through one tensioner.
Twin needle sewing increases the capabilities of your machine and makes decorative and finishing stitches easier. Using a double needle for knitwear makes it possible to imitate the stitching of a flat-stitch machine. A sewing double needle is indispensable when sewing clothes with double stitching. Finishing stitches on jeans, patch pockets, details on men's shirts, etc. You can stitch evenly and neatly by sewing a seam with a double needle.
How to use a double needle
How to use a double needle? Just like with a regular needle, you just need to buy a suitable double needle for your sewing machine model and thread both upper threads simultaneously into two needles. The bottom thread in the bobbin will be used by both top threads at the same time.
Twin needles are not suitable for all machines.
Double needles can sew different fabrics, but only in machines with a zigzag stitch; straight-stitch machines like Podolskaya are not intended for their use. The needle plate of these machines has one round hole, while the double needle requires a narrow and wide slot, which is used in zigzag stitch machines. In addition, additional thread guides and a stand for the second spool are required. If you are going to install a twin needle on your Chaika sewing machine, pay attention to how the needle is positioned in the hole when it is sewing a straight stitch. The needle should pass exactly in the center of the needle hole. If there is misalignment when using a double needle, it may break.
An additional creel is required for the second spool of thread.
Modern sewing machines Janome, Brother, Juki and many others have a creel for two spools of thread and paired thread feeders and thread guides, into which the upper threads are threaded separately.
Double needle installation
A double needle fits into any sewing machine, just like a regular needle. The flat of the needle (cut) should be directed back, away from you, and the round side should be directed towards you, forward. Each coil must have a separate pin (coil holder), sometimes an additional one is installed for this. If there is only one spool stand on the machine body, then a second one is included in the kit. The threads from the spools are passed through all the thread guides, including the upper thread tensioner, together, and only the lowest thread guides separate them into needles. The left thread is threaded into the left needle, the right thread into the right needle. If there is only one thread guide, like Chaika’s, then the left thread is passed through the thread guide, and the right one next to it, directly into the eye of the right needle.
What are they and their purpose
A double needle can have different distances between the needles - narrower, wider, and there are even triple needles. Different widths make it possible to choose the width of the finishing stitch and use it for design. The use of double needles is more intended for decorative seams that do not experience heavy loads.
Of course, it can be used to make finishing stitches on a pocket or flap shirt. But, we should not forget that to form a seam, a double needle uses only one thread - the bottom one, so such a seam will not be particularly strong. But, for example, for embroidering two or three parallel patterns at the same time, a double needle is simply irreplaceable. This pattern looks especially impressive if the threads are of different colors. Using double needles with a narrow gap between them, you can create an imitation of shadow in the design. Using narrow needles, I place threads on top of each other, creating a shadow effect. In addition to simple finishing stitches, double needles can be used for sewing on braid, performing elastic gathering, tucks and other operations.
Attention! Incorrectly selected double needles may break
double needle
When buying double needles in a store for your sewing machine, pay attention to the maximum width of the needle plate opening on your machine, or simply the width of the zigzag stitch on your machine. Incorrectly selected needles may break, hitting the needle plate.
In addition, before you start sewing with a double needle, watch the stitch type switch. The stitch should not be set to a zigzag or other needle offset, such as zipper stitching, etc. The double needle should only work in straight stitch mode. In any other mode, they will simply break on the needle plate of the sewing machine.
Use of double needles
Have you used twin needles on your sewing machine yet? Now you will find out how many decorative and other possibilities its use in creating clothes provides.
To use double needles you need:
Front threading
The presence of a zigzag stitch in a sewing machine.
The distance between the needles should not exceed the maximum zigzag width of your machine!
Preparatory operations.
Double needle
Install a double needle on your machine, just like a regular single needle.
If your machine has two spool holders, install the spools so that one spool thread unwinds clockwise and the other counterclockwise. This will prevent the threads from getting tangled when sewing.
If you don't have two thread guides, insert one thread into the thread guide and leave the other loose.
Thread the threads into the corresponding needles. The machine is ready to sew. I advise you to sew at minimum speed, this will also help prevent threads from tangling.
Decorative stitches (embroidery)
Does your machine have decorative stitches? Try using twin needles to embellish clothing with these stitches.
Decorative stitches
The double needle allows you to embroider two parallel designs at the same time. You can thread the upper threads in different colors.
If you use narrow needles 1.8 - 2.5 mm, the stitch patterns will overlap each other, creating a shadow effect.
For decorative stitches, use a needle size smaller than the maximum zigzag width on your machine!
Sewing on braid
Sew on the braid
Place a needle slightly smaller than the width of the braid into the needle holder and attach the satin stitch foot to the machine. This foot has a wide groove on the sole.
Set the machine controls to straight stitch and desired stitch length. Loosen the upper thread tension. Thread the ribbon through the needle hole of the foot (or under the foot).
Place the fabric under the foot, lower the needles into the fabric and sew. The braid is attached to the fabric on both sides at the same time.
Ruffles with elastic
Sewing on elastic
Wind a thin sewing elastic band (like Hungarian) onto the bobbin. The upper threads must match the fabric and match the color.
Set the stitch length to 2-2.5 mm and sew with a straight stitch.
An elastic band tucked into the shuttle mechanism will create uniform gathers on thin fabric. Admire how the use of a similar technique decorated the blouse.
Raised tucks
Relief tucks on fabric
For the following embellishments you will need a special foot for raised tucks. The foot has grooves on the sole into which the fabric is pulled during sewing, resulting in a raised fold.
Different pleat sizes require different presser feet. The wider and deeper the grooves, the more voluminous the relief can be obtained. Many parallel grooves on the foot allow you to lay reliefs that are even relative to each other.
The foot with 7 grooves is designed for small pintucks and is used on light fabrics.
A foot with 5 deep grooves is used for sewing on medium fabrics and allows you to make larger pintucks. This foot can also be used for sewing in cord.
Raised tucks
To make reliefs on light fabrics, it is recommended to use needles with a width of 1.6 - 2 mm; on medium tissues, needles 2.5 - 3 mm; and needles 4 mm or more on medium and heavy fabrics.
When stitching pintucks, the upper thread tension regulator should be set to 7-9, that is, to the maximum.
When decorating fabric with reliefs, keep in mind that the consumption will be higher.
Raised tucks
It is very important to perform the first tuck exactly, since the evenness of subsequent ones will depend on this. Therefore, draw the first line on the fabric and only then place a tuck along it.
It is advisable to first make reliefs on the larger part, then apply the pattern over the part and mark the cut lines.
Embossed tucksRelief tucks
For wide stitching of reliefs, use a quilting guide.
Reliefs can be both decorative and serve as darts.
See how you can decorate a summer blouse with raised tucks. Use embossed tucks to decorate underwear, children's clothing, blouses, and summer tops.
Reliefs on fleece
raised tucks
How much time do you spend knitting a sweater? Try knitting a sweater in one day using a double needle. Believe me, it's very simple and fast!
For such reliefs as in the photo, you will need fleece and a double needle of at least 5 mm. Such reliefs will look beautiful on velvet.
Reliefs with cord
reliefs with cord
To sew in the cord, use a double needle of such a width (the distance between the needles) that the cord passes freely between the needles.
Install any foot suitable for sewing in cord: a foot for sewing on beads or a foot for large embossed tucks.
Reliefs with cord
Using a chalk or disappearing marker, draw a straight or curly line on the fabric where you want to add cord trim.
Pin the end of the cord to the beginning of the line on the wrong side of the fabric.
Place the fabric with the cord under the foot, make sure that the cord fits exactly between the needles and start sewing with a straight stitch following the line drawn on the fabric.
This is what the “reliefs with cord” trim on a blouse looks like. And these figured reliefs are made on transparent fabric with a backing of cords in a contrasting color.
Sewing knitwear
knitwear
To sew knitwear, use special needles for sewing knitwear with a width of 4-5 mm.
In the photo, the hem was made with a 4 mm needle. On the front side you can see a double straight stitch, on the back side there is a zigzag stitch, which allows the knitted fabric to stretch. This stitch imitates sewing on an overlocker.
Knitwear
Set your machine to the straight stitch and desired stitch length.
Fold the edge of the knitted product, lay a stitch along the front side at the same distance from the fold.
Carefully trim the allowance close to the zigzag.
Sample stitches using a double needle were made on a Janome sewing machine model My Excel 23X. This machine has a maximum zigzag width of 6.5 mm.
Sample stitches using a double needle were made on a Janome sewing machine model My Excel 23X. This machine has a maximum width
For many beginning needlewomen, sewing with a double needle causes real stupor, because what is obtained at first is far from ideal. Today I will show you how to set up your assistant so that the seam is beautiful, elastic and not tight.
First, let's refuel the machine. We will place the second spool on an additional rod and pull the threads from both spools as one through all the necessary slots. Next we will separate the threads. We will thread one into the needle, passing it through the thread guide, and the second, bypassing it. Set the stitch length to 3.5 mm.
Let's try stitching with standard settings. We get a beautiful stitch from the face, and from the inside we get strongly elongated loops of the upper thread and a lower thread pulled almost into a straight line.
Logic dictates that the upper thread tension should be increased. Let's try. We increase it by one division and try to flash it. We get the same thing, maybe even worse.
This is the same mistake that many make. The loops on the wrong side are not because the top thread is loose, but because the bottom thread is too tight!
Let's fix it! Unscrew the needle plate, remove it and take out the bobbin holder. (It can be easily reached by hand; I needed tweezers so that my fingers wouldn’t block anything in the photo.) By the way, once you’ve opened the inside of the car, clean it thoroughly; fuzz and dust have probably accumulated there. ;)
We reached the bobbin case and saw that there were two screws on it. We don't need the right one, with a cross notch. It secures the tension plate and should never be touched! But the left screw with a flat slot is precisely designed to adjust the tension. To work we need a small screwdriver.
Note for yourself the initial position of the screw in the direction of the slot (i.e. the place on the body where the notch on the screw is directed, I have a red dot there). At first, I simply scratched a notch on the body to return the screw to its previous position with millimeter precision. Noted? Now use a screwdriver to turn the screw counterclockwise a third of a turn (I have this position marked with a green dot). Usually this is enough. We put the bobbin holder in place and tighten the needle plate.
Let's try to flash it. Sample line No. 3. Much better already! The loops from the top threads became smaller, and the bottom thread began to fit in an obvious zigzag. In principle, you can already sew like this. But I want more.))))
You can try tightening the upper thread again. And then we get the line on sample No. 4. Better? Not at all!
Then I take out the bobbin holder again and loosen the lower thread a little more. I receive sample No. 5. Hooray! Just what you need!We draw conclusions: when sewing with a double needle, the main adjustment is made not by the upper thread tension wheel, but by the screw on the bobbin holder. No matter how much we tried to adjust the upper thread, it did not give any result other than pulling the stitches together into a roller. It may seem that this setup is complicated and time-consuming. At first, yes, but then habit and experience will turn it into a matter of seconds. And, you see, the beautiful line is worth it!
By the way, look, from the face all five samples look quite presentable.))))
Well, now you also know how to make beautiful stitching with a double needle. Like this, for example:
Good luck to everyone, obedient fabrics and precise settings! See you again soon - I'll bring a tracksuit for my first-grader.))))
To simplify and speed up the sewing process, various devices are used. These include a double removable accessory for the machine, containing 2 needles. With it you can make 2 parallel lines, which can be seen on the front part. And on the inside there will be a beautiful zigzag stripe. The result is a beautiful seam used to work the bottom of the garment. The rules for working with a double needle for a sewing machine are described in the article.
How does a double needle work?
This device consists of:
- Thickenings (flasks). On the back of the cone there is a flat (flat part) that rotates back during installation.
- Cases. With this part, 2 needles are soldered into one.
- Rod.
- Long groove.
- Short groove.
- Ushka.
- Points.
Double needles are available in different brands. They differ slightly in appearance, quality, and price. Popular manufacturers include SCMETZ, HEMLINE, PRYM, SINGER.
Features of work
Please note that not all machines can work with such a tool. It is necessary that the device performs a zigzag seam. Many of the newest devices are designed for its installation, and already include 2 thread racks in the design.
When purchasing such a tool, one must take into account the design aspects of the device, since the gap between the needles cannot be greater than the width of the hole for them. To measure the distance manually, you should read the instructions, which indicate the maximum zigzag width. Only this parameter is the main thing when purchasing.
We can highlight the main points without which a double needle for a sewing machine cannot be used:
- The device has a zigzag stitch function.
- The gap should not be larger than the probable width of the zigzag.
- Front filling type.
Separately, you should look at the features of threading with a double needle with a sewing machine. When doing this, you should not pull the upper threads very hard, since the only lower thread is attached to 2 upper ones. Due to improper tension, they may rupture.
Types of needles
According to their intended purpose, double needles for a sewing machine are divided into the following types:
- Universal, suitable for different materials.
- Jeans. The devices are used for sewing on thick fabrics.
- Super stretch. Used for knitwear, its special feature is the rounded tip, which does not pierce like an awl, but pushes the threads apart.
The numbering of these needles is standard. The marking indicates 2 numbers separated by a fraction: the first means the diameter, and the second means the distance between them.
Installation Rules
How to thread a twin needle into a sewing machine? Its installation is no different from the placement of a traditional needle. It must be taken into account that the cut is at the back, and the round side is turned towards the dressmaker. It is advisable that the coils have separate holders.
When passing through all the holes and thread guide holders, you need to do this for 2 threads at once. And the division is before the last thread guides, and then threaded into the eyes of the double device. Some models only include 1 lower thread guide. Then the left thread is passed through it, and the right one is next to it and threaded into the eye.

During operation, it is necessary to monitor the position of the sewing mode setter. The twin needle is used for straight stitching only. If you make a seam with an offset, for example, a zigzag, the needle will be broken on the plate. It is advisable that the coils be positioned so that one unwinds clockwise and the other counterclockwise. This will serve as protection against tangling of threads during work.
How to sew with a double needle on a sewing machine? Many people believe that this device is used only limitedly: only for finishing and hemming stitches, including 2 straight stitches. But that's not true. The tool allows you to make many decorative and necessary seams.
How to sew?
After the needle is inserted, you need to get to work. This is done according to the following rules.
- The flywheel rotates towards itself.
- Thread and needle thickness should be selected based on the fabric.
- It is important to control the tension level of the upper thread and the stitch size.
- Threading must be done according to the instructions for the machine.
- When sewing, the piece of the product should be on the left side, and the seam allowances should be on the right.
- You need to put material under the foot, make a puncture and lower the foot, bring the threads behind the foot with ends 8-10 cm long.
- At the end of the work, you need to raise the needle and foot, move the material, tighten the threads and cut them using a knife located on the sleeve of the sewing machine.
- You should stop working when the material comes off the teeth of its rack.
- After completing the work, a piece of fabric is placed under the foot and the machine turns on.
These are the basic principles of operating any sewing machine at home or in production. Using a twin needle, you can perform various functions, which are described in detail below.
Decorative designs and finishing
How to use a double needle on a sewing machine? Using this device, decorative seams and original stitches for decoration are made. Features: The result looks beautiful if different colors are used. The tool is in demand for embroidery; it can be used to create identical patterns.

Sewing on braid
This device allows you to conveniently sew on the braid. In this case, the work will turn out much more elegant. It is enough to correctly install the thread and needles and attach the accessory to the right place in the material. With the help of an even parallel double seam, the braid will be fixed beautifully and neatly.
Assembly with elastic band
Sewing with a twin needle on a sewing machine allows you to perform other operations. It is easier to assemble the material using this elastic seam. You need to wind a thin elastic band onto the bobbin of the machine, you need to use threads that match the fabric.

After this, you can start sewing. It is advisable to set the pitch to 2.0-2.5 mm. This way the elastic is placed in the shuttle mechanism, and a uniform and beautiful assembly on the fabric will be ready. This element will perfectly decorate any product.
Relief protection
Decorative patterns are made using this device. To do this, you will need a special foot for creating tucks. It differs from the usual one in that it is equipped with grooves on the sole, which lift the material when performing work.
When creating this stitch, the pattern is influenced by many reliefs on the foot itself, as well as their depth. The larger it is, the more embossed the fabric will be. The thread tension regulator is set to maximum. Material consumption during pattern creation increases.
Reliefs with cord
To do this, you need a foot designed for embossed pinching or sewing in beads. In the area where the cord will be located, you need to draw a line with chalk or a felt-tip pen. The cord needs to be pinned from the inside out. Then the fabric is placed under the foot so that the cord is located between the needles. After this you can start sewing. The result is beautiful reliefs that can decorate any product.

Decorative hem
You can sew a variety of fabrics with a twin needle on a Janome sewing machine or other similar equipment. It is ideal for hemming knitwear. When performing this operation, you should take a zigzag or satin stitch foot. Parallel lines are laid from the face, but you need to leave a small one free, which will be cut off in the future.
Safety at work
With double needles, as with others, you must follow safety rules:
- Store in a special needle bed, which must be closed. It is advisable to wrap them with thread.
- Place the broken needle in a separate box.
- Know the number of needles that are used in the work. After finishing work, it is recommended to check their availability.
- Do not stick needles into foreign objects.
- Do not use a rusty needle. It does not pass through the material well, leaves stains, and can also break.

Thus, the double needle allows you to perform different types of stitches. Every seamstress should have this device in her arsenal so that all options for decorating products are available to her in her work.
Some common questions about double needle
If your machine performs a zig-zag stitch, then you can install double needle.
Double needle needed:
- for making finishing double stitches
- when sewing knitwear, you can imitate the stitching of a cover-stitch machine
- the needle is often used when sewing clothes with double stitching
Decorative finishing stitches on jeans, patch pockets, details of men's shirts, etc. You can stitch evenly and neatly by making just one seam with a double needle.
Twin needle should work only in straight stitch mode! In any other mode, it will simply break on the needle plate of the sewing machine.
Note! To use double needles you need:
-
front threading
-
the presence of a zigzag stitch in a sewing machine.
-
the distance between the needles should not exceed the maximum zigzag width of your machine!
How to thread?
Exactly the same as with one needle, only instead of one coil there will be two. Both threads will go through the same upper thread tensioner. BUT! It is imperative to LOOSEN the tension of the BOTTOM thread, and sometimes in order to prevent the stitch itself from tightening and breaking, you need to loosen the UPPER threads (whether to loosen them or not is up to your machine to “decide”; on mine I don’t loosen the upper threads, only the lower one).
What threads are best for a double needle?
For a high-quality stitch, it is desirable that the lower thread be a number “thinner” than the upper ones. In this case, the threads must be of high quality, thin and elastic.
Types of double needles?
Twin needles differ from each other in the distance between the needles. Depending on this distance, the line will change - narrower or wider.
How to make embroidery with a shadow effect using a double needle?
The shadow effect is created as follows: take a double needle with a narrow distance between the needles and threads of different shades. As a result, the threads seem to overlap each other, creating the effect of a three-dimensional image.
Preparatory operations:
- Install on your machine double needle, similar to a regular single.
- If your machine has two spool holders, install the spools so that one spool thread unwinds clockwise and the other counterclockwise. This will prevent the threads from getting tangled when sewing.
- Next, both threads are threaded along the thread guides in the same way, both threads go side by side and only before threading into the needles do the threads diverge along different guides: one thread on the left, the other on the right.
- If you don't have two thread guides, insert one thread into the thread guide and leave the other loose.
- Thread the threads into the corresponding needles. The machine is ready to sew. I advise you to sew at minimum speed, this will also help prevent threads from tangling.
When sewing with a double needle, the upper threads get tangled, what should I do?
To prevent the threads from getting tangled:
- place the reels so that one unwinds clockwise and the other counterclockwise;
- if this does not help, take threads with a smaller twist: cut off 1 meter of thread, fold it in half and grab the ends with one hand, the “tail” of the thread hangs. Remember how many times they were twisted - and next time take those that twist less (unfortunately, not all manufacturers comply with GOST standards for twisting).
And finally, here is an example of an incorrect stitch from the wrong side: the loops of the upper thread are very elongated, and the lower thread is pulled almost into a straight line:

Example of an incorrect stitch
To avoid this, the tension of the lower thread must be reduced!
Here's an example of a good line:

An example of a good stitch with a twin needle
Decorative stitches (embroidery)
Does your machine have decorative stitches? Try using twin needles to embellish clothing with these stitches.
The double needle allows you to embroider two parallel designs at the same time. You can thread the upper threads in different colors.
If you use 2mm needles, the stitch patterns will overlap each other, creating a shadow effect.
For decorative stitches, use a needle size smaller than the maximum zigzag width on your machine!
Sewing on braid
Place a needle slightly smaller than the width of the braid into the needle holder and attach the satin stitch foot to the machine. This foot has a wide groove on the sole.
- Set the machine controls to straight stitch and desired stitch length.
- Loosen the upper thread tension.
- Thread the ribbon through the needle hole of the foot (or under the foot).
- Place the fabric under the foot, lower the needles into the fabric and sew.
The braid is attached to the fabric on both sides at the same time.
Ruffles with elastic
- Wind a thin sewing elastic band (like Hungarian) onto the bobbin. The upper threads must match the fabric and match the color.
- Set the stitch length to 2-2.5 mm and sew with a straight stitch.
An elastic band tucked into the shuttle mechanism will create uniform gathers on thin fabric. The use of such a technique can very effectively decorate, for example, a blouse.
Reliefs with cord
To sew in the cord, use double needle such a width (the distance between the needles) that the cord passes freely between the needles.
- Install any foot suitable for sewing in cord: bead sewing foot, or a foot for large raised pintucks.
- Using a chalk or disappearing marker, draw a straight or curly line on the fabric where you want to add cord trim.
- Pin the end of the cord to the beginning of the line on the wrong side of the fabric.
- Place the fabric with the cord under the foot, make sure that the cord fits exactly between the needles and start sewing with a straight stitch following the line drawn on the fabric.
Relief tucks on fabric
For the following embellishments you will need a special foot for raised tucks. The foot has grooves on the sole into which the fabric is pulled during sewing, resulting in a raised fold.
Different pleat sizes require different presser feet. The wider and deeper the grooves, the more voluminous the relief can be obtained. Many parallel grooves on the foot allow you to lay reliefs that are even relative to each other.
Foot with 9 grooves Designed for small pintucks and used on light fabrics.
Foot with 7 grooves used for sewing on medium fabrics and allows you to make more voluminous pintucks. This foot can also be used for sewing in cord.
To make reliefs on light fabrics, it is recommended to use 2 mm needles; on medium tissues, 3 mm needles; and 4 mm needles on medium and heavy fabrics.
When stitching pintucks, the upper thread tension regulator should be set to 7-9, that is, to the maximum.
When decorating fabric with reliefs, keep in mind that the consumption will be higher.
It is very important to perform the first tuck exactly, since the evenness of subsequent ones will depend on this. Therefore, draw the first line on the fabric and only then place a tuck along it.
It is advisable to first make reliefs on the larger part, then apply the pattern over the part and mark the cut lines.
For wide stitching of reliefs, use a quilting guide.
Reliefs can be both decorative and serve as darts. You can very effectively decorate, for example, a summer blouse with raised pintucks. Use embossed tucks to decorate underwear, children's clothing, blouses, and summer tops.
Sewing knitwear
For sewing knitwear, use
needles 4 mm wide.
On the front side there is a double straight stitch, on the reverse side there is a zigzag stitch, which allows the knitted fabric to stretch. This stitch imitates sewing on an overlocker.
- Set your machine to the straight stitch and desired stitch length.
- Fold the edge of the knitted product, lay a stitch along the front side at the same distance from the fold.
- Carefully trim the allowance close to the zigzag.
IN online store "Beloshveyka" you can buy double needles at a very attractive price.
All the best and beautiful lines)

