Star news


How to make finger paints. DIY finger paints
Every mother tries to buy her child not only bright, but also useful toys. The trend of the last year is finger paints. This is the best choice for the little ones, because with the help of such paints the child not only actively develops fine motor skills, but also learns to understand the harmony of colors. How these paints differ, how to make them yourself, and how to use them will be discussed in this article.
What is the use of such paints?
If your child does not yet know how to hold a brush correctly, but is actively learning to draw, then this set for early creativity is the best choice for mother and baby!
Hand drawing is useful in all respects because it:
- develops imagination;
- forms the correct perception of color;
- instills artistic taste;
- helps children realize their fantasies.
With finger paints, children will be happy to draw funny, cute cards for their moms and dads and just allow themselves to have a little fun.
Advantages of choice
The choice of finger paints for babies is determined by the variety of color palettes and the presence of sponges, stencils, seals, templates, etc. Finger paints are best used at 1 year of age, because younger children are unlikely to be able to understand what is required of them. At 6 months, only the most desperate mothers give such a toy to their children. Children from 1.5 years old are already able to figure out how to use a new toy. They are happy to discover a new world of bright colors and unusual sensations.
A recipe for finger paints, the composition of which must necessarily contain water and food colorings approved for use in the Russian Federation and the EU. Good children's paints should not contain alcohol! Finger paints for 2-3 year old children differ from gouache in that they are easily washed off from clothes, tiles, bathtubs, and floors. The composition is unsuitable for food, so it has an unpleasant or even bitter taste. Having tried it, the curious researcher immediately loses the desire to repeat this unpleasant experience.
Gouache sometimes has a sweetish taste, which is why the baby may decide that it is edible. That is why it is not recommended to give gouache to younger children.
On video: children's creativity using finger paints.
Recipes for making finger paints
Due to their popularity, good finger paints for kids are not cheap. In addition, not in all localities parents have the opportunity to purchase goods of decent quality. However, you shouldn’t be upset, because you can easily “make” a set for drawing by hand yourself. Below we will try to look at several simple recipes on how to make finger paints at home.
Starch based
Children's finger paints for hand painting can be prepared using starch. To bring her idea to life, mom will need:
- 3 tbsp. spoons of sugar;
- ½ teaspoon salt;
- ½ cup starch;
- food colorings;
- 2 cups of drinking water.
The ingredients should be mixed in a small saucepan and heated on low gas until the mixture reaches the consistency of sour cream. Then you need to divide the resulting mass into several containers. You should add safe or food-grade egg dyes to each to get the colors you want.
Natural dyes (vegetables and fruits) can be used as pigments.
Flour option
If there is no starch in the house, it is quite possible to replace it with pancake flour. In this case you should mix:
- 2 tbsp. flour;
- 5 tbsp. spoons of fine salt;
- 2 tbsp. Spoons grow. oils;
- 1 tbsp. water;
- food colorings.
The resulting composition must be thoroughly mixed and only then begin drawing.
Shaving foam dyes
There is a third recipe, unusual, but quick. The result should be colored foam. We draw with this composition only in the bathroom!
To prepare finger paints for children you need to take:
- shaving foam (non-allergenic);
- regular gouache, honey watercolor or food coloring.
The resulting paint can be stored in baby puree jars, gouache jars, or any sealable small containers you find.
Popular products
The most famous finger paint companies are located in Europe:
- Djeco is a French company that has been producing original children's educational toys since 1954. One of her products is finger paints, which are suitable for both children under one year old and young artists from 6 years old. The most complex models have beautiful plastic stencils in the form of funny animals attached to the lids so that small parts do not get lost. djeco finger paints are an excellent choice; the child will be delighted with their rich colors, and the parents will be delighted with the fact that the child is already creating his first artistic masterpieces.
- Jovi paints– are no less popular among young mothers, because the company boasts that it stands out from others with a variety of high-quality products, whose products can be seen on supermarket shelves in at least 50 countries! Jovi paints for children's toys have been on the global market for creativity and self-expression for 78 years. The bright colors of jovi paint are liked by all children without exception. And their parents are pleased with the low price and good quality of jovi paints.
By the way, they can also be successfully used as safe paints for wooden toys. With the help of jovi paint, a boat, house or pyramid will become even brighter and more elegant.
- Russian brand Molly (Molly)– specializes mainly in products for children under 7 years old. Exciting educational games, soap making, bath fizz, making sponge balm, drawing kits for kids and much more interesting things. Molly finger paints are an option for picky mothers who are confident in the advantages of domestic children's products. This set of paints also includes pet templates.
- Trolls is another brand under which paints for the little ones are sold. The products are absolutely safe for children's health. The set of Trolls finger paints includes only 4 colors: red, yellow, green, blue. But on the lids of the jars there are funny stamps that will inspire the young artist to create a colorful masterpiece.
Remember that it is best to buy paint from trusted manufacturers. When choosing, be sure to read the ingredients. Here is a list of companies whose product quality is always at a decent level:
- Crayola;
- "Ray";
- Erich Krause;
- "Orange Elephant";
- "Kalyaka-Malyaka";
- Artberry.
Any of them can be used by children as paint for wooden toys.
How to use and what to draw?
Before using finger paints, clean your work area, prepare paints, stencils, a pack of dry wipes or a clean towel. Lay out an oilcloth tablecloth and dress the child in some comfortable clothes. If you don't have the stencils or templates included in the kit, take a simple, clean sponge, dip it in paint, and show your little one a new way to paint!
You can draw in the bathroom; to do this, you need to wash it and remove all extraneous things. It is recommended to wear old panties for the child.
Don't forget, you can't leave your baby alone with children's paints! This is not dangerous, but it can lead to a lot of cleaning and unproductivity.
Are there only 4 colors in the set? No problem, show your child how to mix finger paints right on the palm of his hand. Learn to paint a variety of wooden crafts, such as a cube or a boat, and use templates to draw various figures together in a fun and exciting way.
Here are some examples of what you can draw:
- Owl. Apply brown (mix yellow, red, blue) color to the handles, press your palm to the paper on the left side, then to the right (these will be the wings) and down (the tail). Using your fingers, draw the head with eyes and beak.
- Tree. It's easy to paint a summer tree with finger paints. To do this, just hold a long stick (trunk) with your finger and place green leaves with your hands. With a little imagination, tree templates can be turned into apple, pear or cherry trees.
- Birds.
- Dip your palm into the paint, spread your fingers and press all fingers except the thumb onto the paper - you will get wings. Add a head to the remaining thumb impression and add a black dot to create an eye.
Rainbow. If you have sponges or a regular table sponge, it’s easy to draw a cheerful rainbow. Add a small amount of each color to one side of the sponge. If you don't have enough colors, you can simply mix the ones you need or make them from 5 colors of red, yellow, green, blue and purple. The palette can be anything - use your imagination and don’t focus on unimportant details. Now you need to press the sponge to the paper and draw an arc.
Paint with finger paints from trusted brands with the whole family or create finger paints with your own hands and enjoy your child’s first creative successes! how to make finger paints at home in 10 minutes. My children love to draw - with watercolors, gouache, felt-tip pens, crayons, pencils and finger paints. I used to buy finger paints for children at the store. But one day the children expressed a desire to paint with finger paints, which they did not have at home - they had run out the day before. So we decided to experiment and make your own finger paints at home. It only took 10 minutes to make. The children and I were pleased with the result, so now we make our own finger paints, and have completely abandoned store-bought ones. Moreover, the advantage of finger paints prepared at home is that the mother knows what is included in their composition, which is important when the child is very small and puts everything in his mouth. Read on and find out recipe for finger paints for children at home!
Recipe for finger paints for children at home (ingredients):
- Flour – 2 cups
- Water – 1.5 cups
- Salt – 7 tablespoons
- Vegetable oil – 1.5 tablespoons
- Food coloring (for coloring you can use Easter kits for coloring eggs, gouache dissolved in water, or you can experiment by coloring with products - beet juice, turmeric, etc.)
- Jars for paints (you can use jars that are left over from store-bought finger paints, or you can use glass jars from baby food)
How to make finger paints at home in 10 minutes
- Pour flour into a bowl for preparing paints, add salt and mix well. Then add water, pour in a thin stream and do not forget to stir so that lumps do not form. When mixing, you can use a mixer or blender. Then add vegetable oil to the mixture. The consistency is creamy. If it seems to you that the mass is very liquid, add flour; if it is very thick, then add water.


- The next step is to divide the resulting dough into several parts - as many as we should have in the colors of finger paints.
- Now let's do the fun part - adding colors to our paints. You can use the dyes that come with the Easter egg coloring kit. And you can paint paints in different colors using products. I recommend the second option for mothers of children who put everything in their mouths. If you don't keep track, your child will eat the finger paints. If you know that you have added foods suitable for human consumption, you can rest assured about your baby’s health. Finger paint colors:
Pink color – beet juice
Orange color – orange, carrot, tangerine zest
Green color – spinach or dill. To do this, you need to steam the greens in boiling water, then strain through cheesecloth.
Purple color – black currant
Brown color - add chocolate, cocoa or coffee
Yellow color – turmeric
Red color - can be obtained by using cherries, lingonberries, cranberries, red currants, barberries, dogwoods in creating finger paints
Raspberry color - raspberry
- After adding the dye, mix the paints well again so that the color is evenly distributed and the finger paints are of a uniform shade. Well, now we can say that finger paints for children at home are ready. The recipe is very simple, does not take much time to prepare, even a child can handle it. My 5-year-old son often takes part in the process of preparing finger paints, and making them gives him a lot of pleasure. It is recommended to store finished finger paints in the refrigerator for 1-2 weeks. We run out of them very quickly, because children really love to draw, so 2 weeks is more than enough.

Did you like the article “how to make finger paints at home in 10 minutes”? Share with friends using social network buttons. In order not to miss new interesting articles, subscribe to blog updates!
Good day! Today I will share with you how to make your own at home.
Finger paint recipe:
To begin with, we will need:
Flour - 1 cup
Vegetable oil - 1 teaspoon
Salt - 1 tablespoon
Water - about half a glass
Food dyes (you can use Easter dyes for coloring eggs, you can use vegetable dyes (like beets), you can use brilliant green, etc.)
Using a blender or a simple whisk, mix flour, salt and butter, gradually pouring water into it. You want it to have the consistency of thick sour cream. If you have ever painted with finger paints, then you know what they should feel like
If you have jars of gouache, you can pour it into them, or you can pour it into glass jars for baby puree. In general, we pour our not yet painted finger paints into small containers.
Then we pour/pour/add our food coloring into each jar. Each one has its own.
Stir well and voila! DIY finger paints are ready! Enjoy creativity!
Read in this article:
Few would argue that the early development of a child affects him only in a positive way, but at what age should this be done? By the end of the first year, babies begin to become more actively interested in the world around them. They try to repeat everything that adults do, although still very clumsily. The question arises: maybe this is the very moment when you should take up the development of your baby. Considering that a child develops best through play, then finger paints for children are something that you simply need to introduce your child to.
Combination of pleasant and useful
You can try a huge number of different activities and techniques for the early development of a baby, but there is hardly a more exciting and productive activity than finger painting.
First and, perhaps, most importantly, this activity develops creative abilities well. If you take a pencil or a brush, it is almost impossible to teach a child to draw with them before the age of 3. Finger paints allow a child to develop his imagination by leaving various strokes, blots and dots on a piece of paper. With their help, the baby can express what he feels at the moment, his emotional state.
In addition, drawing educates children aesthetically and helps develop fine motor skills. This is an excellent massage of the nerve endings located on the palms and fingertips. There is an improvement in coordination of movements. All this not only has a beneficial effect on the little artist’s well-being, but also contributes to the development of logic, speech and memory.
On the way to a masterpiece
You can start painting with finger paints from the moment your baby begins to sit well. Don't expect quick results. It will take more than one month until the baby creates a masterpiece. The most important thing is not to put pressure on the baby or push him. You need to show by your own example what can be done, drawn. As soon as the baby understands what is required of him, you can begin to study various finger drawing techniques.

You need to show your child that with your finger you can not only make a dot or dash, but also create an interesting blot. After your baby has learned to draw with his fingers, you can move on to painting with your palms. Using two palms you can create interesting prints. Once these techniques are fully mastered, you can move on to using stamps, which can be used as ready-made figures purchased in a store, or made independently from a sponge. Kids especially like this activity. In addition, using a sponge you can create an interesting background on a large sheet of paper.
After a certain time, when the child already feels confident in controlling his hands and fingers, you can invite him to paint with a brush. With its help you can create more complex images. If it is still difficult for your child to draw some shapes with a brush, you can use special stencils. First, you can try making a print with a sponge, and then add paint with your fingers or a brush. It is worth noting that today there are a huge number of special coloring books on sale. As a rule, they differ from ordinary ones in larger pictures with a minimum number of elements.
Safety is key
Before introducing your child to drawing and giving him finger paints, you should pay attention to safety. We are not talking about paints, since they are made without toxic substances, because they are made especially for kids. And even if the little artist decides to taste them, nothing bad will happen. In this case, it is worth talking about the safety of the child, that is, the rules that can help you avoid some problems that arise during the drawing process.
Literally in the very first lesson you can see not only the painted piece of paper, but also the baby’s face, walls, floor and clothes. In order to avoid this, you must initially teach your child to draw in one place, or even better, at a table. In order not to stain the floors, you can use oilcloth, and the denser it is, the better.
Can I make my own paints?
If we talk about big cities, you can buy finger paints in almost any store for children. Moreover, not only paints are on sale, but also all the accessories necessary for classes. But for residents of small towns, in order to find them, sometimes you need to spend a lot of time. If you still couldn’t find it, don’t despair; you can make your own finger paints.

The recipe for making paints can be selected depending on the age of the baby:
- For example, for the youngest children you can use a simple recipe, although at the same time very tasty. To do this, you only need two ingredients: yogurt and food coloring, of course. You need to take care in advance about the availability of closing containers for paints. For the first lesson, you can prepare several jars, pour a small amount of yogurt into each and add coloring. These paints can be stored for no longer than a week in the refrigerator.
- To make your own finger paints for older children, you can use the following recipe: pour flour (2 cups) and salt (5 tbsp) into a container prepared in advance. After this, you need to slowly pour in the water while stirring. You need to add until the consistency resembles sour cream. At the end, add a little sunflower oil (2 tbsp). In order for the paints to turn out without lumps, it is best to stir them using a mixer. We pour the finished paints into jars - and you can start creating.
- This recipe is for those kids who have already gotten rid of the habit of tasting everything. Mix half a cup of water and 1.5 cups of cornstarch. Then slowly pour in 1 liter of boiling water and stir until the composition becomes transparent. Next, add half a glass of talc and stir until smooth, leave to cool. At the end, add half a glass of soap shavings and dye, then pour into jars and put in the refrigerator for a couple of hours. This is necessary so that the finger paints do not delaminate.
These recipes will allow your baby to fill his life with rainbow colors, and for parents there is nothing better than watching the shining eyes of their child.
We haven't painted for a long time. I was still too lazy to get paints and then wash the children away from the consequences of joyful drawing. And they increasingly began to demand painting with paints. And then I remembered our amazing summer experience of large-scale painting in nature. Then we came up with a free creative activity for the children from the summer camp - painting on whatman paper with finger paints using kitchen sponges.
The advantages of painting with finger paints on a large format:
- drawing on this is a new experience for many children
- finger paints are suitable for all ages (they are absolutely safe for)
- after painting, the picture dries within a day and you can arrange an exhibition of bright children’s works
- amazingly pleasant tactile sensations from painting with a sponge and delicate finger paints
- Finger paints are easy to clean and wash off
- bright rich colors, grass, trees and smeared happy children - an excellent setting for an unforgettable photo shoot!


So, I remembered, felt nostalgic about summer, and in 5 minutes I prepared a fresh batch of finger paints for our home painting. While the children are drawing, I am writing this note :)
Finger paint recipe:
- 3 cups flour
- 2-2.5 glasses of water
- 5 tablespoons salt
- 2 tablespoons vegetable oil
- food colorings
- jars or bowls
How to make finger paints?
- Pour flour into a large bowl, add salt to it, mix well.
- Gradually pour in 2 glasses of water, mix so that there are no lumps (you can use your hands, a mixer, a whisk or a spoon). If the dough seems too thick, add another 0.5 cup of water.
- Add vegetable oil to the well-kneaded mixture.
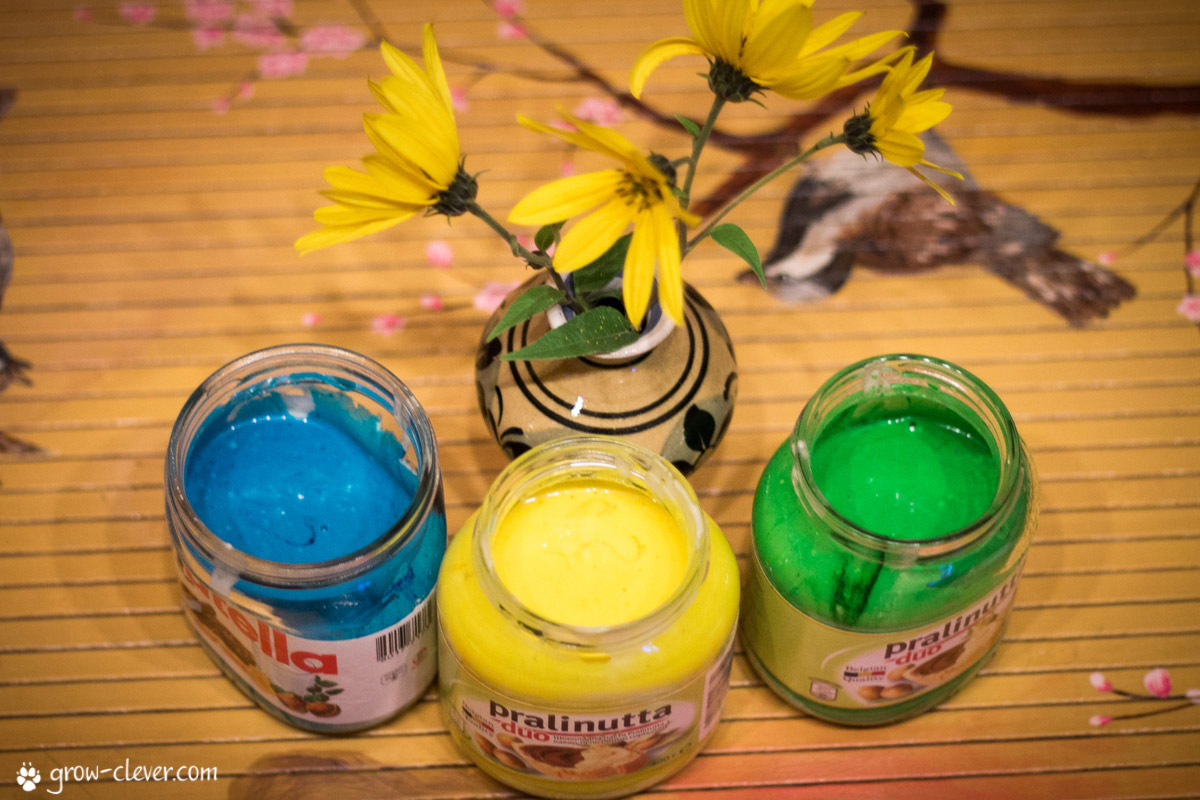
- Now we will mix the paint with dyes. Divide into the required number of bowls and add a little food coloring to each. I divided this portion into 3 colors (blue, green, yellow), but it could easily be divided into 5-6 colors. I mixed the colors in jars with a wide neck so that it would be convenient to dip the brushes into them. However, then I saw that there was too much paint and I decided that the jars would only be for storage, and for painting I poured each color into ceramic baking molds.

Note: Finger paints can be stored in the refrigerator for several days.
For drawing, I gave the children A3 sheets and their old toothbrushes. They were inspired by unusual tools and - hey, paint! The colors were just right for painting nature, so while painting we had time to discuss what a landscape was. In general, our evening creativity was a success!

