Star news


How to make a 3d snowflake from paper. How to make a New Year's snowflake from paper
On the eve of the New Year holidays, everyone wants the house to be extraordinarily beautiful, cozy and fabulous. Therefore, it's time to think about what you can do to achieve your desired goal. A good option for decorating a room before the New Year holidays would be to decorate the windows with unusual designs and festive motifs, which will bring a pre-holiday mood and a New Year's fairy tale into the ordinary decor of the room.
And you don’t need to think that all home decorations can only be purchased in a store, spending a fairly impressive amount of money. It would be much better to unite with the whole family and make a variety of decorations for the house and Christmas tree yourself. You can set aside a specific day for such an activity, for example, when you plan to install the beautiful New Year's tree. And don’t forget that this is the most exciting activity!
The simplest thing you can do with your own hands is to cut out and attach snowflakes in different places. Everyone remembers how they cut them out in the garden before the holidays as a child. Today, having become parents, you can spend time with your child with benefit and pleasure, cutting out beautiful snow-white snowflakes from paper with your own hands. Kids always take part in such events with great joy.
Teaching your child to cut out a snowflake yourself is not at all difficult. To do this, you need to prepare the necessary tools and paper. As a base, you can use napkins, colored paper, or just a white sheet from an album.
The thickness of the sheet is not particularly important. But you need to know that thin sheets make the most delicate and airy snowflakes. And paper that is too thick will be difficult to cut.
You will also need a pencil and sharp scissors. After the pattern for the future snowflake is selected, the paper is folded as shown in the photo. The more folds you make, the more interesting and delicate the snowflake will turn out to be.


The size of the future decoration depends on how large the sheet is initially selected. In this case, the choice is influenced only by the desire to have a large or small snowflake.

Once the design is on the paper, we begin cutting. This process requires special care and precision. Under no circumstances should you cut off the edges of the paper at the folds, as the snowflake may simply fall apart.

Children really enjoy this process. After all, in the end you will get a beauty with your own hands, which will be so nice to decorate a Christmas tree, windows or walls in a room.
It should be noted that such a seemingly simple activity as cutting out snowflakes from paper with your own hands is a great opportunity to develop a child’s imagination, sense of beauty and artistic taste.
You can and should develop your child’s abilities at home, but various clubs in the garden and school will only help raise the level and hone the child’s talents.
In addition to simply cutting out paper, a child can be interested in making three-dimensional models of snowflakes. Such decorations are designed for older children and adults. But that doesn’t make them any less interesting or beautiful.

The same openwork snowflakes made of paper are taken as a basis, the design is transferred, for example, to polystyrene foam or polystyrene foam. Using a sharp knife, all the necessary elements are cut out, and the result is unusually beautiful, voluminous snowflakes.

They can be left white, but if you connect the kids and all together paint them with bright colors, then such decorative elements will simply surprise with their unusual design. And the time spent creating them will unite all family members. The result of your work will be unique.

Do-it-yourself volumetric paper snowflakes
In this master class we will make such a heart with a snowflake. It can be used as a bag for a small gift or simply as a DIY Christmas tree decoration.

First you need to print out this diagram.


We transfer the diagram onto paper and cut it out.


The result is two identical blanks.


To fasten them together, we make cuts - on one side from the top to half the snowflake, on the other - from the bottom to half the snowflake.

We collect the finished volumetric snowflake, threading it into each other.

Attach the handle.


Your DIY voluminous paper snowflake is ready!

How to make a 3-D snowflake with your own hands
Modern technologies have reached such a seemingly simple task as creating a snowflake. As the name suggests, 3-D snowflakes are a more complex, but very effective technique, thanks to which the manufactured decor is distinguished by a special elegance of lines and rather unusual shapes.
What might you need to make a snowflake with a 3D effect?
Prepare a square sheet of paper of the desired color, a pencil and ruler, scissors or a sharp paper knife, and glue. The work of making 3-D snowflakes is very painstaking and requires a lot of patience.
The first step is to draw a sheet of paper into squares. We will need 6 identical squares. Then the following diagram is applied. It can be printed.

Fold the square in half diagonally and transfer the diagram as shown in the figure. Fold in half again.

The next step is to cut parallel lines. The cuts should be made in such a way that they are directed towards each other, but do not converge completely.


We connect and glue the corners of the first small square.


Then we turn it over and glue the corners of the next square.

And so on in order until all the corners are glued together.

To make the snowflake voluminous, you need to very carefully glue the corners of all the squares. The result is six snowflakes, which, when glued together, form a three-dimensional 3-D figure.

We connect the corners of all the blanks together.


In order for the figure to keep its shape and not fall apart, you need to additionally glue the sides of the snowflake.

That's all, our 3-D paper snowflake is ready!

By coming up with various patterns, painting the figure with paints and even decorating with beads, you can not only create a very beautiful New Year’s decoration, but also help develop your child’s imagination and sense of style.
Paper snowflakes - kirigami instructions
Snowflakes - Kirigami is a fairly simple way to quickly and effortlessly make a lot of beautiful decorations. The highlight of this type of snowflakes is the selection of paper. For snowflakes - kirigami you need bright colored paper.

It can be colored only on one side, but you can choose paper with rich colors on both sides.
Take an A4 sheet and fold it as shown in the photo.

Cut out a square and fold it in half diagonally.

Fold it two more times.


Then we print out and transfer this diagram to the finished workpiece.


The next stage is to cut out patterns on the workpiece using nail scissors.


After carefully cutting out the snowflake, unfold it.


Fold the resulting corners as in the photo.


A snowflake can be decorated with stasis, beads, and Christmas tree tinsel, and then it will become the central decoration of your New Year’s home.
2 more options for DIY kirigami snowflakes:


The light, airy figurine of a ballerina is very beautiful. If you combine two types of a beautiful snowflake and a ballerina figurine, the effect can exceed all expectations.
It takes a lot of time to make this type of decoration. But the work of cutting it out is quite simple, even a child can do it. It’s not just single figures that look very impressive, but a whole garland of graceful ballerinas.
What you need to prepare for work:
- template of a dancing ballerina figure;
- thin white paper for a ballerina's tutu. Multi-layer paper napkins work very well;
- thin white cardboard;
- scissors.

Select a ballerina figurine template. You can find a large number of options on the Internet. Simply copy the selected template into a text document, format and print. But it’s much more interesting to draw a sketch yourself. Transfer the template to cardboard and cut it out.
It is very important that the cardboard is white on both sides, since the snowflake is voluminous and clearly visible from any side. The size of the figurine is optional. There are no restrictions in this matter.
Paper snowflakes in 3D format look very beautiful in any place in your home. For the New Year holidays and Christmas, you can decorate windows and walls with large snowflakes, and smaller ones will look great on the Christmas tree. It’s very easy to make them yourself using different types of paper, both in color and texture.
To make large snowflakes, you must use at least whatman paper. Sufficiently hard paper allows you to make a stable snowflake design, and its spectacular appearance will bring pleasure not only to you and your children, but to all your guests.
Since each snowflake has six rays, to make one you will need the same number of square sheets of paper and simple office tools. If your paper is not square but rectangular, taking as a basis the smaller size of the rectangle, fold the diagonal of a square of this size, and cut off the excess paper with a stationery knife (preferably on glass). The cut pieces can be used to make blanks for small snowflakes.
 Tools you will need to make a snowflake
 Sequence of actions for making a snowflake
1. Preparing blanks for snowflake parts − You will need to select or prepare 6 identical square sheets of paper in the color of your choice. The size of your square paper can vary from 10cm - 25cm. 
2. Fold each sheet of paper in half diagonally and cut three lines on each side of the triangle - this must be done carefully and accurately maintaining the size of the cut strips on each side of the triangle. The resulting cuts should not intersect at its apex. Make the same cuts in each of the six triangles, trying to keep them the same to get the perfect snowflakes.

3. Expand the triangle with the slots − position it as shown in the figure and turn it so that one of the points of the square faces you. It should look like the picture.

4. We form the first roll by connecting two inner corners − We secure this connection using stationery tape or adhesive pencil, and hold the gluing area for 2 - 5 minutes using a regular paper clip. If the snowflake is large, you can use a stationery stapler for fastening. As a result, you should see a triangle on each side of the resulting roll.

5. Turn the sheet of paper over to the other side and form a roll from the next cut strip − connecting the next two corners of the cut strip with tape or a stapler. This roll will be larger than the first.

6. Turn the paper over to the other side again and form a new roll over the first one formed earlier. After this, turn the paper over to the other side again and form the last roll from the remaining strip. As a result, we get the first ray of a snowflake.

7. Repeat steps 2 to 6 with the remaining 5 sheets of paper − make all 6 rays of your snowflake
8. Combine the tops of the three finished snowflake rays and secure this connection with a stapler. Do the same with the remaining three rays - this way you have formed two parts of your snowflake. Now you will have 2 parts, consisting of 3 three rays each. (For smaller snowflakes, it may be easier to use double-sided tape or PVA glue instead of staples.)

9. Connect the joints of the two new parts together and get a snowflake with six rays.

10. Using a stapler, successively connect each pair of rays of the snowflake along one radius − This way we are guaranteed to form a stable snowflake shape.

At this point, the work of making a snowflake is completed and you can see the result.

Be patient in your work - it cannot be done quickly. You don't have to be an artist to do this. Try it! Good luck to you in this exciting endeavor.
- Photo wallpaper in the interiors of your home (0)
In my blog, I paid a lot of attention to the use of wallpaper when decorating walls during renovation or decoration of premises in the house, but not [...] - How to beat housing and communal services using electric water heaters (0)
You won’t encounter such a problem in your normal country house. You have probably already installed an autonomous water supply system in it as [...]
Snowflakes are the main decoration of rooms and Christmas trees on the eve of the New Year holidays. Since the next New Year is just around the corner, the question is, how to make a snowflake with your own hands, is very relevant. In this article we will tell you and describe in detail master classes on how to make beautiful snowflakes from paper.
Who among us in childhood, preparing for the arrival of Grandfather Frost, did not try to decorate our room and Christmas tree with homemade decorations? We were all, of course, immersed in the process cutting out beautiful snowflakes made of paper together with parents, brothers and sisters, so that the holiday is truly a success, and a joyful atmosphere reigns in the house.
In just half an hour we managed to create a lot of simple snowflakes from thin white paper, because it’s very simple, especially if you have pre-prepared ones on hand snowflake stencils, for example, these:

For those who have forgotten, how to fold paper to cut out snowflakes, we remind you:
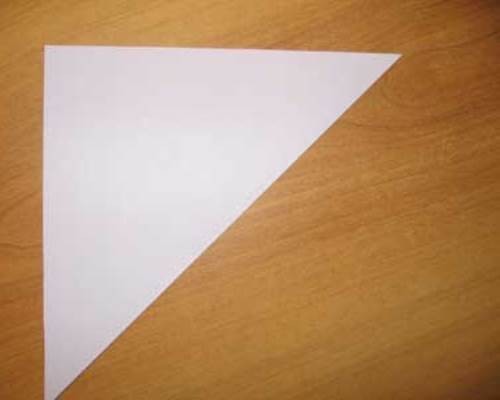
- Fold a thin sheet of paper, positioned vertically towards you, so that you get an equilateral triangle. If you did everything correctly, then when you expand the triangle, you should see a square.
- Cut off the excess strip under the square using scissors. As a result, you should have something like this:
- From it you need to make another triangle, folding the previous one in half, and then another one in exactly the same way. The result should look like this:

- We again cut off the excess part from this triangle (to do this, you need to bend it in the same way as shown in the photo):

- On the blank we draw the pattern of the future snowflake. You can use these templates for cutting snowflakes from paper:

The above paper folding pattern is the simplest of all. However, there are many other techniques.
If you want the result to be an airy and light snowflake that can be easily glued to anything, then there is nothing simpler and better, how to make a snowflake from a napkin. According to the manufacturing technique, it is no different from simple paper. It is even easier to work with, because the napkin is initially square in shape and has a very thin structure - it is easy to cut.

Most often, preschoolers work with this material to create snowflakes, but experienced needlewomen can also use it. If you fold the napkins beautifully and fasten them together with glue, you can get a New Year's star, a flower that looks very similar to a snowflake.
Snowflakes made from napkins can be easily attached to glass and mirrors if you moisten them with water and let them dry in the place where they should be. Here are some beautiful ones stencils of snowflakes from napkins for windows:


Openwork snowflakes for beginners
Paper snowflakes, the more elegant, the more beautiful they are. However, to make an openwork snowflake, you need to show patience and perseverance, because it will take a long time and a lot of cutting.
If you decide to create such beautiful elements of New Year's decor, then use the following patterns of openwork paper snowflakes:


So that you don’t have to figure out for a long time how to redraw a pattern from a stencil via the Internet, you can download this template for paper snowflakes and print on the printer:

How to make a voluminous snowflake?
Non-flat snowflakes look much more beautiful, but are much more difficult to make. Therefore, if you are preparing to receive guests on New Year's Eve, then it is better to give preference to volumetric decorative elements when decorating your home.
They can also be made from colored or any other decorative paper with patterns and designs, from newspaper or magazine, and not just white.
There are many ideas and techniques for creating three-dimensional paper snowflakes. Some volumetric snowflake schemes At first glance they may seem simple, while others may seem overly complex. Therefore, to all options for voluminous snowflakes we have attached photo instructions, looking at which, you can easily figure out how to create decor for the New Year's holiday.
Modular paper snowflakes for the New Year
Snowflakes made using this complex technique look great. We will tell you how to do step by step this modular snowflake with your own hands:

- Assemble triangular modules from paper (in this case white, light blue and dark blue). In total you will need 270 blanks:
- 78 modules – blue
- 42 modules – blue
- 150 modules – white

- Now assemble the modules into rows:
- 1st and 2nd row - 6 white modules each (they need to be connected in such a ring):

- Row 3 – 12 white modules, which should be attached to the resulting ring:

- 4th row – 12 blue modules:

- Row 5 – 24 blue modules:

- Row 6 – 24 modules – alternate 3 blue (long side) and 1 white (short side):

- Row 7 – put 6 modules on each blue module of the previous row
- For each white module of the previous row, put on 2 more white modules
- Assemble with a pocket 6 white arches from 17 white modules:

- Collect 6 blue rays from 5 blue modules:

- Insert rays between the arches to make a snowflake
How to fold snowflakes using origami technique?
For some, working with paper using the origami technique is even easier than cutting out simple snowflakes. If you consider yourself one of these people, then we suggest you try to create a New Year’s decoration like this:

- Take 1 translucent white sheet of paper
- Cut out an equilateral hexagon from it
- Start making a snowflake according to the following diagram:


Diagram: how to make a snowflake using the quilling technique
Quilling is a very popular type of needlework today. With its help you can make various beautiful decorative elements, including snowflakes. As an example, we suggest you create the following snowflake using this technique:

To make it, you can use paper of any color. It will need to be cut into strips of the following sizes:
- 5 strips of 15 cm
- 12 strips of 7.5 cm
- 4 stripes of 5 cm
Now we'll tell you step by step how to make a snowflake using quilling technique:
- We make a blank for the center of the snowflake: for this we use one strip of 15 cm, twist it into a spiral, lower it a little and glue it.
- We make blanks for the rays of snowflakes: for this we use 4 strips of 7.5 cm each. On each side of one strip we make 2 turns, but so that there is a strip of 2.5 cm between the turns.
- Glue the center of the snowflake and the rays together to make something like this:

- We make blanks in the shape of hearts: to do this, take 4 strips of paper 15 cm each, fold them in half, and then twist the ends in a spiral and glue them to the center in the same way as in the photo:

- We make drop blanks for snowflakes: from strips of 7.5 cm we twist spirals in the form of drops and glue them to the center of the straightened heart.
- We make “eye” blanks from 5 cm strips and glue them to the tops of the rays:

How to decorate a paper snowflake: photo
A paper snowflake can be decorated with either cut up rain, various sparkles, or fluff. Apply glue to the snowflake and sprinkle decor on top.
We suggest decorating your home for the New Year with homemade New Year's paraphernalia. Everyone knows how to cut out a simple snowflake, but not many know how to make a three-dimensional snowflake out of paper. It’s not difficult to make, and a 3D snowflake looks much more impressive than a simple one. You can make it from white paper, or you can make it from colored paper. Such an interesting voluminous snowflake can decorate a Christmas tree and create a festive mood at home or at work.
We will need:
- Paper white or colored.
- Scissors.
- Pencil.
- Threads.
- Needle.
- PVA glue.
- A piece of gum.
- Ruler.
- Round object.
To make one snowflake you will need to cut out ten circles. To cut perfectly even circles, you need to use some kind of round object as a template. For example, a CD, a large cup, etc. are perfect for this.
So, we put sheets of paper together, trace a round object and cut out circles.
Now we mark the circles into 8 equal sectors and cut them along the intended lines, without cutting 1 cm to the center of the circle.
Now, using a pencil, we twist each of the sectors into cones, as can be seen in the photo. To prevent the cones from unfolding, their edges must be secured with glue. The ends of the cones can be made with holes or sharp - whichever you prefer.

This is what each workpiece with twisted sectors looks like:

Now pass the needle and thread through a piece of elastic, and then you need to string all the paper blanks onto it, piercing them in the middle. Pull the thread and remove the workpiece so that it takes the shape of a ball. Now place a second piece of elastic on the needle to compress the snowflake into the desired shape. After this, cut the thread.

You can do it a little differently. For example, I didn’t use elastic bands, but simply threaded the pieces onto a thread, and then threaded a bead through a needle and tied it off.

Perhaps you want to lay out such snowflakes to decorate the interior, then you can cut the thread, and if you are going to hang them on the Christmas tree, leave the thread and make a loop out of it.
This is such an interesting homemade New Year's toy (if you can call it that).

Snowflakes are an integral element of decoration during the New Year holidays. Probably each of us, at least once in childhood, cut out a snowflake. Today we will start making three-dimensional snowflakes, especially since making them is very simple.
We will need:
- 6 sheets of colored paper A4 size or larger.
- Pencil.
- Ruler.
- Scissors.
- Glue or stapler.

The larger the paper, the larger our three-dimensional snowflake will turn out.

You need square sheets of paper. Cut off the excess with scissors.

You need to mark a square folded diagonally using a ruler.

We cut the square along the lines starting from the edge to the center. Don't cut it all the way. Expand the squares.

Glue the opposite rays of snowflakes. That is, we glue the ends of the rhombuses together. It turns out to be a tube.

The glue has dried and we turn our product over to the other side. We glue other corners, as in the photo.

Then we turn it over again and glue the next ones. Then we glue the entire square and we will get one ray of a snowflake. In the same way we make 5 more rays.

All that remains is to collect the snowflake. First we glue the middle, then the side rays. You can use a stapler instead of glue.

The volumetric snowflake is ready.
Hello everyone! Today I want to continue the theme of crafts and show you how you can easily and quickly create wonderful toys in the form of paper snowflakes at home. The other day my sons and I made such a beauty that now this wonderful creation makes us happy. Watch and do with us.
I remember how I sat and cut out snowflakes as a child; it brought me so much joy and pleasure. And then she ran and glued it to the window. Time has passed, but nothing has changed until now, I still love this activity, only now I do them with my kids.
As always, I’ll start with the simplest manufacturing options, and along the way there will be more and more complex options.
In order to create a snowflake, you only need one tool - scissors and a sheet of paper and a great mood.

Then you need to correctly fold the paper into a triangle, and then draw a suitable pattern and cut it out. You will also need a simple pencil))).
The main thing is to take a square-shaped sheet, fold it in half (1), then in half again (2), repeat steps (3, 4), almost done! Draw with a pencil what you will cut out, for example like this in this photo:

So, from this triangular blank I propose to make these magically beautiful and light versions of winter snowflakes, which you can use everywhere, even bring them to kindergarten, school and decorate rooms in your apartment, in the entrance and windows with them.
If you like everything openwork, then this look is just for you:

If you prefer classic options, then choose these wonderful snowflakes:

The following layouts and diagrams will be a little more complicated:

In general, I really liked this selection of all kinds of decorations on snowflakes, which I saw on the Internet:

Look how picturesque and patterned they are, it’s just super beautiful, and most importantly, it’s accessible to everyone, even a preschool child, a schoolchild, and even us adults.
For the little ones, you can offer this craft in the form of curls made from stripes.

Cutting snowflakes from napkins or paper
Have you ever seen those, such that the cutest snowflakes appear from napkins that absolutely everyone would like? I found these and am sharing them with you, the method is simple and easy, and also budget-friendly, you will need glue, napkins, scissors, a pencil or pen and cardboard.
Interesting! Napkins can be replaced with any other type of paper, such as corrugated paper.
The stages of work themselves are not complicated, but these pictures outline the entire sequence, so watch and repeat.
 The final result of the work will be incredibly beautiful and will be remembered by everyone, and if you decorate it with colored sequins or something like that, it will be absolutely cool.

Or this way, depending on how someone decides to decorate the original sample.

Well, now I’ll show you a rather primitive, old method; before, such cute snowflakes were used to do everything in labor lessons or in art kindergartens. You will need paper and a good mood, and of course, scissors and glue. You will need to cut long strips of paper from a regular A4 sheet, the width of the strip should be 1.5 cm and the length approximately 30 cm.

You can make these multi-colored stripes and you should get 12 plain stripes.


This is how you glue these strips together step by step.

It turned out incredibly original, you can hang it on a Christmas tree, on a window or on a chandelier))).

Another similar option made from paper strips.

I saw a friend’s snowflake made from ordinary newspaper, then you can cover it with shiny varnish or glue sackcloth.

Or you can roll cones out of paper and glue them in a circle, alternating colors.

Do-it-yourself volumetric snowflake with step-by-step descriptions
To begin with, I want to offer you this way of working, maybe you will like it better than the following:
This type of work is a little more complicated, but it is the most interesting in my opinion, because it looks Such a snowflake appears as if in 3D form. Of course, it’s time-consuming, but it’s worth it, my child and I made such a masterpiece in 1 hour. We are happy to share our step-by-step master class with you.

Stages of work:
1. You will need 6 squares of paper (blue and 6 of another white color), we took ordinary squares that we already had, they are sold as notes for notes. If you don't have these, then make your own.
Fold each square in half from one end to the other.

It will turn out something like this, and the last figure lies on the table, this is the result of the work.

2. Then fold the two ends of the paper to the fold line on both sides.

Turn the finished templates over to the wrong side.


Now turn the craft over to the other side again and push out the parts that stick out.

4. This is how it should work out, absolutely not difficult.

The next step will be to prepare 6 white squares, from which we will make the following blanks.

5. So let's start, this work is even easier than the previous one, let's make origami out of paper again.

This is how it should turn out, there should be 6 blue blanks, and also 6 white ones.

6. Well, after you have cut the white squares, fold each leaf in half by taking one end and placing it on the other.

Do it after the envelope.

7. Now turn all the envelopes over to the other side.

My youngest son also helped, and the eldest joined a little later.

8. Fold the sides.

Turn it over and fold out the sides, then fold them towards the center. Cut out a small circle from paper and attach all the modules.

9. Now start gluing.

Take your time, do everything carefully. Use a napkin.

10. Almost everything is ready, all that remains is to decorate and cheer up yourself and those around you.

So I called my eldest son for help, and this is what we did to him.

11. We glued a photo in the middle, it turned out to be such a funny and mischievous modular paper snowflake. Tomorrow we will hang this beauty on a booth in the kindergarten. It looks simply amazing and much brighter live). So be sure that absolutely everyone will like this miracle!

In fact, there are quite a lot of three-dimensional options; they can be made using the origami technique, or in the most ordinary way.
I found these on the Internet, I hope you find them useful, take paper, scissors and glue:

Here is another similar option.

If you have a lot of time, then you can make more complex voluminous snowflakes; I know that the halls of kindergartens, schools, universities, universities and even shops are usually decorated like this.
Interesting! You don’t have to glue the parts together, but use a stapler to do it faster.


Video on how to cut out a New Year's paper snowflake for children
First I wanted to show you a primitive video, and then I thought that you can easily do the most ordinary thing yourself. So I thought, I thought and... I propose to cut out an unusual snowflake in the form of an angel:
Simple snowflake patterns for beginners in origami technique
As far as I know, origami is also divided into subtypes, for example, modular paper origami. Which one do you love the most? I have some interesting ideas.
Or the simplest and easiest to do, even school-age children can figure it out:

Modular origami is already more difficult; here you initially need to learn how to fold the modules correctly, and then everything will go like clockwork.

You will need to make quite a lot of modules to put together such a composition, but you will develop fine motor skills)))

Each such module is easily inserted one after another, so you can come up with any options on the go.

All I can do is wish you good luck and creative success.

Schemes and templates for cutting snowflakes from paper for the New Year
As for the various ready-made patterns, I offer you these types of snowflakes. The main thing is to remember that first you need to fold the sheet correctly, as I showed you at the very beginning
Now outline what you want to see and cut out along the contours.

If you want to make the snowflake more voluminous, use ready-made templates, like this one:

Then for this purpose you will need to cut out 3-4 templates, and then stitch or glue them in the center, and press them down with a stapler. Who needs such ready-made blanks and diagrams, write a comment below, I will send it to you by email absolutely free, I have quite a lot of them in my piggy bank, I will be happy to share a whole bunch.


By the way, you can create your own pattern, look how it looks, try it, it’s a creative activity:

I once thought it was last year, and I imagined such beauty:

For those who like openwork and very complex options, although there is nothing complicated, I can suggest watching this video, by the way, in it, paper is folded differently, take a look, there is something to learn:
Master class on snowflakes in quilling style for beginners
This type of toy is quite difficult if you have never made it using such a well-known quilling technique before. But this is at first glance, because the main thing is to understand the essence.
Even a beginner or a child can get the simplest diagram and snowflake:

And also this video will help you with this, everything is accessible and described and shown step by step. All you have to do is repeat all the actions after the presenter and you will get a masterpiece.
Snowflakes using the quilling technique, this one is stunningly beautiful and charming. Try it.
Well, I gave you a whole bunch of ideas for realizing the festive mood, decorate your house, apartment. It will look simply great, especially with your own hands, such crafts will always bring warmth and comfort to every heart))).

See you! Have a great day everyone, sunny mood! Come visit more often, join my contact group, write reviews and comments. Bye everyone!
Sincerely, Ekaterina Mantsurova

