Star news


How to quickly make a butterfly out of paper. How to make beautiful butterflies for decoration
At the final stage of renovation work, there is certainly a desire to add some zest to the updated interior. The opposite situation, when no fundamental changes are expected in the near future, also gives rise to the idea of enlivening the situation with original decor. In both cases, hand-made butterflies will help to decorate the wall in an interesting way. The creative process can captivate all family members; depending on the chosen concept, there is something for everyone.
Preparatory work
Decorating a wall with butterflies is a relatively new trend in the world of design solutions. Winged flowers will make the atmosphere refined, filled with romance, lightness and carefree dreams. The translation of creative ideas into reality is preceded by a preparatory stage:
- Choose the most suitable wall for the butterflies. A wide view will allow you to admire the original decor more often.
- Calculate the shape and area of the image on the wall, whether it will occupy a small area or be scattered over the entire surface. In addition to direct mounting on the wall, butterflies can be made into a panel, framed, or hung from a sconce.
- Decide what material is best to make butterflies from. Take care of its compatibility with the interior of the room. The article presents traditional and extravagant ideas for creating moths.
- Consider the color, size and shape of the jewelry. Bright shades on a light wall are the optimal solution. Butterflies of different sizes look much more impressive than those made from one stencil. Butterflies made with asymmetry will help you get as close to the natural image as possible. You should not strictly observe specularity; in the end, small deviations will add volume and dynamism to the appearance of the application.
- Depending on the chosen direction, prepare the material and tools with which you will decorate the wall.
Advice ! The overly intricate shape of the butterflies will create difficulties when cutting. If there are time constraints, it is better to stick to simple figures.


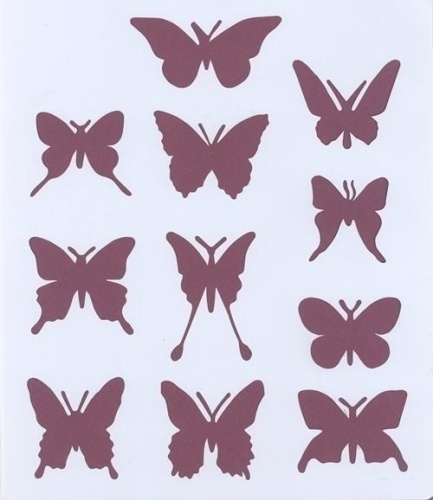
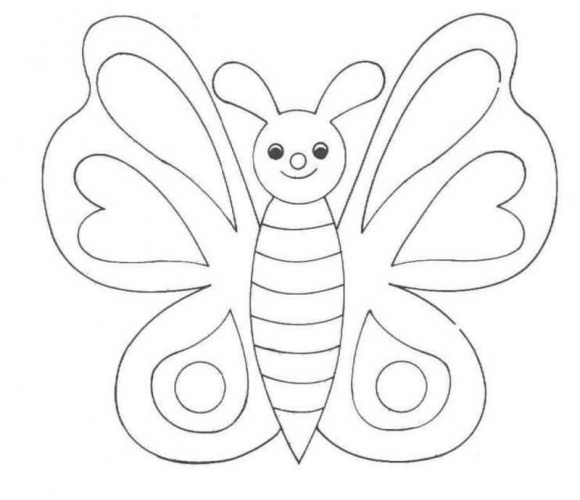
Having basic artistic skills, you can make a stencil for future butterfly blanks yourself on plain paper or using available picture editing programs. In the absence of talent, ready-made templates of butterflies for the wall, designed for cutting, will come to the rescue.
Paper moths
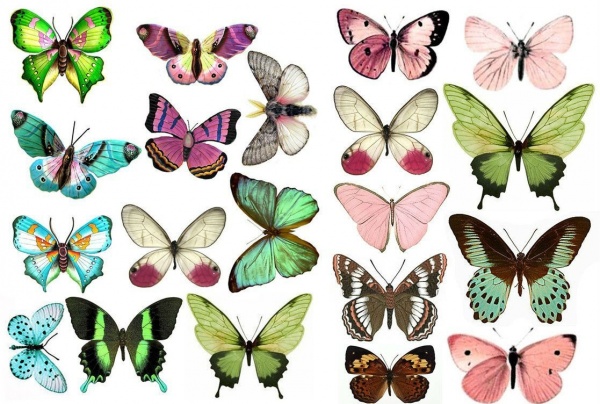
The most affordable way to decorate is to decorate the wall with paper butterflies. Making the moths monochromatic or combining two colors depends solely on the imagination of the novice designer. If the required shades are not available, acrylic paint and white paper will solve the problem. Butterflies on the wall made from bright sheets of glossy magazines look interesting. The variety of shades is difficult to create on your own, but bright printed designs will whimsically decorate the wall without additional costs. A pre-arranged palette will allow you to make smooth transitions in the composition.

Having selected the sketches you like in various sizes, you determine the required number of butterflies. After this, the images are printed and stencils are made. It is most convenient to attach a simple shape to cardboard and cut out the inside. The design of complex designs is applied to a thick sheet and carefully cut out with a stationery knife. To speed up the process of preparing figures, just fold several sheets of paper and cut them out at the same time.
Cardboard version
Making cardboard butterflies on the wall is more difficult. However, the material allows for greater variation in shape design. To achieve the desired curves, just slightly moisten the product and, giving the desired bend, fix it with a weight. After drying, the butterfly will retain the required shape.

Another interesting option for making butterflies out of paper for the wall is to make origami. This activity has recently become especially popular among children.

The idea of placing butterflies on the wall is initially drawn on paper. It is advisable to ensure compatibility with the wallpaper pattern and the overall theme of the room. A whirlwind of moths or a flock flying from one side of the wall to the other looks extravagant. To make a heart or a large butterfly from small parts - there are no limits to imagination. The sketch is transferred to the wall using chalk or a pencil, carefully marking the lines along which the figures will be located.

Mounting methods
Butterflies cut out of paper or cardboard are attached to the wall in several ways:
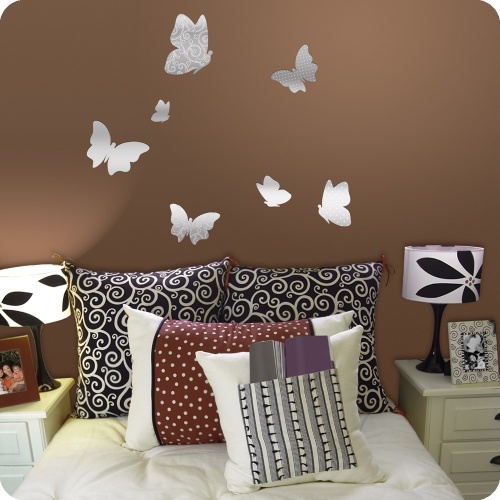
- PVA glue. If the goal is not to preserve the attractive appearance of the wall after removing the decor, PVA glue or wallpaper solution is quite suitable. Fully glued butterflies will not create a natural effect. Volumetric applications look much more interesting. To do this, the wings of the moths are slightly bent and only the middle is fixed. When the air conditioner is running or there is a summer breeze, the butterflies will come to life, fluttering with the air flow. The glue is applied to the base in small doses so as not to spoil the surface of the wall outside the template.
- Pieces of foam plastic are used to secure light moths. Initially, the material is glued to the product, then to the wall.
- Double-sided foam tape, cut into small squares, is attached to the butterflies, after first removing the protective film. Having completed all the details, we begin to decorate the wall.
- If there is a prospect of removing butterflies from the wall without subsequent repairs, it is better to mount them with pins. This is only acceptable for wallpaper; the option of plastered walls will not allow the proposed method to be applied. Having selected hairpins decorated with beads or stones, they are bent using pliers at an angle of 90 degrees. Having secured the upper part to the body of the butterfly with glue, the end is carefully placed behind the wallpaper. If necessary, the decor can be easily dismantled without leaving marks on the wall.
Note! When fixing cardboard products, take into account their large mass, unlike their paper counterparts.
Decorating with a stencil
Butterflies made using a stencil will add originality to the wall design. Having selected and printed the sketches, the design is applied to thick film or laminated with strips of tape, outlined with a permanent marker and cut out with a sharp stationery knife. Several blanks will make the work easier; it is advisable to make one copy for each color. Luminescent paints will add extravagance to the design. At night, with directional light, the spectacle looks breathtaking. Further work includes the following steps:
- Stencils with butterflies are attached to the wall using spray adhesive or construction tape.
- A sponge cut into several parts and equipped with a handle will allow you to make a suitable brush. Purchasing ready-made tools will shorten the preparatory period.
- Ordinary paints are applied regardless of the time of day; it is better to work with phosphor material in dim light. Remove excess dye from the sponge, ensuring minimal contact with the stencil.
- A blue outline made with a regular brush along the edges of the wings will allow you to highlight the image glowing on the wall. After drying, the stencil is removed.
Advice! To prevent regular paints from stretching, first draw along the contour with a blade or sharp knife.

In addition to paints, decorating the surface with butterflies is done with putty. To do this, after fixing the template on the wall, the building material is applied using a palette knife. Upon completion of the process, the stencil is removed and washed with water to remove putty residues. After the solution has dried on the wall, you can make an extraordinary coloring of the butterflies.
Vinyl and plastic
The times when every home had an impressive collection of vinyl records are gone. Butterflies on the wall made of vinyl can remind you of the past and put stale rarities to good use. The template you like is applied to the plate, and the outline is outlined with white chalk or a piece of soap. To make the material pliable, it is placed on a baking sheet lined with baking foil in the oven. The desired condition is achieved in a few minutes, as the curling edges will tell you. Without wasting any time, start cutting butterflies from softened vinyl using sharp scissors. If you don’t have time to do it before it hardens, you will have to repeat the procedure of placing it in the oven, so don’t rush to turn it off. Sanding them with sandpaper will make the edges of the butterflies less sharp.
Advice ! While the vinyl is warm, make the products voluminous; fancy curves will add personality to the decor on the wall.

Double-sided tape will help secure the butterflies on the wall. Pieces cut along the length of the moth's abdomen are initially glued to the wall, then the figures are attached directly to them. Silicone glue is another way to securely fix the decor to the wall.
It’s enough to just make a butterfly out of plastic and then decorate the wall of your country house. To work, you will need the middle part of the bottle and materials for decoration. Having selected the stencil you like, the design is transferred to plastic with a permanent marker and cut out. The butterfly is painted with varnishes of bright colors, with sparkles; if available, you can use acrylic ones or those left over after repairs. Little needlewomen will be interested in making a butterfly for the wall, decorated with rhinestones and beads. Don't forget the wire antennae.

Fabric and metal design
On walls with liquid wallpaper or decorated with draperies, butterflies made of fabric look appropriate. This creates an atmosphere of special warmth and homeliness. Cut and processed butterflies are attached to the wall with glue. Thin fabrics will allow you to create a three-dimensional image on the wall. To do this, the cut out moth is soaked in a soap or glue solution and dried in a certain shape.

Butterflies on the wall made from tin cans look radically opposite. Working with the material will require a lot of effort and accuracy. Golden spray paint can give the workpieces an attractive look. It is better to subsequently dilute the monotony with an additional pattern. The extravagant design on the wall will harmoniously fit into the interior designed for brutal men.
Regardless of which wall design option you choose, the decor you make will definitely add individuality to the room and emphasize refined taste and awareness in matters of design art.
The best option to decorate a room for a special event (wedding, children's party, birthday) is to make a decor in the form of a butterfly. This type of decoration will best bring fresh and positive notes to the design of any room.


Making a paper butterfly
The most accessible material for making a butterfly is paper. It is enough to buy colored thick cardboard in the store, choose the shape template you like, transfer it to the back side of a sheet of cardboard and cut it out according to the silhouette.

The resulting forms can be attached to the desired surface - room walls, furniture walls, curtains, doors, etc. – using double-sided tape, pins or glue.

There are also more original ideas for handmade butterflies. For example, draw the silhouette of a butterfly using paints according to a template on paper, leaving a white outline with an allowance. Or cover the silhouette with fabric, decorating it with beads or beads. You can also use glitter nail polish, but it doesn't have to be clear.

You can fold origami butterfly figures. The diagram is easy to find on the Internet.


Making “live” butterflies
The most interesting option is to make a beautiful “live” butterfly with your own hands. First you need to prepare several tools: pliers, scissors, wire, several thin rubber bands. It is better to make the body of the butterfly from thick cardboard.

First you need to decide on the desired shape and choose a template for the butterfly wings. Having cut out the wings according to the template, parts for them are made (two pieces for each butterfly) from wire according to the example shown in the photo.

The main function will be performed by rubber bands; they need to connect two wire parts. The previously prepared wings must be glued onto the resulting frame.

Finally, the butterfly must be secured in a narrow container (box, box, postcard, etc.), having first tightened the elastic band tightly with the upper wings of the butterfly. When the recipient opens the gift, the rubber band will loosen and the butterfly will flutter out, as if it were a real one.

Butterfly in parchment style
The parchment technique is the application of relief images on parchment paper or tracing paper. This technique is quite new, but with its help you can make an incredibly beautiful butterfly with your own hands.


To work with this technique, you do not need to buy special equipment. The basic tools you can use are knitting needles or a crochet hook and a computer mouse pad. They can easily replace dots and parchment boards.

The main material is parchment paper, sold in office supply stores. It can be replaced with tracing paper with a density of at least 150 g/m2, but such a need is unlikely to arise.

Instead of buying a board with ready-made stencils of designs, you just need to download and print the desired pattern, and then transfer it to tracing paper. A sewing needle or awl will replace pin pencils, which are used to draw or pierce the outline of the future image.
The remaining materials can be found in any home: scissors (it is better to use small nail scissors), a transparent ruler, paper tape, office glue, beads, rhinestones or glitter for decorating butterflies.

Master class on making a butterfly
First apply a stencil of the future image on the rubber base, then parchment paper. Secure the structure along the edges with paper tape. When finished, the side to be embossed will be the wrong side. The design on the front side will be convex.

Embossing is done using dots of different sizes. The paper is carefully pressed against the stencil with a ruler as necessary. Under no circumstances should you do this with your hands so that there are no greasy marks left on the paper.

The next step is perforation of the image. The parchment paper must be turned over and placed on a hard, flat surface. Use a needle to make punctures along the silhouette of the design.

Cut out butterfly shapes with scissors: insert the blades into the punctures made with a needle and cut along their line.

You can decorate the butterflies to your liking: glue beads or seed beads, varnish them, sprinkle them with sparkles, etc.

You can liven up the butterfly a little by making its wings double. To do this, you just need to prepare two identical drawings and then stick one on the other. Or stick on only half of the wing pattern, making either the upper or the lower wings double.


Butterfly in kanzashi style
When using the kanzashi technique, you will need two different types of ribbons 5 and 10 cm wide, a piece of ribbon 5 cm long and wide in a different color, a square piece of ribbon with a side of 2.5 cm.


Place the two largest pieces of ribbon of different colors together and roll it into a triangle. From the wrong side, sweep the pieces with thread. You can immediately glue a bead at the base of the seam to prevent the seam from unraveling.

Fold the triangle in half and cut off the “bottom” and sides. For convenience, you can use a clamp to prevent the edges of the tape from moving apart. As you work, it is better to constantly compare the sizes of the workpieces so that the wings of the butterfly are the same.

The edges of the cuts should be singed on both sides. Fold large pieces of ribbon into petals with folds, and small pieces with sharp corners. Glue small petals into large ones.

The lower wings are simply made from round petals.

Align the upper and lower wings and sew them with thread. It is worth making sure that the needle passes through all layers of the tape. Carefully tighten the seams and knots, remove all excess thread ends. Adjust the joints of the wings so that they are at the same level.

Make the body of the butterfly from large beads and beads, as shown in the photo of a homemade butterfly. Combine the body and wings, sew with thread.

The finished butterfly can be placed on a clamp or platform made of paper and fabric.

You can prepare a “pillow” of lace: wind the lace into a ball without an internal hole, then straighten the folds evenly. Glue a kanzashi butterfly onto a lace “pillow” to create a more voluminous craft.

With a little imagination, you can find many materials from which you can make a butterfly at home. It is not necessary to spend large sums of money, but the result will please your family and friends.

Photos of homemade butterflies


There is, perhaps, nothing more ordinary and at the same time original than a decoration in the form of a butterfly. This form is good in everything. Jewelry, clothing items and accessories are created in the shape of butterflies. Butterflies decorate postcards, notebooks, photo albums, furniture and even just walls. Finished products can be purchased in a store and simply stuck to the desired place, or you can make them yourself, which is undoubtedly a more exciting activity.
What can you make a butterfly from?
Not only a paper butterfly can serve as decoration. To create this charming decorative element, you can use fabric, threads, ribbons, beads, natural materials and even used plastic bottles. In any case, thanks to patience and indefatigable imagination, you will be able to create miniature masterpieces with your own hands.
It's so exciting! Take a piece of unwanted garbage and turn it into a beautiful butterfly. This kind of handicraft is very inspiring. Just get creative and use everything you don’t need at home. Turn it all into your own little masterpiece. Let's look at several ways to make a paper butterfly.
Butterflies using quilling technique
The simplest, but no less beautiful decorative option is a paper butterfly. You can make it with your own hands in several ways. And get a unique option every time. More complex options are a paper butterfly made from double-sided strips. This technique is called quilling and requires certain skills, tools and a lot of time. But the products turn out amazing. Having made these kinds of insects of different sizes, you can hang them from the ceiling or chandelier using a very thin fishing line at different levels, which will create a wonderful weightless effect. They can be used to decorate curtains and walls, cards and albums, and even as jewelry.

Openwork butterflies
Another option is a DIY paper butterfly using the weaving technique. This technique is one of the types of folk decorative art. Its essence consists of cutting out paper using scissors or special knives. Works in this style can be simpler, or can reach the heights of grace.

Most often they decorate windows or mirrors and other glass surfaces. They are attached using a soap solution. They are also used in creating postcards. To make such a decoration, they use paper butterfly templates, which they use to cut out their products.
Figured butterflies can also be cut out using a plotter. This is such a special tool. Then you, of course, will spend much less effort and time on creating them if you need a large number of decorating elements.
Simple garland of paper butterflies
Making a garland, the main element of which is a paper butterfly, is not difficult at all with your own hands.

Moreover, you will probably find everything you need at home. And all you need to brighten up a dull room or decorate a fun party are a few sheets of multi-colored double-sided paper and decorative or regular wire. A ribbon or rope on which the garland will be attached will also come in handy.
For one butterfly you will need 2 squares measuring 15 x 15 cm. Fold each of them diagonally. You should get a triangle. Now fold both triangles towards each other, that is, from the edge to the center, like an accordion. The width of the fold should be no more than a centimeter. Do the same with the second square. Then connect them together in the center and wrap them with wire, bending the edges in the form of antennae. That's all. Our paper butterfly is ready. Make as many of these as you need. Now all that remains is to attach them to the tape and hang them where you want them to be.
Butterfly using origami technique
Let's look at another way to make a paper butterfly. It cannot be called simple or complex. Rather, both options are present here. Everything will depend on the paper butterfly pattern used. And, believe me, there are a huge number of them. And all of different levels of difficulty. And, of course, the more complex and intricate the scheme, the more interesting it looks in the end

When folding your product, make sure each time that all folds are made perfectly and do not warp. If you choose a material with an interesting color or unusual texture, your origami paper butterfly will not disappoint you.
Place the square of paper with the white side facing up. Fold it twice diagonally and once vertically. Next, follow exactly the instructions shown in the picture above.
By making a large number of these butterflies, you can miraculously decorate any room with their help. You can make them in different sizes and use all the rainbow colors. After this, glue it to the original non-bulky driftwood, imitating the color scheme of the rainbow. And nail a driftwood with butterflies to the wall, for example, in a children's room.
Butterflies on the wall made of paper and more
There are many ways to “settle” such wonderful insects as butterflies on your wall. One of them is a three-dimensional transparent painting, inside of which there is a dried butterfly of a rare species. It looks amazing, but not for those who are for the preservation of wildlife. This exhibition is unlikely to please such people.
Another, no less beautiful option would be butterflies made from feathers and wire. They often have variegated colors and look great on plain walls. If you have walls with a pattern, then this option is unlikely to suit you, since such butterflies will get lost against this background.
Or you can buy butterflies made from self-adhesive film and stick them wherever you want.
What you can do with your own hands
You can create butterflies with your own hands not only from paper, but also from cardboard, thin plastic and even from oracle.

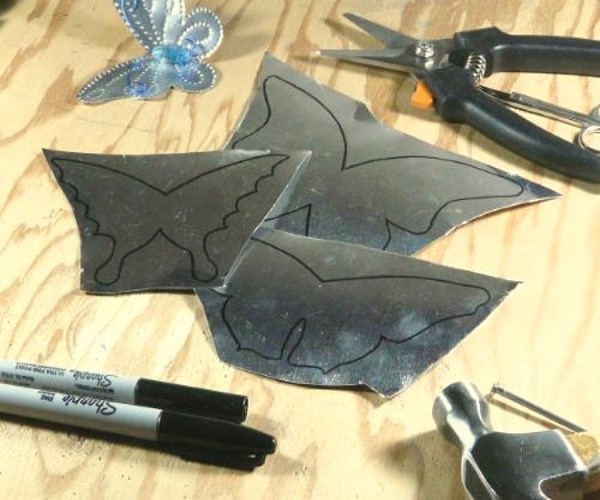
Butterflies made from vinyl records will also look interesting. To make them, you need to trace the butterfly template on a plate using a white pencil and heat it in the oven, holding the plate there for no more than 45 seconds. Once the vinyl is soft, cut out the butterfly and shape it. It is possible that the heating procedure for each butterfly will need to be repeated several times. After all, this material cools and hardens just as quickly as it heats up.
Perhaps the easiest option for decorating walls would be paper butterflies. The photo shows how unusual compositions can be obtained from them.
Composition mounting options
Decorative insects made or purchased by you can be fixed to a permanent location in different ways. There are four mounting options in total.
- Fastening with glue. The choice of adhesive material will depend both on what you are going to attach your element of the composition to, and on the material from which the attached object is made. If we are dealing with paper insects, then most often the number one choice is PVA glue. And the main thing here is not to get carried away. If you apply more than necessary, you risk not only smearing, but also distorting the color.
- You can use the pin method. It is, of course, much neater than the adhesive one, but it will only work if there is space between the wall and the wallpaper.
- Another mounting option is fixation with tape. You can use both flat and volumetric versions. The latter will add airiness and weightlessness to your composition.
- And last but not least, and perhaps even more original, is using threads and transparent wire. This type of fastening is especially suitable for butterflies that have been folded using the origami technique. This type of fixation will affect your imagination to the maximum and will bring a lot of positive emotions during the work process.
Preparing to create paper decor
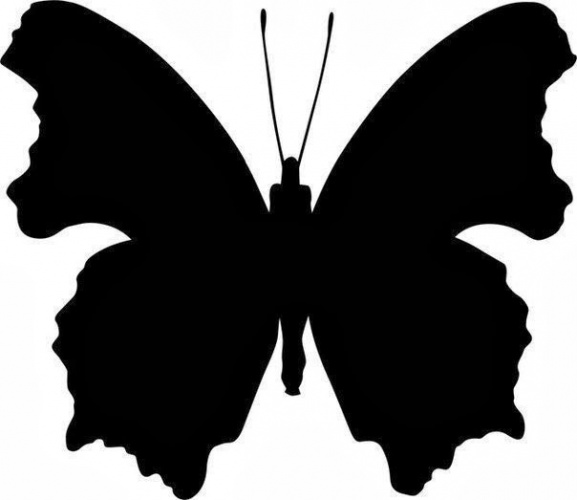
Although paper insects are the cheapest option for decoration, this method still gives you options that no other can give you. When creating paper butterflies, you can make them flat or voluminous, smooth or textured, multi-layered and even openwork. Or even combine everything in one. The main thing is to approach this issue not only creatively, but also wisely. After all, your composition should improve the room as much as possible. Breathe life and dynamics into it, and not become an indicator of bad taste. It should also be noted that the paper color range is not only very wide, but can easily be supplemented with all kinds of paints. Although in fairness it should be noted that the most win-win option is black monochromatic butterflies. In general, before you get down to work, think through everything down to the smallest detail. Starting from shape and color and ending with methods of attaching the composition.
The process of creating a butterfly for a wall composition
In order to make a paper butterfly, which will become one of the elements of the future wall composition, you will need the following materials and tools.

Firstly, this is paper and small decorative elements for decoration, if you want to use them. For example, it could be rhinestones. Secondly, scissors, glue, pencil and everything you need for fastening. Also use ready-made templates to use to cut out insects for your composition.
So, let's look at how to make a paper butterfly. Cut the paper you will use into squares. The sizes of the figures depend on your idea. Fold each square in half and carefully trace half of the sketch of your future butterfly on one side, working out all the details. Without unfolding the square, carefully cut out all the elements, and only then unfold it. You will get a completely symmetrical insect.
Once all the butterflies are cut out, decorate them as you intended and begin attaching them to the wall. On the surface that will be the basis of the composition, apply markings in advance so that you don’t end up with any unpleasant surprises.
Butterflies decorate postcards, notebooks, photo albums, furniture and even just walls. Finished products can be purchased in a store and simply stuck to the desired place, or you can make them yourself, which is undoubtedly a more exciting activity. What can you make a butterfly from?
Let's look at several ways to make a paper butterfly.
Butterflies using quilling technique

The simplest, but no less beautiful decorative option is a paper butterfly. You can make it with your own hands in several ways.


And get a unique option every time. More complex options are a paper butterfly made from double-sided strips. This technique is called quilling and requires certain skills, tools and a lot of time. But the products turn out amazing.


Having made these kinds of insects of different sizes, you can hang them from the ceiling or chandelier using a very thin fishing line at different levels, which will create a wonderful weightless effect.


They can be used to decorate curtains and walls, cards and albums, and even as jewelry.
Openwork butterflies

Another option is a DIY paper butterfly using the weaving technique.


This technique is one of the types of folk decorative art. Its essence consists of cutting out paper using scissors or special knives.


Works in this style can be simpler, or can reach the heights of grace.


Most often they decorate windows or mirrors and other glass surfaces. They are attached using a soap solution. They are also used in creating postcards.


To make such a decoration, they use paper butterfly templates, which they use to cut out their products. Figured butterflies can also be cut out using a plotter.


This is such a special tool. Then you, of course, will spend much less effort and time on creating them if you need a large number of decorating elements.
Simple garland of paper butterflies
Making a garland, the main element of which is a paper butterfly, is not difficult at all with your own hands.


Moreover, you will probably find everything you need at home. And all you need to brighten up a dull room or decorate a fun party are a few sheets of multi-colored double-sided paper and decorative or regular wire. A ribbon or rope on which the garland will be attached will also come in handy.


For one butterfly you will need 2 squares measuring 15 x 15 cm. Fold each of them diagonally. You should get a triangle. Now fold both triangles towards each other, that is, from the edge to the center, like an accordion. The width of the fold should be no more than a centimeter.


Do the same with the second square. Then connect them together in the center and wrap them with wire, bending the edges in the form of antennae. That's all. Our paper butterfly is ready. Make as many of these as you need. Now all that remains is to attach them to the tape and hang them where you want them to be.
Butterfly using origami technique

Let's look at another way to make a paper butterfly. It cannot be called simple or complex. Rather, both options are present here.


Everything will depend on the paper butterfly pattern used. And, believe me, there are a huge number of them.


And all of different levels of difficulty. And, of course, the more complex and intricate the pattern, the more interesting the origami paper butterfly ultimately looks.


When folding your product, make sure each time that all folds are made perfectly and do not warp. If you choose a material with an interesting color or unusual texture, your origami paper butterfly will not disappoint you. Place the square of paper with the white side facing up. Fold it twice diagonally and once vertically.


By making a large number of these butterflies, you can miraculously decorate any room with their help.


You can make them in different sizes and use all the rainbow colors. After this, glue it to the original non-bulky driftwood, imitating the color scheme of the rainbow. And nail a driftwood with butterflies to the wall, for example, in a children's room.
Butterflies on a paper wall

There are many ways to “settle” such wonderful insects as butterflies on your wall. One of them is a three-dimensional transparent painting, inside of which there is a dried butterfly of a rare species. It looks amazing, but not for those who are for the preservation of wildlife.


This exhibition is unlikely to please such people. Another, no less beautiful option would be butterflies made from feathers and wire. They often have variegated colors and look great on plain walls.


If you have walls with a pattern, then this option is unlikely to suit you, since such butterflies will get lost against this background. Or you can buy butterflies made from self-adhesive film and stick them wherever you want.
What can you do with your own hands?
You can create butterflies with your own hands not only from paper, but also from cardboard.


Perhaps the easiest option for decorating walls would be paper butterflies. Options for fastening the composition Decorative insects made or purchased by you can be fixed to a permanent location in different ways.
There are four mounting options in total.
1. Fastening with glue. The choice of adhesive material will depend both on what you are going to attach your element of the composition to, and on the material from which the attached object is made. If we are dealing with paper insects, then most often the number one choice is PVA glue. And the main thing here is not to get carried away. If you apply more than necessary, you risk not only smearing, but also distorting the color.

2. You can use the pin method. It is, of course, much neater than the adhesive one, but it will only work if there is space between the wall and the wallpaper.
3. Another mounting option is fixation with tape. You can use both flat and volumetric versions. The latter will add airiness and weightlessness to your composition.

4. And last but not least, and perhaps even more original, is using threads and transparent wire. This type of fastening is especially suitable for butterflies that have been folded using the origami technique. This type of fixation will affect your imagination to the maximum and will bring a lot of positive emotions during the work process.
Preparing to create paper decor
Although paper insects are the cheapest option for decoration, this method still gives you options that no other can give you.

When creating paper butterflies, you can make them flat or voluminous, smooth or textured, multi-layered and even openwork. Or even combine everything in one. The main thing is to approach this issue not only creatively, but also wisely. After all, your composition should improve the room as much as possible. Breathe life and dynamics into it, and not become an indicator of bad taste.

It should also be noted that the paper color range is not only very wide, but can easily be supplemented with all kinds of paints. Although in fairness it should be noted that the most win-win option is black monochromatic butterflies.

In general, before you get down to work, think through everything down to the smallest detail. Starting from shape and color and ending with methods of attaching the composition.
The process of creating a butterfly for a wall composition
In order to make a paper butterfly, which will become one of the elements of the future wall composition, you will need the following materials and tools.
Firstly, this is paper and small decorative elements for decoration, if you want to use them. For example, it could be rhinestones. Secondly, scissors, glue, pencil and everything you need for fastening. Also use ready-made templates to use to cut out insects for your composition.

So, let's look at how to make a paper butterfly. Cut the paper you will use into squares. The sizes of the figures depend on your idea.


Fold each square in half and carefully trace half of the sketch of your future butterfly on one side, working out all the details. Without unfolding the square, carefully cut out all the elements, and only then unfold it.
You will get a completely symmetrical insect. Once all the butterflies are cut out, decorate them as you intended and begin attaching them to the wall. On the surface that will be the basis of the composition, apply markings in advance so that you don’t end up with any unpleasant surprises.
Everyone who has ever made a renovation wants to add individuality to the finished interior and introduce some original idea. And vice versa, when you do not intend to make repairs in the near future, but want to change something in the interior. In both cases, decor with butterflies on the wall will help. You can create such a decoration with your own hands. This will ensure that all family members will be carried away by an interesting creative process.
Preparing for work
A design solution such as the use of butterflies for interior decoration has become one of the popular trends in modern society. These decorative elements add lightness and romance to the atmosphere. It’s not hard to find butterfly templates on the Internet. from paper for interior decoration, so you can safely experiment and start making them.
Before starting work, you should clearly decide on the following actions:

Don't bother creating intricately shaped butterflies. This will only create additional difficulties, but will not greatly affect the final result. In addition to the fact that templates for butterfly stencils for DIY decoration can be downloaded on the Internet, you can also make them yourself. To do this you need to have imagination and basic artist skills.
Making a paper butterfly
 The easiest and cheapest way to make moths is by cutting them out of paper. They can be made in any shape and color. By showing their imagination, even beginners will create a beautiful piece of jewelry and can rightfully be proud of it.
Absolutely any material is suitable for making paper crafts (magazines, newspapers, colored paper, etc.). Butterflies made from old glossy magazines will look beautiful. They will turn out bright, colorful and will decorate the wall of your house or apartment in an original way.
If you don’t want to bother making templates, you can simply download and print ready-made ones. After that, all you have to do is carefully cut them out. Ready-made butterflies are hung on the wall in a pre-designed order and, thereby, bring it to life.
Cardboard moths
 It is much more difficult to make a butterfly from cardboard than from paper. The advantage of this material is the ability to create more complex and bizarre shapes. Cardboard moths can be easily reshaped. It is enough to moisten them with water and secure them with a weight. After drying, the workpiece will have the desired shape.
It is best to place such butterflies on the wall in flocks, flying from one end to the other. A heart made of moths or a large insect made from small parts will also look beautiful. Before placing it on the wall, you should draw the future pattern with a pencil, and then attach the finished moths along it.
Vinyl and plastic products
 Butterfly figurines can even be made from vinyl to decorate a room. Surely everyone has old collections of records that no one needs and only take up space. Butterflies will help give them another chance to benefit.
To make it, take the moth template and apply it to the plate. Draw the outline with chalk or a bar of soap. To cut a butterfly from a plate, you need to make its material more pliable. To do this, place the vinyl record in the oven. In a few minutes you can cut a moth out of it. If the process is delayed and the plate has cooled down, then repeat the heating and finish the work. After cutting, you should clean the edges of the workpiece with sandpaper.
Vinyl moths can be given interesting and whimsical shapes. To do this, bend them while the vinyl is still warm. Once cooled, the butterflies will retain their shape and look great on the wall.
Such products are secured using double-sided tape or silicone glue.
Another simple way to make a moth is to cut it out of plastic. For work, we will take the middle part of a plastic bottle and decorative elements. Using a stencil and marker, transfer the image onto the plastic. The blank is cut out and painted in a bright color. You can add wire antennae to the finished butterfly and decorate it with beads or rhinestones.
Crafts made from fabric and metal
 Moths made of fabric perfect for walls with liquid wallpaper And. To make such butterflies, an image is applied to the fabric and cut out. Attach the finished insects using glue. To add volume to the composition, use a thin cloth soaked in a soap solution. The moth is given the desired shape and dried. Fabric butterflies add lightness and warmth to the interior.
The absolute opposite are moths made from tin cans. It will take a lot of effort and patience to give the desired shape to the workpiece. The cut out figures are painted with golden spray paint and given the desired pattern. These moths will perfectly complement the interior of a man’s room..
Butterflies in the form of a picture
One of the most striking ways to decorate the interior with moths is to place them in the form of a picture. To make it, follow a few simple steps:

Glowing Moths
To create an effect For the glow we will use phosphor paint.
Place a drawing on the wall next to the light source. Then we glue the templates to the wall and apply paint. After drying, remove the templates and admire the beautiful moths.
To enhance the glow effect, the wings can be outlined with blue paint.
Methods for attaching products to the wall
There are many options for attaching finished products to the wall. Of these, the following are distinguished:

When attaching cardboard figures, it is worth considering their heavy weight.
It doesn’t matter which of the described options you choose, the main thing is that the figurines made for decoration will add uniqueness and emphasize your individuality.
Attention, TODAY only!

