Star news


How to do a manicure faster. Manicure at home step by step for beginners
Every girl should have beautiful and well-groomed hands. Since it’s very easy to do a manicure at home, you don’t need to spend any money to always be neat.
Nail preparation
The first step is to prepare the nail plate and cuticle for further processing. To get started you will need:
- Tweezers, trimmer;
- Scissors;
- File;
- Scrub, oils, cream;
- Degreaser (you can use alcohol or face lotion).
To learn how to do a cool European manicure, you need to remember that the most important part is preparation. In this step, the old coating is removed, the cuticle is trimmed, the nails are filed and their surface is leveled. To carry out the procedure, you can use a special apparatus or several files and hand tools (they must be sharpened before use).
Step-by-step instructions on how to prepare your nails for a manicure at home:
- The old varnish is erased. Immediately after this, the marigolds are soaked in the bath. We recommend adding a little sea salt and iodine to the water - then the plate will become thicker and stronger;
- After 5 minutes of “soaking” the nails, you need to take out one finger at a time and check the cuticle. If it is easily deformed, then it can be cut. Using a file or a special stick, the peel is carefully brought to the hole itself, after which it is cut off. Depending on your experience, you can use a trimmer (for professionals) or tweezers (for beginners). The action is repeated with each nail;
- After trimming, you need to lubricate the cuticle with oil. Most often, spas use cocoa or shea for this purpose, which have excellent antimicrobial and regenerating properties;
- Next, the plate is leveled and the desired shape is given to the nails. For rough processing - shaping, hard tools are selected. For example, with diamond or mineral coating. For soft - cleansing the nail from growths and irregularities, more gentle - silicone or wooden;
- When the treatment is completely finished, all that remains is to degrease the surface and hole, remove any remaining oil from the cuticle;
- If everything is done, then the instruments must be sterilized. If the main work is carried out by machines, then they are disassembled and washed in a special solution. Hand instruments are rinsed in Chlorhexidine.
 Photo - Preparing for a manicure
 In exactly the same way, trimmed pedicures are performed at home. After this you can start designing.
Unedged or European manicure is carried out without tools - it is easiest to do it yourself. The plate is cleaned of varnish and fat, then a special gel is applied to the cuticle. It is noteworthy that when using the unedged technique, you do not need to soak your nails.
After applying the softener, a few minutes should pass, then you simply move the skin closer to the hole. The cuticle is very pliable and soft. You do not need to use any trimmers or scissors to remove it. It can even be removed with an orange stick. All that remains is to wipe the plate with remover and cover it with a base for further coloring.
Simple edged manicure with regular varnish
The easiest way to do a manicure on short nails at home is with your own hands. In addition, it will look most advantageous on small plates. All points are carried out in the same way as written in the section above. After giving the desired shape and degreasing, the plate is covered with a base - it will fill the cracks and become a strong and even base for the paint.
You can make different types of manicure with regular polish:
- On the water;
- Gradient;
- Art design and many others.

Let's focus on the most common coating - it is very easy to make yourself and does not require much time. After the base has dried, a layer of colored varnish is applied on top of it. It must also be completely dry. If the shade is not bright enough, the surface is repainted.
To make the manicure last longer, a professional fixer is used. It performs several functions: it gives neatness, strengthens the plate, helps remove delamination and prolongs the life of the varnish. The fixative is often enriched with various vitamin and mineral supplements.
Video: doing a trim manicure yourself
Learn how to do French manicure
Doing a French manicure correctly is very simple; it does not require any special skills or tools, so it is often done at home. The only thing is that it is recommended to buy white varnish with a thin brush. Of course, you can work at home using stencils, but any professional craftsman will tell you that only by painting with a brush can you give your nails the desired and beautiful shape.


Instructions on how to do a simple French manicure at home step by step:

Video: an easy way to create a French manicure
Lunar manicure with gel polish or shellac
The original moon manicure, which can be easily performed with both shellac and regular varnish, is becoming increasingly popular. Of course, if we talk about convenience, then it is best to do it with gel - it lasts longer and it is easier to draw holes with it. In appearance, lunar is the complete antipode of French. If in a French manicure only the tips of the nails are shaded with white (or another color), then in a lunar manicure the holes are shaded.
To make a professional lunar design, you need to prepare a manicure kit: these are accessories for trimming, tools for working with gel (removers, primers, etc.), and an ultraviolet lamp.


Fashionable manicure with gel polish with rhinestones at home step by step:

In order for this unusual manicure to look interesting and stylish, you need to select varnishes very carefully. Experts advise using paints in contrasting colors, for example, black and white, green and yellow. But, if you work in pastel colors (pink and white, brown and beige), you will get a more delicate design.
Video: 4 ways to draw a hole for a moon manicure
Matte and mirror for short nails
Recently, many girls have begun to create designs on their nails that are not shiny at all. Some even use varnishes that harden after application and become powder.
Matte or velvet manicure can be done at home in three ways:
- Use regular polish, and while drying, hold your nails over the steam for a few seconds;
- Use a special matte varnish;
- Use special sand coatings. After application, they dry out and turn into textured varnishes.
You don't need any special training to make an interesting matte design. You just need to buy a polish without glitter - they are sold in any cosmetic store.


Step-by-step technology:

But the easiest and fastest manicure you can do at home is with foil. In order for the nails to be shiny and glossy, they are covered with special stickers. To do this, they use colored foil, on which patterns can be applied, or simple stickers that replicate the mirror coating.
How art is made mirror manicure with foil at home:

Glowing manicure is performed at home in the same way - here either fluorescent varnish or foil is also used.
Video: manicure with foil
Water manicure step by step
Despite its apparent simplicity, manicure on water or water design is quite difficult to perform. They can make the most unusual designs and patterns, but to do this you need to gain experience and purchase high-quality varnishes. To work, you will need a container with warm water (preferably disposable, because after nail art it will be spoiled), glue, a needle, and varnishes of the desired color.


Instructions on how to make a beautiful water manicure at home step by step:

Drawings obtained using water manicure are very original and interesting, but require a lot of time. Therefore, it is often much faster and easier to make them with acrylic paints.
Video: making drawings on water for water manicure
Newspaper and ombre
Color gradient designs are popular due to their simplicity. If it is done in salons with a special airbrush, then at home it can be done even with a simple sponge. This is ideal for New Year, birthday or any other holiday.

 To ensure that your hands, especially your nails, always look well-groomed, you need to know how to do a manicure correctly. This procedure should be performed once every seven days. You can do everything you need carefully and quickly in a beauty salon.
If you don’t have the desire or opportunity to visit it, then you can do a manicure yourself at home and it’s no worse than the one that’s offered to you for money.
When answering the question of how to properly do a manicure, it should be noted that there are a huge number of them. However, most often a woman is suited to cut, uncut or classic. The main thing is to choose and decide.
The classic manicure procedure involves removing the cuticle using small metal tweezers or sharp nail scissors.
Trim manicure
 Preferred for those with thick and rough cuticles. Quite traumatic. If you are careless or inexperienced, you can injure yourself by cutting off too much skin. As a result, this injury can provoke inflammation, due to which the cuticle becomes even coarser and begins to grow more intensively.
Unedged manicure or European
 This type of manicure also involves removing the cuticle, but using a special product developed on the basis of soft acids, namely fruit and lactic acids. Unedged or European manicure is preferable to women with delicate and thin skin on their hands. The process of removing cuticles boils down to painless and delicate dissolution.
The procedure for a European manicure takes much less time than a classic one.
However, this method of cuticle removal is contraindicated for women with sensitive skin, since the components of the product can provoke an allergic reaction.
Twelve manicure tools
 The manicure is created using twelve necessary tools. Therefore, if you are really interested in the right manicure, they should always be in your feminine arsenal. In particular, we are talking about:
- sharp nail scissors;
- nail file;
- metal tweezers;
- a metal spatula or orange wood stick to push back the cuticle;
- bath products: sea salt, olive and essential oils;
- nail polish remover;
- cotton pads or balls;
- cuticle softening oil;
- cuticle remover;
- hand cream;
- base coat and fixer;
- nail polish.
Four stages of manicure
Only if you follow all the steps during a manicure will your nails be able to always look healthy and beautiful, and you will receive an answer to the question of how to do a manicure correctly.
Stage one “Bath”
 Having decided on a home manicure, you need to give your nails a bath in order to soften the cuticle and remove it further without any injury.
So, you need to pour hot water into the bowl to such a level that all the fingers of both hands can be completely immersed in it. You must also first add two or three tablespoons of olive oil, two tablespoons of colorless sea salt and a few drops of essential oil (for example, lemon) to the liquid.
The oil will not only soften your skin, but will also nourish your nails with valuable vitamins, and colorless sea salt will make them strong.
The fingers are immersed in this solution for about ten minutes. As soon as you notice that the cuticle has become soft, feel free to begin removing it.
Stage two “Cuticle removal”
 Taking your fingers out of the bath one at a time, use a stick or spatula to push the cuticle to the base of the nail. You must act carefully, but with sufficient force. You must always be careful not to overdo it. After all, there is a risk of damage to the base of the nail.
Using the sharp side of a stick or spatula, remove any remaining skin from under the cuticle. Remove the remaining nicks using tweezers. The skin should not be torn off, but bitten off to avoid cuts. When using an unedged manicure, the cuticle is removed by using a special product from the “cuticle remover” series.
In this case, the gel is applied around the nail, not forgetting the area under the nail. As a result, carefully, using a stick or spatula, the product is removed along with the dissolved cuticle.
It is better not to apply this product to all fingers at the same time, since the remover dries out quite quickly. Professionals recommend treating two nails at a time.
Many manicurists recommend applying cuticle remover to those nails that are still covered with old varnish. Since the product used has a fairly aggressive composition that destroys the nail plate.
Stage three “Nail shape correction”
 To do a manicure correctly, you must remember that if you want to shorten your nails as much as possible, you must use nail scissors, and all movements must be single and confident. If the nails are filed, then it is necessary to direct the file only in one direction so that the nails do not begin to peel. You also need to make sure that all nails are the same length.
Stage four “Applying varnish and care”
 In order to lay the polish evenly on the nail plate, you must ensure that it does not extend beyond the boundaries of the nail, as shown in these instructions. Pay attention to the photo.
Now let’s try to apply the varnish correctly ourselves:
- Degrease the nail plates with nail polish remover.
- Apply a base coat to protect your nails from the harmful effects of nail polish and further yellowing. The base also levels the surface of the nail plate.
- Use a brush with polish from the base of the nail to its edge.
- The second and third strokes should also come from the base of the nail, drawing a kind of arc with the brush, following to the edges.
- The final step will be to use a fixing coating, which will give your manicure not only shine, but will also extend its life.
Now you know how to properly do a manicure in the comfort of your own home without the participation of an expensive beauty salon in this process. The main thing is to understand that every woman by nature is an innate skilled in all matters of beauty.
Beautiful nails give self-confidence, lift your spirits, and increase the status of their owner.
But not everyone can afford to visit a salon all the time. For many, the topic of manicure at home is relevant.
To properly make a beautiful manicure, preliminary preparation is necessary.
It includes the purchase of manicure tools, disinfectants and related items that you cannot do without.
Necessary tools for manicure at home
Good, solid tools– this is the key to high-quality cuticle care, prevention of nail splitting and high speed of the procedure.
For a classic edged manicure you will need the following tools:
| Tool | Description |
| 1. Cuticle tweezers. | It is best to purchase a Solinger brand tool, this is an old German brand of cutting tools. Tweezers have their own sizes. They determine the length of the blade. It’s good to take 0.5 cm. |
| Double-sided cuticle spatula: on one side it resembles an oar, on the other it resembles a hatchet. Must be metal. | |
 3. Knipser 3. Knipser
|
Tool for cutting the length of the nail. It looks like a small guillotine, it can be used for fingernails and toenails. |
 4.File 180 grit 4.File 180 grit
|
The grid should be imprinted on the file itself. |
 5. Polisher 2000 grit 5. Polisher 2000 grit
|
There are double and triple polishers, then the grit for each side must be printed. |
| Related Items: | |
 1. A large bowl, preferably ceramic - it holds the temperature well; 1. A large bowl, preferably ceramic - it holds the temperature well; |
|
 2. Towel or napkin; 2. Towel or napkin; |
|
 3. Cotton pads; 3. Cotton pads; |
|
 4. Orange sticks; 4. Orange sticks; |
|
 5. Nail polish remover. 5. Nail polish remover. |
|
| Disinfectants: | |
| 1. Chlorhexidine; | |
| 2. Alcohol solution 70%. | |
| 3. You can purchase a professional product for treating hands and metal tools at the pharmacy. | |
Which manicure tools should you use and which should you not?
If you still have little experience in nail care, orange sticks will come in handy. They can move the skin near the cuticle and clean the eponychium.
Some people use it to trim cuticles. manicure scissors. This is acceptable, but the best quality manicure will be if you use tweezers. Scissors have straight blades, while tweezers have beveled blades. That's why It is the tweezer that cuts the skin more and deeper and after them the manicure lasts longer.
 Nail fork
 Since we are talking about the cuticle area, No blade pressure is allowed. This can damage the matrix - the growth cells of the nail under the hole. As a result, the nail will grow crooked for the rest of its life.
Choosing a nail file, which one is used for what
Files vary depending on the grit. Grits measure the amount of abrasive applied to 1 square centimeter of a file:
The coarsest file is 80 grit. It is used to reduce the length of artificial nails;
Technique for performing European unedged manicure at home:
Step 1: Wash your hands with soap;
 Hand washing
 Step 2: Apply cuticle remover;
 Applying cuticle softener
Step 3: Starting from the little finger, use the rounded tip of a file or an orange stick to push the roller away;
 moving away and grinding the roller
 Step 4: Remove the softened thin skin from the surface of the nail;
 Cuticle removal
 Step 5: Process the rollers with a 180 grit file;
 processing rough rollers with a file
 Step 6: Wash your hands with soap;
Step 7: Degrease nails with an alcohol solution;
 Degreasing nails
 Step 8: Apply varnish coating.
 Varnish coating
 How to paint your nails evenly and beautifully
There is no difficulty in painting your nails easily and quickly and doing it exactly at home, without using a brush on the roller.
First of all, the varnish must have a certain consistency. The new varnish applies well and dries quickly, because the solvents have not yet evaporated from it. If the varnish has thickened, add 3-5 drops of varnish solvent to it.
Do not try to thin the varnish with acetone. or nail polish remover. These products will cause the varnish to curl.
Technique for applying varnish in bright or dark tones:
Step 1: Dip the brush into the varnish, squeeze out the excess with the back of the brush onto the bottle in a “pull away” motion.
Step 2: Place the brush in the middle of the nail at an angle of 45 degrees and move towards the cuticle. Before reaching the roller, stop the brush and move towards the free edge of the nail. This entire double movement must be done without lifting the brush from the nail or stopping it.
 Positioning the brush
  Smooth movement towards the cuticle
  Moving the brush towards the free edge
 Step 3: Place the brush on the nail in the cuticle area so that the brush lies in the hand perpendicular to the finger. Make a stroke with the brush along the cuticle to the side roller, round the stroke along the contour of the nail (the brush changes position - now it lies in the hand parallel to the finger) and bring it to a free edges of the nail.
 Movement to the side roller
 Step 4: Repeat this movement on the other side of the nail. If you run out of varnish on the brush during the process, turn it over and continue.

Step 5: With a well-wrung out brush, run along the end of the nail, sealing it.
 Result
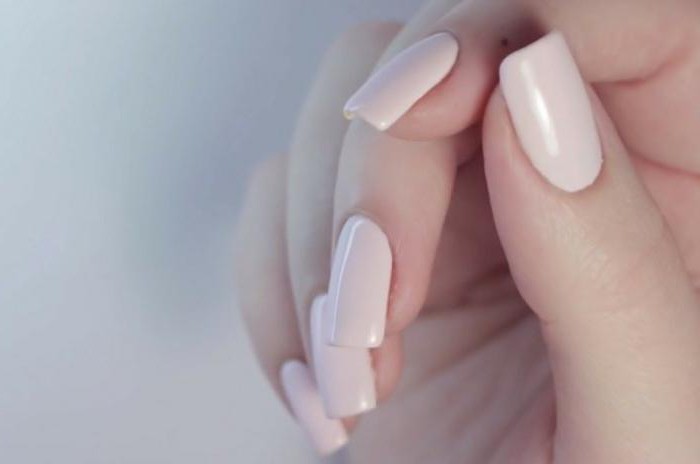
 Technique for applying varnish in nude and dense pastel colors:
 Nude polish
 Step 1: Dip the brush into the varnish, squeeze out the excess with the back of the brush onto the bottle in a “pull away” motion.
Step 2: Place the brush in the middle of the nail at an angle of 5 degrees and move towards the cuticle, holding it almost suspended. The brush does not put pressure on the nail, only the polish touches the nail. Before reaching the roller, stop the brush and move towards the free edge of the nail.
Step 3: Bring the brush to the cuticle area. Keep the hand parallel to the finger. Barely touching the nail, move the brush towards the side roller and down to the free edge. The brush should go along the side of the nail without touching the roller.
Step 4: Repeat this movement on the other side of the nail. If you run out of varnish on the brush during the process, turn it over and continue.
Step 5: With a well-wrung out brush, run along the end of the nail, sealing it.
Nail designs at home
There are beautiful design options for which you don’t have to go to the salon. They can be done at home: rhinestones, glitter, gel pen painting, stickers, bouillons, varnish painting, craquelure, velvet, cat's eye.
 Cat's eye - stripes
  Cat eye-waves
 1. Cat's Eye Design. For it you will need to purchase magnetic polish and a Cat's Eye nail magnet. Still releasing options “Wave”, “Stripes”" and others. But the most spectacular is “Cat's Eye”.
 Cat's eye - made with gel polish
 It is done on the newly applied layer of varnish. The magnet is brought to the nail so that the strip is along the nail. Hold for 1 second.
If you hold the magnet closer to the nail, there will be a clear line, further away it will be blurry.
If you bring a magnet first vertically and then horizontally, there will be a bright point.
 Gel polish - made with ordinary varnish
 2. Craquelure design. A new product, hard varnish, has appeared on the product market. This is a special cracking varnish that is applied to the dried previous layer.
Substrates made of gold, white, and black varnish look good. Crack polish dries quickly. It can be thinned like regular varnish.
If you apply it in a thick layer, it will crack into large pieces. If in a thin layer - into small ones. You can combine it: make one side of the nail with large fragments, and the other with small ones.
 Craquelure - large, medium, small.
 3. Velvet design. The varnish for this effect is called “Satin”. After drying it becomes matte, hiding all the unevenness of the nail.
If you apply a top coat on it, it becomes shiny, like regular varnish. You can make two nails shiny and leave the rest matte. This design looks good in dark or bright colors. On pastel colors it is almost invisible.
4. Leopard design. On a dried substrate (for example, coffee-au-lait color), uneven spots are applied with a brush with a slightly darker (beige) varnish and, without waiting for them to dry, a black dot is added to each spot. Using an orange stick, each dot is given the appearance of a comma.
 Leopard design
 This design is classic. It can be performed not only in natural tones, but also in avant-garde ones. A turquoise backing with blue spots and black commas looks good.
5. Zebra design.
 Zebra design
 Black lines are applied to a dry white substrate with a thin brush. There are varnishes for design, they have just such brushes.
The lines are drawn diagonally on the nail. The first line is drawn simple. The second, parallel to it, with a thickening coming from the middle of the line. It looks like a very narrow triangle. The third line is drawn simple along the previous one. The fourth is drawn with a thickening on the other side. The fifth is simple.
You can draw with a regular black gel pen. When the drawing is dry, simply seal it with topcoat. One zebra nail looks good, the rest are white.
 Nails with rhinestones and bouillons
 6. Design with stickers, bouillons and rhinestones. It is used on special occasions (weddings, graduations) and requires a beautiful dress.
Decorate two nails, tightly covering them with rhinestones of different sizes.. Swarovski rhinestones are suitable; they can be purchased in a set. The largest stone is placed in the center, closer to the cuticle. Near it on both sides there are smaller stones.
The smallest stones are placed on the edge of the nail. The space between large stones can be filled with golden broths. On the remaining nails, place one small stone in the center near the cuticle.
 Pencil for rhinestones
 Place stones on wet varnish. The stone is taken by simply bringing an orange stick moistened with water or a special pencil for rhinestones to it and it sticks to it (there are special pencils for attaching rhinestones on sale). It is placed on fresh varnish, corrected, trimmed, it sticks to the varnish and releases the stick.
Sterilizing instruments at home
In nail salons, instruments are sterilized in a dry-heat oven.
 Manicure tools
 At home, you can use the oven for these purposes. Place metal tools in a specially designated bowl, turn on the oven at 250 degrees and heat for 15 minutes.
If during the procedure a wound was caused and blood came out, the instrument is soaked in the solution before sterilization chlorhexidine or wiped three times with 70% alcohol(in the presence of special pharmaceutical products, it is better to carry out processing with them, according to the instructions).
Files and orange sticks can also be soaked in a disinfectant solution. But if there was no blood while working with them, it is enough to wipe them.
Below you can watch a detailed video about sterilizing manicure instruments; some information will be useful to you at home.
What pharmaceutical products may be useful?
In addition to chlorhexidine, you can buy hawthorn tincture 70% in the pharmacy. This alcohol solution can be used as a disinfectant.
The professional line of pharmaceutical products for sterilization is very diverse. Disinfectants are divided into two types: for hands and for metal tools. The pharmacist at the pharmacy will always tell you what products are available.
You may also need it glue BF-6. This is a medical glue for treating wounds. It is convenient for cuts, disinfects and seals the wound instead of a band-aid.
Good to have on hand for warts "Mountain celandine", brown herbal balm. If a wart is discovered during the manicure procedure, you can immediately cauterize it with this balm.
Baths and oils for strengthening and growing nails after manicure
To keep nails healthy, they need to be nourished and treated. The aggressive environment makes them thin and brittle, appear on them. To avoid this, it is good to do it with sea salt.
You don’t have to buy expensive sea salt; the kind sold in grocery stores will do. You can add it during manicure to steam your nails.
In the process of saturating the nails with such water, a phenomenon called osmosis. This is an exchange of salts between two environments. Nails, like appendages of the skin, are an excretory organ. Nail effusion emerges through microscopic holes on the surface of the nail.
After taking a course of antibiotics, it forms very actively, preventing artificial nails from sticking to the nail bed.
That is why after taking antibiotics, two weeks must pass before nail extensions. Those who spent a lot of time in sea water on vacation notice improvements in the condition of their nails. Baths do not have to be done for a long time. 15 minutes is enough.
This procedure can be carried out in the evening while watching TV. After the bath, hands are lubricated with nourishing cream. The best creams are with fruit oils
. This could be avocado, aloe, or apricot oil. Just do not confuse them with essential oils. This is a completely different product. If the cream says that it contains mineral oil , it is better not to buy such a cream.
This is a product of chemical distillation of petroleum. It won't be good for your nails.
You can always look beautiful, you just need to get used to it.

A properly done manicure is not only a bright highlight of your look, but also an opportunity to protect your nails from splitting and brittleness. Therefore, before carrying out this procedure at home, it is very important to first familiarize yourself with the basic rules and step-by-step photo instructions that are given in our article.
An integrated approach is the key to a beautiful manicure
What you will need
To ensure a high-quality manicure and no different from a salon one, it is important to acquire several tools in advance, without which you certainly cannot cope.
- These include:
- Nail scissors. They must be well sharpened and intended exclusively for working with cuticles or nails;
File;

When choosing a nail file, your preference should be given to glass or sapphire, but it is better to avoid metal ones, as they injure the surface of the nail and contribute to its delamination.
- Minimum set of necessary tools
- Metal spatula or orange stick;
- Nail clippers;
- Moisturizing cuticle oil;
- Remover;
- A small container or tray for manicure;
- Sea salt or special cosmetic compositions intended for nail baths;
- Non-acetone nail polish remover;
- Hand cream;

Shellac or regular varnish, as well as base and top coat.
Manicure set with gel polish
Today in the nail industry segment there are three types of manicure: hardware, classic and unedged. The first one is simply impossible to do correctly at home without special training, but the last two are precisely the simplest options that even a beginner can handle, guided by the step-by-step lessons given below.

Hardware manicure
Classical
This manicure can be called the oldest option, which, despite the emergence of new techniques, still remains very popular among most women. It consists of several stages.
- Step 1
Using a cotton pad or lint-free wipes, remove the old decorative finish with nail polish remover. This should be done carefully so as not to damage the plate. Just apply the disc to your nail, hold it for a few minutes and wipe off the old polish.

Removing gel polish
In the case of gel polish, a special product is used that stays on the nails for 10-15 minutes. Another option is to remove the old gel polish using a highly abrasive file or router.
- Step 2
Adjust the length and shape of the nail plate. To do this, you need to file the nail down with gentle movements. If it is excessively long and you need to remove quite a lot, then you can use tweezers or scissors for this, and then file it down.

Adjusting the length and shape of nails
Please note that today the basis of fashion trends is the short length of the nail plate. As for the shape, it should be as natural as possible, so the best option would be a rounded square or almond-shaped.
- Step 3
At this stage it is very important to thoroughly soften the cuticle. If it is very dry and rough, you should apply a special softening agent followed by steaming. If your skin is normal, a 10-minute bath with sea salt or special compositions of oils will be enough for you. After this time, dry your hands with a paper or terry towel.

Softening the cuticle
- Step 4
Using a spatula or orange stick, slightly push back the softened cuticle and use nail scissors to cut it off. Also, do not forget about the rough skin on the sides and hangnails. In case of a cut, the bleeding area must be disinfected.

Cuticle removal
- Step 5
The final stage, at which the place of the cut cuticle is treated with moisturizing oil and the hands with cream. If you further plan to apply a decorative coating, the surface of the nail plate should be degreased and polished with a buff.

Polishing with buff
Unedged
The most fashionable and popular manicure method today. In addition to being painless, the possibility of infection or fungal disease is also minimal. To begin with, as in a classic manicure, you should remove excess old decorative coating and adjust the shape of the nail plate. Next, a special remover is applied to the cuticle and after the time specified by the manufacturer, the softened skin is removed using a spatula.

European unedged manicure
The unedged type of manicure is suitable exclusively for girls with thin cuticles. But those with dry and rough skin should give preference to edged or hardware manicure.
How to apply decorative coating correctly
Beautifully painted nails, without smudges or streaks, are the key to a perfect manicure. But, unfortunately, due to incorrect application technique, even an expensive product may not work well.

Varnish application process
Therefore, so that your efforts are not wasted, and your nails always look perfect, we suggest that you follow the following rules during this process:
- Make sure that the nail plate is completely degreased, as the durability of the coating depends on this.
- Always use a base coat. In addition to the fact that it will extend the wear period, this product will also provide your nails with reliable protection.

Applying the base
- The varnish should also be applied in a special way. To do this, make a drop in the center of the nail, which, using a brush, first stretch it towards the cuticle with gentle movements, and then along the entire length of the plate. Finally, draw the sides of the nail. Depending on the pigmentation and the desired effect, the varnish can be applied in several layers.
Today on the Internet there are many educational video lessons for beginners with detailed examples of how to properly apply varnish and create various designs.
- Don't forget to use a top coat. In addition to the fact that it can be used to obtain an additional glossy or matte effect, it also provides protection against chips and other damage.

Applying top
As you can see, doing a manicure correctly at home is quite easy, and with the proper approach, following all the rules and steps, it does not take much time. The main thing is to adhere to basic safety techniques and process tools on time.
An image that combines three or more colors risks looking ridiculous and tasteless. If you doubt your stylistic abilities, combine 2 primary colors and one accent color in your look.
Girls like to surprise and change, so every season new items appear in the world of fashion and beauty. Manicure is a niche that receives special attention, because now there are a lot of options for its execution for every taste. If you can’t go to a nail technician, you can do it simple for beginners.
It is worth noting that medium- and short-length nails are now in fashion; they are easier to care for and use different design options, so even those who have never faced the need to do this and have not specifically grown long nails will find it interesting to spend time this way.
Let's start with preparation
Before doing a manicure, you need to carefully prepare the nail plate and cuticle. Both preparation and manicure do not require additional costs and are very simple to do, you just need to “stuff” your hand a little. To carry out the procedure, the following tools are needed:
- trimmer or tweezers;
- file;
- scissors;
- cream, oil with vitamins, hand scrub;
- degreaser, if it is not in your home kit, you can use alcohol.

- trimmed (wet);
- hardware;
- unedged (European);
- SPA manicure.
The most common is the usual one, which is carried out using scissors or tweezers. It is used both in beauty salons and at home. For a cool one like in Europe, you need to take time to prepare before coating.
Step-by-step manicure lessons for beginners
So, after all the tools have been collected, you can get to work. Preparing your nails step by step:
- The beginning of the manicure consists of removing the old polish, after which the fingertips are soaked in a bath of warm water. Add pureed soap to the water, as well as sea salt and iodine to strengthen the nail plate if desired. Salons have a special product to quickly soften and remove the cuticle, but it is not necessary to use it.
- After 5 minutes, you can check whether the regrown skin is deformed well enough. Each finger is removed from the bath separately. To do this, you should use a pusher. The side that is shaped like a shoulder blade is used to thoroughly clean and remove the skin in the area of the hole.
- Next you should trim the cuticle. Either or tweezers are used. Those who have sufficient experience can use a trimmer.
- You need to hold the tweezers or scissors at an angle of 45 degrees; cut the cuticle in one line without interrupting it. Also, do not forget about the side bolsters, where the skin quickly becomes rough.
- After pruning, it is necessary to lubricate the area with oil to avoid irritation and dryness.
- After this, the nail plate needs to be filed down a little using a buff. This way, all irregularities are removed, and the adhesion to the varnish will be much better. Using files, the nail is filed to the desired length; it can be given a wide variety of shapes.
- Afterwards, the remaining oil is removed and the nail plate is degreased.

This is how easy it is to do a manicure at home for beginners. Speed can only be developed over time, so you will need to work hard on your first manicure.
We use regular varnishes
Those who like to look at their well-groomed fingers have realized that going to a specialist to apply gel polish is not at all necessary, because all these varnishes and drying lamps are sold in specialized stores, and you can choose inexpensive options. But for those who decide to get their nails in order for the first time, you can use regular varnish. To begin with, it is better to make short nails, which are easier to care for.
Before doing a short manicure, you need to cover your nails with a colorless base varnish; you can use coatings for this purpose that give your nails strength and hardness. With regular varnish, you can not just cover your nails in one color, but also make a gradient, water manicure and use different designs.
For those who want a simple option, just go with one tone. In this case, colored varnish is applied on top of the colorless varnish. Liquid and faded varnishes can be applied in two layers and wait until dry. After this, a top layer of colorless coating is applied to consolidate the result and give the nails the necessary shine. With these simple tips, manicure lessons for beginners become a breeze.
Also remember that the varnish must be applied correctly. A small amount should be used. The brush is placed approximately in the center of the nail plate, a couple of strokes are made in the middle part of the nail, then one on the sides and a few more throughout the nail to smooth out uneven color.
The simplest designs
Even the simplest manicure can be varied without much effort. Without making any drawings, you can achieve the effect of a summer mood by painting your nails in different colors with similar shades. Manicure at home for beginners can also be done using dots or lines on the nails. The dots are placed with a regular needle, the lines are made with a brush, and there are also special ribbons on sale that are glued to the nail plate.

Craftswomen use tape to paint their fingers in different colors. The desired shape is cut out on the tape, the nail is painted in one tone, then the tape is glued to the desired position and the second layer is painted.
French manicure
French is widely popular all over the world, and it is quite simple to make. French manicure step by step for beginners should be done like this:
- For the background you can use soft pastel colors: pink, coffee, beige. The nail is completely covered with the background color, then wait for it to dry.
- For the first time, you can buy special stencils, but then it is better to buy white varnish with a thin brush and learn to draw a “smile” yourself, as all masters do.
- After the background and smile are dry, you need to apply a clear varnish on top.
And to top it off
Doing manicures at home for beginners is not at all difficult, you just need to practice a little to work quickly and not be afraid to try something new to create unique designs. Many famous masters did not study anywhere; they themselves learned the art of caring for nails and giving them beauty.

