Star news


What can you make a birch from with your own hands? "Russian birches"
There is hardly anyone who would remain indifferent to white birch. This amazing tree evokes different associations - for some - a feeling of tenderness, for others - sadness, for those who are far from their native land - a feeling of nostalgia, but everyone who saw this tree once will fall in love with it forever. Well, let's try to reproduce the masterpiece created by nature in our own creativity - we will start weaving a birch tree from beads with our own hands.
Beaded birch tree for beginners
In the master class we will look at weaving a bright summer birch tree from beads 25 cm high. If you want to make a larger tree, simply prepare more materials, the weaving pattern will remain the same.
So, to make a birch tree from beads for beginners, we need this:
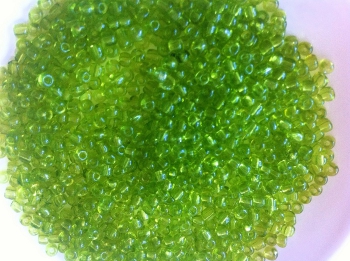
- bright light green small beads of the same size;
- beading wire;
- copper wire for weaving a birch trunk from beads;
- green floss threads;
- PVA glue;
- a piece of drywall for the stand;
- primer;
- plaster or putty;
- black and white paint;
- beads for decoration - green, pink, yellow.
Having prepared everything we need, we can get to work.
How to make a birch tree from beads?
- Let's start by weaving beaded birch branches. To do this, we will need pieces of wire from 25 to 40 cm long, depending on the size of the desired branch, and for the tree to look realistic, the branches should not be the same. So, take a piece of wire 40 cm long and put 8 beads on it.
- Twist the beads into a loop.
- Next, we again collect 8 beads on one of the ends.
- We twist it into a loop, then connect it to the other end.
- Now we do the same at the second end of the wire cut.
- And so we continue until we reach the desired number of leaves, or until the length of the wire approaches the end.
- Having made the required number of leaves on the branch, we twist the pieces of wire and put the branch aside.
- Next we weave the next branch, etc. In the master class we made a birch tree from beads, consisting of 33 branches (their number should be a multiple of three, this is a necessary condition), but if you have the opportunity to make more, it’s better to take the time, the birch tree will come out more magnificent and more realistic.
- When all the branches are ready, take them three at a time and twist them together.
- Now we take three triple branches and also twist them together, forming larger branches.
- First of all, we made this top for our beaded birch tree.
- Now we need a piece of thicker copper wire. Fold it in half and braid it to the ends of the wire branches.
- We carefully twist it lengthwise and get the base for the birch trunk.
- Now we take one of the remaining triple branches and weave a piece of copper wire to it.
- And carefully wrap it to the birch trunk. We try to attach it as close to the top as possible so that the tree turns out to be quite lush, without “bald spots”.
- Let's form another top from three triple branches.
- We attach the resulting second tip to the trunk just below the first.
- Now we will make a twig from five small thin branches.
- Let's attach it to the trunk a little lower than the previous branches.
- In this way, we continue to collect and attach all the remaining branches, and this completes the weaving of the bead base for the birch tree.
- Next we will need green floss threads. Gently coat the wires of the tree branches with PVA glue and wrap them tightly with threads.
- Now let's make a stand for birch made of beads. To do this, we will cut out the shape we need from drywall and carefully prime it.
- Let's try the tree on a stand.
- Now we apply plaster or putty to the stand.
- Next, carefully and evenly plant the tree roots into the putty.
- Then we will finish the top of the stand with putty or plaster.
- Now we have finally assembled a birch tree from beads, all that remains is to modify the trunk and decorate the tree.
- Now we will make a solution of gypsum with PVA glue in a 1:1 ratio and add a little water. From the resulting material we will form a tree trunk.
- Next, we wait until the solution has dried, after which we take black paint and apply it in a thin layer to the birch trunk.
- After this, apply a thin layer of white paint.
- We get such a realistic play of colors.
- After the paint has dried, apply a thin layer of glue and sprinkle the stand with green beads, making a clearing.
- Now let's take care of the flowers. Let's weave multi-colored flowers from beads.
- We leave the stem-root of the flower to attach it to the stand.
- Use a thin drill to make a hole in the stand, pour glue into it and plant our flower.
- This is how we plant all the flowers.


Now our birch tree, woven from beads with our own hands, is ready!  To decorate it, you can make several more types of flowers and grass. We enjoy the result of our work.
Do-it-yourself spring decoration of a preschool educational institution. Master class with step-by-step photos
Volumetric trees made of ceiling tiles. Master Class.
Spring group decoration.
Proshina Vera Ivanovna – teacher of the MADOU CRR kindergarten No. 60 “Fairy Tale” Moscow region, Likino-Dulevo
I prefer to use ceiling tiles to decorate the group. I suggest you see how you can make voluminous trees with your own hands from ceiling tiles for spring decoration of the room.

Target: production of volumetric birch from ceiling tiles.
Tasks:
Show a method for making three-dimensional trees from ceiling tiles.
Develop imagination and a creative approach to spring room decoration.
Cultivate the desire to make trees for the spring decoration of the group with your own hands.
The material will be useful to educators, additional education teachers, primary school teachers and anyone who likes this idea in decorating a room.
Trees made from ceiling tiles can be used in the design of a group, music hall, stairwell, in the decoration of theatrical performances or musical celebrations.
Material: ceiling tiles, scissors, pencil, ruler, corrugated green paper, glue stick, artificial branch, “Master” glue, wallpaper, black, white paint, brush.

Introductory part.
This forest fashionista
He often changes his outfit:
In a white fur coat - in winter,
All in earrings - in the spring,
Green sundress - in summer,
On an autumn day - dressed in a raincoat.
If the wind blows,
The golden cloak rustles. I. Semenova
(Birch)

Birch is the most common species among deciduous trees. It lives for about 150 years, the trunk reaches 30 - 40 cm in diameter and 28 m in height. There are about a hundred species of birch in the world. Birch is a slender tree, with a thick fluffy, bright green crown. The leaves are small - up to 7 cm long and up to 4 cm wide, heart-shaped with a serrated edge. Birch flowers - “earrings”. The bark is white or yellowish. The outer part of the bark is birch bark. It peels off very easily. The birch tree initially grows at a relatively slow pace, but after a few years it begins to develop rapidly.
Linguists associate the Russian name for birch with the verb to preserve. This is due to the fact that the Slavs considered birch to be a gift from the gods that protects people. Birch in a number of traditions symbolizes light, radiance, purity, and femininity.

Birch is a healing tree. People say about the benefits of birch: “The birch has four things: the first thing is to illuminate the world; the second thing is to cry to console; the third thing is to heal the sick; The fourth thing is to maintain cleanliness.” The bark, leaves and buds are used for medicinal purposes. The buds are collected in early spring during the swelling period, but always before the leaves bloom. They are stored in paper bags for two years. But the birch leaf is plucked in May, during the birch flowering period, when the leaves are still sticky and fragrant. Dry outdoors in the shade.
It should be remembered that you should not collect leaves from trees growing near roads. Birch leaves are good for preparing baths - they have a calming effect on the body, have a beneficial effect on the skin, help with dermatitis, eczema, as well as rheumatism, gout, and stimulate metabolism in the body.
With the arrival of spring, axillary birch buds release resinous, fragrant droplets called “tears,” which attract bees. They use them to produce propolis.
Spring birch sap (“birch tree”) is considered a blood purifier and, as people define it, “heals” the blood. It is taken 3 glasses a day for skin diseases, all kinds of eczema, lichen, rashes, for childbed fever and for diseases with high fever; It is considered a diuretic and is used for gout, arthritis, rheumatism and scurvy. Experienced producers advise: when going to harvest juice, take with you a small brace, a drill, drill a hole in the trunk no more than 4-5 cm deep, insert a tube into it (such as for cocktails), deepening it 2-3 cm. Tie it on. dishes - a bottle, a jar, juice will flow into it through a tube. Don't forget to cover the hole afterwards to keep the tree alive. One adult birch tree can produce up to 150 liters of sap if used skillfully.


Modern bioenergeticists confirm that this tree has enormous positive energy, and advise people to recharge with this energy from time to time. To do this, you just need to lean your back against the trunk and stand there for a while. For a Man, it is pleasant and useful to wander in a birch grove, where there is a lot of light, the air is transparent and clean.

Heavy, dense birch wood is used to make high-quality plywood, skis, small carved toys, and whistles. Birch bark has long been used in folk crafts. Birch bark is the upper, elastic layer of birch bark. Due to its remarkable qualities (strength, flexibility, resistance to rotting), birch bark has long been considered an excellent material for the manufacture of various utensils - traditional containers in which dairy products do not spoil even in the heat, salt shakers, baskets, purses, baskets, boxes, ladles, simple shoes .


Signs:
It is good to plant a birch tree near the house for the well-being of the family and protection from lightning.
If you throw birch branches on garden beds, there will be no caterpillars on the cabbage.
Birch is a blessed tree that once sheltered the Virgin Mary and Christ from the weather.
As soon as the birch leaf unfolds completely, you can plant potatoes.
The nightingale sings when it can drink dew from a birch leaf.
If in August the leaves on birch trees turn yellow below, early sowing will be good.
If a leaf from an oak or birch tree falls cleanly, it means an easy year; if it doesn’t fall cleanly, it means a harsh winter.
If a lot of sap flows from a birch tree, then it will be a rainy summer.
If the birch blossoms before the alder and maple, expect a dry summer.
If the leaves of birch trees begin to turn yellow from above, it is early spring; if the leaves turn yellow from the lower branches, it is late spring.
Russian birch is a symbol of Russian nature, the favorite tree of the Russian people. Slender, curly, with white hair, she was always compared to a tender, beautiful girl, to a bride. Artists and poets dedicated their best works to her. The birch tree in Russia has always been loved for its beauty. Our ancestors, the Slavs, called it the main tree of their land, its support.
Why - suddenly they asked you -
Do you see Russia in the birch tree?
Because in beauty and strength
She will not yield to Russia.

On the seventh Thursday after Easter, the Russian people celebrate the holiday of the Russian birch tree - “Semik”. It marks farewell to spring and welcome to summer and glorifies the green earth. Semitic Thursday and the days following them were celebrated in the old days with girls' festivities: round dances around birch trees in the grove, weaving wreaths and telling fortunes about the grooms. Over time, some of these rituals were transferred to Trinity.
My birch, my little birch, my white birch, my curly birch.
You are standing, little birch tree, in the middle of the valley,
On you, birch tree, the leaves are green,
Below you, birch tree, silk grass,
Near you, little birch, the red girls are singing at seven,
Below you, little birch, red girls are weaving wreaths.
On this day, temples and houses are decorated with young birch branches, the floors are sprinkled with herbs, and ribbons are curled into the birch branches. The fun is accompanied by dancing, singing songs and round dances around the birch tree. The most familiar round dance, “There Was a Birch Tree in the Field,” was composed in 1750. It is still popular today.
April 11 – Birch Day is celebrated.
Birch in Russia is a symbol of happiness, purity, love and tenderness.
No other country in the world has as many birch trees as we have in Russia. Therefore, it is a symbol of our homeland Russia, a symbol of its spirituality, prosperity and longevity. And it will be in our vastness forever, because our land is eternal and our people are eternal!

The sun warmed the slopes a little
And it became warmer in the forest,
Birch green braids
I hung it from thin branches.
All dressed in a white dress,
In earrings, in lace foliage,
Welcomes the hot summer
She is at the edge of the forest.
Step-by-step process for completing the work:
Birch can be made of any size depending on your space in the room, even from floor to ceiling. To make a tall birch tree, you need to connect the ceiling tiles together.
1. First, cut off the thin edges of the tile evenly. We check how the tile bends: on one side it bends strongly, on the other it bends worse.
2. Determine where the width will be on all tiles. We measure the required width for the trunk and cut off the excess with scissors.
3. Place the edges of the tiles overlapping each other (check that the fibers bend correctly). We cut along the ruler with a stationery knife, pressing the tiles tightly.

4. Apply a thin layer of ceiling glue to the cut sides.

5. After a minute, firmly press (join) the tiles on a flat surface so that the cut points coincide exactly.
6. Strengthen the junction of the tiles on the wrong side by gluing a thin strip of paper. Let the glue dry. This will be the trunk.

7. Cut a strip from the wallpaper equal to the height of the birch tree. We make the width 1.5 -2 centimeters narrower than the width of the tile (width of the trunk).

We glue the cut strip of wallpaper along its entire height to the birch trunk from the wrong side. Spread the glue with a thin strip of 0.5 cm. Apply it evenly so that the barrel does not warp. We put a load on top - books, let the glue dry.

8. We glue the wallpaper on the other side in the same way. Place the load for 10 minutes.

9. This is how the barrel turned out.


10. Draw branches.


11. Using the template, we cut out branches from the ceiling tiles and glue them onto the trunk. First, mark the junction of the branch and the trunk. Press the branch with your hand until the glue dries (no need to spread it in a thick layer).
12. We decorate the birch with black and gray strokes with a brush and paint.

13. We make thin hanging branches. Take a vine with leaves. We remove the leaves and make blossoming leaves from corrugated paper. Cut strips of green paper 5 cm long and 3 cm wide. Fold it in half, bend the side corners into the middle - it looks like “bundles”.

14. We glue these “balls” to the vine.

15. Now you can decorate the birch tree on the wall.

16. Branches can be made from the stem of an artificial flower.

17. The rose branch turned into a birch branch.

18. The volume of the trunk is visible here.


19. Birch put on earrings (real ones).

20. This is what a birch tree looks like in autumn.

21. And this is how it is in winter.

Now let's make a maple tree.
Its trunk is thicker than that of a birch. We draw the bark: with a ballpoint pen we randomly draw stripes along the trunk. You need to adjust the pressure on the handle. If you increase the pressure while applying the strips, then when bending the ceiling tile, it may crack or break. Paint the trunk with brown paint. Then use a sponge to randomly apply light brown and gray paint. The recesses obtained by drawing the stripes with a pen are painted over with black paint.


We remove the leaves from the purchased maple branches and make small green blossoming leaves just like on a birch tree.


And this is what maple looks like in the fall

And this is a maple in winter.

General view of the spring composition.
She simultaneously personifies death and resurrection, winter and spring. The Slavs considered her a gift from the gods that protects people. For many nationalities, it symbolizes light, radiance, purity and femininity. And all this is a white birch tree - so close to every Russian soul.
For work we will need:
- large green beads - 100-150 g.
- silver (light) beaded wire - 2 spools
- pieces of wire with a diameter of 1 mm and a length of 25-30 cm in the amount of 40-50 pieces.
- aluminum (copper) wire for the frame - 40-50 cm.
- mold for filling the stand
- foil and cling film
- white threads (floss or shoe silk)
- medical adhesive plaster
- toilet paper
- decor (moss, stones)
- white water-based paint (can be replaced with white gouache)
- black gouache
- hard brush
- plaster
- PVA glue
— car varnish transparent aerosol
Step 1. Weave low.
Before starting work, we need to prepare pieces of beaded wire 45-50 cm long (you can cut two coils at once). Take one piece and fold it in half. We put on one bead and in the middle of the segment we twist the wire at a distance of 1-1.5 cm (see photo). Then we string the next bead onto one side of the wire and twist it again to the same distance, and so on.

In this way we make two types of lows:
8-9 beads long, 35-40 pcs.
- 10-13 long beads in the amount of 100-120 pcs.
Step 2. Collecting branches.
Before we proceed to this stage, I would like to recall the interesting fact that there are many unique patterns in nature. So one of the mysteries of nature is the amazing sequence of tree branches. Namely, the branches are arranged according to the Fibonacci sequence (the golden ratio rule), in simple words - along a helical line or from small to large. Therefore, we will not forget about this fact and will start small, i.e. from first order branches.
For all branches we will need a so-called blank. It is done in the following way - onto a piece of wire with a diameter of 1 mm and a length of 25-30 cm. Using a strong thread, we attach three strings in an alternating order as shown in the photo. Thus, we prepare - 30 blanks from long lows and 10 from short ones.

From the resulting blanks we begin to assemble the branches directly:
The branches of the first order (crown) are made from short blanks (8-9 beads each) to which two beads are added in an alternating order (see photo). You need 3 such branches.
Branches of the second order (middle of the tree) can vary and consist of 3 or 4 blanks (you can also add long low branches along the length of the assembled branch in an alternating order, if desired). 4-5 such branches are needed.
Third-order branches (bottom of the tree), they are the largest and widest - are made by connecting branches made according to the previous scheme (second-order branches). When assembling such a large branch, it is necessary to use aluminum or copper wire as a frame, and its length must be sufficient to be firmly screwed when attached to the trunk.
Step 3. Assembling the tree.
For the frame, copper or aluminum wire with a diameter of 3-4 mm and a length of 50-60 cm is used. If we plan to bend the trunk, then the wire must be bent immediately (before attaching the branches), and at the end of the wire we must make a loop for reliable fastening in the stand.

Not forgetting the rule of the golden ratio, we begin to attach the branches to the frame, arranging them like a spiral staircase. The branches can be grabbed with a strong thread or pinned with a medical adhesive plaster.
Step 4. Planting and shaping the trunk.
To cast the stand, we need a mold and cling film (cellophane bag). We line the mold with film (bag), install the frame in the mold and fill it with a solution (gypsum, PVA glue and water - the consistency of sour cream) to a height of 2-3 cm. After a couple of hours, the stand can be carefully pulled out of the mold.

Before opening the trunk with the first layer of plaster, it is necessary to wrap the trunk with strips of gauze and bandage, making a slight thickening at the bottom. It is advisable to wrap the low parts with pieces of foil (cling film).
In this work, I used the method of simulating bark using papier-mâché. To do this, you and I will need the coarsest toilet paper and PVA glue (slightly diluted with water).

We tear off (be careful not to cut with scissors) a piece of paper, coat it with PVA glue (diluted) and glue it to the trunk, imitating the folds of the bark with wet paper. Carefully coat the resulting layer on top. In this way we glue each subsequent layer. We continue until you are satisfied with the result. Don’t forget to carefully soak each layer on top with PVA glue. Using this technique, I made an imitation of torn bark. Let the barrel dry thoroughly.

To decorate the trunk, we prepare a mixture of plaster, water and PVA glue (the consistency of liquid sour cream) - we begin to coat the trunk and branches.
Advice: If you add PVA glue to the mixture, the texture will be smoother, and if you use only gypsum and water, the texture will be more pronounced (closer to natural bark), but the composition dries very quickly.
Let it harden for a while.
Step 5. Painting and decoration.

We paint the trunk and branches with white water-based paint (I use Snezhka - environmentally friendly and odorless) and leave to dry well. To apply black stripes we will need a dry, hard brush and black gouache. Dip a dry brush into gouache (remove excess paint on the paper) and apply black stripes along the entire trunk using horizontal movements. We paint the bottom of the trunk more intensely.
The stand can be decorated with moss.
The final stage is to coat the entire product with colorless aerosol varnish. We open the bottom of the stand with varnish.
Beautiful birch. Perhaps, in the Russian soul, already at the subconscious level, there is tenderness and sentimentality towards it, and a feeling of nostalgia when a person is outside the Motherland. Sung in folk songs and poems by poets, it has firmly entered into perception as one of the unspoken symbols of Russia. And how can you remain indifferent to her discreet, but pure and bright beauty? And what about birch sap, which we all adore since childhood and look forward to spring so we can drink in this heavenly freshness again? You can write an ode to the birch endlessly, but the subject of our article is not about that at all. In it we look at options for paper crafts. It would seem, what is the connection? Let’s answer - the most direct one. We suggest you make, in fact, a birch tree out of paper. This craft is suitable as an option for children's creativity, or as a piece of scenery for a play in kindergarten or elementary school. It all depends on the size of the craft and the goal you set for yourself.
Birch for a performance in kindergarten

This beautiful birch tree can be made for a performance in a kindergarten. To make it, we will need several sheets of thick white A4 paper, green colored double-sided paper, brushes, black gouache, glue, scissors.
From sheets of white paper we glue two or three paper cylinders, depending on how tall the birch tree is needed. Glue the cylinders taking into account the size, taking into account the fact that one cylinder is inserted into another. Make random slits on the walls of the cylinders for future branches. For the top of the birch we form a paper cone, synchronized in diameter with the previous fragments of the birch trunk. We also make slits.
Let's start forming branches. To do this, fold triangles of white paper of the required height and width in half, leaving an unglued edge of about 1 cm at the base, and glue them together. The width of the base of the branch should match the size of the slot in the trunk. We cut the unglued edge at the fold and insert it into the slot on the paper cylinder. Unfold the edges of the fragment, coat it with glue, and glue it inside. In this way we design all the fragments of the trunk.
Our birch must be sustainable. To do this, four cuts are made at the bottom of the lower fragment of the trunk, opposite each other, and in them, according to the principle of gluing branches, spacer roots are glued (see photo). After all the fragments are ready, glue them together. We draw black stripes imitating birch bark on the branches and trunk. Our birch tree is almost ready, only there are no leaves on it. This is the simplest part of the craft. We make a birch leaf template. We fold a sheet of green paper in several layers (this will help save time when cutting). We attach the template to the paper, trace the outline, and cut it out. We attach the finished leaves to the branches in random order. The birch is ready.
Birch tree for children's creativity

This birch tree is perfect as a craft option for kindergarten. Even a five-year-old child can cope, naturally, under the strict guidance of an adult. To make such a birch we will need white and green colored paper, a compass, a ruler, a pencil, a black marker or felt-tip pen, glue, and scissors.
Using a compass, draw a circle on white paper. Mark a point in the center of the circle. Draw a line from this point to the edge of the circle. Cut a line to the center of the circle. Then we begin to roll our circle into a little bag, holding the cut edges. They will overlap one another. When we see that the resulting cone has approached the desired size of the trunk, we stop and use a pencil to mark the point where the edge of the paper stopped. We unfold the paper circle, and from this point, using a ruler and pencil, draw a line to the center of the circle. Cut along the line. Then we glue the edges of the cut. We have a cone. This is the trunk of our birch tree. Using a marker or felt-tip pen, draw black stripes on it. We make birch leaves from thin strips of green paper, which we glue to the resulting trunk. In order for the crown of our birch to be curly, the strips of paper must be curled before gluing. This is done as follows: a strip of paper is clamped between the blade of the scissors and a finger, and pulled out lightly. It turns out to be a beautiful paper spiral. The more of these spirals we glue, the thicker the crown of our birch tree will be.
Volumetric applique "Autumn birch"

This option is also suitable as a version of a craft for kindergarten. To make such a birch we will need a sheet of blue or dark blue colored cardboard, white plain paper, yellow or light orange corrugated paper, a black marker, and glue.
We fold the sheet of paper lengthwise and twist it into a rope. This is the trunk of our birch tree. Using glue, attach it to a sheet of cardboard (background). We tear the yellow corrugated paper into small pieces and crumple them into lumps. We glue these lumps around the top, forming a crown. Using a marker, draw black stripes on the trunk. The craft is ready.
How to make a birch tree from paper /video/
How to make a paper tree
Birch tries on a spring outfit
Winter birch
Conclusion:
There are many ways to make a birch tree out of paper. In our article we showed you the fastest, most common, and do not require complex manufacturing techniques. We hope that joint creativity will bring many pleasant moments to you and your child.
I want to tell you how my son and I made a 3D model of an autumn birch tree.
Consumables:
- white cardboard
- small yellow birch leaves
- white and black gouache
- scissors
- plasticine and various natural materials for animals
How to make a birch tree with your own hands?
We roll a white cardboard sheet into a bag and attach it with glue - this will be the birch trunk.
We also cut several strips from cardboard with a tapered end and attach them with glue to the trunk - the branches of the future tree. Our entire structure was mounted on a plastic cake base, in the middle of which there was just as if a peg on which a tree had been placed.
We whiten the trunk and branches with gouache. Draw black notches.
We attach birch leaves to the branches using super glue.
At the bottom, the rough side of the dishwashing sponges imitated grass. Several leaves were placed on the grass, as if they had fallen from a birch tree.
Mushrooms were made from rowan halves and plasticine. A hedgehog was made from a pine cone, needles and plasticine.

